Last Updated on 16th July 2026 by peppe8o
This tutorial will show you how to install Stirling PDF on Raspberry Pi computer boards, giving you Docker commands to get it up and running in minutes, as well as metrics from CPU, RAM, and storage usage.
If you value data privacy, uploading tax returns, contracts, or scanned IDs to free online PDF editors should make you uncomfortable. While those cloud tools are convenient, you never truly know where your data ends up. The solution? Self-hosting.
Why Stirling PDF and Raspberry Pi are a Perfect Match
Stirling PDF is a robust, open-source application that allows you to split, merge, convert, sign, and OCR (Optical Character Recognition) PDF files.
Running it locally on a Raspberry Pi offers massive benefits:
- 100% Privacy: Your files never leave your local network (LAN).
- Low Power Consumption: The Raspberry Pi draws minimal power, making it perfect for a 24/7 home server.
- Zero Cost: No subscriptions, no limits on file sizes, and no ads.
Real-World Resource Usage (The Raspberry Pi 5 Benchmark)
To give you the most accurate expectations, we monitored Stirling PDF on a Raspberry Pi 5 (8GB RAM) using a custom script telemetry (sampling every 0.5 seconds). Here is exactly how the system handles different real-world workloads:
| State / Operation | CPU Peak (%) | RAM Peak | Execution Time / Notes |
|---|---|---|---|
| Idle (No active tasks) | ~0.08% | 1.27 GiB | Stirling PDF pre-allocates Java resources on startup. |
| Merging 3 PDFs (with images) | 78.41% | 1.276 GiB | Blazing fast. Active processing peaks for only ~2 seconds. |
| OCR Text Recognition (10-page dense research paper) | 402.29% (Fully Multi-threaded) | 2.136 GiB | ~50 seconds total. Maxes out all 4 cores of the Pi 5 Broadcom CPU. |
🧠 Analysing the Numbers:
- The CPU Beast: When doing OCR, the CPU usage hits 402%. This means Stirling PDF is highly optimised and successfully unleashes Tesseract’s multi-threaded engine to utilize 100% of all 4 Pi cores simultaneously.
- The RAM Footprint: While idle RAM is on the higher side (~1.27 GB) due to Java pre-allocations, the RAM scaling under stress is excellent. Processing 10 heavy scanned pages only pushed the memory up by an extra ~750MB, peaking at 2.13 GB, and dropped back down to idle levels the second the job finished.
The Takeaway: If you only plan to split, merge, and sign PDFs, any Raspberry Pi computer board will probably run this setup effortlessly. However, if you plan to use OCR scanning or Office-to-PDF conversions frequently, a Pi 4 or Pi 5 with at least 4GB of RAM is highly recommended to prevent the system from slowing down.
Choosing the Right Docker Tag: Save 2.3 GB of Space!
When looking at the official repository stirlingtools/stirling-pdf, you will find three main tags. I ran docker image ls on my Pi to analyse their actual disk footprints, and the differences are massive:
| Image Tag | Compressed Download Size | Actual Disk Footprint | Best Used For |
stirlingtools/stirling-pdf:latest | ~1 GB | ~3.3 GB | Full-featured. Includes OCR engines and LibreOffice for conversions. |
stirlingtools/stirling-pdf:latest-fat | ~1 GB | ~3.3 GB | Same as latest, with extended pre-installed multi-language OCR packages. |
stirlingtools/stirling-pdf:latest-ultra-lite | ~350 MB | ~950 MB | The SD Card Saver. Strips away LibreOffice and heavy OCR packages. |
If you have a fast SSD or a large SD card (64GB+), go for the standard latest tag. If you are running low on space or using a smaller Pi (like the Pi Zero 2 W), the latest-ultra-lite tag is a game-changer.
What We Need
As usual, I suggest adding from now to your favourite e-commerce shopping cart all the needed hardware, so that at the end you will be able to evaluate overall costs and decide if to continue with the project or remove them from the shopping cart. So, hardware will be only:
- Raspberry PI Computer Board (including proper power supply or using a smartphone micro USB charger with at least 3A)
- high-speed micro SD card (at least 16 GB, at least class 10)
Step-by-Step Procedure
Step 1. Prepare the Operating System
The first step is to install the Raspberry PI OS Lite to get a fast and lightweight operating system (headless). If you need a desktop environment, you can also use the Raspberry PI OS Desktop, in which case you will work from its terminal app. Please find the differences between the 2 OS versions in my Raspberry PI OS Lite vs Desktop article.
Please make sure that your Operating System is up to date. From your terminal, use the following command:
sudo apt update -y && sudo apt full-upgrade -yYou also need to install Docker on Raspberry PI (please use the linked tutorial).
Step 2. Create a Dedicated Directory
SSH into your Raspberry Pi and create a dedicated folder for Stirling PDF to keep your configuration organised:
mkdir ~/stirling-pdf
cd ~/stirling-pdf
Step 3. Configure the Docker Compose File
Create a docker-compose.yml file using nano:
nano docker-compose.ymlPaste the following configuration. As you can see, I set 2 different languages (English and Italian): you can set your favourite there.
services:
  stirling-pdf:
    # Switch to :latest-ultra-lite if you want to save 2.3GB of space!
    image: stirlingtools/stirling-pdf:latest
    container_name: stirling-pdf
    ports:
      - '8080:8080'
    volumes:
      - ./trainingData:/usr/share/tessdata
      - ./extraConfigs:/configs
      - ./logs:/logs
    environment:
      - DOCKER_ENABLE_SECURITY=false
      - LANGS=en_GB,it_IT
    restart: unless-stopped
Save and exit.
Step 4. Deploy the Container
Launch the container in detached mode (running in the background):
docker compose up -dCheck if the container is running smoothly without errors by inspecting the logs:
docker logs -f stirling-pdfStirling PDF will be ready from your Raspberry Pi only after you see something like the following log lines:
...
12:41:58.908 [main] INFO  s.software.SPDF.SPDFApplication - Stirling-PDF running on port: 8080
12:41:58.909 [main] INFO  s.s.p.s.ServerCertificateService - Server certificate feature requires Pro or Enterprise license
12:41:58.913 [main] INFO  s.s.p.s.UserLicenseSettingsService - License check result: type=NORMAL, requiresPaid=true, hasPaid=false
12:41:58.916 [main] INFO  s.software.SPDF.SPDFApplication - Stirling-PDF Started.
12:41:58.917 [main] INFO  s.software.SPDF.SPDFApplication - Navigate to http://localhost:8080/
Accessing Stirling PDF on Your Local Network
Once the logs show that the application has started successfully, you can access the dashboard from any device connected to the same Wi-Fi.
Open your web browser and navigate to: http://<YOUR_RASPBERRY_PI_IP>:8080
(Replace <YOUR_RASPBERRY_PI_IP> with the actual IP address of your Pi, for example, http://192.168.1.218:8080)
You will reach the page for your first login:
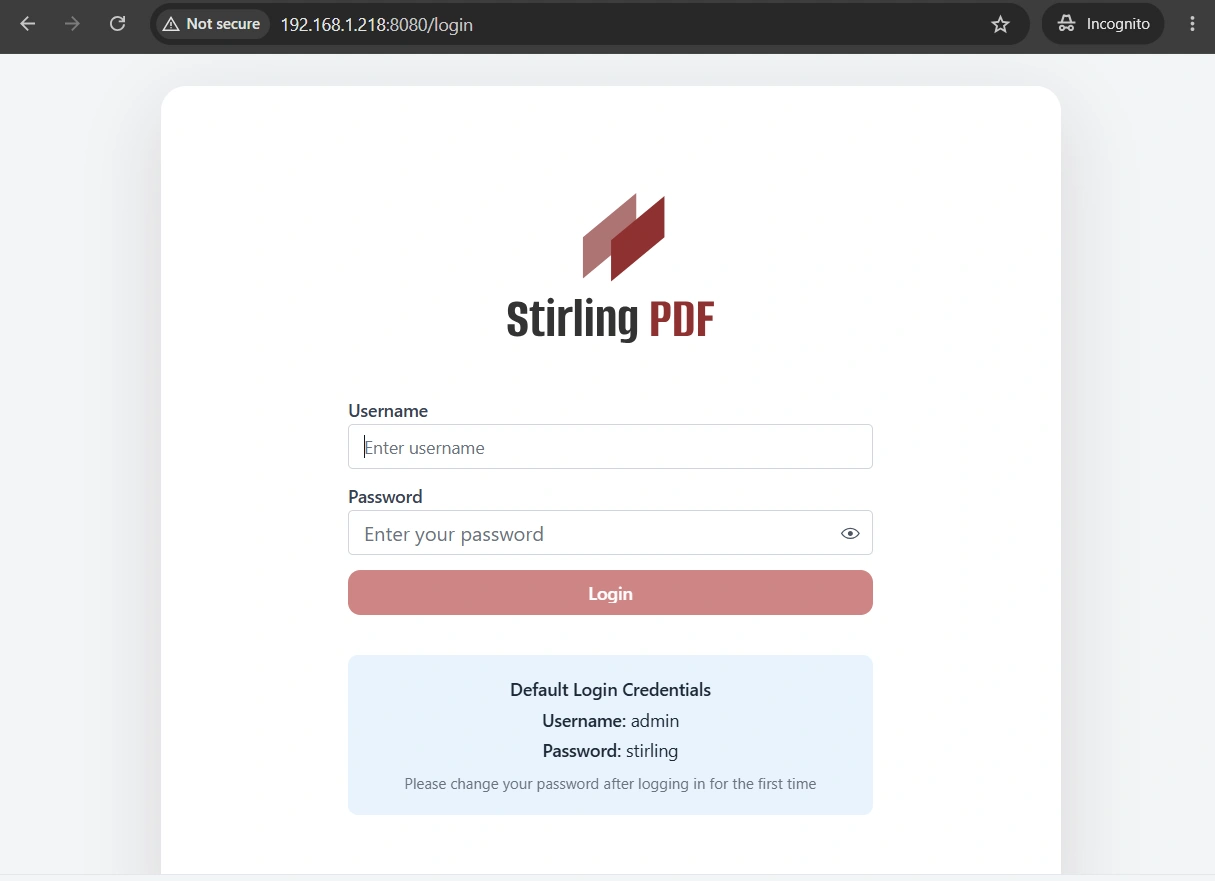
The default credential is admin/stirling (as you can see from the banner below the Login button).
As soon as you login with these credentials, Stirling PDF will ask you to change the admin password:
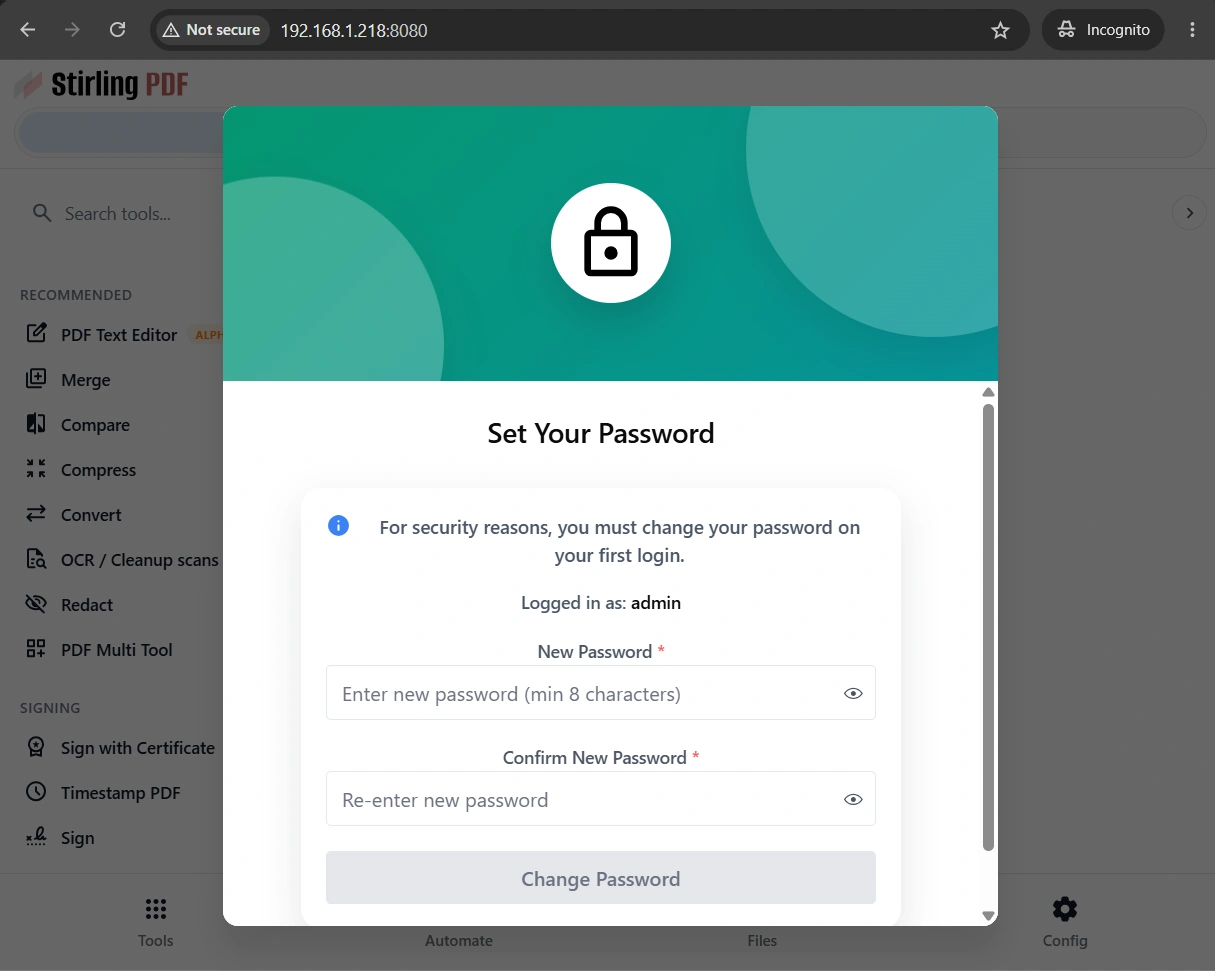
After you set the new password, you will be logged out and redirected to the login page to use the new password.
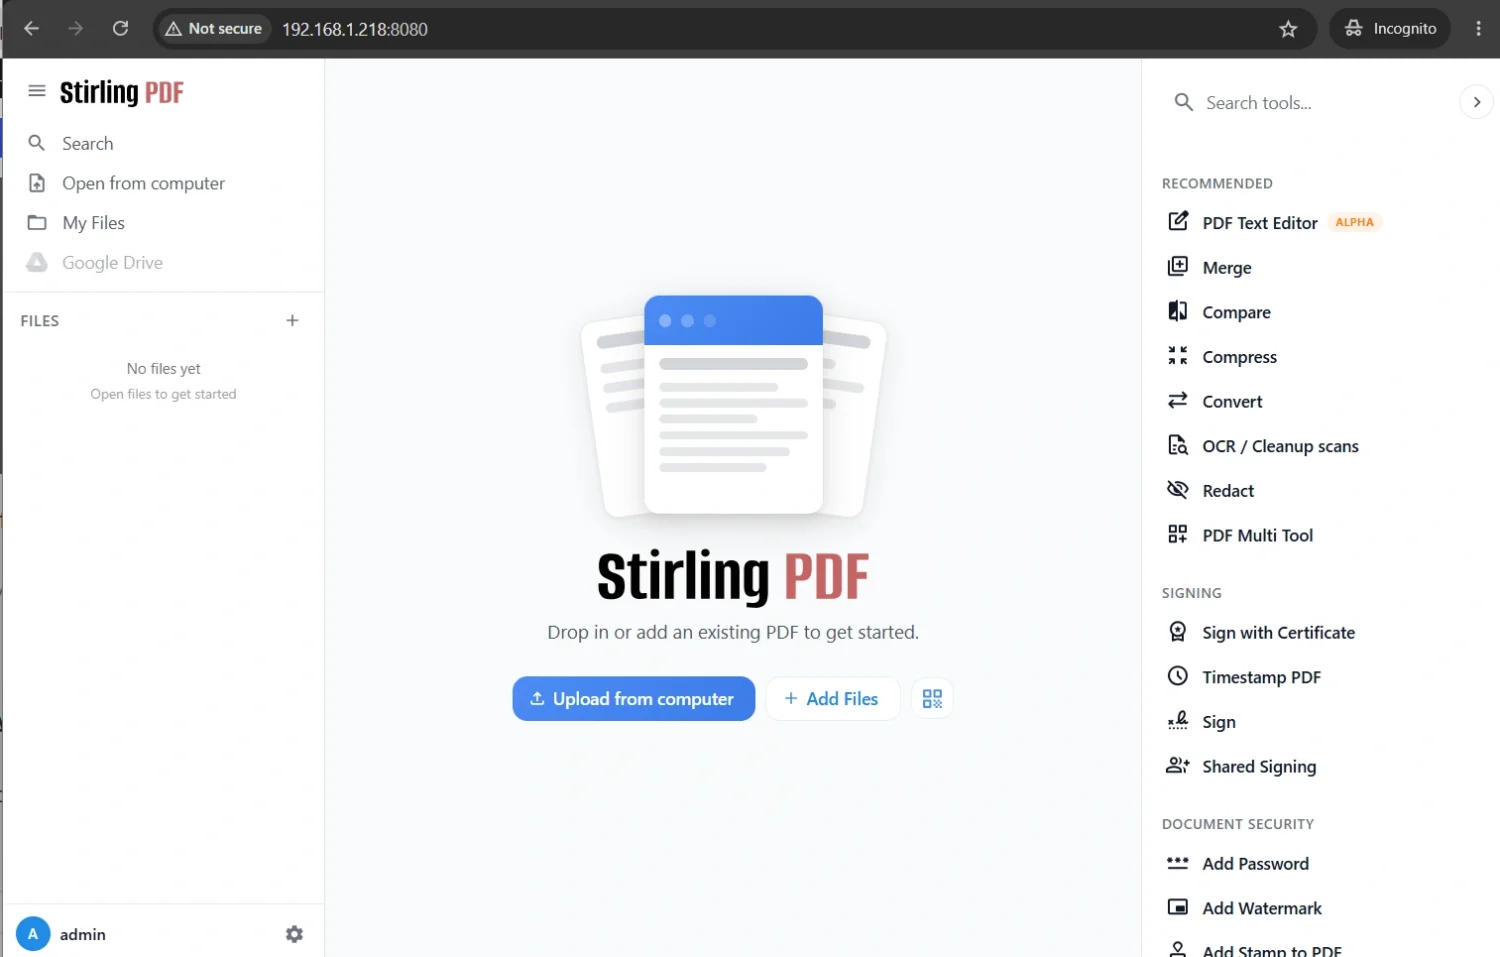
The main dashboard is clean and well organised, with a right-sidebar menu listing all the available tools:
Advanced Tweaks for Home Labs (Local DNS & IP Static)
To make this a permanent local service, you should make sure the URL never changes:
- The Quick Fix: Go to your home router settings and map the Pi’s MAC address to a Static IP.
- The Elegant Fix: If you run Pi-hole or AdGuard Home on your network, add a Local DNS record (e.g.,
pdf.home.lan) pointing to your Pi’s IP so you can access it via a friendly URL instead of an IP address.
🛠️ Troubleshooting & Real-World Gotchas
When self-hosting on ARM architecture (like the Raspberry Pi), you are bound to run into a few hurdles. Here is how to solve two of the most common issues.
1. The Error: “Unable to read image from file”
If you try to convert a JPG/PNG to PDF and get a nasty Java crash in your logs (java.io.IOException: Unable to read image from file), the culprit is usually corrupted or non-standard EXIF metadata (such as a CMYK colour profile from print-oriented images).
To fix this, check your Docker Tag: If you are using the latest-ultra-lite or latest tag, switch to the latest-fat tag.
2. The Limit: OCR on Handwritten Text (HTR)
If you try to run OCR on handwritten notes and end up with random gibberish, don’t panic. Under the hood, Stirling PDF uses Google’s Tesseract OCR. Tesseract is fantastic for printed, geometric text, but it struggles with handwriting (HTR – Handwritten Text Recognition) because:
- It cannot easily segment cursive letters that touch each other.
- It relies heavily on straight lines and uniform character heights.
How to optimise handwriting OCR in Stirling PDF:
- Write in printed block letters: Avoid cursive. Keep letters distinct and spaced out.
- Ensure maximum contrast: Crop out shadows, and use Stirling PDF’s “De-skew” feature first. If the text lines are slanted, OCR accuracy drops to zero.
- Confirm your language settings: Ensure you set the proper
LANGSvariable in your Docker Compose and select the correct language in the UI before starting.
⚠️ Pro-Tip reality check: If you need to convert hundreds of pages of cursive diaries or fast-written meeting notes, Tesseract (and thus Stirling PDF) is not the right tool. For deep handwriting recognition you will need to use AI models that are better suited for the job.
Final Thoughts
You now have a fully functional, self-hosted alternative to Adobe Acrobat and online converters. No subscription fees, no data harvesting—just raw utility running quietly on your Raspberry Pi.
Next Steps
Interested in more projects with your Raspberry PI? Try to look at my Raspberry PI computer tutorial pages.
Enjoy!
Open source and Raspberry PI lover, writes tutorials for beginners since 2019. He's an ICT expert, with a strong experience in supporting medium to big companies and public administrations to manage their ICT infrastructures. He's supporting the Italian public administration in digital transformation projects.