Last Updated on 2nd September 2023 by peppe8o
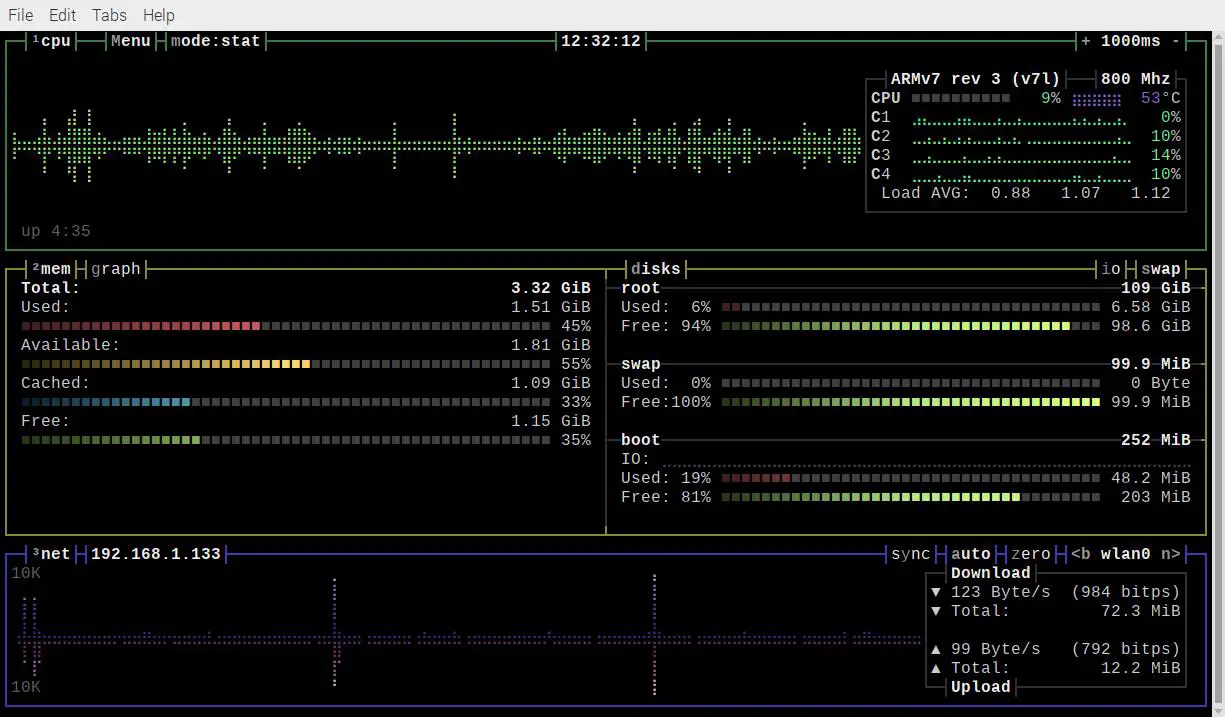
In this tutorial, I’m going to show you how to install BpyTOP on Raspberry PI.
Monitoring a computer resources can help to better understand issues when your device is going to be slow or freezing. BpyTOP on Raspberry PI makes available an enhanced and interactive resources monitoring tool that you will love
Before starting, if you connect your Raspberry PI from a remote SSH connection please check that your SSH software supports TrueColor. For example, Puty supports TrueColor from version 0.71, so you will have to install the new Putty version if it has a lower version.
For this tutorial, I’m going to use a Raspberry PI 3 Model A computer board, but this tutorial will work with any Raspberry PI board with an internet connection.
What We Need
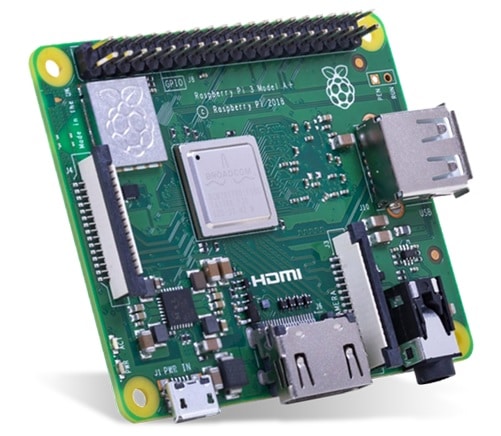
As usual, I suggest adding from now to your favourite e-commerce shopping cart all the needed hardware, so that at the end you will be able to evaluate overall costs and decide if to continue with the project or remove them from the shopping cart. So, hardware will be only:
- Raspberry PI 3 Model A+ (including proper power supply or using a smartphone micro usb charger with at least 3A) or newer Raspberry PI Board
- high speed micro SD card (at least 16 GB, at least class 10)
Check hardware prices with the following links:


Step-by-Step Procedure
Prepare OS
Install your Operating System. You can use BpyTOP with Raspberry PI OS Lite as well as with Raspberry PI OS Desktop (in this case, working from its terminal).
Make your OS up to date. From a terminal, please use the following command:
sudo apt update -y && sudo apt upgrade -yInstall BpyTOP
BpyTOP installation is really simple when using pip. First, please install pip3:
sudo apt install python3-pipThen you can install BpyTOP:
pip3 install bpytopThe installation process will be complete in a few time.
At the installation, a warning could arise telling you to include your “/home/pi/.local/bin” to the PATH variable. Please note that this path changes if you have a different user from the default “pi”. Your environment PATH should already include it:
pi@raspberrypi:~ $ echo $PATH
/home/pi/.local/bin:/usr/local/sbin:/usr/local/bin:/usr/sbin:/usr/bin:/sbin:/bin:/usr/local/games:/usr/games:/snap/bin
as your .profile files already include the following part:
# set PATH so it includes user's private bin if it exists
if [ -d "$HOME/.local/bin" ] ; then
    PATH="$HOME/.local/bin:$PATH"
fi
If your $PATH variable doesn’t include the “/home/pi/.local/bin”, please add the PATH update in your bashrc file:
nano ~/.bashrcAnd append the following line at the end of this file:
export PATH="$HOME/.local/bin:$PATH"You can reload the bashrc with the following terminal command without the need to logout or reboot:
source ~/.bashrcOpen BpyTOP
You are ready to use BpyTOP. From the terminal, use the following command:
bpytopThe new resources monitor will appear:
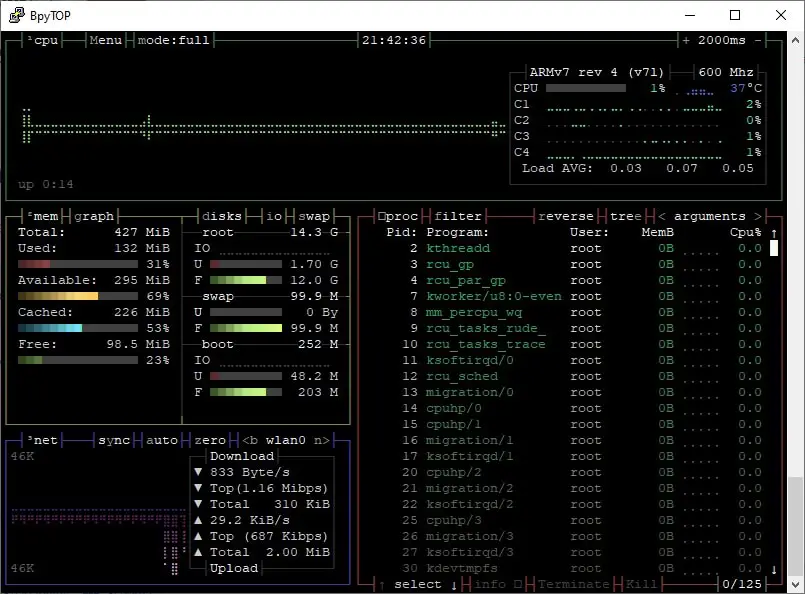
Like Htop, this interface is interactive and allows you to manage it also with your mouse.
Every label has a char or a number near it with a different colour, indicating the keyboard shortcut to select/manage it. For example, you can change the layout by switching between the available modes, managed with the “m” key (lower case, so without the shift) or by clicking on “mode:full” label in the top part of BpyTOP window. Available layouts, besides the default “full” already shown, are “stat”:
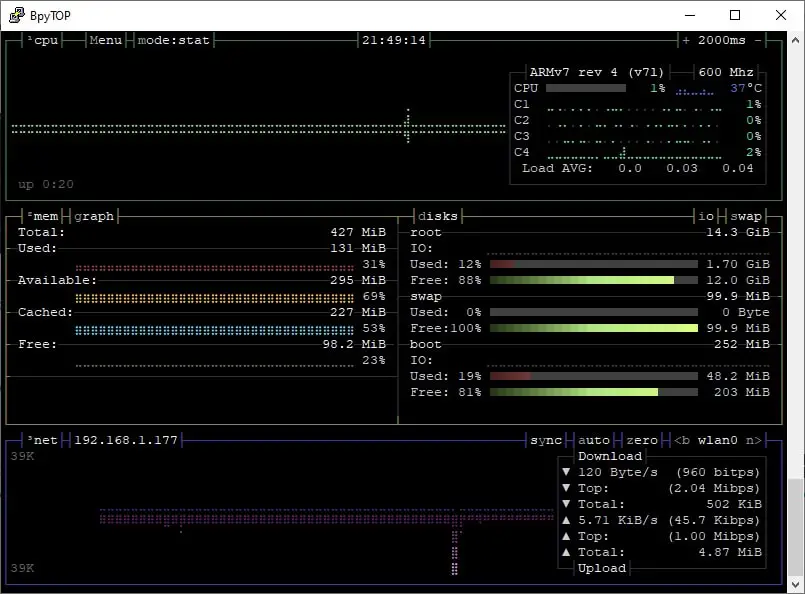
And “proc” mode:
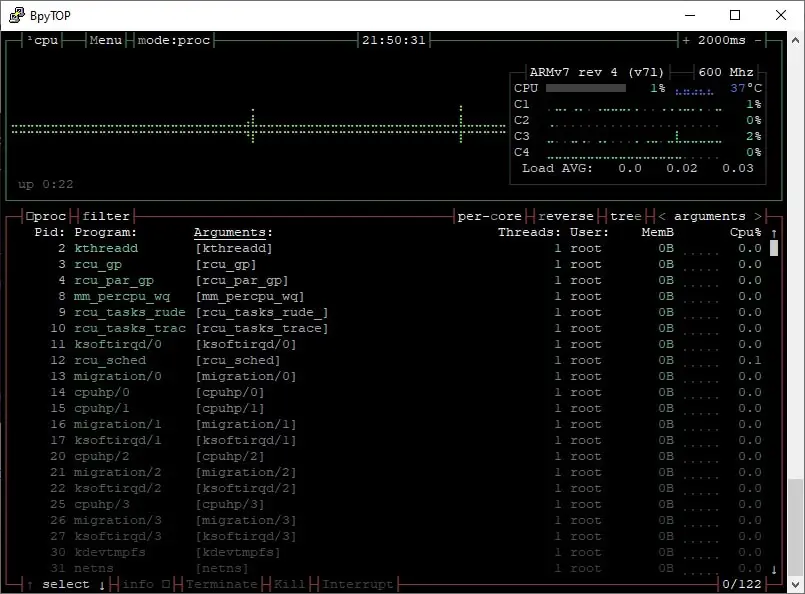
In “mode:full”, the number key from 1 to 4 allows you to hide/show the main 4 areas of this layout:
- key 1 -> hide/show the CPU monitor
- key 2 -> hide/show the memory/disk monitor
- key 3 -> hide/show the network monitor
- key 4 -> hide/show the processes monitor
With the “esc” key you can access the options menu, as well as you can exit from BpyTOP. Here you can choose what to do with the UP/DOWN arrow keys from your keyboard.
Exit from BpyTOP for the next step to install new themes.
Change Theme
A cool feature of BpyTOP is that you can use different themes. At the start, BpyTOP has only the default theme. To get new themes, you can download them from BpyTOP author page on GitHub or you can also create your own ones. Let’s try downloading and enabling a new theme. For example, I will install the “matcha-dark-sea” theme.
From the terminal:
cd .config/bpytop/themes/You can get themes from https://github.com/aristocratos/bpytop/tree/master/themes page. Choose a theme here, “matcha-dark-sea” in my case and click on it. The next GitHub page will show you
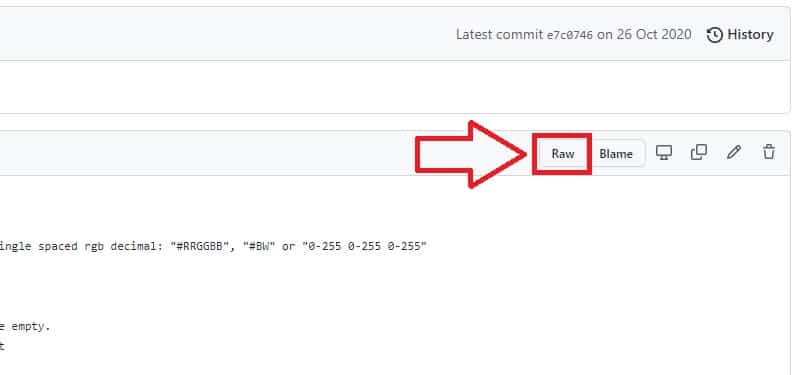
Click on “Raw” button, so being redirected to a page showing the raw code. This page will have a “raw.githubusercontent” domain on URL, like the following:
https://raw.githubusercontent.com/aristocratos/bpytop/master/themes/matcha-dark-sea.theme
Copy this URL and go back to your terminal. Use the wget command with the link just copied to download the theme directly in your themes folder:
pi@raspberrypi:~/.config/bpytop/themes $ wget https://raw.githubusercontent.com/aristocratos/bpytop/master/themes/matcha-dark-sea.theme

--2022-02-02 22:09:31--  https://raw.githubusercontent.com/aristocratos/bpytop/master/themes/matcha-dark-sea.theme
Resolving raw.githubusercontent.com (raw.githubusercontent.com)... 185.199.108.133, 185.199.109.133, 185.199.110.133, ...
Connecting to raw.githubusercontent.com (raw.githubusercontent.com)|185.199.108.133|:443... connected.
HTTP request sent, awaiting response... 200 OK
Length: 2378 (2.3K) [text/plain]
Saving to: ‘matcha-dark-sea.theme’

matcha-dark-sea.theme    100%[================================>]   2.32K  --.-KB/s    in 0.002s

2022-02-02 22:09:31 (1.04 MB/s) - ‘matcha-dark-sea.theme’ saved [2378/2378]
Open again BpyTOP, press “esc” to choose the Options menu.
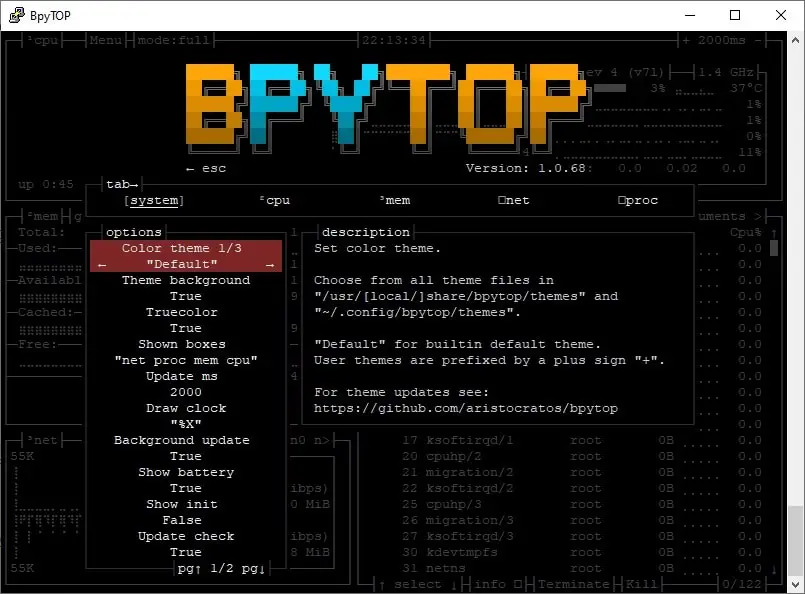
Navigating the Option menu is simple: keys 1 to 5 let you choose what menu to show (1-> System, 2-> cpu, 3 -> mem and so on). Keyboard arrows up and down let you move vertically in the selected menu and the keyboard arrow left/right let you change settings for the selected option.
In our case, we are already on theme selection menù, so the right/left keyboard arrow will let you choose in the available themes. I will
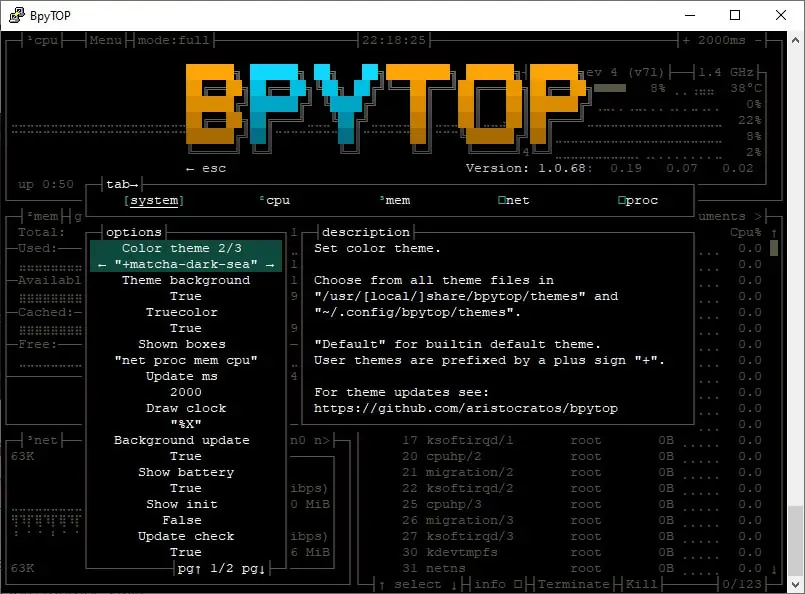
After selecting it, you can exit the menu with the “esc” key and get your theme already applied.
What’s Next
If you wish to test more Raspberry PI projects, take a look at peppe8o Raspberry PI tutorials.
Enjoy!

Open source and Raspberry PI lover, writes tutorials for beginners since 2019. He's an ICT expert, with a strong experience in supporting medium to big companies and public administrations to manage their ICT infrastructures. He's supporting the Italian public administration in digital transformation projects.

