

Last Updated on 1st September 2023 by peppe8o
This tutorial will show you how to install CasaOS on Raspberry PI computer boards. It will also show you some basic operations with this software.
What is CasaOS
The name CasaOS could let you think about an Operating System. Testing it in my Raspberry PI, I would define it more like an orchestrator, a hub collecting all the main tools you need to easily manage and install the most common open-source software.
CasaOS developer created it with smart homes and automation systems management in mind.
It enables you to get info and control about your home services from a clear Web Dashboard. As this is self-hosted, you will keep control of your data storage and devices access.
With CasaOS you can instantly get your personal cloud storage or media centre with one click: it gives you a number of applications available from its internal App Store, like NextCloud, PhotoPrism, Plex, and so on.
You can implement on it your home cloud services, without having to pay expensive fees and getting all the needed space by mounting proper USB storage in your Raspberry PI.
What We Need
As usual, I suggest adding from now to your favourite e-commerce shopping cart all the needed hardware, so that at the end you will be able to evaluate overall costs and decide if to continue with the project or remove them from the shopping cart. So, hardware will be only:

- Raspberry PI Computer Board (including proper power supply or using a smartphone micro USB charger with at least 3A)
- high speed micro SD card (at least 16 GB, at least class 10)
Please note that CasaOS requires a bit of RAM to run properly. So, I suggest using a Raspberry PI 3 Model B or a newer model, even if you can try it with a Raspberry PI Zero 2 W.
Prepare the Operating System
Please start installing your favourite Raspberry PI OS. I suggest you install Raspberry PI OS Lite to get a fast and minimal headless OS. You can also use Raspberry PI OS Desktop, in this case working from its internal terminal.
If you don’t know what’s better for you, check my Raspberry PI OS Lite vs Desktop: comparison between the 2 distributions article.
Make your OS up-to-date. From the terminal, please use the following command:
sudo apt update -y && sudo apt upgrade -yImprove performances (for Raspberry PI OS Lite)
Those people using Raspberry PI OS Lite can get good performance improvements by changing the default GPU memory, reducing it to the minimum amount (16MB). My Change the Raspberry PI GPU Memory tutorial will help you in this task if you don’t know how to do it.
Install CasaOS in your Raspberry PI
CasaOS script makes the packages and software installation really easy. Everything you need is just using the following terminal command in your terminal:
wget -qO- https://get.casaos.io | sudo bashThis process will take some minutes depending on your Raspberry PI model and Micro SD speed. So, give it all the time to do its job and wait for completion.
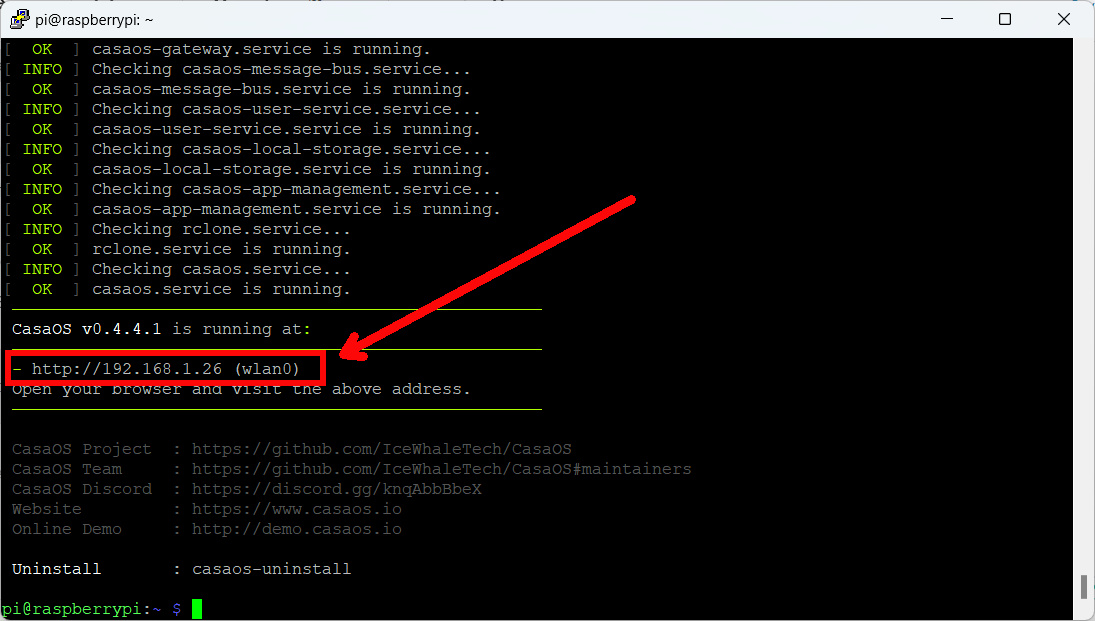
At the end of the process, if everything goes correctly you will get something like the following terminal message, also showing the IP address to reach your CasaOS GUI from a browser (that should match your Raspberry PI’s IP Address:
Access CasaOS
Now, you can switch to your favourite browser to check if the CasaOS web GUI is ready. Please use the URL resulting from the terminal message. You should get a welcome message with a “Go” button to create your account:
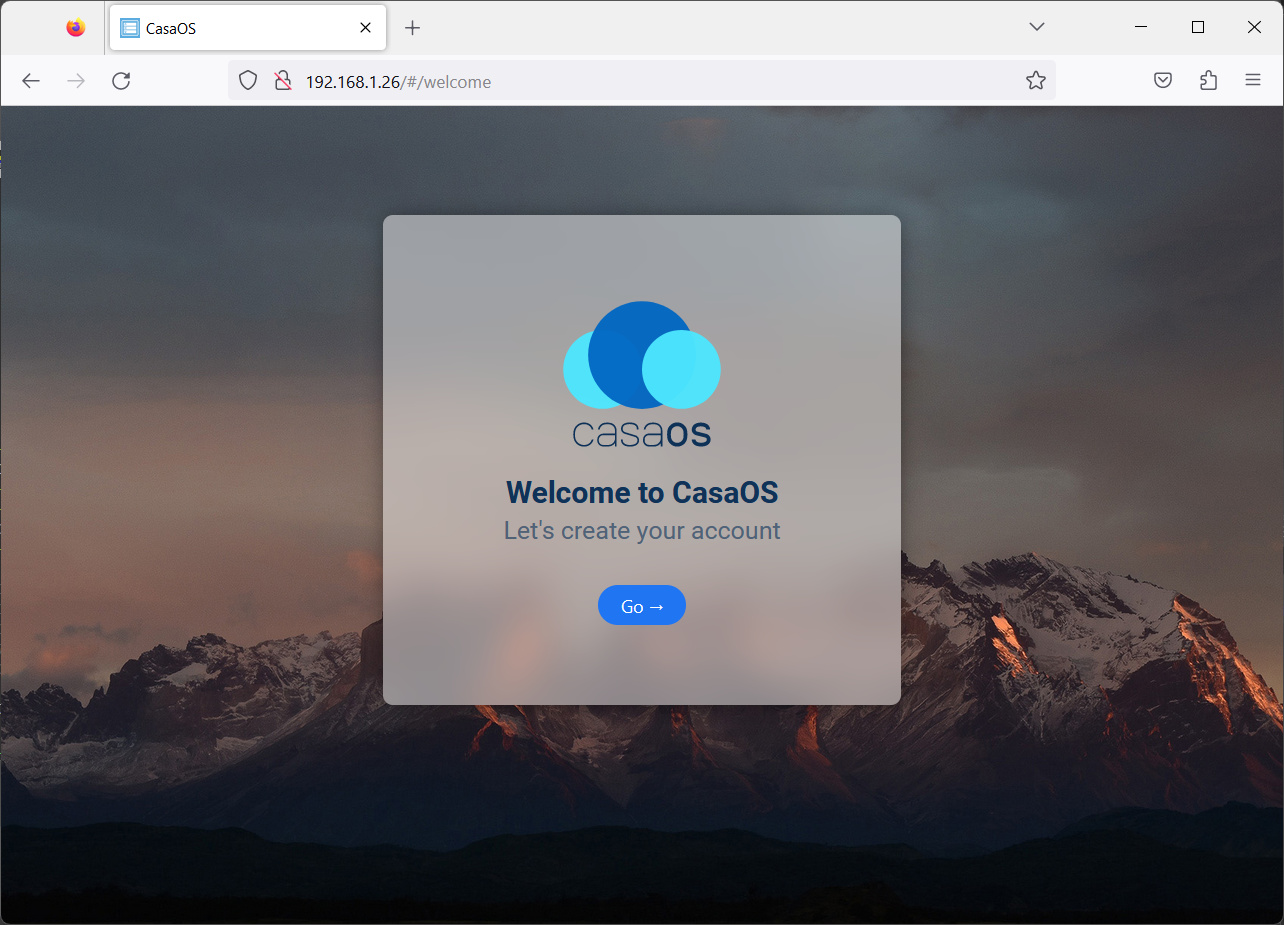
Please click the “Go” button.
The following page will show a form to set your favourite credentials. Please fill it:
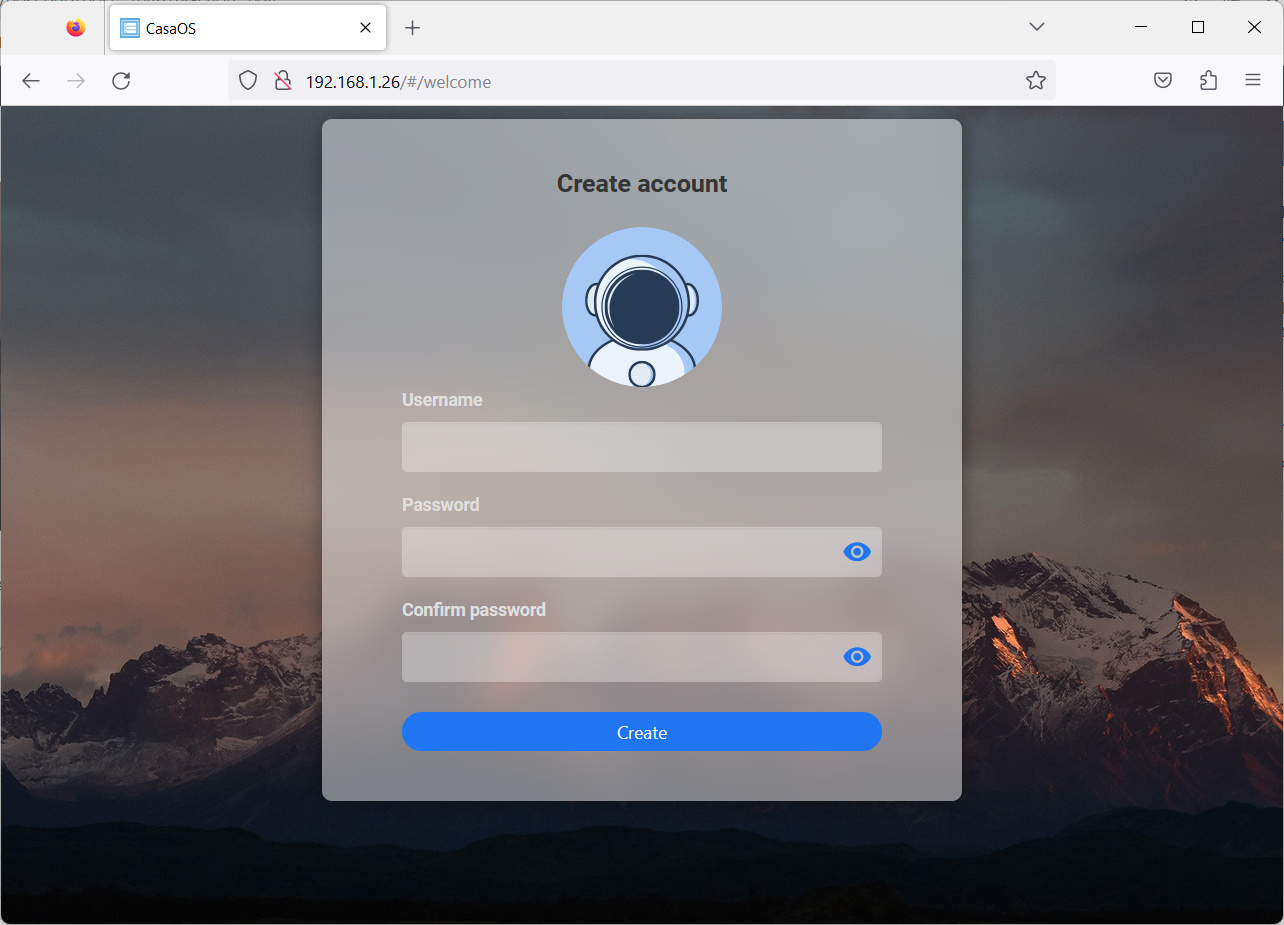
Then, click the “Create” button.
The following page will ask you if you want to get the latest news about CasaOS. It’s up to you accepting or decline it with the related button:

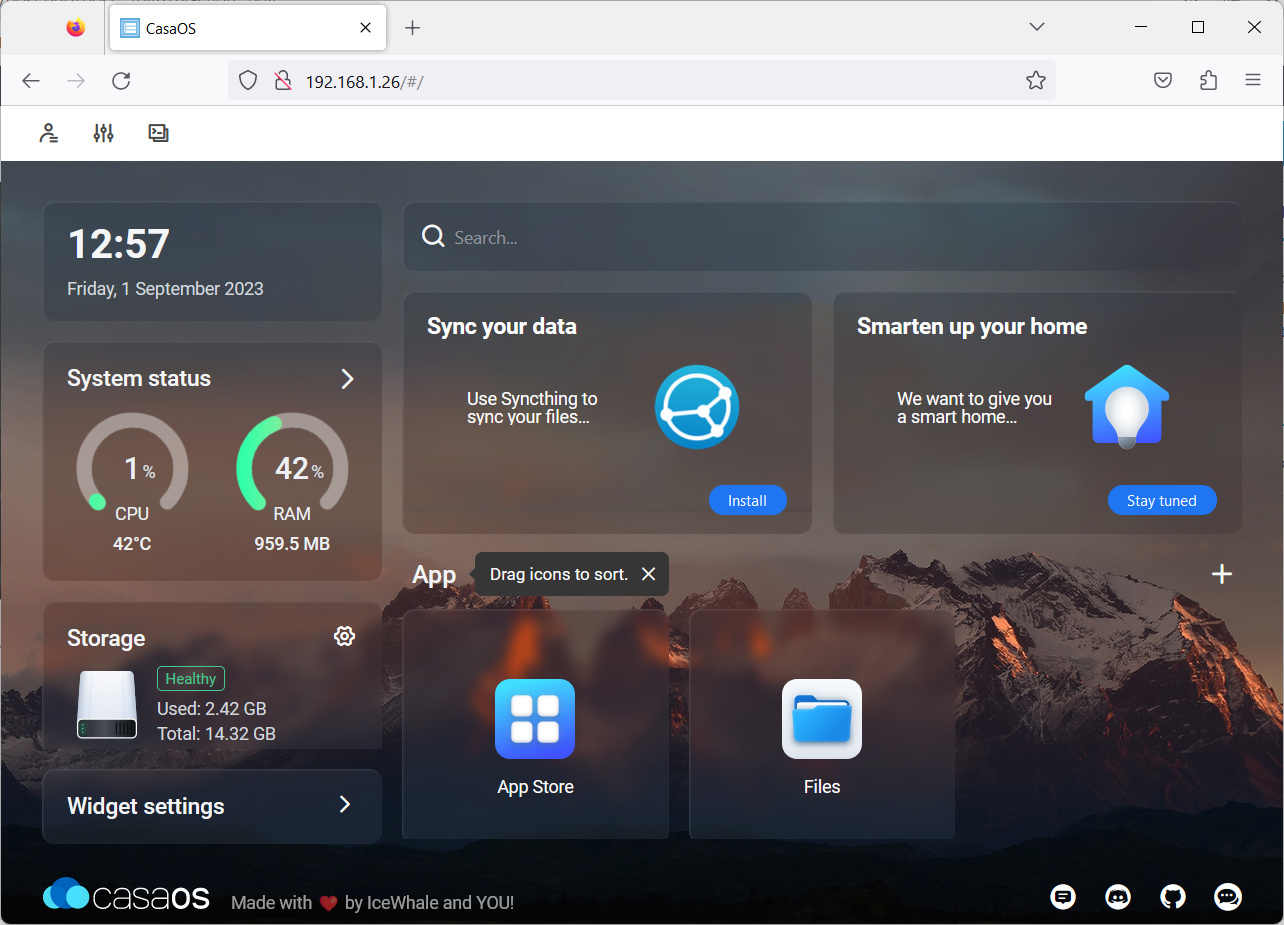
Finally, we reach the CasaOS dashboard:
Customizing CasaOS Dashboard
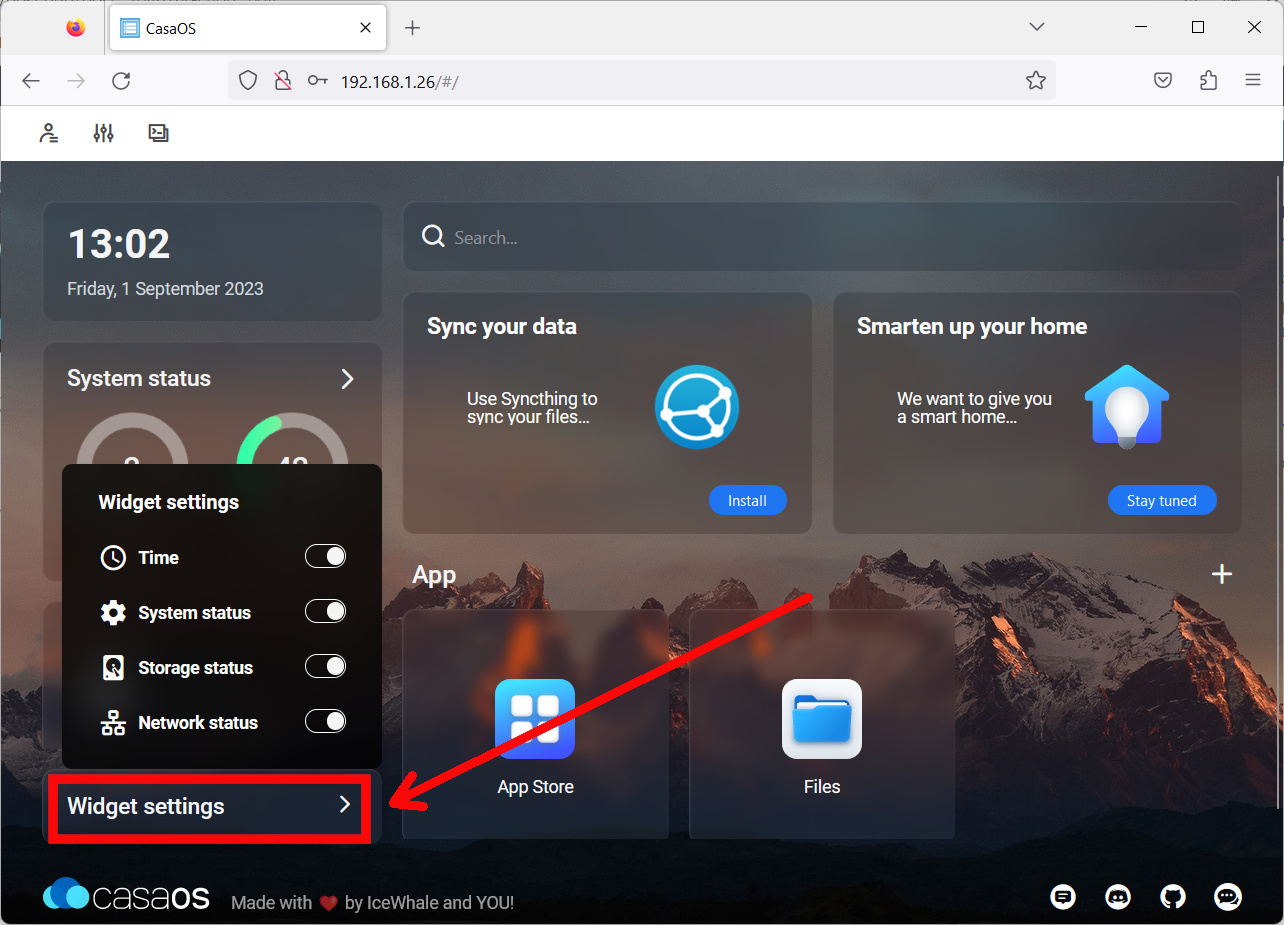
By default, we can find here some important info like the used CPU and RAM, as well as the Storage capacity and usage. You can hide/show these widgets with the “Widget settings” button:
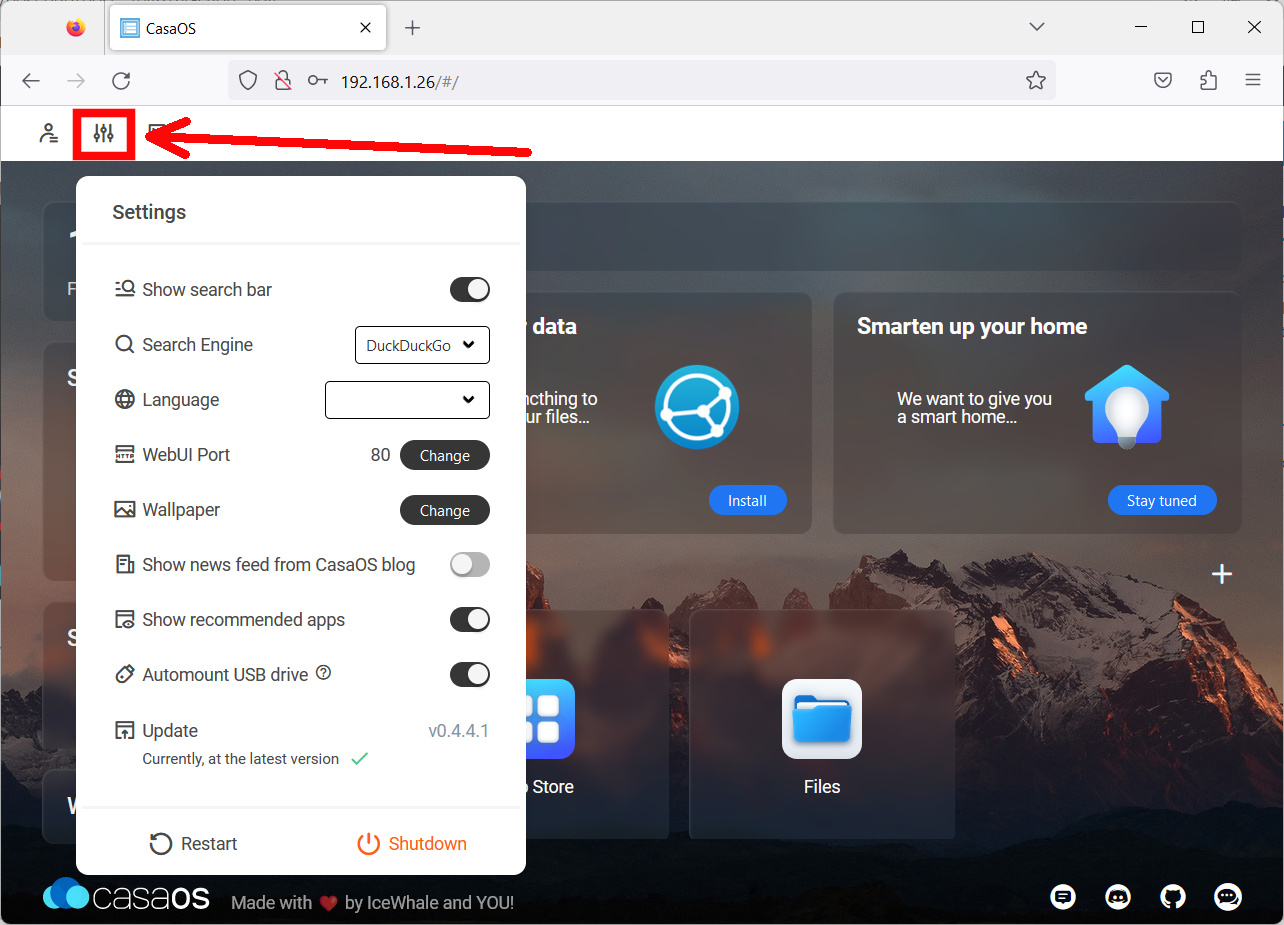
Another important part is the General Settings button. Here you can change your interface language, customize your Wallpaper or even change the default port for CasaOS web GUI:
Install an App in CasaOS with Raspberry PI
You probably set CasaOS in order to have a simple hub for installing new apps. So, let’s see how this task can be executed.
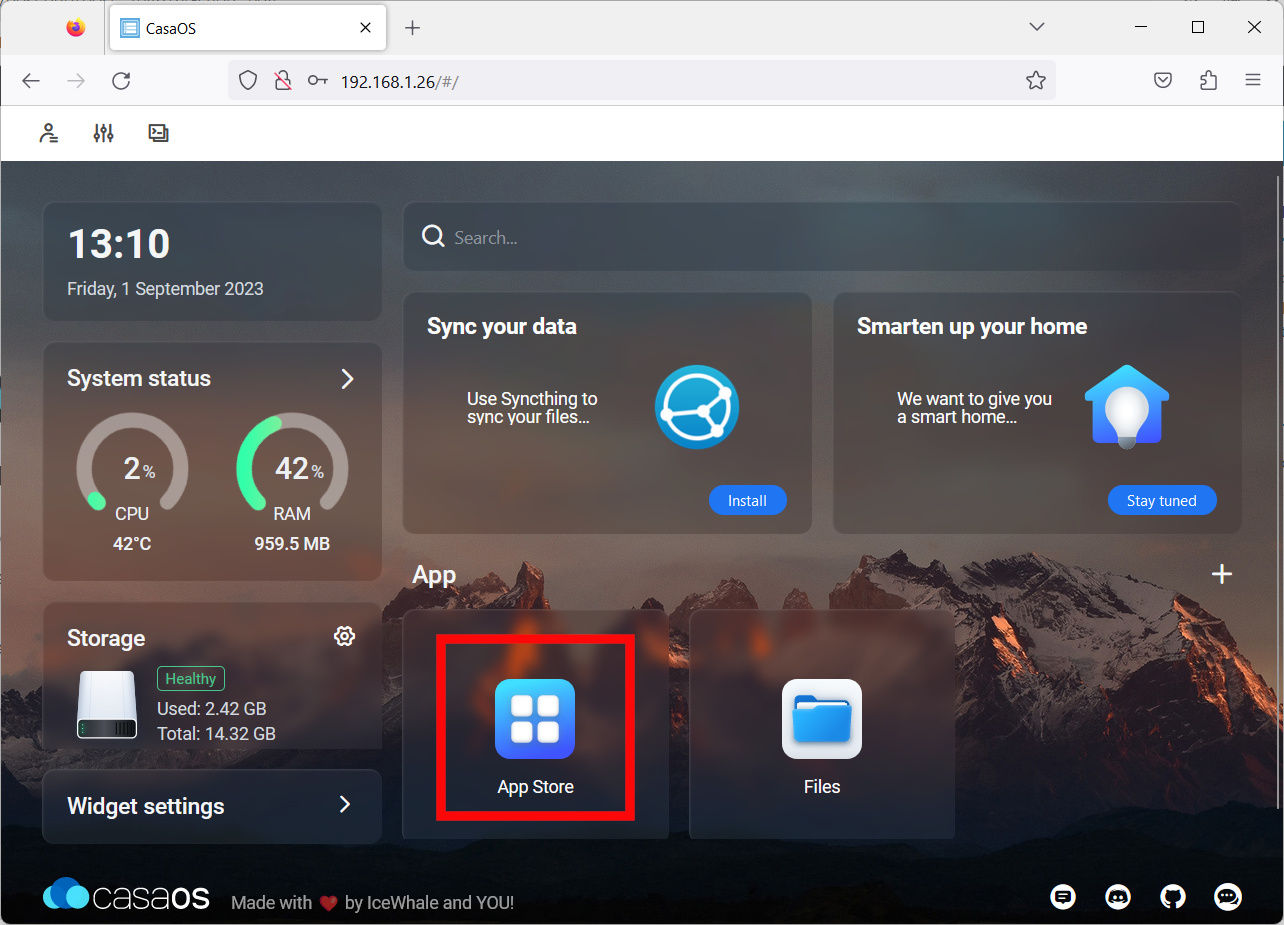
Please locate (and click) the “App Store” button in your dashboard:
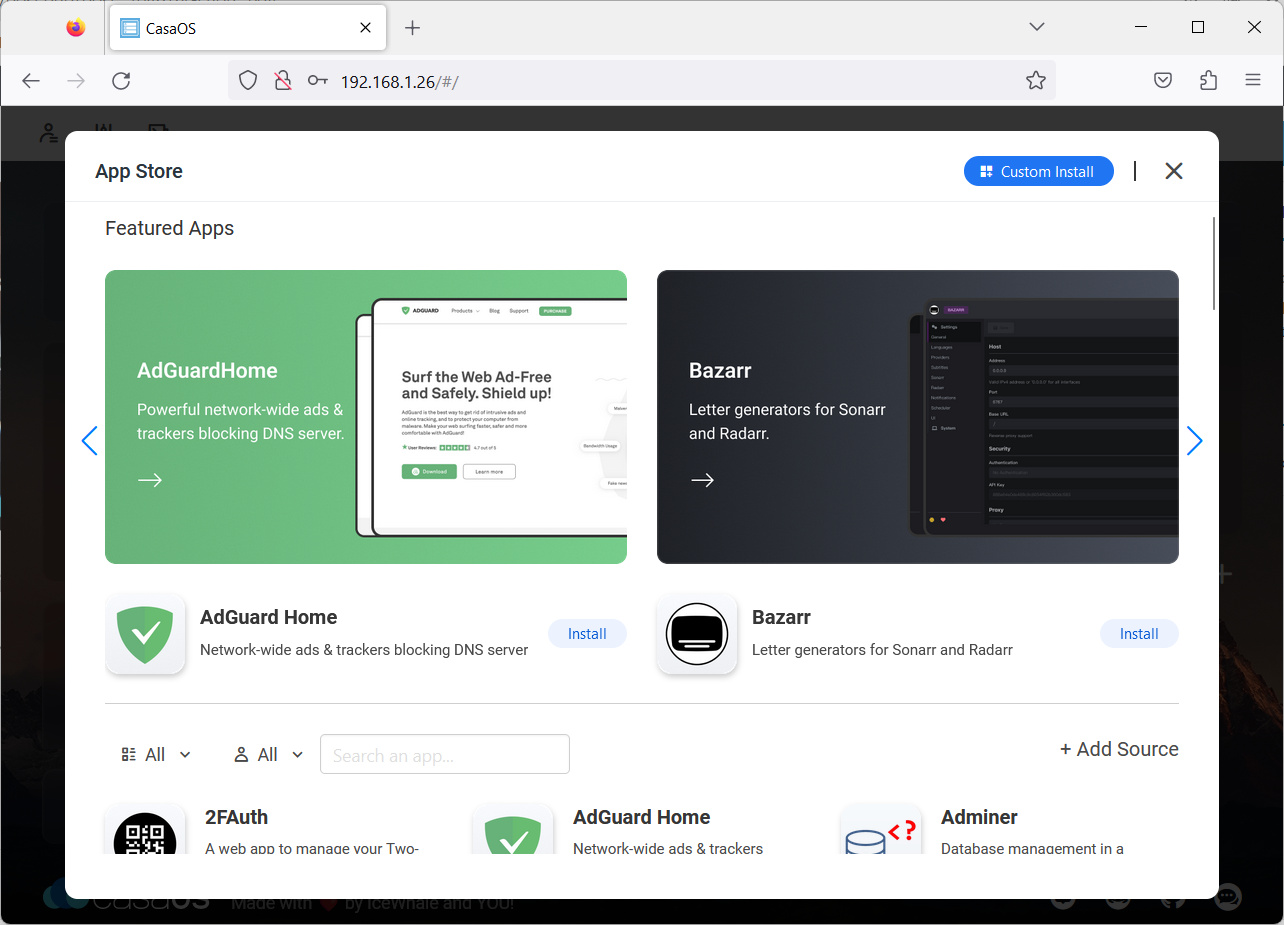
This will open a window with a list of available apps, like the common stores for Android and iOS devices:
By clicking one of the Apps, you will get details and screenshots:
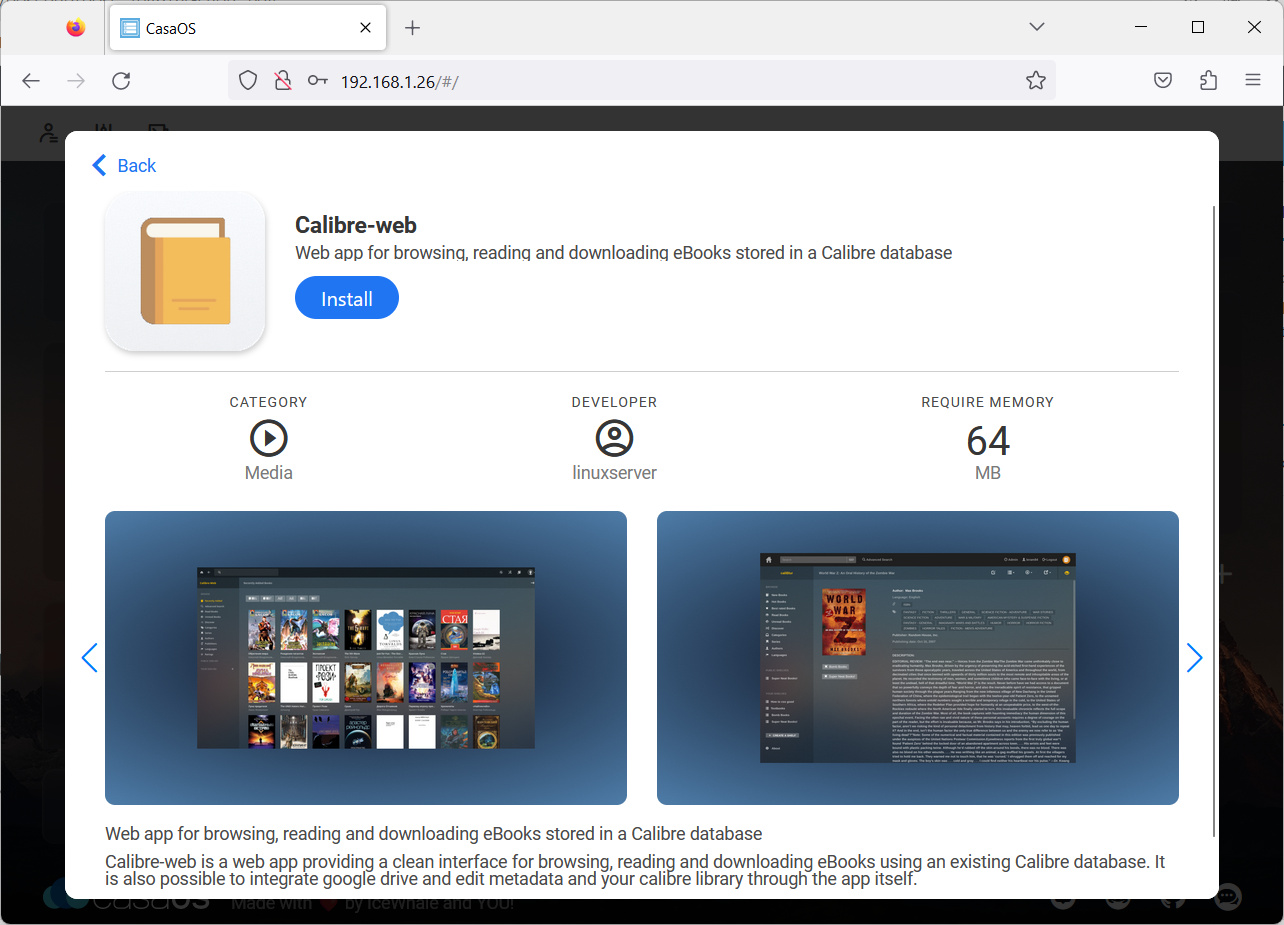
You probably noted that on this page there’s the “Install” button for the selected app. Clicking it (I will do the task for my example with the selected Calibre-web).
It will show you a “tips” popup. Usually, these are the default credentials to remotely access the app, which you can change according to the App user reference:
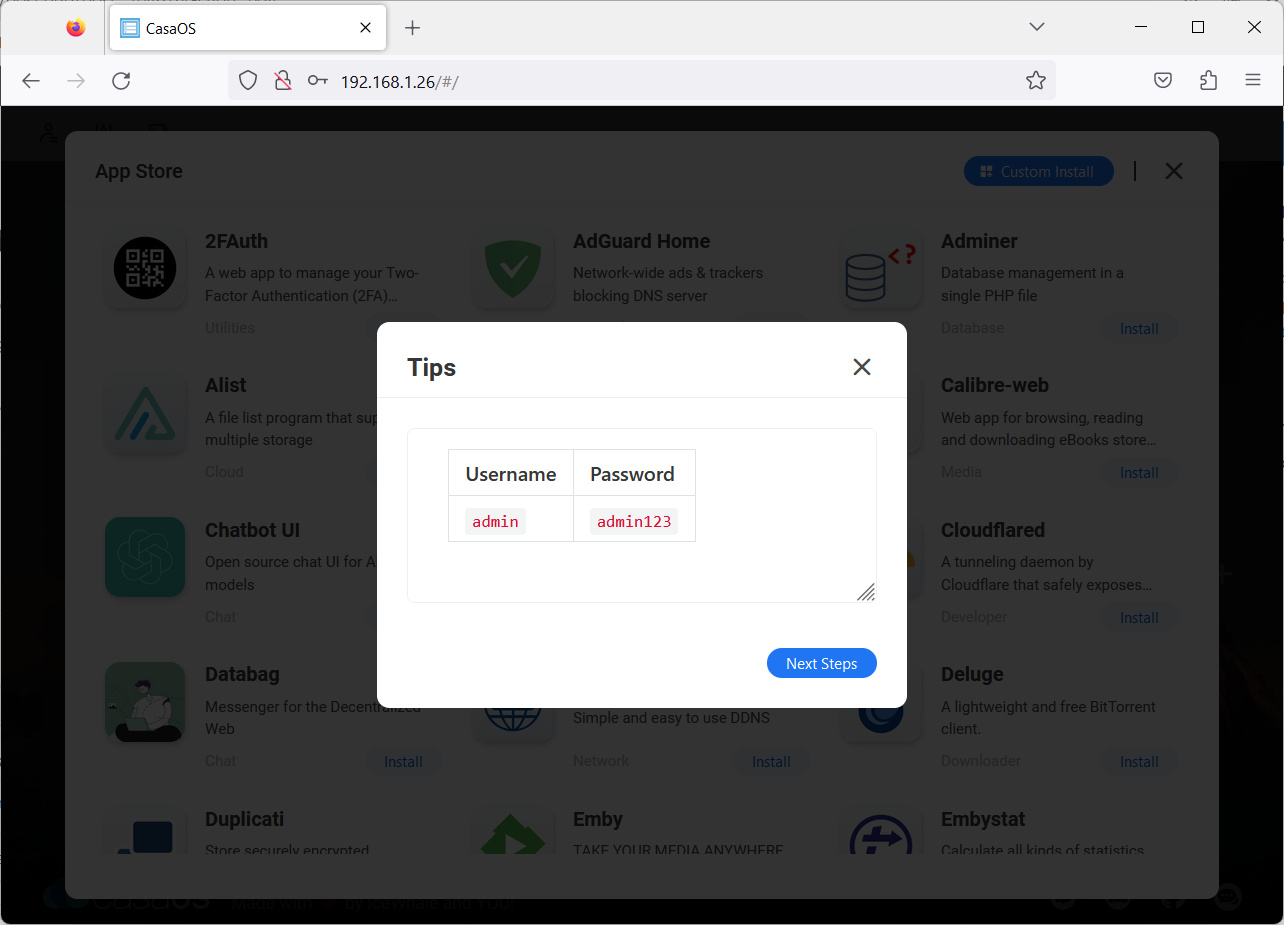
Take note of it and click the “Next Steps” button. A progress bar will let you see that the installation is going on. You can even hide it in the background, as the installation time depends on the App itself.
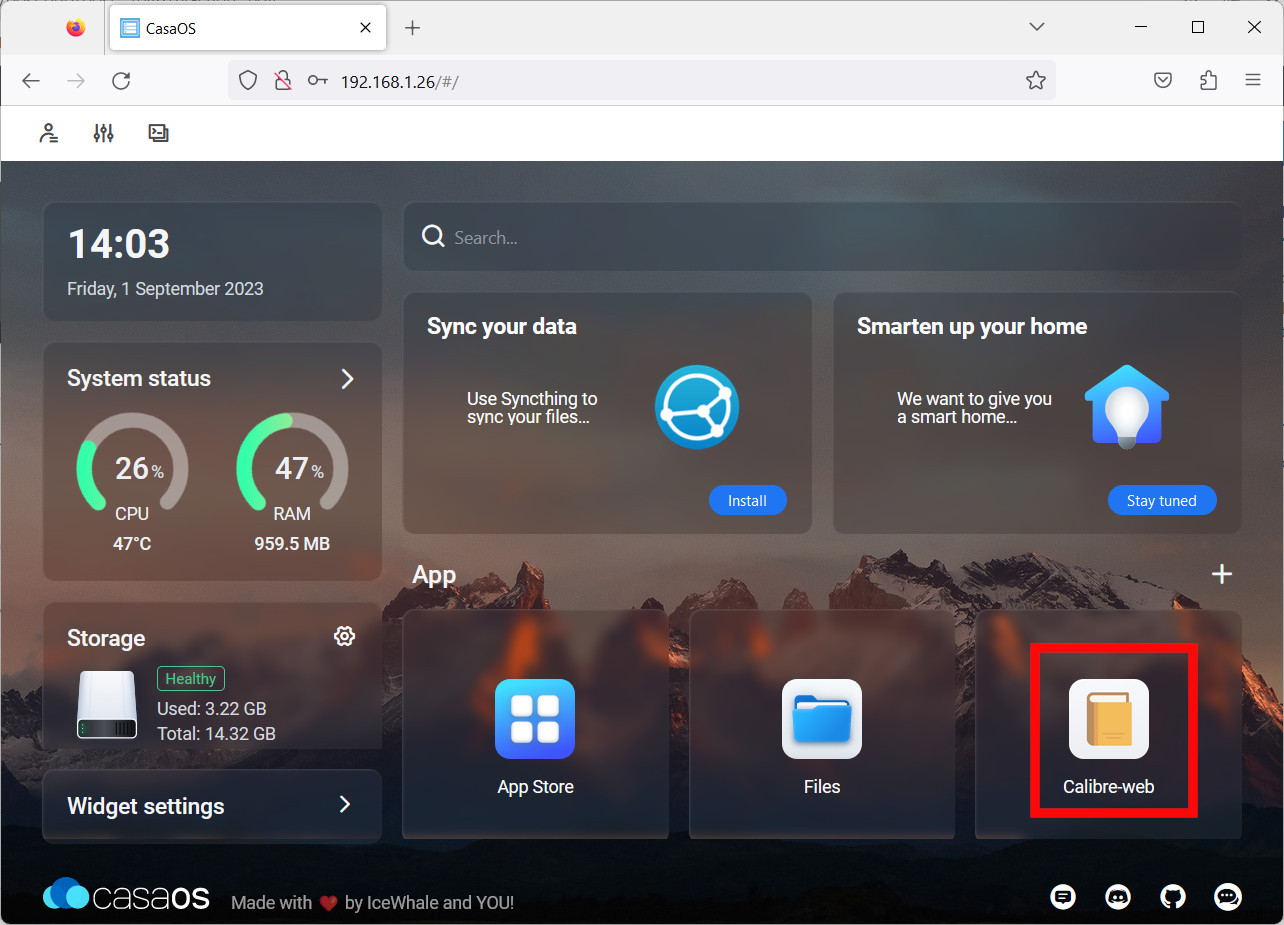
At the installation completion, the App window will automatically close and you will find the new App in your Dashboard:
Some applications could take time to complete their setup in background, with CasaOS (or any orchestrator) being not able to detect that the app’s internal setup is still in progress. It depends also on the performances that CasaOS on Raspberry PI can achieve, even if a long installation time doesn’t mean that the app will run slowly.
This kind of case will result in the App launch giving you an error page. And this is the case of Calibre-web. The only thing you need to do here is to wait, but you can double-check from the App logs if everything is still in progress by looking at the App logs.
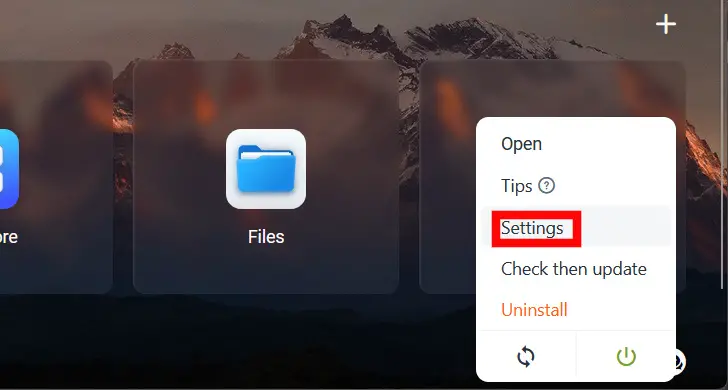
When you move your mouse pointer over any App button from your dashboard, you will see appearing the so called “kebab menu” (3 points one over the other):
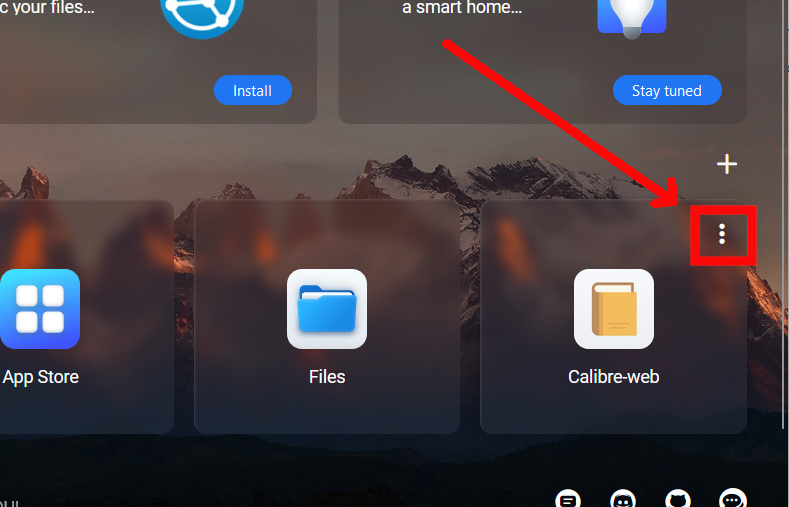
Please click it and select “Settings”:
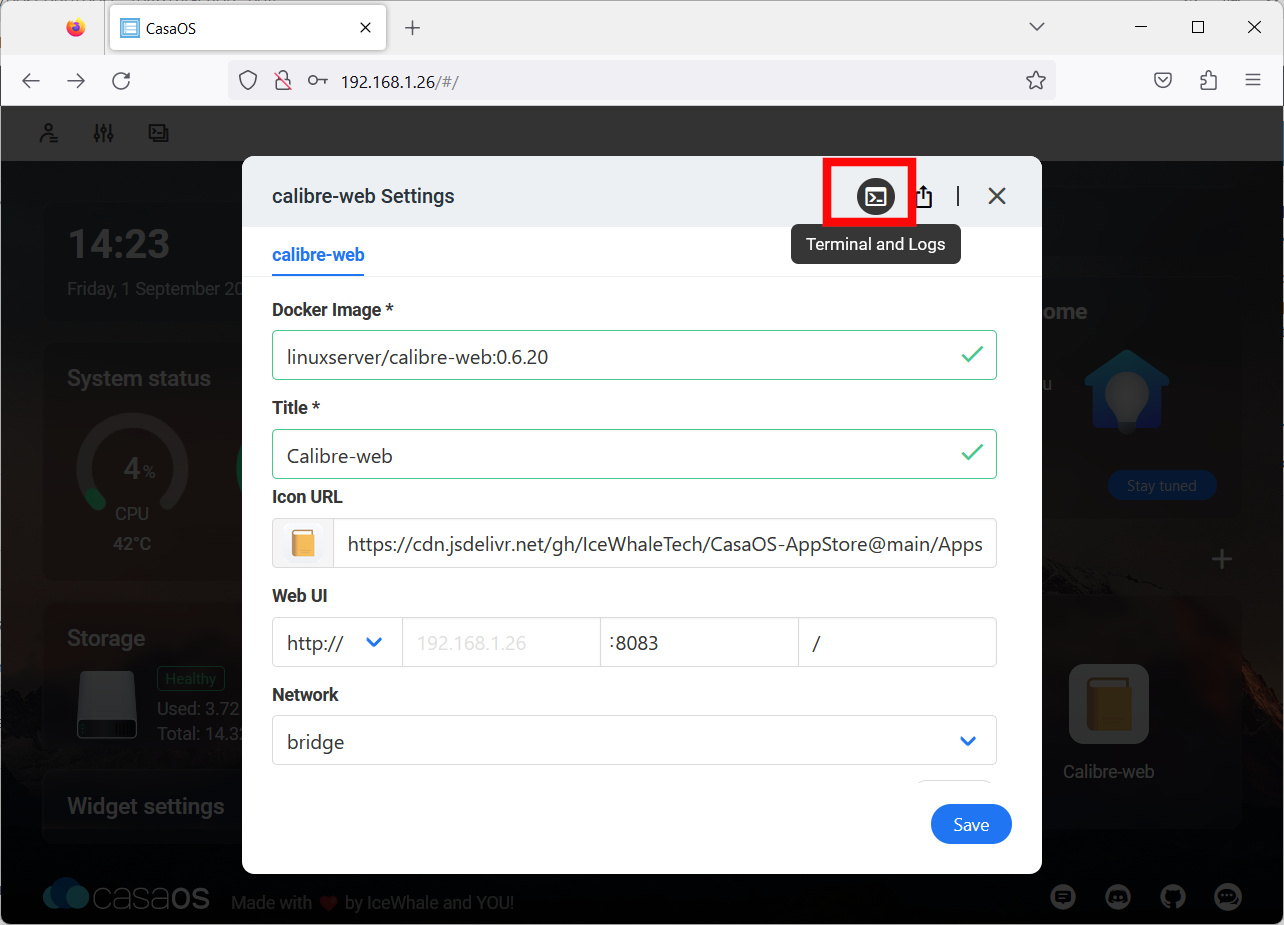
Identify and click at the top of the new window the “Terminal and Logs” button:
Now, please switch to the “logs” tab:
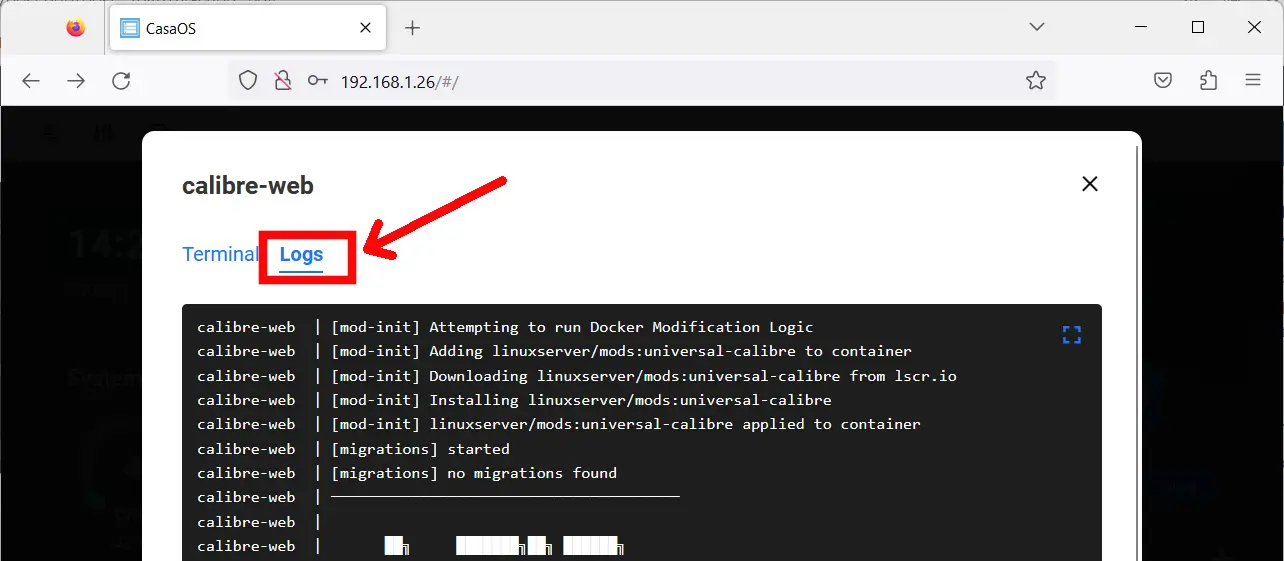
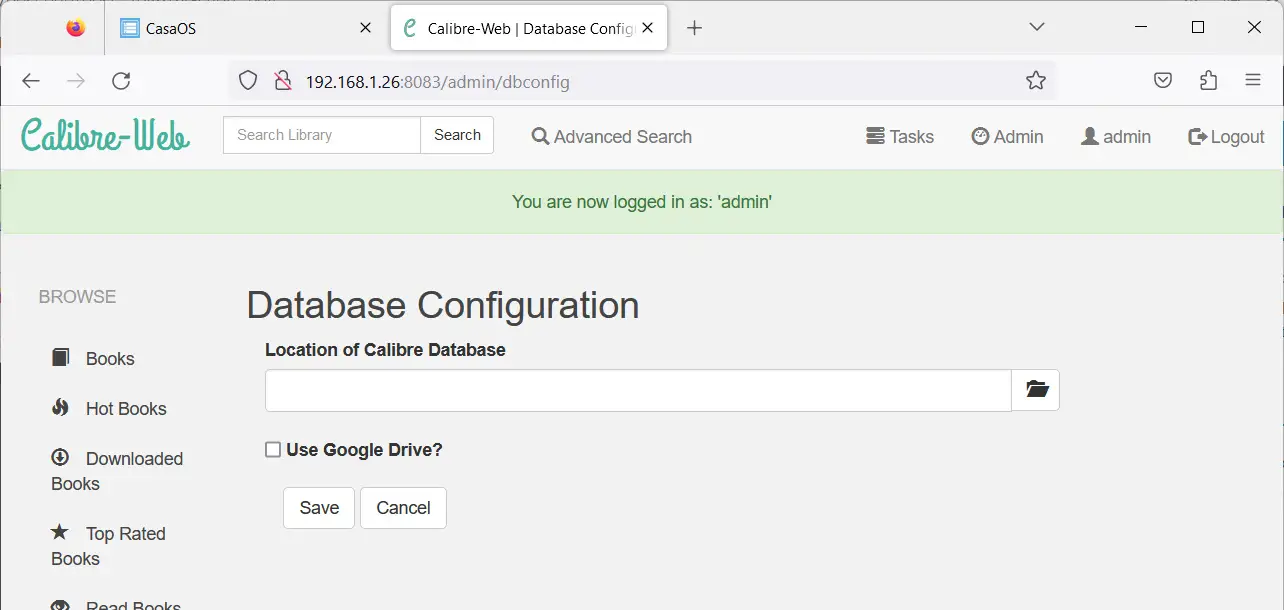
Scroll down the logs shell in order to check if the setup is finished or if it is still in progress. Once it finishes, please go back to your dashboard and open the App by clicking on it. With Calibre-web, it will redirect you to a new browser tab on the login page:
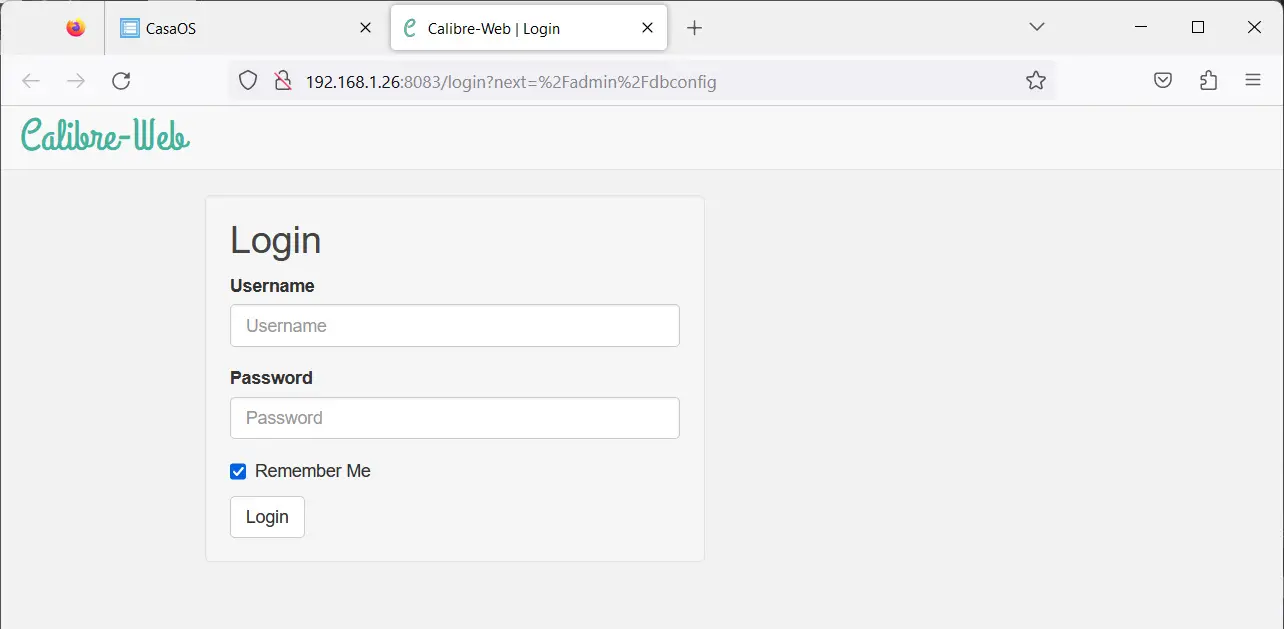
Now, you can use the App credentials to login into it:
CasaOS Official Wiki
If you need more info about using CasaOS, you can refer to its official wiki page: wiki.casaos.io/en/home.
Next Steps
Interested in more projects with your RPI? Try to look at my Raspberry PI computer tutorial pages.
Enjoy CasaOS on Raspberry PI!

Open source and Raspberry PI lover, writes tutorials for beginners since 2019. He's an ICT expert, with a strong experience in supporting medium to big companies and public administrations to manage their ICT infrastructures. He's supporting the Italian public administration in digital transformation projects.
![]()
![]()
![]()
![]()
![]()
![]()
![]()


