
Last Updated on 13th April 2024 by peppe8o
In this tutorial, I’m going to show you how to connect the gas sensor MQ-2 with Raspberry PI Pico, coding it with MicroPython.
Detecting air gas comes useful in applications like air quality monitoring, Gas leak alarm and maintaining environmental standards in hospitals. The MQ-2 with Raspberry PI Pico bring this capability to your DIY projects with cheap parts
WARNING: health and safety are serious topics. Lives and object security should never fully depend on DIY projects until you are a professional in these fields and you adopt all the needed precautions.
MQ-2 Gas Sensor
The MQ-2 Sensor is used for gas leakage detecting equipment in family and industry. These sensors are suitable for detecting LPG, i-butane, propane, methane, alcohol, Hydrogen, and smoke.
The following picture, from elecrow MQ-2 datasheet, shows the internal structure and configuration of MQ-2 gas sensor. It is composed of a micro AL2O3 ceramic tube (5 in picture), a SnO2 Tin Dioxide sensitive layer (1), a measuring electrode (2) and a heater (4). These are fixed into a crust made of plastic and stainless steel net. A potentiometer (RL) makes it possible to tune the sensor in different temperature/humidity conditions, and/or to set a threshold when an analog port is unavailable and you want to get a digital output:
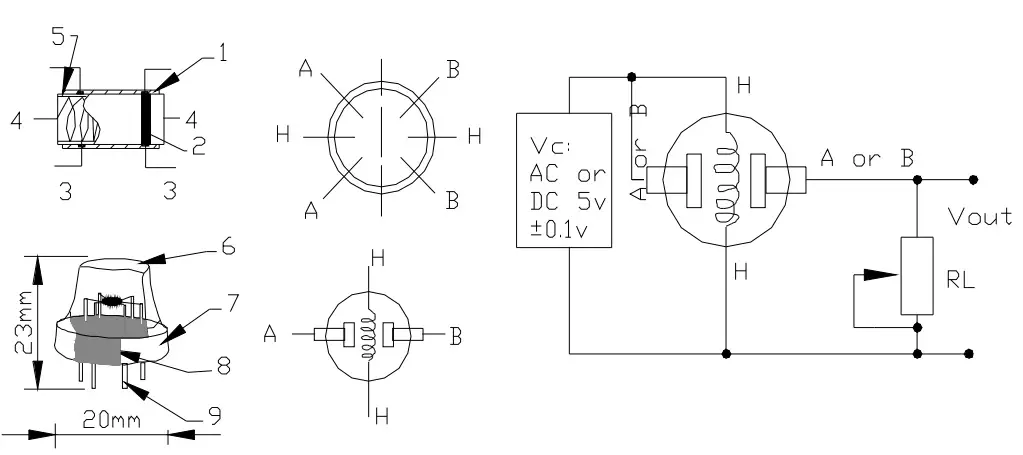
The heater provides necessary work conditions for sensitive components. The enveloped MQ-2 have 6 pin, 4 of them are used to fetch signals, and the other 2 are used for providing heating current.
Mq-2 sensor working principle is described in a so nicely way from figaro.co.jp with the following gif:
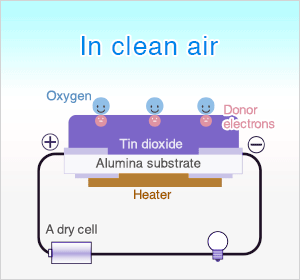
As shown, with gas presence in air, the MQ-2 resistance decreases, so resulting in higher current passing to the external microcontroller measuring the sensor analog output.
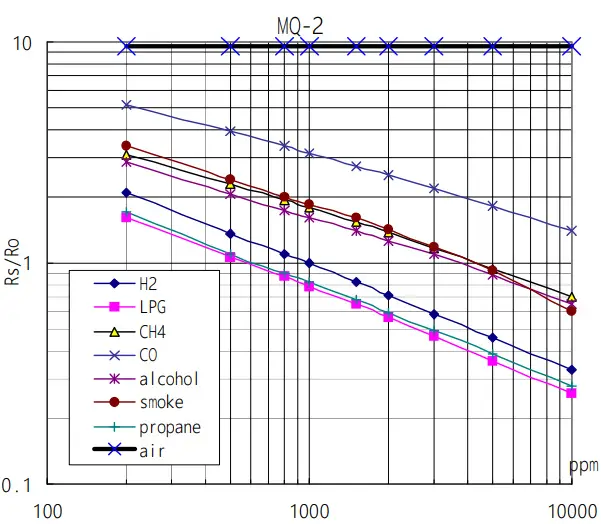
Finally, the following picture shows typical sensitivity characteristics of MQ-2 for several gases:
MQ-2 pinout
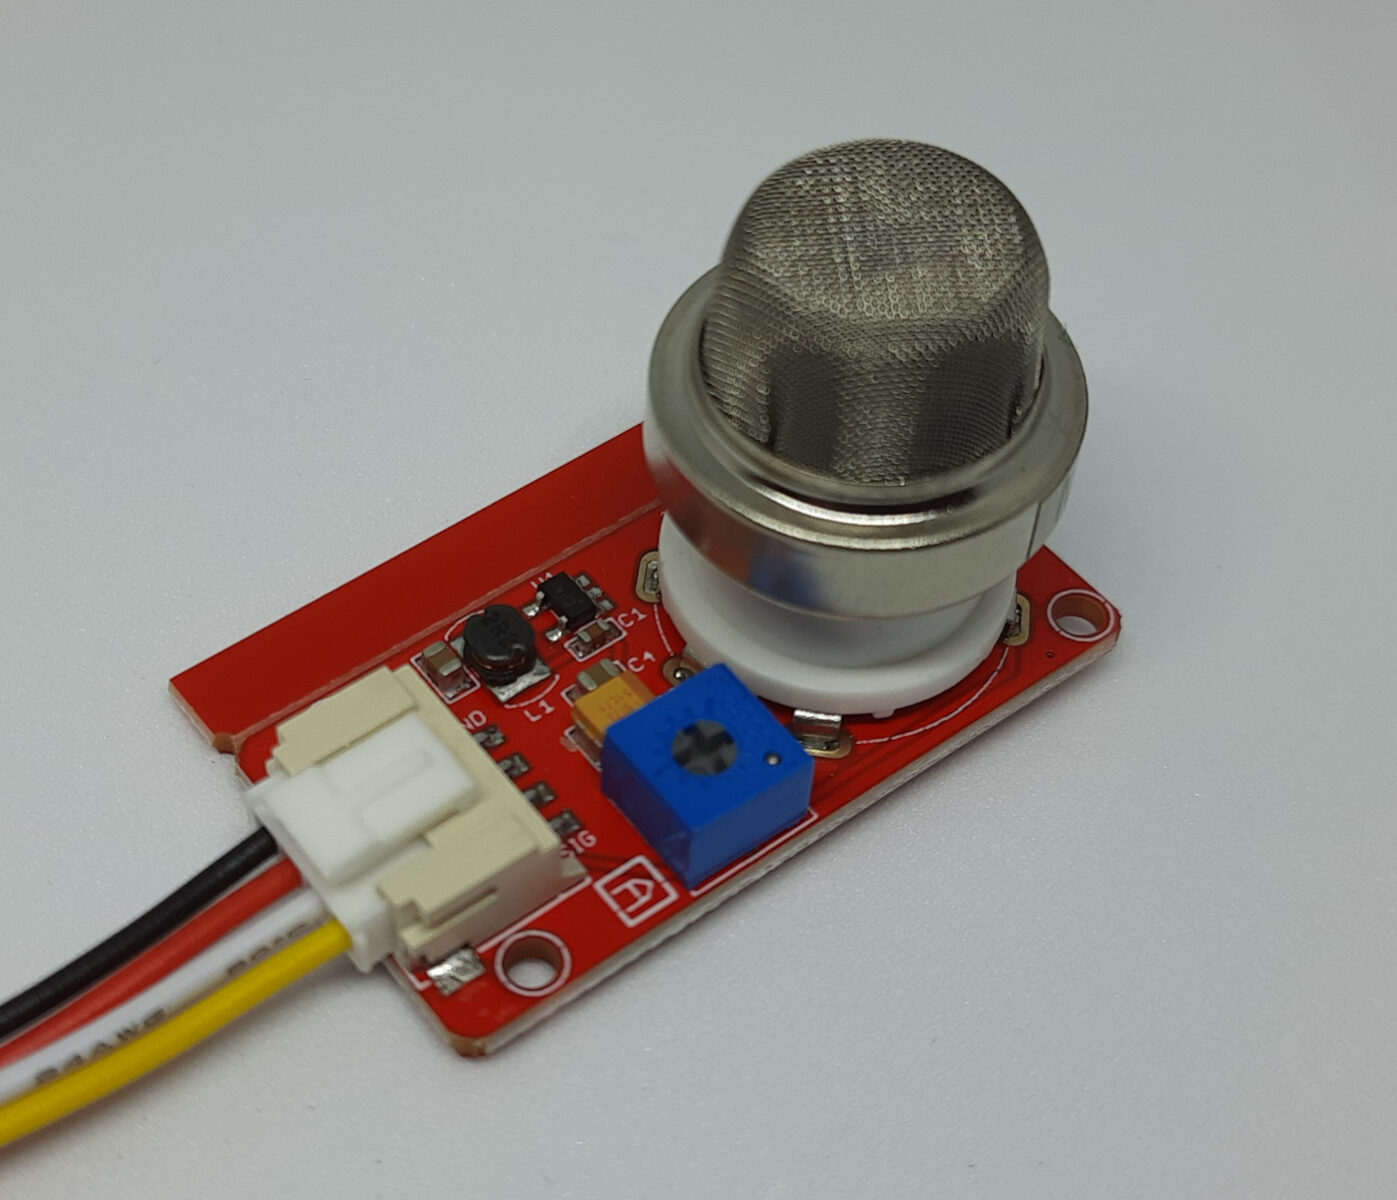
The following picture shows my MQ-2 (Crowtail Gas Sensor 2.0) pinout:
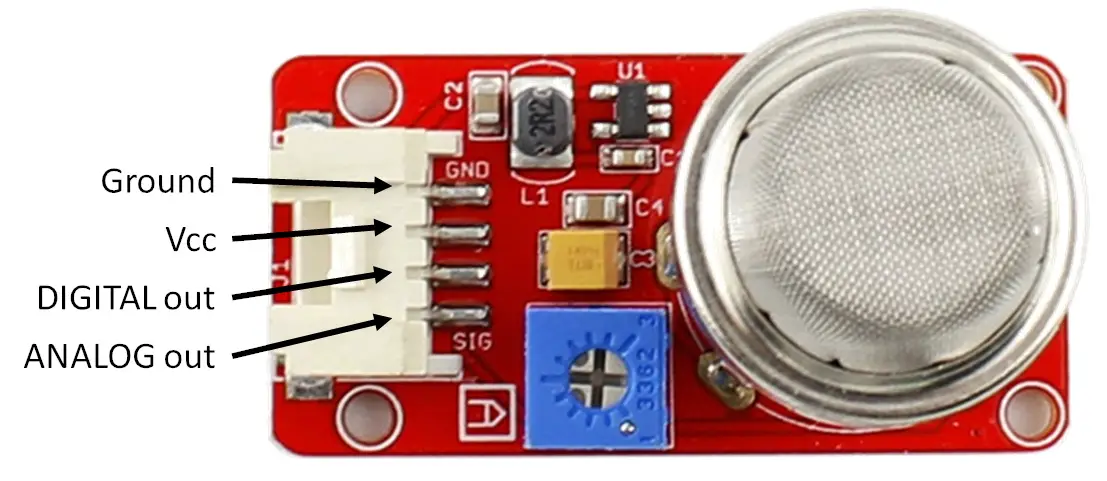
Please note that some MQ-2 sensors from different producers may have a different position for the PINs, but you will always identify the following 4:
| 1 | Vcc | From this PIN the MQ-2 sensor takes the positive power |
| 2 | Ground | This PIN goes to the microcontroller ground |
| 3 | Digital Out | This PIN outputs a 0 or 1 when a threshold is reached. You can leave this unconnected if you are going to use the analog |
| 4 | Analog Out | This PIN gives the analog output depending on gas intensity in the air |
What We Need
As usual, I suggest adding from now to your favourite e-commerce shopping cart all the needed hardware, so that at the end you will be able to evaluate overall costs and decide if to continue with the project or remove them from the shopping cart. So, hardware will be only:
- A common computer (maybe with Windows, Linux or Mac). It can also be a Raspberry PI Computer board
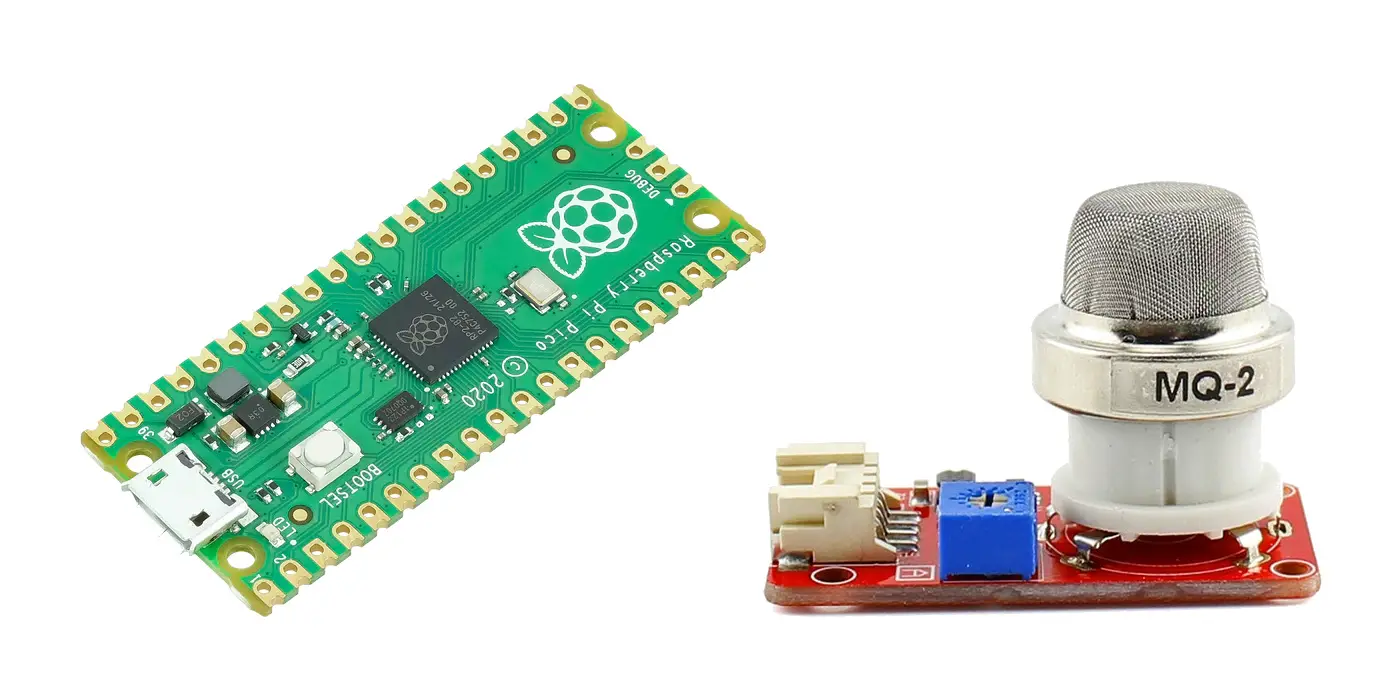
- Raspberry PI Pico microcontroller (with a common micro USB cable)
- MQ-2 sensor (you can get exactly mine one from Elecrow Store)
- breadboard
- dupont wirings
Step-by-Step Procedure
Wiring Diagram
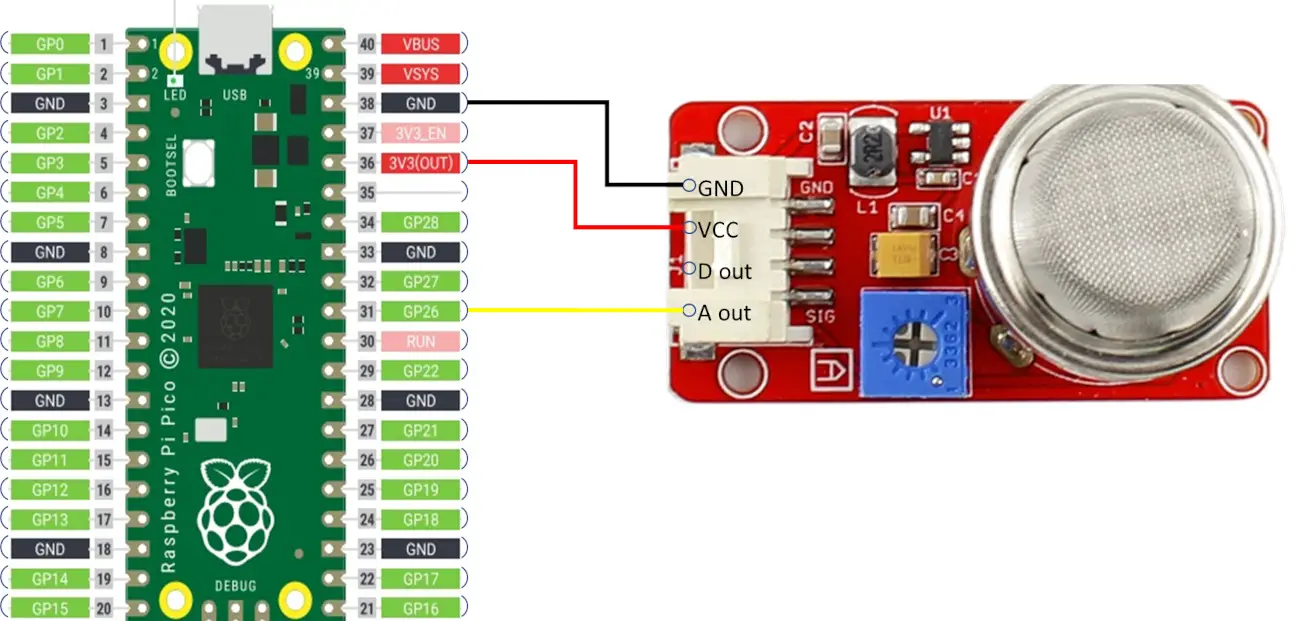
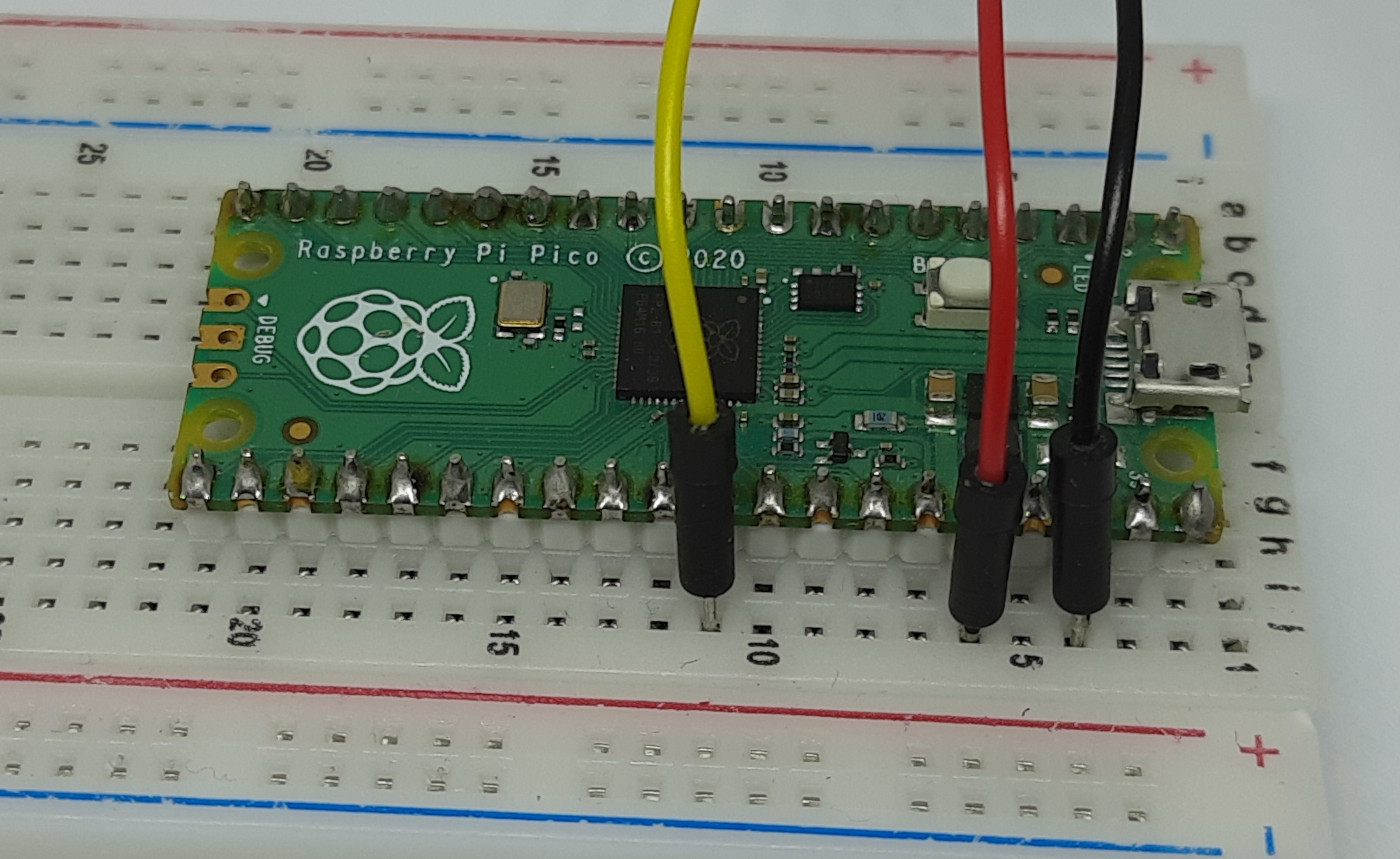
The following picture shows how to connect your Raspberry PI Pico with the MQ-2 gas sensor, according to Raspberry PI Pico pinout:
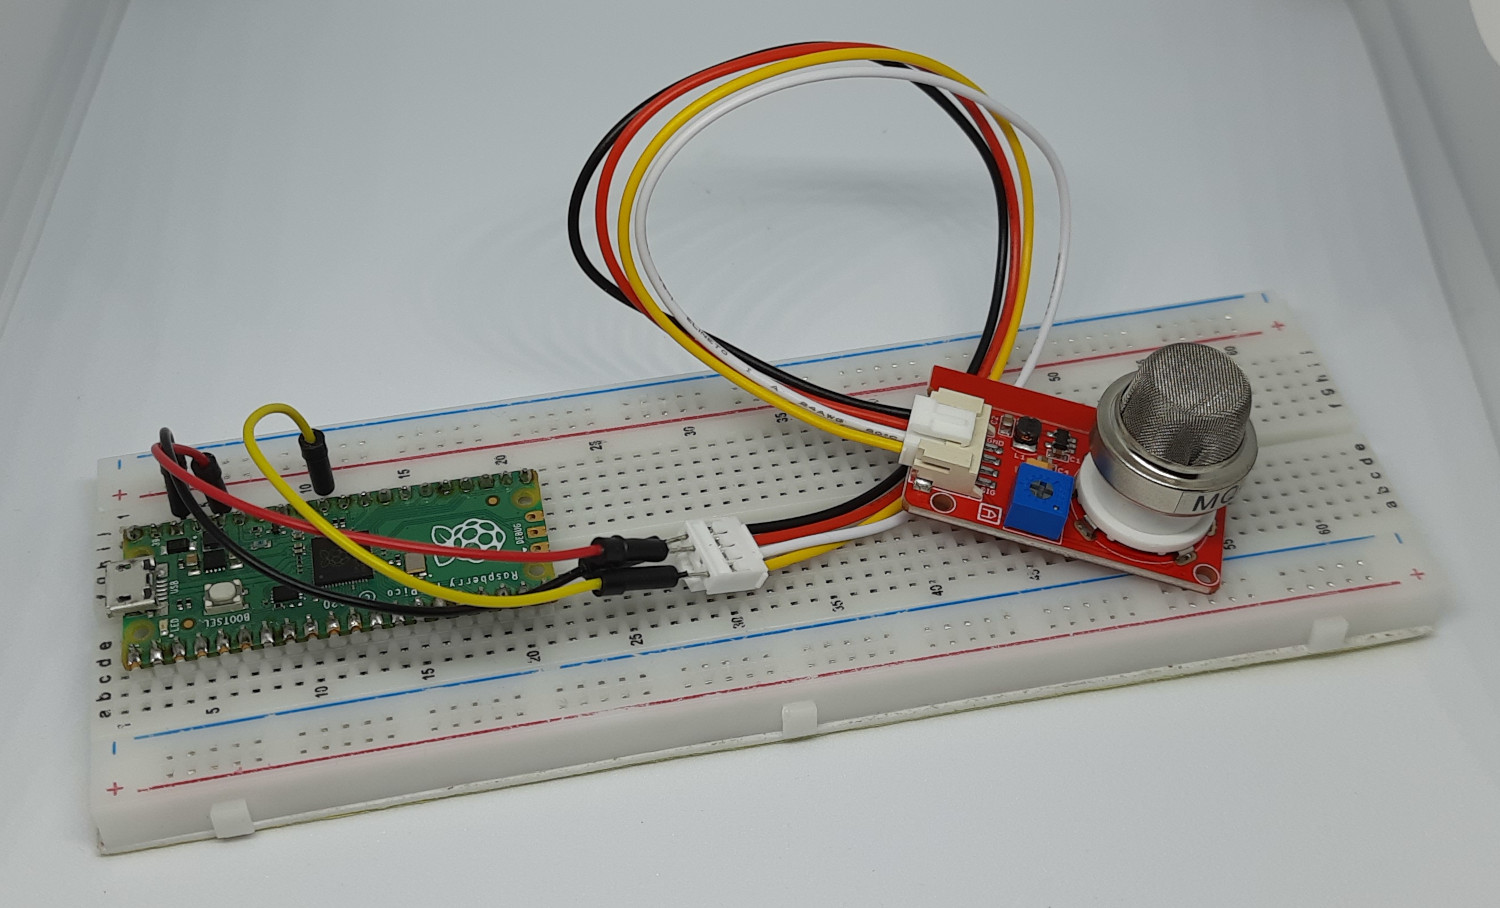
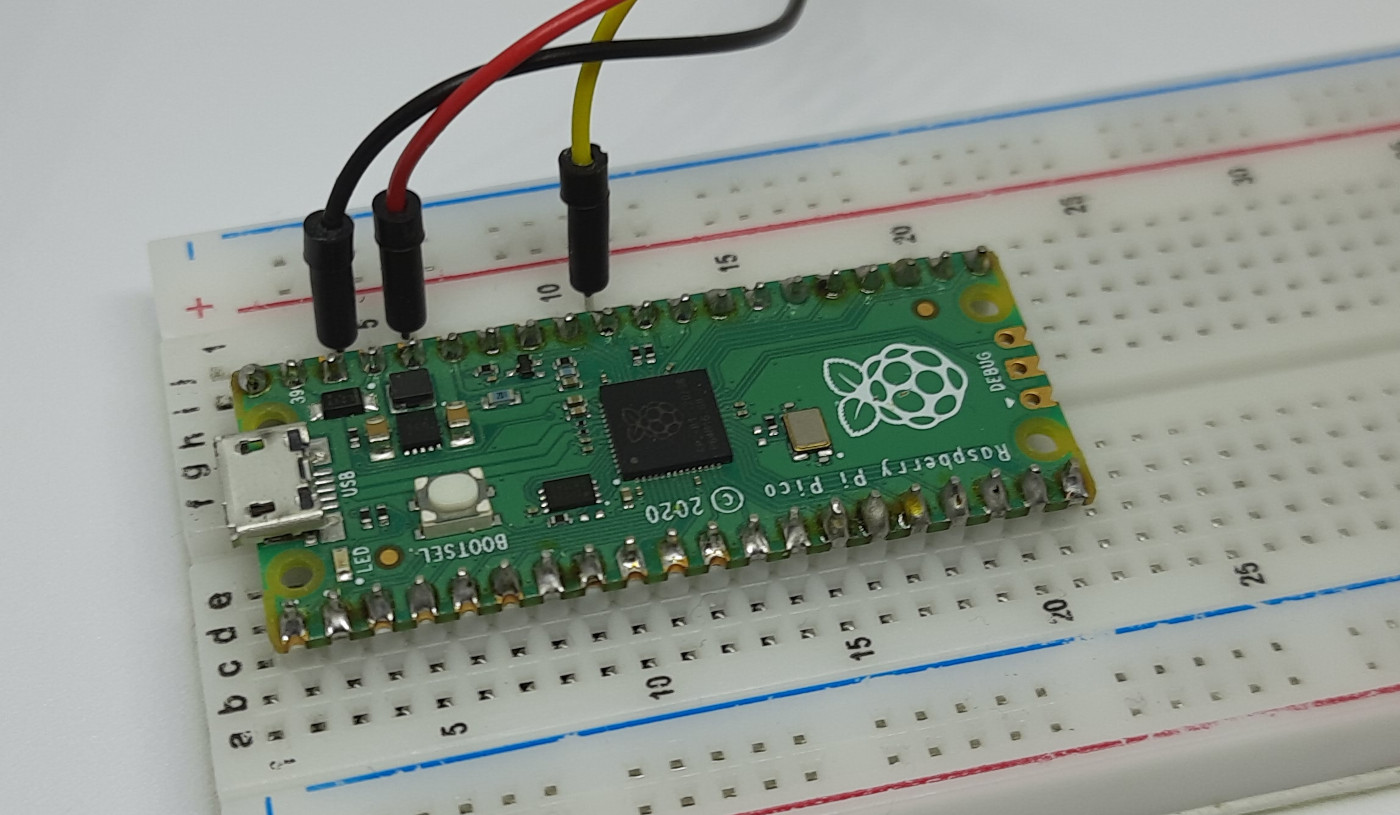
Please find below some pictures from my test lab. As you will see from the following pictures, my MQ-2 sensor has by factory a shield connector. You can also use Dupont wirings to take the single cables and bring them to your breadboard:
Get MQ-2 MicroPython Libraries
I had to edit some MQ-2 MicroPython libraries to get working with Raspberry PI Pico. The source libraries comes from https://github.com/kartun83/micropython-MQ project, but I had to change the way how the code read analog data (using the read_u16 for RPI Pico), the max value (65535 for a 16-bit instead of the 12-bit 4096 max value), the base voltage (using 3.3V).
My libraries are available for edits and download in my GitHub repository: https://github.com/peppe8o/rpi-pico-peppe8o/tree/main/libraries/mq-2 but you can get a copy of required libraries also from my download area with the following links:
According to my Adding external modules to MicroPython with Raspberry PI Pico tutorial, add these 2 files in your Raspberry PI Pico root folder or inside a folder named “lib”. This will be what appears in my RPI Pico storage:

Get my mq-2-test.py Code
Download my mq-2-test.py file from the same GitHub repository (mine one) or from my download area with the following link:
This code starts importing the required libraries:
from mq2 import MQ2
import utime
The following line sets as variable the number of the Raspberry PI Pico port getting the analog input from MQ-2 gas sensor (GP 26 according to my wiring diagram). Then, we initialize the sensor object also setting the voltage to 3,3 V:
pin=26
sensor = MQ2(pinData = pin, baseVoltage = 3.3)
Before starting to measure the gas presence, a calibration process (that must be performed in clean air) checks the base resistance (R0) and identifies its value:
print("Calibrating")
sensor.calibrate()
print("Calibration completed")
print("Base resistance:{0}".format(sensor._ro))
The main loop continuously checks the presence of any gas in the air and gives back results to the shell:
while True:
	print("Smoke: {:.1f}".format(sensor.readSmoke())+" - ", end="")
	print("LPG: {:.1f}".format(sensor.readLPG())+" - ", end="")
	print("Methane: {:.1f}".format(sensor.readMethane())+" - ", end="")
	print("Hydrogen: {:.1f}".format(sensor.readHydrogen()))
	utime.sleep(0.5)
Test the MQ-2 Code
You are now ready to run the code from Thonny. Once completed the calibration test, you will see the gas measurements and you can check that the project is correctly running by forcing a little quantity of gas near the sensor while the code is running. The measurements should be in ppm according to the original code description.
>>> %Run -c $EDITOR_CONTENT
Calibrating
Calibrating:
Step 0
Step 1
Step 2
Step 3
Step 4
Step 5
Calibration completed
Base resistance:15.76491
Smoke: 17.1 - LPG: 3.2 - Methane: 7.4 - Hydrogen: 9.4
Smoke: 20.9 - LPG: 2.7 - Methane: 7.8 - Hydrogen: 8.0
Smoke: 17.2 - LPG: 4.2 - Methane: 9.2 - Hydrogen: 7.1
Smoke: 11.9 - LPG: 3.5 - Methane: 15.0 - Hydrogen: 6.5
Smoke: 16.3 - LPG: 3.5 - Methane: 8.7 - Hydrogen: 7.1
Smoke: 15.4 - LPG: 4.0 - Methane: 8.2 - Hydrogen: 7.8
Smoke: 12.2 - LPG: 2.7 - Methane: 8.6 - Hydrogen: 6.7
Smoke: 14.6 - LPG: 3.0 - Methane: 9.2 - Hydrogen: 8.5
Smoke: 14.2 - LPG: 4.0 - Methane: 11.1 - Hydrogen: 7.7
Smoke: 19.0 - LPG: 2.8 - Methane: 6.3 - Hydrogen: 8.7
Smoke: 16.7 - LPG: 4.3 - Methane: 6.9 - Hydrogen: 7.7
Smoke: 12.8 - LPG: 4.1 - Methane: 8.2 - Hydrogen: 10.6
Smoke: 15.2 - LPG: 3.7 - Methane: 7.4 - Hydrogen: 7.8
Final Notes
I can’t test in lab if the ppm between smoke, LPG, Methane and Hydrogen is correct as reported by code. I can just state that by making a gas source near the sensor (for example a lighter without firing it) the values suddenly rise. My suspect is that the overall values increasing detect a gas presence but I don’t know if the sensor can differentiate between the different gases. A check by someone able to test it would be appreciated.
In order to get better measurement values in ppm, I suggest tuning the sensor output by using the potentiometer in a space with a controlled gas presence. You can refer to the Sensitivity Adjustment paragraph in Elecrow MQ-2 datasheet for what the producer suggests in order to accomplish this task.
Measurements depend also on air temperature and humidity, which can influence the results.
Finally, you can achieve better measurements after a time as the MQ-2 sensor requires a pre-heat time.
What’s Next
Interested to do more with your Raspberry PI Pico? Try to look at my Raspberry PI Pico tutorials for useful and funny projects!
Enjoy!

Open source and Raspberry PI lover, writes tutorials for beginners since 2019. He's an ICT expert, with a strong experience in supporting medium to big companies and public administrations to manage their ICT infrastructures. He's supporting the Italian public administration in digital transformation projects.
![]()
![]()
![]()
![]()
![]()
![]()
![]()


Hi. I´m getting an error in script.
Traceback (most recent call last):
File “”, line 27, in
File “mq2.py”, line 8
SyntaxError: invalid syntax
Can u help me?
Hi Andre,
usually the syntax error brings more details on the line where the error happens. Please, can you check if the error from your shell has more notes on the library issue? Moreover, are you using the micropython firmware available from Thonny?