Last Updated on 2nd September 2023 by peppe8o
In this tutorial, I’m going to show you how to read QR codes from Raspberry PI with Pyzbar, also providing a use case: read your Covid-19 Green Pass and get your data.
With a camera and a few python code lines you can transform your Raspberry PI into an advanced QR codes reader by usin Pyzbar, also making your RPI able to perform more actions on conditions mach.
About Pyzbar
Pyzbar is a Python library enabling your scripts to read one-dimensional barcodes and QR codes. It is really simple and easy to use, as you can read codes with a simple “decode” command from an image, getting also info regarding data and position of your QR/bar-codes from the image.
For this tutorial I’m going to use a Raspberry PI 3 Model A+, but this should work with all Raspberry PI computer boards,
What We Need
As usual, I suggest adding from now to your favourite e-commerce shopping cart all the needed hardware, so that at the end you will be able to evaluate overall costs and decide if to continue with the project or remove them from the shopping cart. So, hardware will be only:
- Raspberry PI 3 Model A+ (including proper power supply or using a smartphone micro usb charger with at least 3A) or newer Raspberry PI Board
- high speed micro SD card (at least 16 GB, at least class 10)
- Raspberry PI camera
Check hardware prices with the following links:


Step-by-Step Procedure
Prepare Operating System
Start preparing your OS. Install Raspberry PI OS Lite (for a fast, headless operating system) or Raspberry PI OS Desktop (in this case working from its internal terminal).
Make your OS up to date. From terminal use the following command:
sudo apt update -y && sudo apt upgrade -yEnable your camera interface. From terminal, use following command:
sudo raspi-configThe terminal will show the following page:
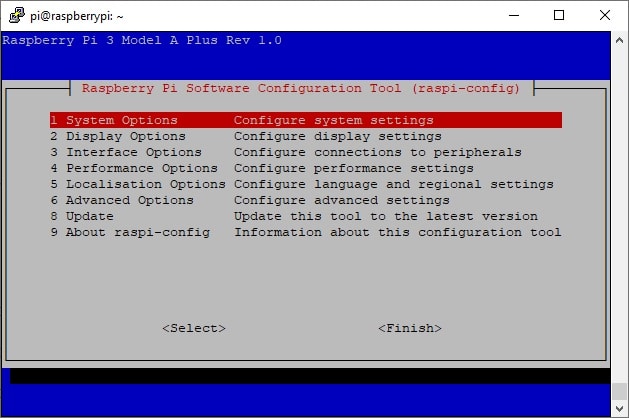
Go to option 3 (Interface Option) and press ENTER:
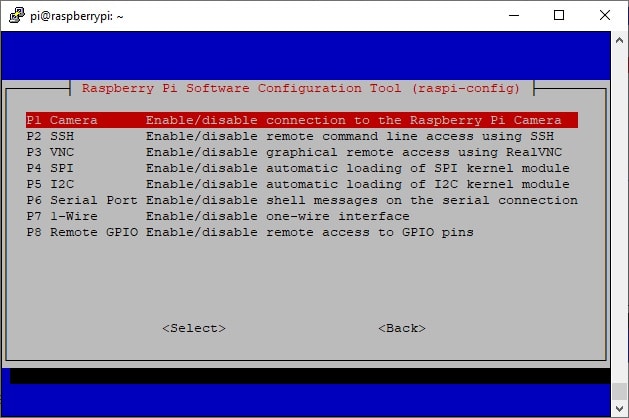
Select fist option (Camera) and press ENTER. In next screen move selection from “No” to “Yes”:
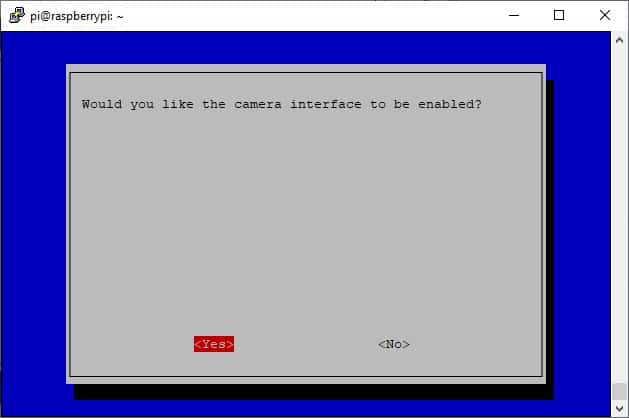
Press ENTER and confirm also in the following screen.
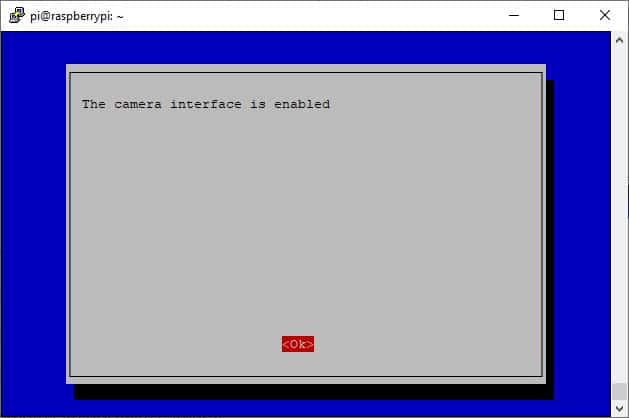
You will go back to raspi-config home. Move to the finish button and press ENTER.
This operation will require a reboot. Confirm in the next screen and wait for the reboot:
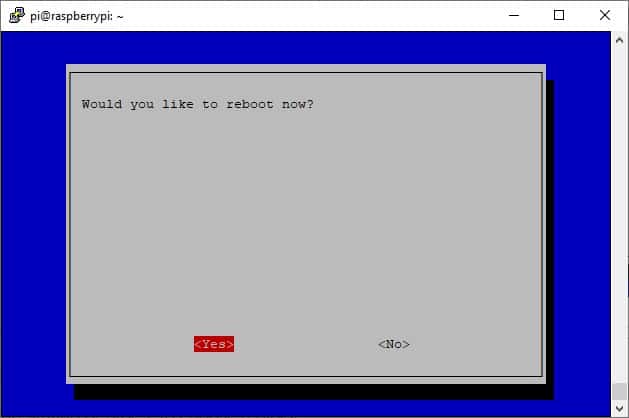
Once your Raspberry PI is rebooted, connect again to terminal. We can now install required libraries:
sudo apt-get install python3-opencv libzbar0 python3-pip
python3 -m pip install pyzbar
From here you can already see that we’ll use OpenCV to manage frames captured from camera.
Prepare the qrCodeReader.py script
From the terminal, you can get directly into your Raspberry PI the python script with following command:
wget https://peppe8o.com/download/python/qrCodeReader.pyThe following lines will explain code line by line.
First of all, required modules are imported:
import cv2
import pyzbar.pyzbar as pyzbar
from datetime import datetime
Next variables initialize camera (with the help of OpenCV). But I also included all settings required to change the default OpenCV videocatpure resolution (640×480) to whatever our camera is able to perform. Most common Raspberry PI cameras are able to reach 2592×1944, but the new RPI HQ camera can get more of these:
#width = 2592
#height = 1944

camera = cv2.VideoCapture(0)
#camera.set(3,width)
#camera.set(4,height)
This is useful when we have to manage high-density QR codes. Here a higher resolution cen help pyzbar in increasing the probability that images are correctly decoded. But higher resolution image elaboration will also require more computing time, resulting in less samples/second.
You need only to uncomment the 4 lines (by removing the “#” character). You can also fine tune these settings until you reach the best compromise between samples number and decoding results.
Now the decodeCam function is defined. This function requires an image as input and the first operation consists in transforming it into a grey-scale image (to make recognition more reliable) using OpenCV modules:
def decodeCam(image):
    gray = cv2.cvtColor(image, cv2.COLOR_BGR2GRAY)
The image is now decoded with pyzbar. A “reading…” output is provided to user to notify that image is going to be processed:
    codes = pyzbar.decode(gray)
    print('reading...', end='\r')
The new “codes” is an array. Pyzbar is able to detect multiple QR/bar-codes simultaneously, so returning a sub-array object for each code detected. Each element of this array contains code data and type (BARCODE or QRCODE). These info are printed on terminal (when detected) and function returns to main loop the image analyzed:
    for code in codes:
        codeData = code.data.decode()
        codeType = code.type
        print("["+str(datetime.now())+"] Type:{} | Data: {}".format(codeType, codeData))
    return image
The main loop is really simple. For each run, it gets a camera frame and runs the decodeCam function on it:
try:
 while True:
  ret, frame = camera.read()
  im=decodeCam(frame)
The last exception statement intercepts user interrupts (with CTRL+C key combination) to stop script execution:
except KeyboardInterrupt:
 print('interrupted!')
Running the qrCodeReader.py script
To run this script you will use the following command:
python3 qrCodeReader.pyUsing a custom QR code:
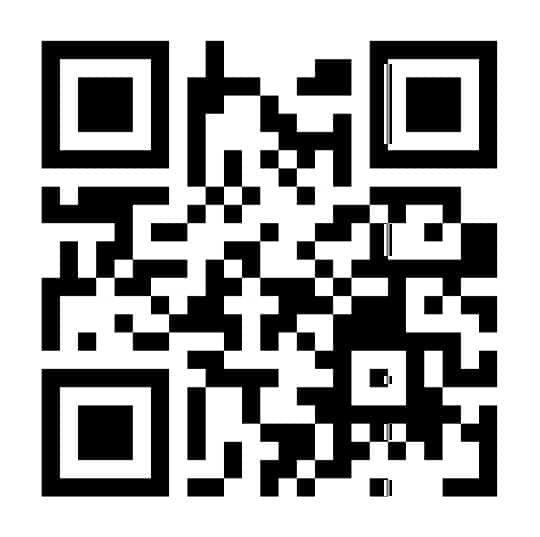
You will get your QR codes read from Raspberry PI similarly to following:
pi@raspberrypi:~ $ python3 qrCodeReader.py
[2021-08-02 20:09:11.973184] Type:QRCODE | Data: Hello peppe8o.com!
[2021-08-02 20:09:12.040178] Type:QRCODE | Data: Hello peppe8o.com!
[2021-08-02 20:09:12.107959] Type:QRCODE | Data: Hello peppe8o.com!
[2021-08-02 20:09:12.175700] Type:QRCODE | Data: Hello peppe8o.com!
As said, CTRL+C stops the script.
Use Case: Reading EU Covid-19 Green Pass
A simple use case is to decode an EU Covid-19 green pass. This step strongly depends on your country green pass coding and it works as follow with my Italian one.
I have to warn that common Raspberry PI camera could have problems in detecting a Covid Green Pass (which is a very high density QR code) from a small display (like a smartphone). Better results come reading this from a bigger display like a tablet. Anyhow, it requires enabling high resolution trick (already showed). Better results could be achieved with a Raspberry PI High Quality Camera, but this could require better computing capabilities (like a Raspberry PI 3 model B/B+ or RPI4). This hardware change has not been tested by me as I don’t have an High Quality Camera.
Another important thing is that reading a Covid-19 Green Pass is different from validating it. The validation process requires connecting to authority services and may be more complex to reach as goal.
That said, install some more packages required:
python3 -m pip install cryptography==2.8 cose cbor2 base45These are required because EU Covid-19 green pass is encrypted and compressed, so some decoding and uncompressing actions are required.
Get the new script:
wget https://peppe8o.com/download/python/covidPassReader.pyYou can note that there are a few changes compared to previous script.
First of all, we need to import addictional modules:
import cv2
import pyzbar.pyzbar as pyzbar
import json
import zlib
import base45
import cbor2
from cose.messages import CoseMessage
json is required to print the data read from QR code, while other modules are required to decode encrypted data.
I also set camera to my best resolution, according to my hardware:
width = 2592
height = 1944
camera = cv2.VideoCapture(0)
camera.set(3,width)
camera.set(4,height)
Changes on decodeCam function are mainly on decoding and decompressing stack:
        decoded = base45.b45decode(codeData[4:])
        decompressed = zlib.decompress(decoded)
        cose = CoseMessage.decode(decompressed)
Instead of printing a flat record, the json allows a better printing:
print(json.dumps(cbor2.loads(cose.payload), indent=2))
The main loop remains unchanged.
The new output will be similar to following image (where my personal data are hidden for privacy reasons):
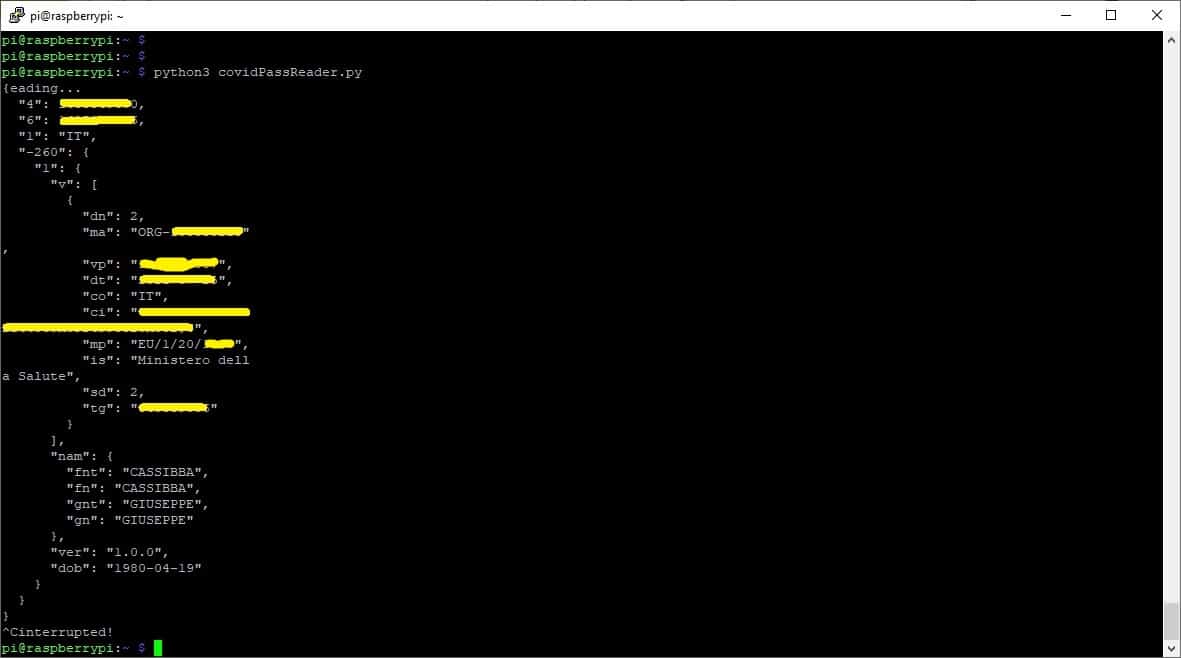
You will find here some data like:
- “4” -> certificate end of validity (in linux datetime)
- “6” -> certificate start of validity (in linux datetime)
- “dn” -> this should be my dose number (second one)
- “dob” -> my date of birth
Enjoy reading QR codes from Raspberry PI!

Open source and Raspberry PI lover, writes tutorials for beginners since 2019. He's an ICT expert, with a strong experience in supporting medium to big companies and public administrations to manage their ICT infrastructures. He's supporting the Italian public administration in digital transformation projects.

