
Last Updated on 17th August 2024 by peppe8o
In this tutorial, I’m going to show you how to use a Matrix Keypad from Raspberry PI Pico and get user input from python.
With matrix keypads you can acquire some simple user inputs (like codes, numbers and so on) into your Micropython programs without having to connect from a different device, by pushing its buttons. Matrix keypad can work with Raspberry PI Pico by using a simple MicroPython code
How Matrix Keypad Works

As already explained in my Matrix Keypad with Raspberry PI computer boards, matrix keypads are made of thin, flexible material. Sometimes this base can also include an adhesive backside so that you can fix this by simply attaching it.
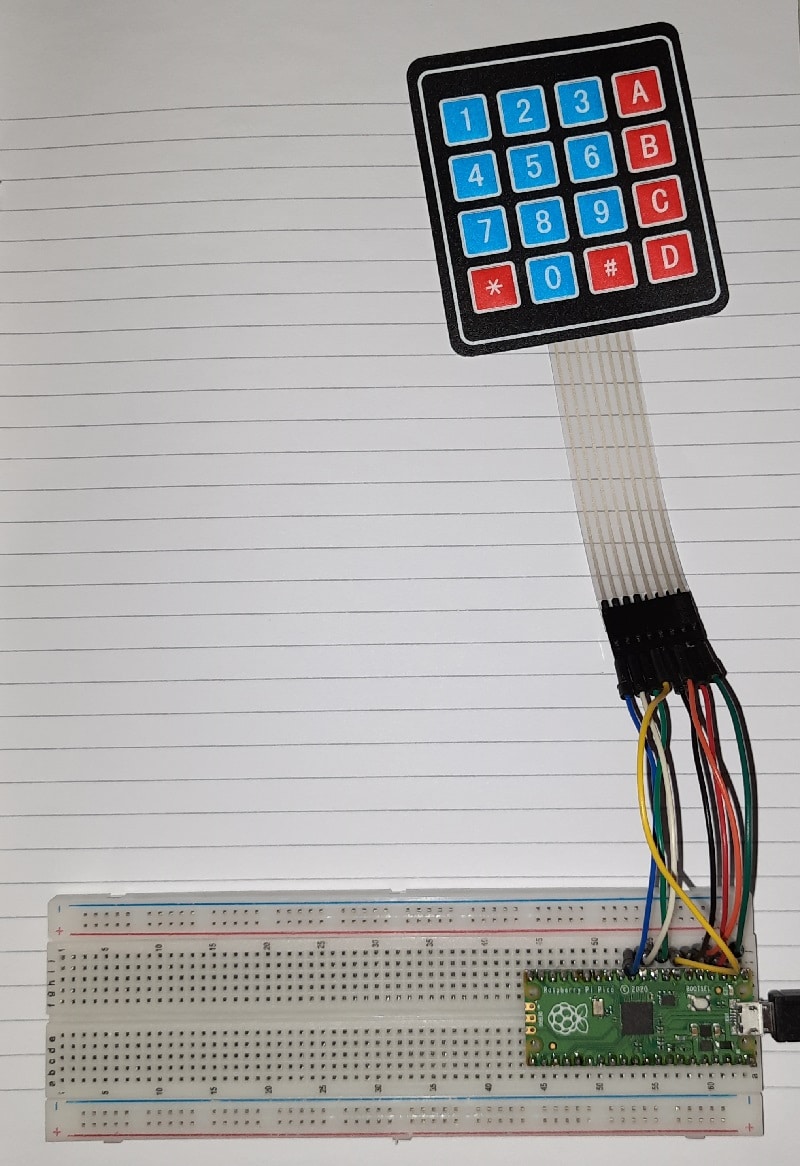
The most common versions have buttons organized in 3 columns x 4 rows or 4 columns x 4 rows. The first model includes all number digits (from 0 to 9) plus “*” and “#”. The 4×4 version usually adds a final column with A, B, C, and D letters.
Their internal circuit has been already explained in my previous tutorial (ref. Matrix Keypad with Raspberry PI computer boards), so I’m going only to show it. Their crossings identify the specific key in a diagram that can be schematized as follows:
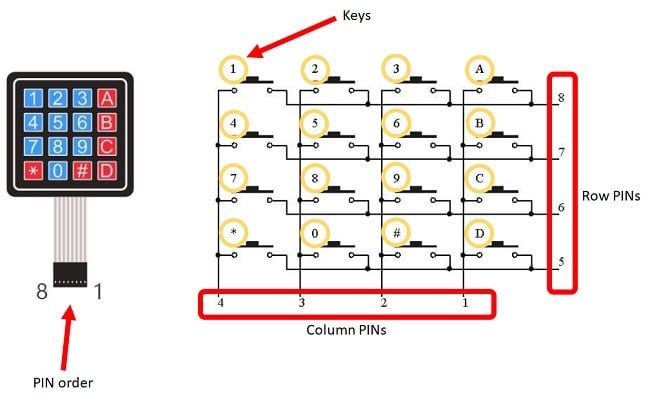
To use this device and get the pressed key, you need to scan iteratively rows (or columns) and check from columns (or rows) the received status. In this tutorial, I’m going to use a 4×4 matrix keypad.
What We Need
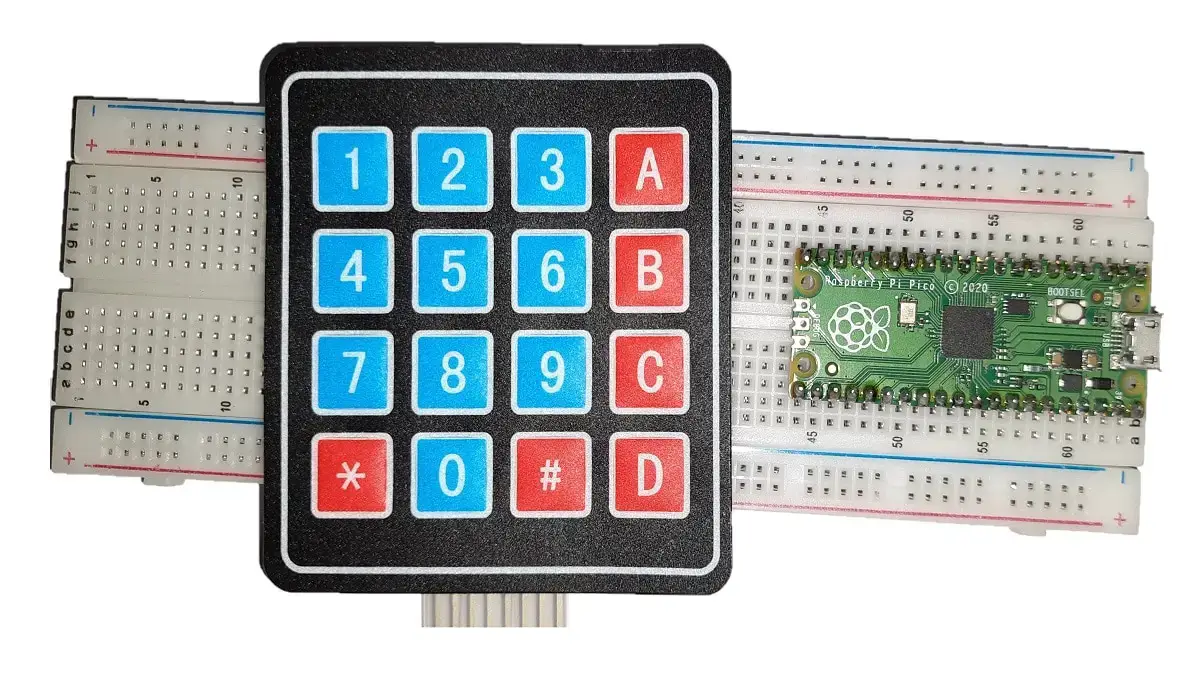
As usual, I suggest adding from now to your favourite e-commerce shopping cart all the needed hardware, so that at the end you will be able to evaluate overall costs and decide if to continue with the project or remove them from the shopping cart. So, hardware will be only:
- Raspberry PI Pico microcontroller (with a common micro USB cable)
- a Matrix Keypad
- dupont wirings
- (optional) breadboard
Check hardware prices with the following links:


Wiring Diagram
Please find below my wiring diagram. Please note that I used a cabling schema which make me able to use each Raspberry PI Pico GP number connected with the same Keypad Matrix Pin number.
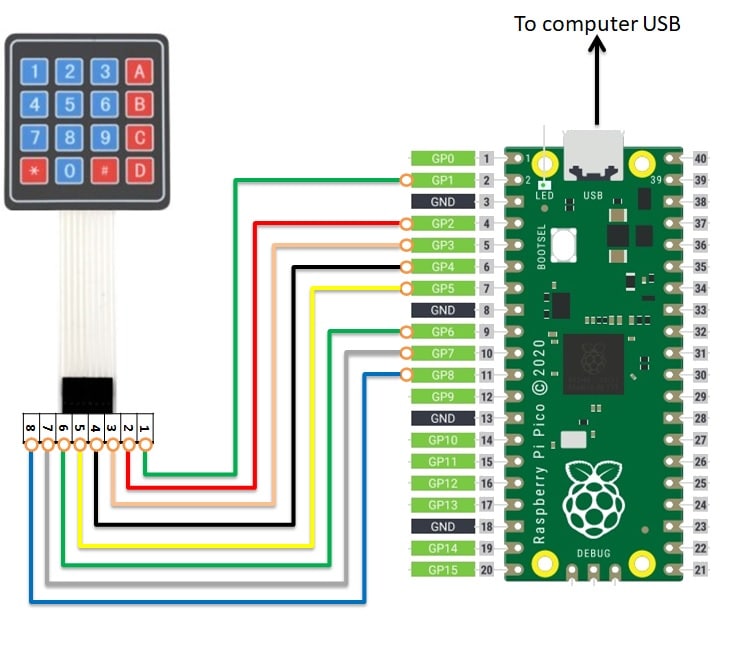
And some images from my micro lab:


Step-by-Step Procedure
Prepare cabling according to the previous paragraph. Connect RPI Pico to Thonny (you can refer to my tutorial about the First steps with Raspberry PI Pico).
Download the pico4x4MatrixKeypad.py MicroPython script. The following paragraphs will explain it.
As for every MicroPython script, we start importing the required modules:
from machine import Pin
import utime
Next, we associate PINs mapping to 2 list variables so that we can manage them in a simpler way. The following part uses my wiring settings, according to Pico GP naming (please refer to Raspberry PI Pico pinout). If you use a different wiring on RPI Pico, you have to set here correct numbers:
col_list=[1,2,3,4]
row_list=[5,6,7,8]
We’ll use rows to scan the matrix keypad, so having rows working in output mode (with the default values to high=1). On the other hand, column values will be read for intercepting user inputs, so having columns working in input mode. In the next code lines, GP PINs are set accordingly and arrays numbers are changed with Pin objects:
for x in range(0,4):
    row_list[x]=Pin(row_list[x], Pin.OUT)
    row_list[x].value(1)


for x in range(0,4):
    col_list[x] = Pin(col_list[x], Pin.IN, Pin.PULL_UP)
Keypad map will create a resolution list able to use indexes to give back the related key. Comparing to matrix circuits, PINs from 1 to 4 identify columns in reverse order (from right to left). In the same way, PINs from 5 to 8 identify rows in a reverse way from bottom to top. For this reason, scanning the matrix with the same order of keypad PINs will require a reverse map definition:
key_map=[["D","#","0","*"],\
        ["C","9","8","7"],\
        ["B","6","5","4"],\
        ["A","3","2","1"]]
We now arrive to the main function, which reads keypad input. This function implements a single scan cycle that checks if any button has been pressed.
We already decided that we’ll trigger rows and read columns. Every single row is put to low (the other remaining to high):
def Keypad4x4Read(cols,rows):
  for r in rows:
    r.value(0)
The next statement acquires in one line columns states, associating them to a list variable:
result=[cols[0].value(),cols[1].value(),cols[2].value(),cols[3].value()]We defined column PINs to default high (with previous Pin.PULL_UP option) when not connected to any source. This will get “result=[1,1,1,1]” when no keys are pressed and min(result) will be “1”. In this case, next “if” statement isn’t activated and row output is restored to HIGH. This will be repeated for all rows and then the function will exit with a “None” result.
If the user presses any key, its column will be in short circuit with the row LOW output, returning only a zero to results list (for example [1,0,1,1]). This will trigger the if statement, which will use the key_map to recover the pressed key value and then exit from function giving back to program the pressed key value:
    if min(result)==0:
      key=key_map[int(rows.index(r))][int(result.index(0))]
      r.value(1) # manages key keept pressed
      return(key)
    r.value(1)
The final lines are a simple usage loop. The user is advised that our program is ready to get inputs, then our script makes an infinite loop calling continuously the keypad function already described. When our function gives us a value different from “None” (this means that the user has pressed a key): the result will be printed to the terminal and an additional delay is set to give the user enough time to release (and avoid unwanted multiple inputs from a single pressure).
print("--- Ready to get user inputs ---")
while True:
    key=Keypad4x4Read(col_list, row_list)
    if key != None:
      print("You pressed: "+key)
      utime.sleep(0.3)
Running the pico4x4MatrixKeypad.py Script
Run this script in your Thonny IDE (F5) and you will read the “Ready to get user inputs” message. You can then press any key and start seeing your inputs printed on Thonny shell, as in the following:
>>> %Run -c $EDITOR_CONTENT
--- Ready to get user inputs ---
You pressed: 1
You pressed: A
You pressed: 0
You pressed: *
You pressed: D
You pressed: C
You pressed: 9
What’s Next
Interested to do more with your Raspberry PI Pico? Try to look at my Raspberry PI Pico tutorials for useful and funny projects!
Enjoy!

Open source and Raspberry PI lover, writes tutorials for beginners since 2019. He's an ICT expert, with a strong experience in supporting medium to big companies and public administrations to manage their ICT infrastructures. He's supporting the Italian public administration in digital transformation projects.
![]()
![]()
![]()
![]()
![]()
![]()
![]()


