
Last Updated on 24th July 2024 by peppe8o
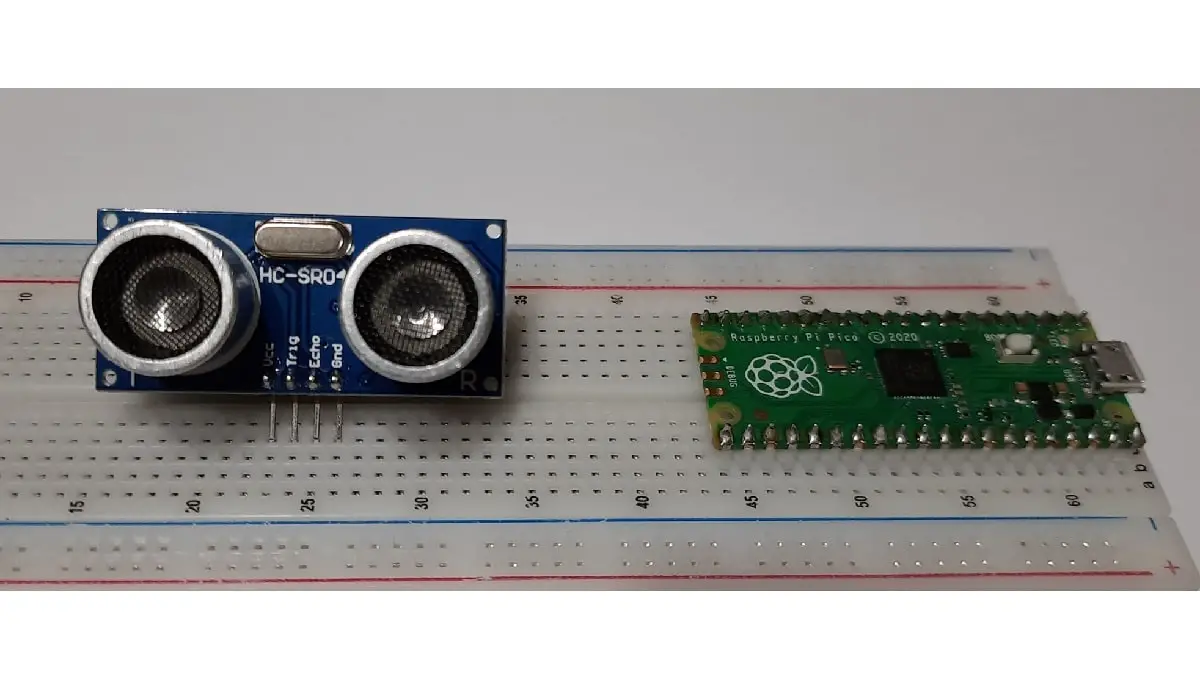
In this tutorial, I’m going to show you the steps required to wire and setup an ultrasonic sensor (HC-SR04) and Raspberry PI Pico microcontroller. Please note that if you want to use a Raspberry PI computer board (like RPI Zero W or RPI 2/3/4 Model A/B) you should refer to my Control an ultrasonic distance sensor with Raspberry PI tutorial. Anyhow, I invite you to look at this article as it details how the Ultrasonic Sensor works and it is really useful to understand what our code is going to implement.
Besides being useful for DIY projects, measuring a distance with the HC-SR04 ultrasonic sensor and Raspberry PI Pico is a great exercise for people wanting to understand MicroPython.
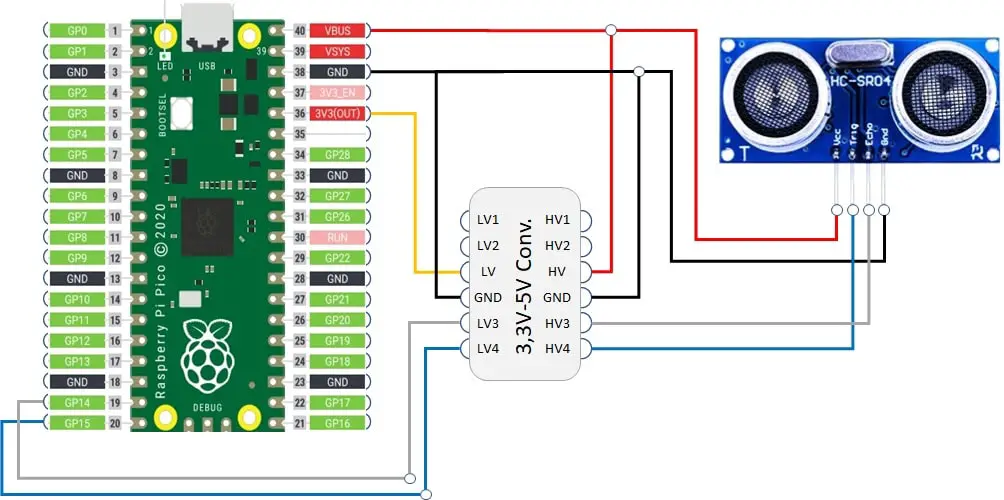
Differently from similar tutorials available on the web, I prefer protecting my Raspberry PI Pico from overvoltage: HC-SR04 sensor works at 5V, and connecting echo directly to Pico Pins may lead, in my opinion, to electrical failures as our PI should work with 0 V – 3,3 V inputs.
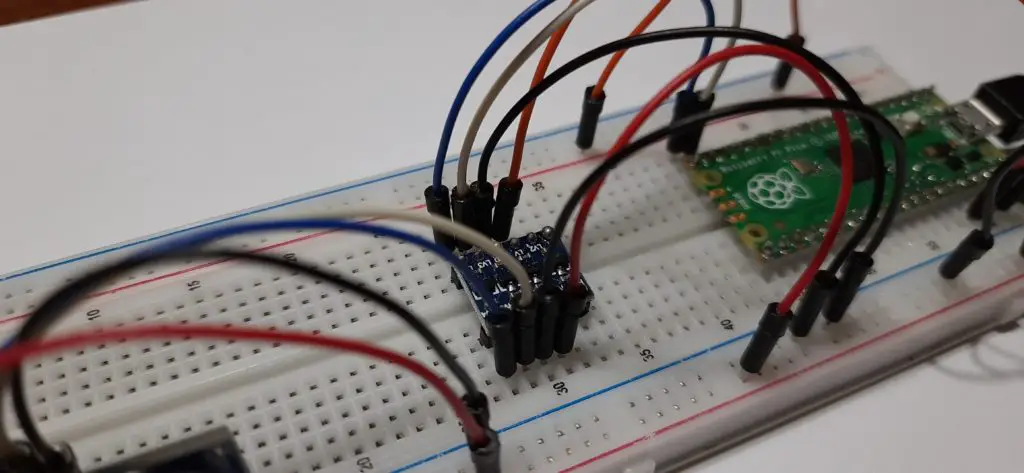
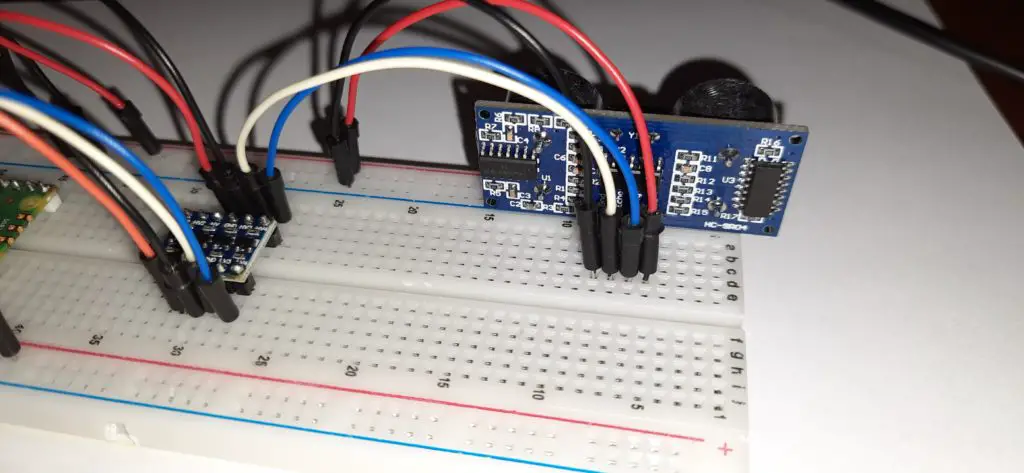
This time, I will divide 3,3V section (RPI Pico side) from 5V section (HC-SR04 side) with the help of a common and cheap 3,3V/5V bidirectional logic converter module. In any case, you can also use instead the resistors circuit shown in my Control an ultrasonic distance sensor with Raspberry PI tutorial.
What We Need
As usual, I suggest adding from now to your favourite e-commerce shopping cart all the needed hardware, so that at the end you will be able to evaluate overall costs and decide if to continue with the project or remove them from the shopping cart. So, hardware will be only:
- A common computer (maybe with Windows, Linux or Mac). It can also be a Raspberry PI Computer board
- Raspberry PI Pico microcontroller (with a common micro USB cable)
- bidirectional logic converter or resistors
- breadboard
- dupont wirings
- HC-SR04 ultrasonic distance sensor
Check hardware prices with the following links:


Wiring Diagram
Please find below the wiring diagram. Please note that the 3,3V-5v logic converter has two sides. The left one manages all 3,3V signals (LVx = Low Voltage) arriving and going to Pico, while the right one manages all 5V signals (HVx = High Voltage) arriving and going to HC-SR04:
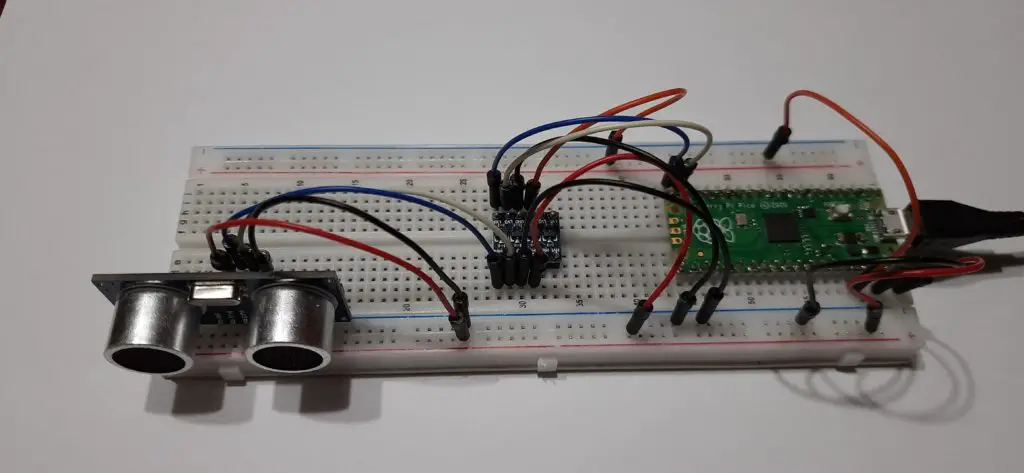
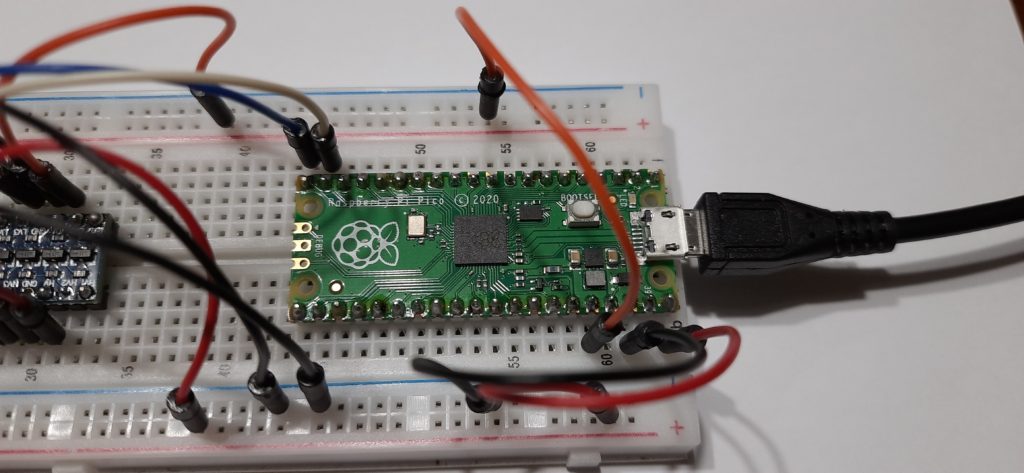
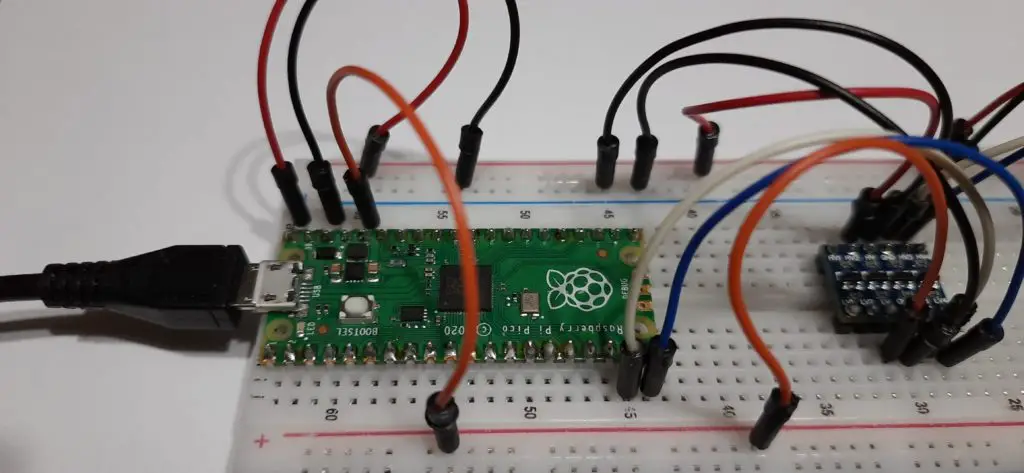
…and some pictures from my installation:
Step-by-Step Procedure
Prepare cabling according to the previous paragraph. Connect RPI Pico to Thonny (you can refer to my tutorial about First steps with Raspberry PI Pico).
Download the rpiPicoHc-sr04.py MicroPython script. The following paragraphs will explain it.
Required modules are imported:
from machine import Pin
import utime
Then I usually associate Pico’s GPs to variables for better management and code understanding:
echo = 14
trigger = 15
The following function includes all code lines needed to read distance from the HC-SR04 sensor, according to its working description available from Control an ultrasonic distance sensor with Raspberry PI.
The distance function requires the number of echo and trigger pins as input:
def distance (ech,trig):
We start initializing some variables at each function call. Counter variable manages a bug of infinite loops occurring in some python codes for ultrasonic distance. I decided to keep it also in MicroPython as security against code freezing. Distance and duration are two variables used to calculate the final measurement:
 new_reading = False
 counter = 0
 distance = 0
 duration = 0
Then we initialize the two GP PINs (echo and trigger):
 echoPIN = Pin(ech, Pin.IN)
 trigPIN = Pin(trig, Pin.OUT)
The script sends a trigger signal to the HC-SR04 sensor, as required by the device to work:
 trigPIN.value(0)
 utime.sleep_us(2)
 trigPIN.value(1)
 utime.sleep_us(10)
 trigPIN.value(0)
 utime.sleep_us(2)
Following while loop waits to get a return from the ultrasonic trigger signal. “echoPIN.value()” will read for echo and return 0 (false) if no signals return to HC-SR04. The “not” before makes the loop repeat until an echo signal arrives. Here the script protection from infinite loops counts up to 5000 “empty” loops. In case we don’t get a return before this time, we set the “new_reading” variable to true and the following IF statement exits from function:
 while not echoPIN.value():
   pass
   counter += 1
   if counter == 5000:
      new_reading = True
      break

 if new_reading:
    return False
The following code lines are executed only once an echo signal arrived (echoPIN.value goes to 1). The exact moment this happens we save the timestamp into “startT” variable. Please note that utime.ticks_us() measures time in microseconds. Dividing by 1.000.000 will return value in seconds.
startT = utime.ticks_us()/1000000The script will wait for the echo going back to 0 (the following while loop will wait for this to happen). Then we save this timestamp as the feedback time:
 while echoPIN.value(): pass
 feedbackT = utime.ticks_us()/1000000
If feedbackT equals to startT, we return a “N/A”. Otherwise, we calculate the measured distance by using the sound speed variable. The distance value is also rounded to limit the number of digits after comma:
 if feedbackT == startT:
  distance = "N/A"
 else:
  duration = feedbackT - startT
  soundSpeed = 34300 # cm/s
  distance = duration * soundSpeed / 2
  distance = round(distance, 1)
The resulting value is finally returned to program from function:
return distance
The last while loop is the main program running. It’s a simple loop calling distance function and printing result value at each iteration. “end=’\r’ ” makes printed strings repeating on the same shell line, instead of scrolling a number of rows for each reading.
Final sleep is only to have numbers displayed varying a bit slower:
while True:
 print (" Distance: " + str(distance(echo,trigger))+ "   ", end='\r')
 utime.sleep(0.5)
Running the rpiPicoHc-sr04.py Script
Run this script in your Thonny IDE (F5) and you will start seeing your readings printed on Thonny shell, as in the following:
MicroPython v1.15 on 2021-04-18; Raspberry Pi Pico with RP2040

Type "help()" for more information.
>>> %Run -c $EDITOR_CONTENT
 Distance: 26.3
What’s Next
Interested to do more with your Raspberry PI Pico? Try to look at my Raspberry PI Pico tutorials for useful and funny projects!
Enjoy!

Open source and Raspberry PI lover, writes tutorials for beginners since 2019. He's an ICT expert, with a strong experience in supporting medium to big companies and public administrations to manage their ICT infrastructures. He's supporting the Italian public administration in digital transformation projects.
![]()
![]()
![]()
![]()
![]()
![]()
![]()


This looks like a great learning project. I don’t have a Pico, among my several RPi’s, so I will have to get one.