
Last Updated on 1st March 2025 by peppe8o
In this article I’ll show you how to create and configure a simple spiderbot (which crawls peppe8o.com home page posts) with a Scrapy on Raspberry PI computer board. I’ll use the Raspberry PI Zero 2W, but this applies also to other Raspberry PI computer boards.
A web crawler (also known as spider or spiderbot) is an internet bot that continually browses web pages, typically for web indexing purposes.
Typically Search Engines use web crawling to scan the web and be aware of contents, links and websites relations. These data are processed to understand what results fit better the users’ queries, but they can be also useful to periodically check websites, for marketing researches, SEO analisys, and so on.
What Is Scrapy
From Scrapy official website:
Scrapy is an application framework for crawling web sites and extracting structured data which can be used for a wide range of useful applications, like data mining, information processing or historical archival.
Even though Scrapy was originally designed for web scraping, it can also be used to extract data using APIs (such as Amazon Associates Web Services) or as a general purpose web crawler.
Ref. https://docs.scrapy.org/en/latest/intro/overview.html
What We Need
As usual, I suggest adding from now to your favourite e-commerce shopping cart all the needed hardware, so that at the end you will be able to evaluate overall costs and decide if to continue with the project or remove them from the shopping cart. So, hardware will be only:
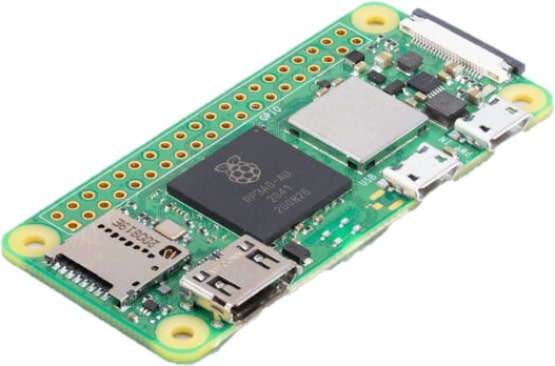
- Raspberry PI Zero 2 W (including proper power supply or using a smartphone micro USB charger with at least 3A) or newer Raspberry PI Board
- high speed micro SD card (at least 16 GB, at least class 10)
Step-By-Step Procedure
Preparing the Raspberry PI Operating System
The first step is installing the Operating System. I suggest you to use the Raspberry PI OS Lite (please note that we need the 64-bit version) to get a fast and light operating system (headless). In this case, you will need to work from a remote SSH terminal. If you need a desktop environment, you can also use the Raspberry PI OS Desktop, in this case working from its terminal app. The links provide you the procedures for both the OSes.
Please find the differences between the 2 OS versions in my Raspberry PI OS Lite vs Desktop article.
Make sure that your system is up to date. Connect via SSH terminal and type the following command:
sudo apt update -y && sudo apt upgrade -yWe also need to install some required packages. From the terminal:
sudo apt install python3-dev python3-pip libxml2-dev libxslt1-dev zlib1g-dev libffi-dev libssl-dev -yInstall Scrapy on Raspberry PI
As you can see, we have also python3-pip package in the previous command. So we can now install scrapy with pip.
Before this step, we must create and activate a virtual environment as required by the latest Python versions. You can read more about Python’s virtual environment in my Beginner’s Guide to Use Python Virtual Environment with Raspberry PI (venv) tutorial.
You will need to activate it every time you’ll try to run scrapy on your Raspberry PI:
python3 -m venv my_crawler --system-site-packages
source ./my_crawler/bin/activate
Now we can install Scrapy on Raspberry PI:
pip3 install scrapyFinally please check that your scrapy installation is ok:
(my_crawler) pi@raspberrypi:~ $ scrapy version
Scrapy 2.12.0
Create Your First Spiderbot with Scrapy on Raspberry PI
Scrapy is not complicated, but requires a bit of study on the official scrapy tutorial pages. It can be run from and interactive shell (with the command “scrapy shell http://url…”). This method is usually the best way to identify tags inside pages you want to extract.
Another good practice, is visiting the URL you want to crawl with the Chrome dev tools (for example in Chrome -> Options -> Tools -> Developer Tools). Then, analyze web page elements and identify the ones you want to extract.
Once identified your targets, you can build a simple crawler to run manually or prepare a complete crawling project. Let’s try an example of a single standalone crawler, manually launched, which extracts posts titles, Summary and date from peppe8o.com home page.
You can both download in your Raspberry PI my script “myspider.py” from my download area:
wget https://peppe8o.com/download/python/myspider.pyOr manually create the spider configuration file:
nano myspider.pyPlease insert the following code:
import scrapy

class QuotesSpider(scrapy.Spider):
    name = "peppe8o"
    start_urls = [
        'https://peppe8o.com',
    ]

    def parse(self, response):
        for posts in response.css('article'):
            yield {
                'Title': posts.css('h2.entry-title a::text').get(),
                'Description': posts.css('div.post-content p::text').get(),
                'Date': posts.css('span.published::text').get(),
            }
This script will download the page from the “strat_urls” list and parse it by extracting all the parts with tags “H2” and class “entry-title”, storing them as titles. Similarly, it will parse the “p” tags inside div elements wiht class “post-content” and save the related text as Description. Same for the Date.
Run this spider by simply typing the following command from the terminal:
scrapy runspider myspider.py -o peppe8o.jsonThe final “-o peppe8o.json” writes results to output file named peppe8o.json. When the crawler ends its tasks, you will find the new file (if not already existing) and you can see its content:
nano peppe8o.jsonThis will show something like the following:
[
{"Title": "FarmOS on Raspberry PI: Farm Management Software Open-Source", "Description": "In this tutorial, ...},
{"Title": "Personal MediaWiki with Raspberry PI and Docker", "Description": "In this tutorial, I\u2019m goin...},
{"Title": "Using a Raspberry Pi as Access Point with DietPi", "Description": "In this tutorial, I will show ...},
{"Title": "Install OpenHAB on Raspberry PI: a Self-Hosted Smart Home Hub", "Description": "In this tutorial,...},
{"Title": "Private chat and messaging server with Rocket.chat and Raspberry PI", "Description": "Rocket.chat...},
{"Title": "Open Source Hotel Management System with Qloapps and Raspberry Pi", "Description": "This tutorial...},
{"Title": "Install Plex Server on Raspberry PI", "Description": "In this tutorial, I will show you how to in...},
{"Title": "Active Cooling for Raspberry PI: What is, Why You Need It, and How to Use", "Description": "This ...},
]
Each run will append newly downloaded record to the end of the file.
Output Formats from Scrapy
Scrapy also supports different output formats:
- JSON
- JSON lines
- CSV
- XML
For example, you can produce a CSV file just editing the file extension at the scrapy runspider command:
scrapy runspider myspider.py -o peppe8o.csvThis will produce a CSV file that you can read with any spreadsheet application.
Moreover, you can send the results to remote storages as FTP servers, Amazon S3 storage, and Google Cloud Storage. More info about it can be found at the scrapy feed exports page.
Another alternative is by locally storing the output and send it as attachment in an email. For this last method you can use Sendmail with Raspberry PI.
Finally, please note that you can also run Scrapy in as Python in Raspberry PI Containers with Docker.
What’s Next
If you want to discover many other projects for your Raspberry PI, you can take a look at peppe8o Raspberry PI tutorials.
Enjoy!

Open source and Raspberry PI lover, writes tutorials for beginners since 2019. He's an ICT expert, with a strong experience in supporting medium to big companies and public administrations to manage their ICT infrastructures. He's supporting the Italian public administration in digital transformation projects.
![]()
![]()
![]()
![]()
![]()
![]()
![]()


