
Last Updated on 6th June 2026 by peppe8o
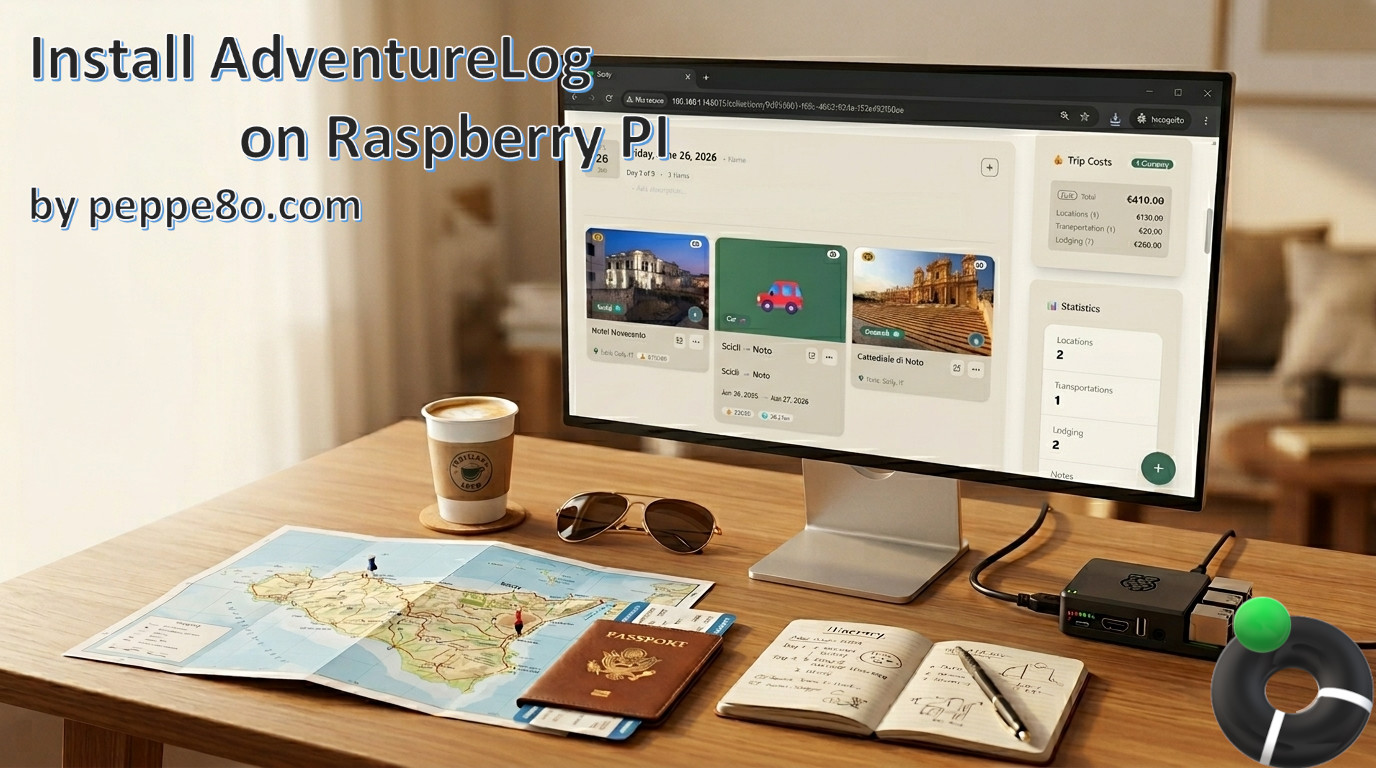
This tutorial will show you how to install AdventureLog on Raspberry PI computer boards with Docker, so getting an open-source and self-hosted travel planning platform.
About AdventureLog
Planning a trip often means keeping multiple records about maps, notes, booking confirmations, and spreadsheets. AdventureLog brings those parts together in a single platform, with low resource usage enabling people to get it running even on a Raspberry Pi.
AdventureLog is an open-source, self-hosted travel planner designed to help you organise trips, log past journeys, and plan future ones. It lets you create collections of places, group them into itineraries, and keep track of travel details. The project is also travel-log friendly: you can store locations you have visited, mark places you want to go, and build a visual trip history over time. For people who like to plan carefully, it is a neat way to keep the whole travel workflow in one place.
What We Need
As usual, I suggest adding from now to your favourite e-commerce shopping cart all the needed hardware, so that at the end you will be able to evaluate overall costs and decide if to continue with the project or remove them from the shopping cart. So, hardware will be only:
- Raspberry PI Computer Board (including a proper power supply or using a smartphone micro USB charger with at least 3A)
- high-speed micro SD card (at least 16 GB, at least class 10)

Step-by-Step Procedure
1. Prepare the Operating System
The first step is to install the Raspberry PI OS Lite (64-bit version) to get a fast and lightweight operating system (headless). If you need a desktop environment, you can also use the Raspberry PI OS Desktop (also here, 64-bit version), in which case you will work from its terminal app. Please find the differences between the 2 OS versions in my Raspberry PI OS Lite vs Desktop article.
Please make sure that your Operating System is up to date. From your terminal, use the following command:
sudo apt update -y && sudo apt full-upgrade -yWe also need to install Docker on Raspberry PI (please refer to the linked tutorial).
Everything will be stored in a single folder, which keeps the setup self-contained and portable. The following shows you the folders and files we’ll create with the commands coming in the next chapters:
~/adventurelog/
├── docker-compose.yml
├── Dockerfile.postgis
├── .env
└── data/
    ├── postgresql/
    ├── media/
    └── static/
2. Prepare the Folders for AdventureLog on Raspberry PI
The first step is creating the required folder structure. Then we’ll enter the root folder of our project. Please use the following terminal commands:
mkdir -p ~/adventurelog/data/postgresql ~/adventurelog/data/media ~/adventurelog/data/static
cd ~/adventurelog
3. Create the PostGIS Dockerfile
This file builds a PostgreSQL image with PostGIS installed from the official Debian Bookworm packages. From the terminal, plase create the Dockerfile as follows:
nano Dockerfile.postgisAnd paste the following content:
FROM postgres:latest

RUN apt-get update && apt-get install -y \
    postgis \
    postgresql-postgis \
    postgresql-postgis-scripts \
    && rm -rf /var/lib/apt/lists/*
Please save and close.
4. Create the Environment File
This file will include all credentials and configuration, keeping it separated from the Compose structure. From the terminal:
nano .envPaste the following content into it. Please note that you must change the bolded strings:
192.168.1.14should be changed with your Raspberry PI’s IP address (every occurrence)- Username and passwords should be set according to your preferences
Please note that the Django admin password and user are those you will use in the web GUI to enter your AdventureLog page.
# --- Frontend ---
PUBLIC_SERVER_URL=http://server:8000
ORIGIN=http://192.168.1.14:8015
BODY_SIZE_LIMIT=Infinity
FRONTEND_PORT=8015

# --- PostgreSQL Database ---
PGHOST=db
POSTGRES_DB=adventurelog
POSTGRES_USER=adventure
POSTGRES_PASSWORD=changeme123

# --- Backend ---
SECRET_KEY=replace_with_a_long_random_secret
DJANGO_ADMIN_USERNAME=admin
DJANGO_ADMIN_PASSWORD=admin
DJANGO_ADMIN_EMAIL=admin@example.com
PUBLIC_URL=http://192.168.1.14:8016
CSRF_TRUSTED_ORIGINS=http://192.168.1.14:8016,http://192.168.1.14:8015
FRONTEND_URL=http://192.168.1.14:8015
BACKEND_PORT=8016
DEBUG=True
ENABLE_RATE_LIMITS=False
Save and close the file.
5. Create the Docker Compose File
Please note that Docker Compose automatically reads .env file from the same folder, without the need of expliciting it. With this file, our compose file doesn’t need to get credentials and server settings as it reads everything from .env via the ${VAR} syntax. Create the file:
nano docker-compose.ymlPaste the following content into it:
services:
  db:
    build:
      context: .
      dockerfile: Dockerfile.postgis
    container_name: adventurelog-db
    restart: unless-stopped
    environment:
      POSTGRES_DB: ${POSTGRES_DB}
      POSTGRES_USER: ${POSTGRES_USER}
      POSTGRES_PASSWORD: ${POSTGRES_PASSWORD}
    volumes:
      - ./data/postgresql:/var/lib/postgresql

  server:
    image: ghcr.io/seanmorley15/adventurelog-backend:latest
    container_name: adventurelog-backend
    restart: unless-stopped
    depends_on:
      - db
    environment:
      PGHOST: ${PGHOST}
      POSTGRES_DB: ${POSTGRES_DB}
      POSTGRES_USER: ${POSTGRES_USER}
      POSTGRES_PASSWORD: ${POSTGRES_PASSWORD}
      SECRET_KEY: ${SECRET_KEY}
      DJANGO_ADMIN_USERNAME: ${DJANGO_ADMIN_USERNAME}
      DJANGO_ADMIN_PASSWORD: ${DJANGO_ADMIN_PASSWORD}
      DJANGO_ADMIN_EMAIL: ${DJANGO_ADMIN_EMAIL}
      PUBLIC_URL: ${PUBLIC_URL}
      CSRF_TRUSTED_ORIGINS: ${CSRF_TRUSTED_ORIGINS}
      FRONTEND_URL: ${FRONTEND_URL}
      BACKEND_PORT: ${BACKEND_PORT}
      DEBUG: ${DEBUG}
      ENABLE_RATE_LIMITS: ${ENABLE_RATE_LIMITS}
    ports:
      - "${BACKEND_PORT}:8000"
    volumes:
      - ./data/media:/code/media
      - ./data/static:/code/static

  web:
    image: ghcr.io/seanmorley15/adventurelog-frontend:latest
    container_name: adventurelog-frontend
    restart: unless-stopped
    depends_on:
      - server
    environment:
      PUBLIC_SERVER_URL: ${PUBLIC_SERVER_URL}
      ORIGIN: ${ORIGIN}
      BODY_SIZE_LIMIT: ${BODY_SIZE_LIMIT}
    ports:
      - "${FRONTEND_PORT}:3000"
Please save and close the file.
Note on volumes: all database data is stored in ./data/postgresql, which is in the same folder as the docker-compose.yml file. Similar considerations are applicable for ./data/media and ./data/static, which will store persistent data for the backend server.
No named Docker volumes are used, so your data is always visible on the filesystem and easy to back up.
6. Build and start the containers
The first run builds the PostGIS image locally, which takes a few minutes on a Raspberry Pi. Everything will be installed with the following terminal command:
docker compose up -dThe process will take a bit of time to download the required images, build the local image and initialise the database.
The first successful boot is not immediate. The backend spends time:
- waiting for PostgreSQL,
- applying migrations,
- creating the default admin user,
- importing countries, regions, and cities,
- starting the web stack.
On the Raspberry Pi, that initial import is the part that takes the most time. It is not a sign of failure; it is simply the application populating its travel database. This is useful to know as you may think the container is stuck when, in reality, it is still importing data. In my Raspberry PI 4 model B (4GB), it took the time listed in the following table:
| Metric | Value |
|---|---|
| Docker provisioning time | ~4 min (docker images pull + local build for thee DB) |
| Time to usable app | ~3 min (provisioning time + migrations + world import) |
You can see your logs to check that everything goes correctly:
docker compose logs -fAdventureLog will be ready once you get something like the following rows:
...
adventurelog-backend   | 2026-06-05 18:03:08,146 INFO supervisord started with pid 1
adventurelog-backend   | 2026-06-05 18:03:09,150 INFO spawned: 'gunicorn' with pid 62
adventurelog-backend   | 2026-06-05 18:03:09,155 INFO spawned: 'memcached' with pid 63
adventurelog-backend   | 2026-06-05 18:03:09,159 INFO spawned: 'nginx' with pid 64
adventurelog-backend   | 2026-06-05 18:03:09,165 INFO spawned: 'sync_visited_regions' with pid 65
adventurelog-backend   | 2026-06-05 18:03:10,169 INFO success: gunicorn entered RUNNING state, process has stayed up for > than 1 seconds (startsecs)
adventurelog-backend   | 2026-06-05 18:03:10,169 INFO success: memcached entered RUNNING state, process has stayed up for > than 1 seconds (startsecs)
adventurelog-backend   | 2026-06-05 18:03:10,169 INFO success: nginx entered RUNNING state, process has stayed up for > than 1 seconds (startsecs)
adventurelog-backend   | 2026-06-05 18:03:10,169 INFO success: sync_visited_regions entered RUNNING state, process has stayed up for > than 1 seconds (startsecs)
adventurelog-backend   | [2026-06-05 18:03:10 +0000] [62] [INFO] Starting gunicorn 23.0.0
adventurelog-backend   | [2026-06-05 18:03:10 +0000] [62] [INFO] Listening at: http://[::]:8000 (62)
Access the Web Interfaces
You will have 2 different web interfaces to use:
- the admin page, available at
http://your_rpi_address:8016/(then clicking “Admin Site”), will enable you to access the platform administration area - the user page,
http://your_rpi_address:8015/, will give you access to the AdventureLog home page after clicking the “login” button.
As you can see, the 2 pages differ only in the last URL number.
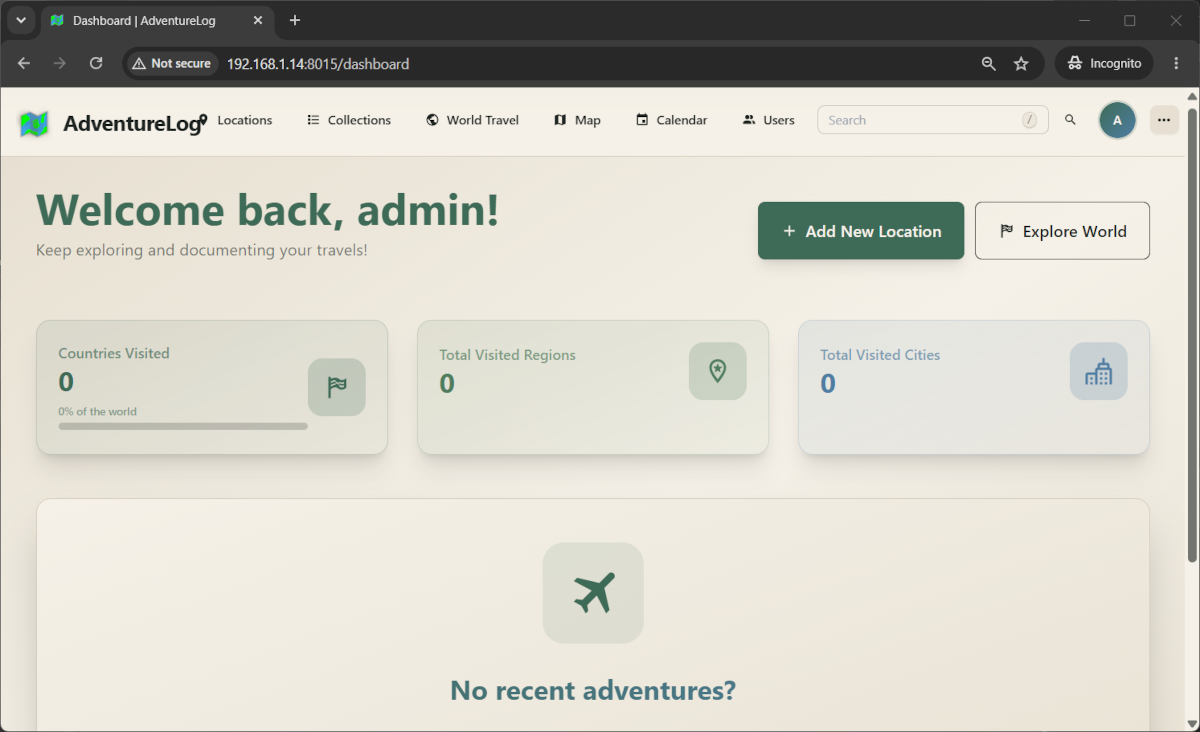
After the login, the AdventureLog home page will show you an empty dashboard, which you can fill with all your travels and plans:
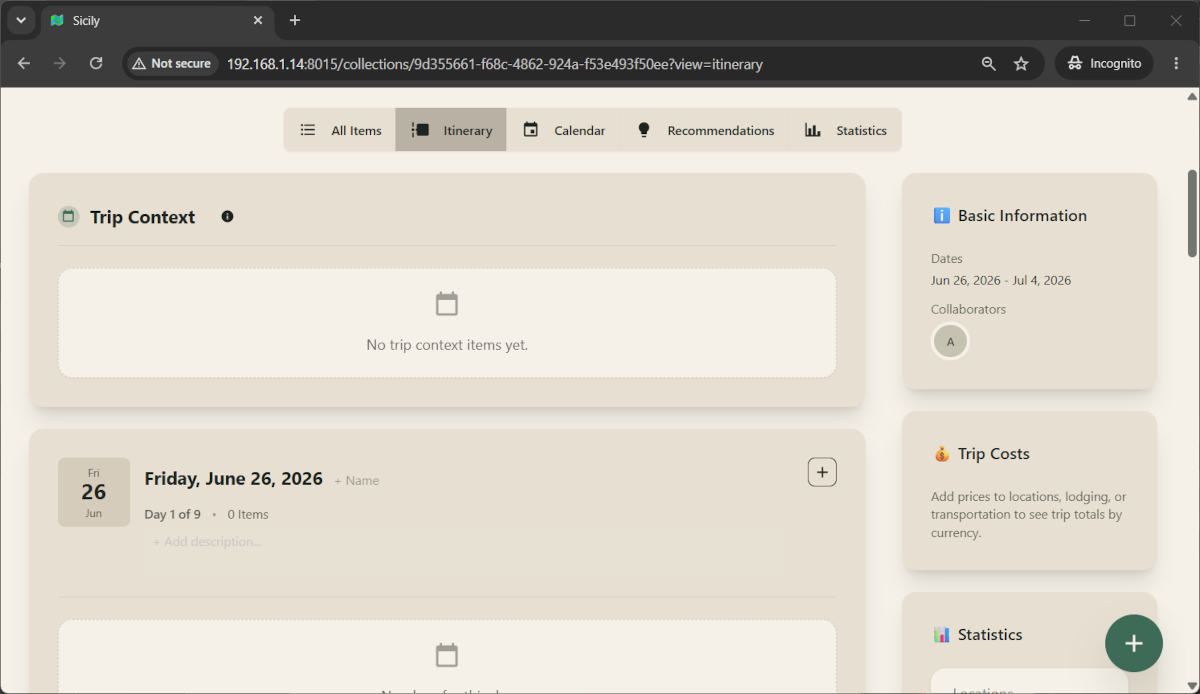
How to Plan a Trip
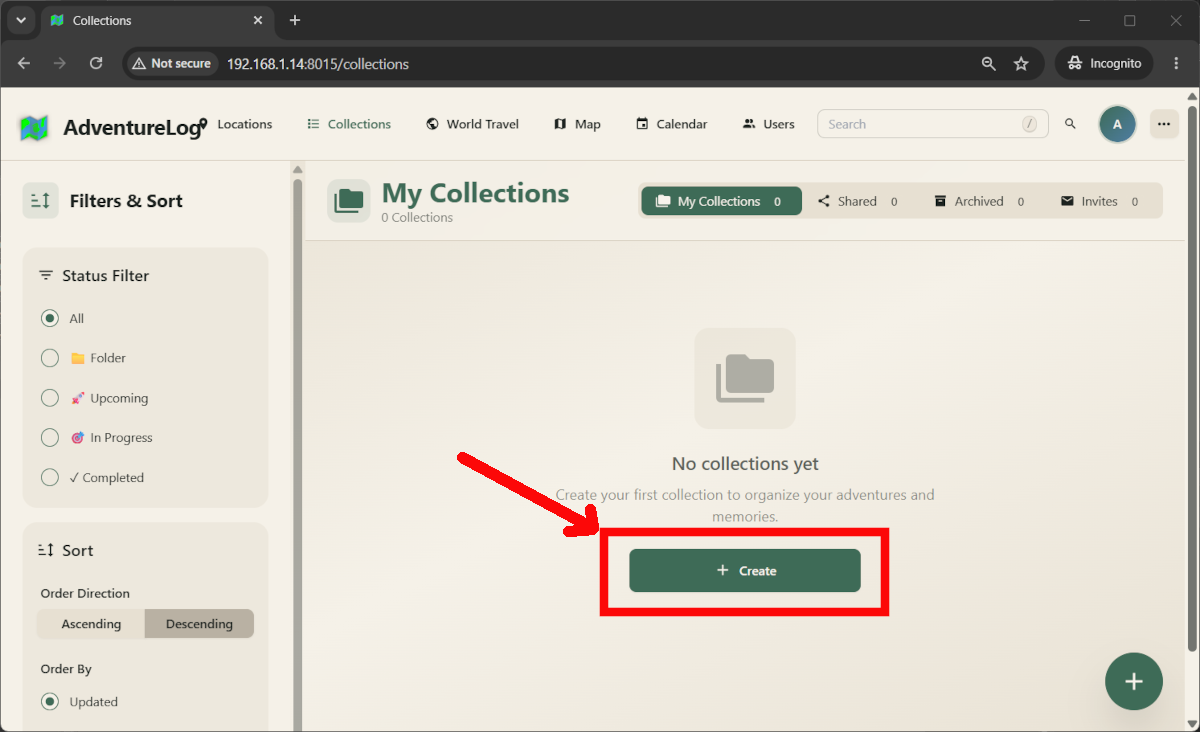
AdventureLog uses collections as the main planning unit. You can reach this page by clicking the related link in the top menu:

To plan a trip, you can create a new collection:
A collection requires at least the name, start and end dates, as shown in the following screenshot:
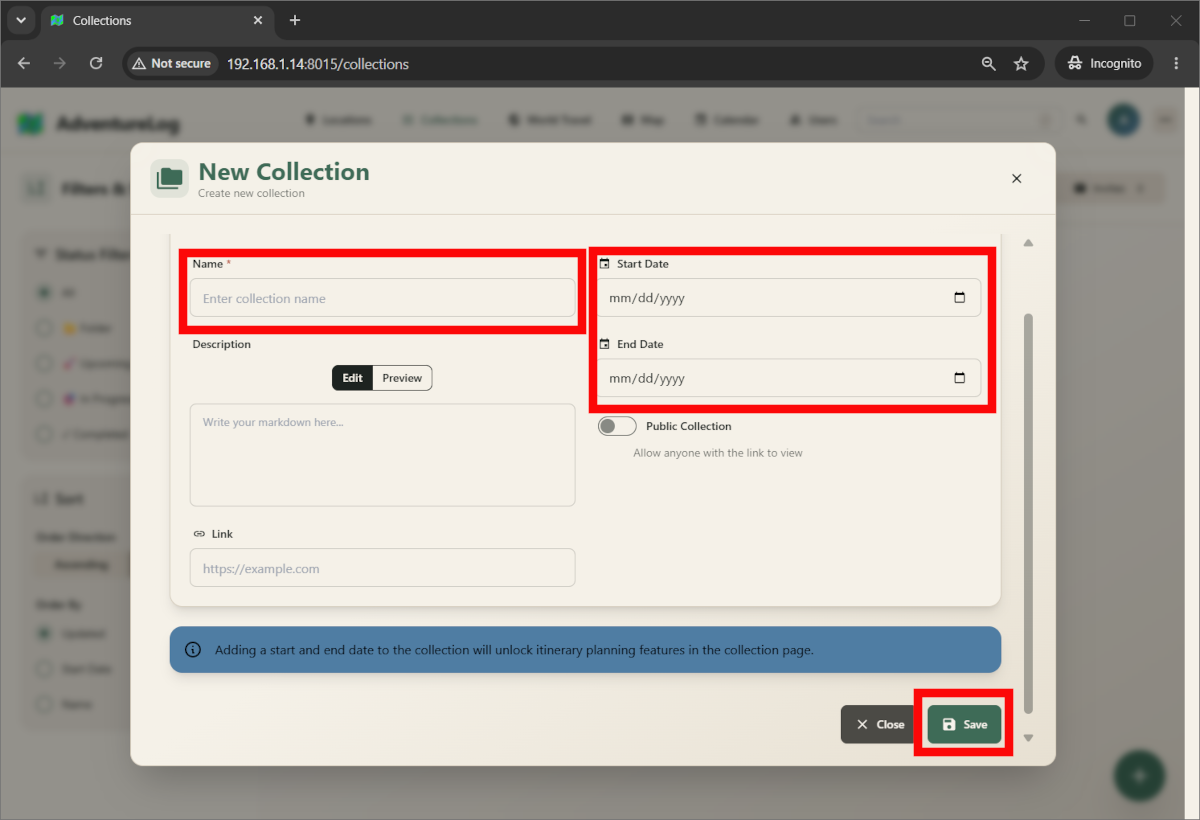
With this info, the collection gets a proper trip structure rather than just a list of places. Once you save it, you can see the collection listed in your collections page and click on its name.
Inside that collection, you can add locations, lodgings, and transport items, then arrange them across the itinerary. The system is meant to make trip planning feel more visual and organised than working from a plain document.
A simple workflow is:
- Create a collection.
- Add trip dates.
- Add locations you want to visit.
- Add hotel and transport details.
- Arrange everything into the itinerary.
- Add budget information for each item.
That gives you one place for both planning and reference.
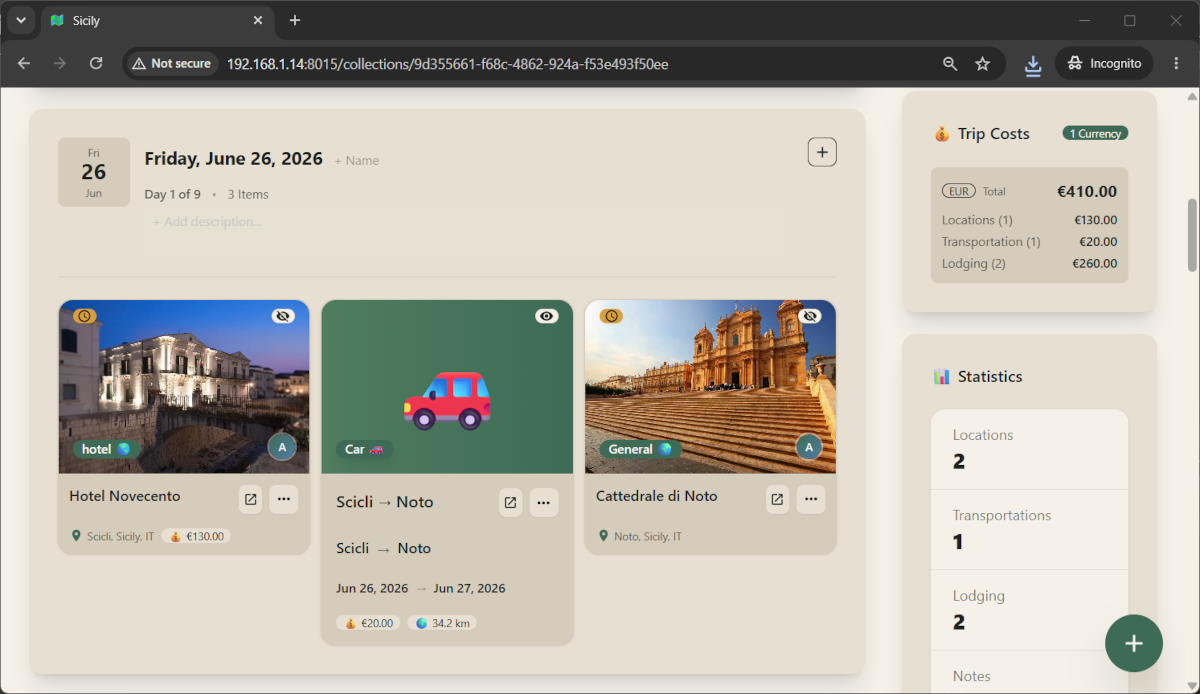
Budget Tracking
One of the most useful improvements in recent versions is the built-in budget system. AdventureLog now supports cost fields directly in trip planning, which means you can keep an eye on travel spending without using a separate spreadsheet.
You can enter costs for:
- locations or activities,
- lodgings,
- transportation.
AdventureLog then aggregates those values into a trip-level budget view. That is especially handy if you want to compare options before booking, such as deciding between two hotels or different transport combinations.
For a Raspberry Pi self-hosted planner, this is one of the features that makes the app feel genuinely practical rather than just decorative.
What Worked Well
During my small test, several things worked exactly as expected:
- Trip planning and collections worked normally.
- Budget tracking worked and was useful.
- The database import completed successfully.
- The app ran well enough on Raspberry Pi for local use.
The overall installation is very usable once the Docker stack is aligned correctly and the URL settings are consistent.
The Image Problem
One thing I found during testing is important enough to document clearly: image upload and image retrieval from URL only worked when I set DEBUG=True in my .env file.
With DEBUG=False, the files were still saved to disk, but they were not served correctly by the application. In practice, this means the upload may appear to succeed, but the image will not be visible or retrievable in the normal production-like configuration. This is a real limitation to keep in mind if you plan to use AdventureLog for trips that heavily rely on images, such as destination photos, uploaded references, or images fetched from external URLs.
The workaround makes the image handling function correctly in my Raspberry Pi test, but it is not ideal from a security perspective. It may be acceptable for a private LAN-only setup, but I would avoid leaving debug mode enabled indefinitely for anything exposed publicly.
So the practical trade-off is:
DEBUG=Truegives working image features.DEBUG=Falseis cleaner for production but currently breaks image serving in my test.
Troubleshooting Notes for AdventureLog in Raspberry PI
A few issues surfaced during the setup and were worth recording:
- A wrong IP address in
ORIGINorPUBLIC_URLcan break browser access. - Frontend and backend must agree on which external URL each service should use.
- Media upload can appear to work while image serving still fails if debug mode is off.
- The first database bootstrap on Raspberry Pi takes a while, so a bit of patience is required, especially for people with low internet speed.
Those are normal self-hosting lessons, but they are worth mentioning because they save time for anyone repeating the setup.
AdventureLog Performance on Raspberry Pi 4 – My Test Results
AdventureLog is usable on a Raspberry Pi, but the initialisation is not “instant”. The initial import and application startup are the heavy phases. After that, the system is much more manageable for normal use on a home network.
Here are some values from my Raspberry PI, after it started.
Images size – consider it when choosing the Raspberry PI microsd card, as a 16 GB storage may become full in a short time, considering that this platform usually stores many pictures.
| IMAGE | DISK USAGE |
|---|---|
| adventurelog-db:latest | 999 MB |
| ghcr.io/seanmorley15/adventurelog-backend:latest | 1.69 GB |
| ghcr.io/seanmorley15/adventurelog-frontend:latest | 495 MB |
Resource usage at idle (after startup, no active user) – With cgroup memory enabled, Docker stats shows AdventureLog using about 342.7 MiB for the backend, 70.0 MiB for the frontend, and 64.6 MiB for the database at idle. These values describe the container footprint rather than the full Raspberry Pi system RAM usage.
| Container | RAM | CPU |
|---|---|---|
| adventurelog-db | 64.64 MiB | 0.01% |
| adventurelog-backend | 342.7 MiB | 0.09% |
| adventurelog-frontend | 70.04 MiB | 0.00% |
AdventureLog Docs
You can find detailed use info in the official AdventureLog Docs, which also includes advanced configuration.
Final Thoughts
AdventureLog is one of the few self-hosted tools that combines trip planning and budget tracking in a single Docker-deployable package. The setup described in this guide keeps everything self-contained: one folder, three files (compose, Dockerfile, .env), and a locally built database image with no runtime dependency on third-party maintainers.
If you are already running a homelab or a Pi-based home server, adding this to your stack takes less than 15 minutes of active setup time (plus the initial image build on first run).
Resources
- https://adventurelog.app/
- https://peppe8o.com/raspberry-pi-os-lite-vs-desktop/
- https://peppe8o.com/docker-raspberry-pi-portainer/
- https://adventurelog.app/docs/intro/adventurelog_overview.html
What’s Next
If you want to discover many other projects for your Raspberry PI, you can take a look at peppe8o’s Raspberry PI tutorials.
Enjoy!

Open source and Raspberry PI lover, writes tutorials for beginners since 2019. He's an ICT expert, with a strong experience in supporting medium to big companies and public administrations to manage their ICT infrastructures. He's supporting the Italian public administration in digital transformation projects.
![]()
![]()
![]()
![]()
![]()
![]()
![]()


I installed in on RPi 4 8GB – works well didn’t have any issues yet when running on local IP address … But I have spent hours trying to find a way to run via sub domain. The sub domain loads and cannot register or log in via domain name, only on local IP – Is there a solution for this issue? I have Nginx running on this Pi as well and the local IP address is redirected to cloadflare.
I suppose you should change the .env file, substituting the IP with the domain name. Moreover, I think you should change the hosts file in your Raspberry PI adding a line with the subdomain/domain name. I suppose you already set the proper port forwarding in your home router. Can you test these changes or do you need more support for them?
Thanks I have got it to load in the domain name and adventurelog seems to work with domain name as well as local Ip – I had to make a few mods to the .env file. I can post it here later for reference. However it’s impossible for the country flag images to show – did you find a solution for this? Spent hours playing around with this.
please can you confirm that you set DEBUG=TRUE in your .env file and the country flag are still not working?
We can check issues from 2 sides: from the server side (Raspberry PI) and client side (your browser).
From the server side, please chek if the
docker compose logs servergives you any error.From the client side, please use the developers tools in your Chrome (if you use this browser) to check if the Console gives you any error