

Last Updated on 10th November 2024 by peppe8o
In this tutorial I’m going to show you how to setup flask on Raspberry PI to publish a simple web page.
Common web servers run on LAMP (Linux Apache MySql Php). With Python evolving into one of most loved programming language, Flask became a more and more important option in creating web application, as it runs also in our loved Raspberry PI computer boards.
What is Flask
Flask is a lightweight web application framework. Compared to LAMP servers, it can take the place of Apache and Php in web stack.
It is designed to make simple the very first setup and publishing, leaving ability to scale with easy. Being one of the most popular Python web application frameworks, Flask doesn’t require specific dependencies to start your project. Developers are free to use their favourite libraries and a growing number of Flask extensions provided by community.
Whole web application can fit into a single Python file, keeping the core simple, but can also include extensions libraries in a logic compliant to python packages. Flask also gives freedom on choosing database, templates and static files. By default, As Flask doesn’t include a database abstraction layer, you can use extensions to add such functionality to your application as if it was implemented in Flask itself. Extensions provide database integration, form validation, upload handling, various open authentication technologies, and more.
Flask can be setup with many configuration values, with sensible defaults, and a few conventions when getting started. By convention, templates and static files are stored in subdirectories within the application’s Python source tree, with the names templates and static respectively. While this can be changed, you usually don’t have to, especially when getting started.
Flask can be considered a glue layer to the best that Python has to offer, also taking advantage of framework-agnostic tools built for WSGI, the Python web interface.
In this tutorial I’m going to use a cheap Raspberry PI Zero W, but procedure will be the same with newer Raspberry PI computer boards.
What We Need
As usual, I suggest adding from now to your favourite e-commerce shopping cart all the needed hardware, so that at the end you will be able to evaluate overall costs and decide if to continue with the project or remove them from the shopping cart. So, hardware will be only:
- Raspberry PI Zero W (including proper power supply or using a smartphone micro usb charger with at least 3A) or newer Raspberry PI Board
- high speed micro SD card (at least 16 GB, at least class 10)
Check hardware prices with following links:


Step-by-Step Procedure
Prepare Operating System
Start installing your OS. As it is a web server, I suggest to use Raspberry PI OS Lite (for a fast and performing OS). You can also use Raspberry PI OS Desktop (in this case working from its internal termina).
Make your operating system updated. From terminal, use following command:
sudo apt update -y && sudo apt upgrade -yFlask team also suggest to use Python virtual environments for creating your web server. For this reason we need following package:
sudo apt install python3-venvInstall Flask
Create your project directory and enter it:
mkdir myproject
cd myproject
Create and activate a virtual environment named “development”:
python3 -m venv development
. development/bin/activate
pip install Flask
Create your web application. I will name it “hello.py”, but you aree free to use your favourite name, caring to NOT use “flask.py” in order to avoid name conflicts:
nano hello.pyCopy following content:
from flask import Flask
app = Flask(__name__)

@app.route('/')
def hello_world():
    return 'Hello, Peppe8o users!'
First line imports Flask library.
After this, we create an “app” instance and pass a “name” variable that Python will fill for us when program is running. This variable will be “main”, if this file is being directly run through Python as a script. If we are importing a different file to enrich our application (for example an “external.py”), this value will get the name of imported file (“external”).
The @app.route(“/”) line defines what to answer when root document is required by client browser. The @ is a decorator, which allows the following function, property, or class to be dynamic.
The hello_world method is where we put the code to run, in our example simply answering with “Hello, Peppe8o users!” text. This text can be enriched with html tags.
Final folder structure is:
myproject/
  development/
  hello.py
Next step is running hello application. After exporting file name to FLASK_APP variable, we can run it with flask command:
export FLASK_APP=hello.py
flask run --host=0.0.0.0
NOTE: if you don’t specify “–host” parameter, it will start running on local host, making page visible only from an internal browser in your Raspberry PI. You can also use a different port by appending “–port” option.
Terminal will start showing something like following:
(development) pi@raspberrypi:~/myproject $ flask run --host=0.0.0.0
 * Serving Flask app "hello.py"
 * Environment: production
   WARNING: This is a development server. Do not use it in a production deployment.
   Use a production WSGI server instead.
 * Debug mode: off
 * Running on http://0.0.0.0:5000/ (Press CTRL+C to quit)
Using your Raspberry PI’s IP address instead of mine (192.168.1.78) and correct port as from terminal log, you can browse from a remote computer resulting page:

And requests from remote clients will be logged in your terminal with following lines (where first IP address is the one of your remote client):
192.168.1.133 - - [01/Apr/2021 13:57:20] "GET / HTTP/1.1" 200 -Last “200” code means that connection has been answered corretcly.
Daemonize Flask With Gunicorn
Using flask from terminal is not so confortable, because it will go down when terminal session will be closed. Gunicorn is one of options to get flask daemonized. Install it from your virtual environment:
(development) pi@raspberrypi:~/myproject $ pip install gunicornBasic gunicorn usage (to check thta all is ok) is with following command:
gunicorn -w 1 -b 0.0.0.0:4000 hello:app- “-w” optin identifies how many workers (processes) are used.
- “-b” option identified the address/port to bind
- hello:app calls our hello(.py) file and its internal app (“app = Flask(__name__)” row). Please note that we are executing this command inside the “myproject” folder. If you run this from upper level, you will need to use “myproject.hello:app” instead.
Commands will still show in terminal:
[2021-04-01 14:01:55 +0100] [574] [INFO] Starting gunicorn 20.1.0
[2021-04-01 14:01:55 +0100] [574] [INFO] Listening at: http://0.0.0.0:4000 (574)
[2021-04-01 14:01:55 +0100] [574] [INFO] Using worker: sync
[2021-04-01 14:01:55 +0100] [577] [INFO] Booting worker with pid: 577
And from browser:
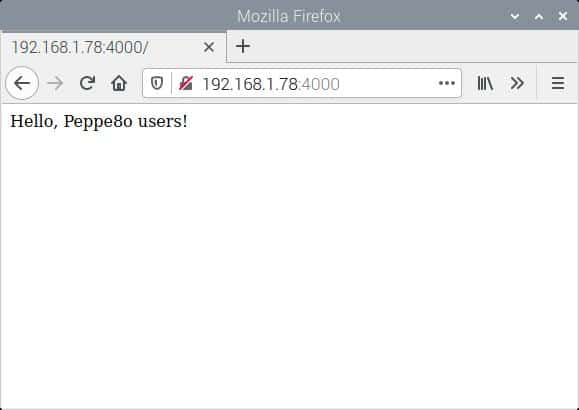
Now that we are sure all is ok, we can move to daemonized version by appending “-D” option and saving logs with “–log-file” option:
gunicorn -w 1 -b 0.0.0.0:4000 hello:app -D --log-file=gunicorn.logThis will create a background process (available from “ps -ef” list) that can be killed with the command:
pkill gunicornA useful final note is how to activate the whole after a system reboot. Commands will be:
cd myproject
python3 -m venv development
. development/bin/activate
gunicorn -w 1 -b 0.0.0.0:4000 hello:app -D --log-file=gunicorn.log
Final toughts
Previous steps allow to create a development environment. The main difference between development and production is that latter will be usually exposed to port 80 (http) or 443 (https). For this, please refer to Flask deployment on production docs page.
Enjoy!

Open source and Raspberry PI lover, writes tutorials for beginners since 2019. He's an ICT expert, with a strong experience in supporting medium to big companies and public administrations to manage their ICT infrastructures. He's supporting the Italian public administration in digital transformation projects.
![]()
![]()
![]()
![]()
![]()
![]()
![]()


very good
Thank you for your feedback, Joseph!
In the final note, the venv should be “development”, instead of “venv”, to match the one created at the beginning.
Instead of:
python3 -m venv venv
. venv/bin/activate
Should be
python3 -m venv development
. development/bin/activate
Hi Francesco,
thank you for your your feedback. You are right, I just updated the tutorial