
Last Updated on 6th March 2026 by peppe8o
This tutorial will show you how to install Fedora on a Raspberry PI computer board.
Fedora is one of the most loved OS in the Linux community. A close relative to Red Hat Linux, it is frequently updated to keep the software aligned with the latest hardware changes and software improvements. From 2022, Fedora officially supports Raspberry PI computer boards
About Fedora
Fedora Linux is a Linux distribution developed by the Fedora Project, maintained and driven by the community and sponsored by Red Hat.
The Fedora community includes thousands of people sharing some common values, also named as the “Four Foundations”: Freedom, Friends, Features, and First.
Fedora is also the upstream source for Red Hat Enterprise Linux.
Differently from other open source OSes, Fedora adopt a fast release timing: Fedora releases a new version every 6 months while, for example, Debian releases a new version every 2 years.
As of February 2016, Fedora Linux has an estimated 1.2 million users, including Linus Torvalds (as of May 2020), creator of the Linux kernel (ref. https://en.wikipedia.org/wiki/Fedora_Linux).
Fedora officially supports Raspberry PI computer boards from its release 37.
For this tutorial, I’m going to use a Raspberry PI 4 Model B with 8GB of RAM.
What We Need
As usual, I suggest adding from now to your favourite e-commerce shopping cart all the needed hardware, so that at the end you will be able to evaluate overall costs and decide if to continue with the project or remove them from the shopping cart. So, hardware will be only:

- Raspberry PI computer board (3 or newer), including proper power supply or using a smartphone micro USB charger with at least 3A
- high speed micro SD card (at least 16 GB, at least class 10, but I suggest a 32Gb storage in order to have enough space for future software installation)
- a USB/wireless keyboard and mouse
- an HDMI Monitor
- an HDMI cable (compatible with your Raspberry PI computer board and monitor)
For example, I’ve installed it in my CrowPI2 computer which includes all the required hardware into a compact laptop form factor and also includes an integrated electronics lab. You can check my CrowPI2 review to take a look at it.
Step-by-Step Procedure
The installation procedure is quite simple. What is important is to download the correct image for Raspberry PI boards. You will need an external computer with the Raspberry PI Imager installed (or whatever image-flashing software you prefer).
Download Fedora image for Raspberry PI
You have to download the Fedora image for ARM (aarch64) architecture in order to get it working on Raspberry PI. You can find the download links on the official Fedora Workstation download page. Save it to your local computer where the Raspberry PI Imager is installed.
The name for the downloaded file should end in “.xz”. This is a compressed file, but you don’t need to extract it.
Flash Fedora on Micro SD Card
Now, we can flash the Fedora image in our micro SD card for Raspberry PI.
For this goal, I will use the Raspberry PI Imager tool, but it should work similarly also with other image-flashing software like the good Balena Etcher.
Plug your micro SD Card into your computer.
Open the Raspberry PI Imager and select, at the O.S. select button, click “Use Custom”:

From the following file search window, please select the previously downloaded Fedora image (directly the “.xz” file without extracting it).
At the Storage selection, please select the micro SD card.
You can now click the Write button. NOTE: at this stage, if a message prompts asking if you want to use the previously saved settings, please answer “NO”.
Install Fedora on Raspberry PI
Once successfully finished, eject the micro SD card from your computer and plug it into your Raspberry PI. Connect the power supply, keyboard/mouse and HDMI to the monitor. Power on the monitor and then your Raspberry PI computer.
After a few storage operations, which may last a few minutes depending on your Raspberry PI model and your micro USB storage performances, you will be prompted at the Fedora welcome page:

Please click the Start Setup button.
The first setup step will ask you to connect to a WiFi network. It will show all the available SSID:
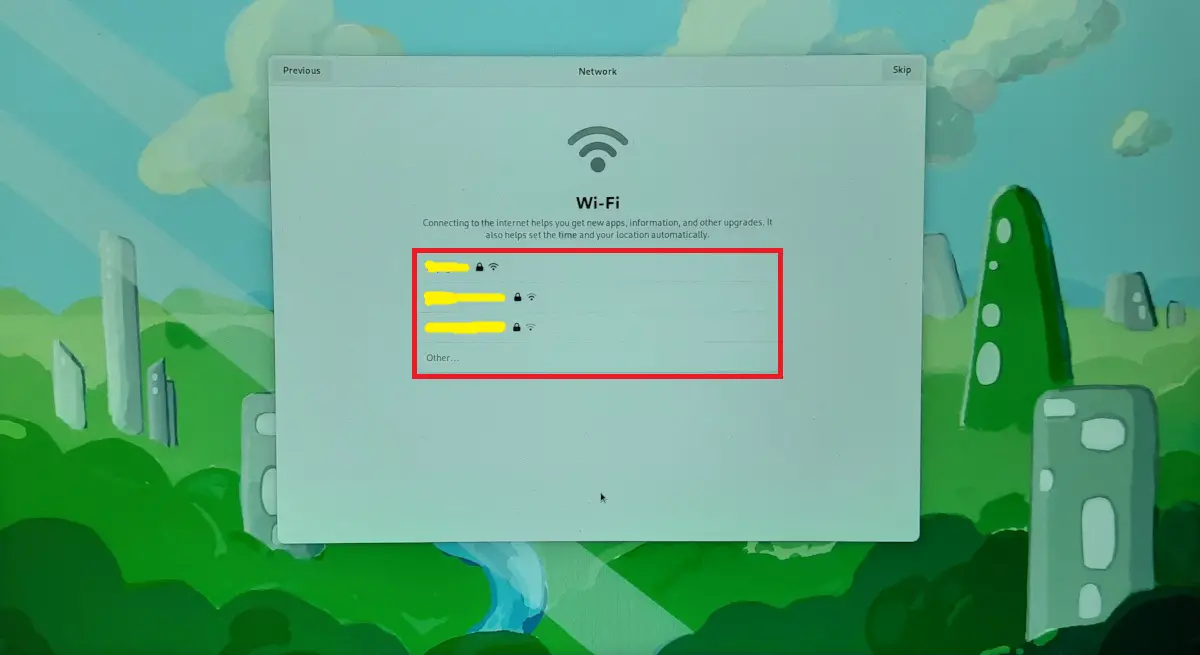
Please click your WiFi network name, that will bring to the request for the WiFi password:
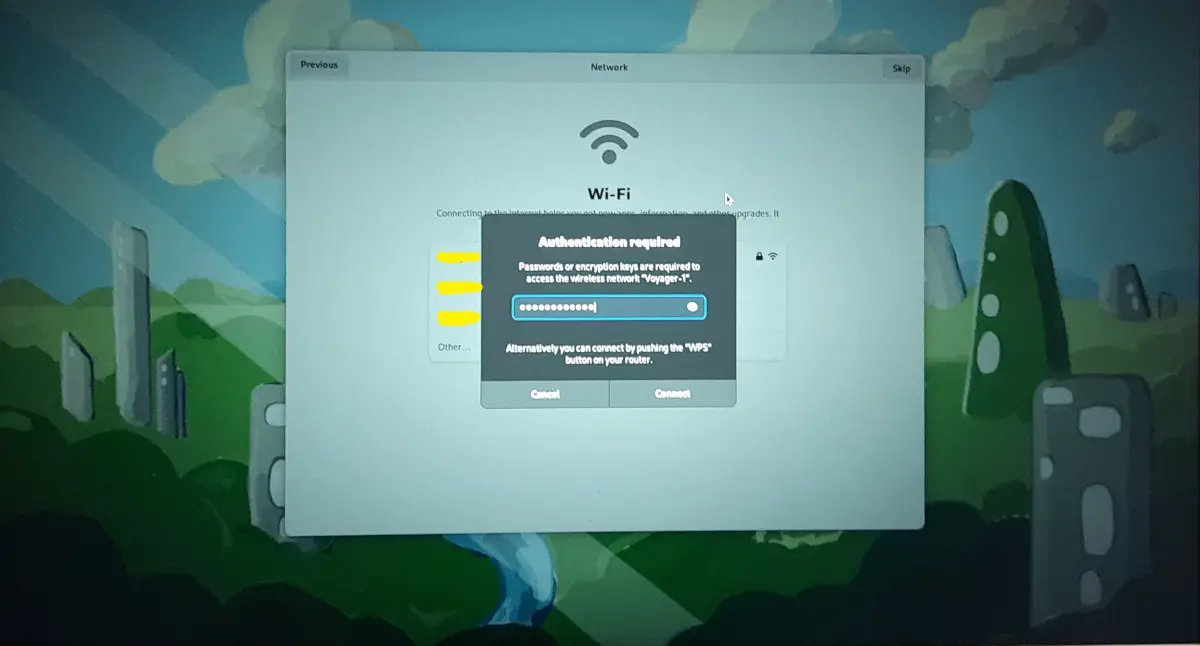
Type it and click “Connect”. Once the network will be connected, the screen will automatically show a small flag near the WiFi name:
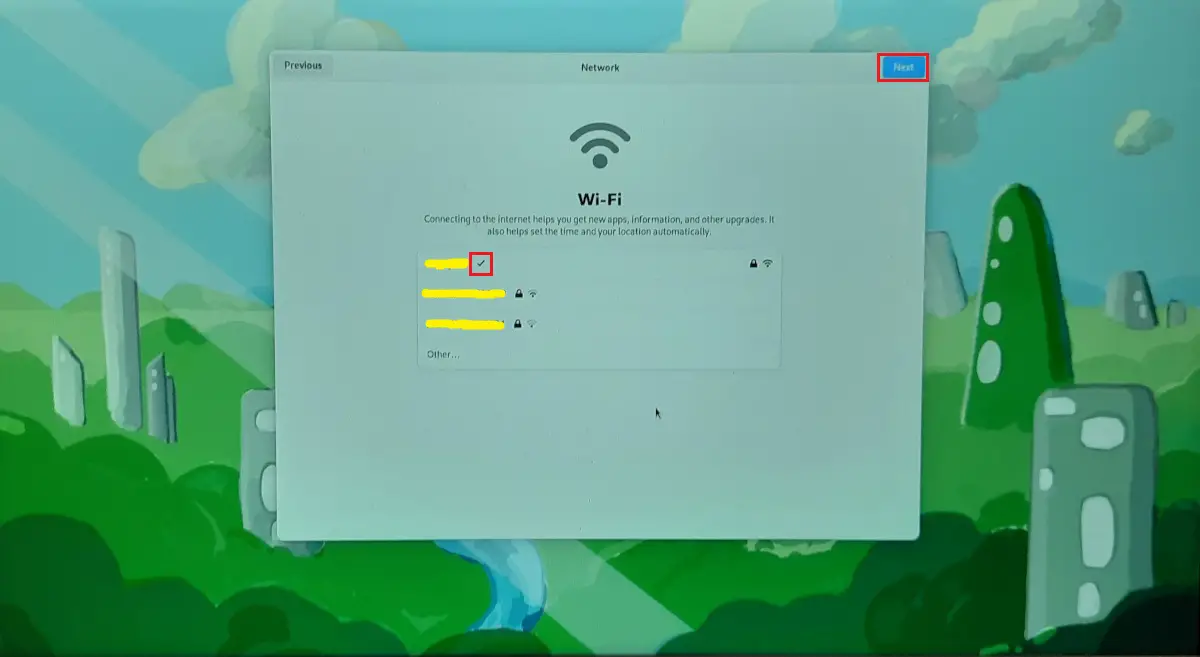
Moreover, you can now click the “Next” button on the top-right side of the window to go ahead.
The following page will ask you to opt or not for the privacy settings. The first option will use your local position (at least the estimated position) for allowing applications to give better services based on your location. For this, a Privacy Policy is available and linked.
The second one usually collects info when an error happens in your system. It will collect some technical reports and send them to Fedora, after removing the personal data. Both are optional and you can set yes or nor at your choice:
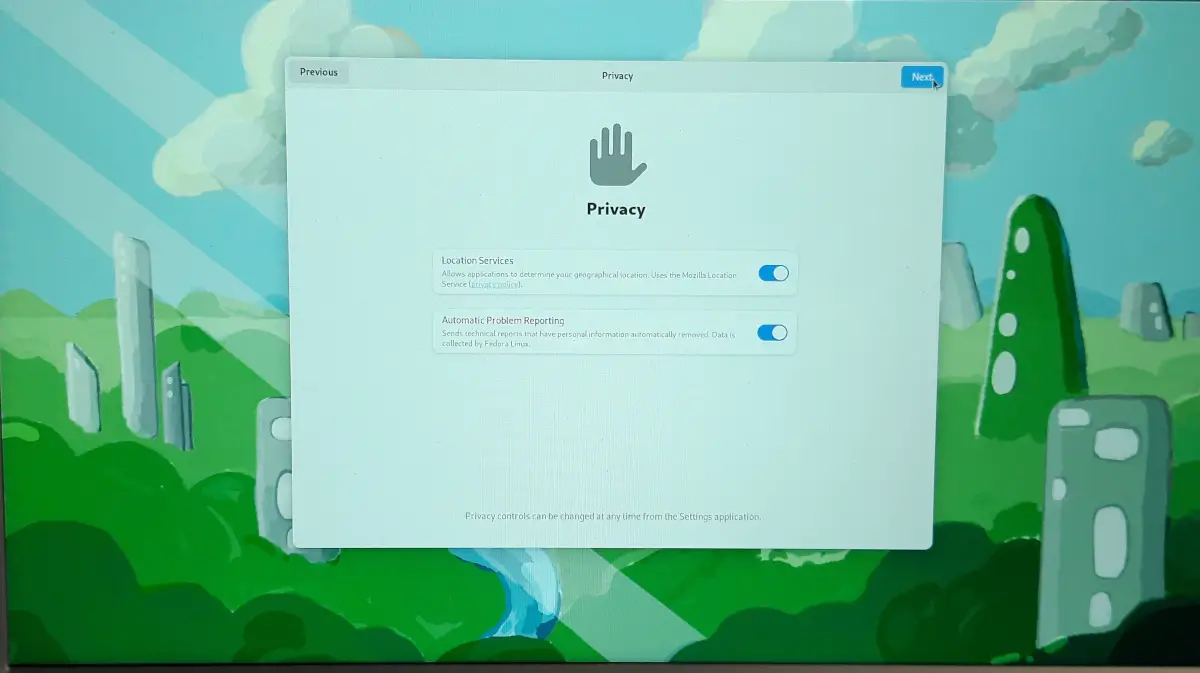
Click the “Next” button to move to the next stage.
Here you can enable (or not) Third-Party Repositories. These are repositories that are not maintained by Fedora, but offer a lot of services and applications that may result really useful when using an open-source system:

Click the usual “Next” button to move to the next stage.
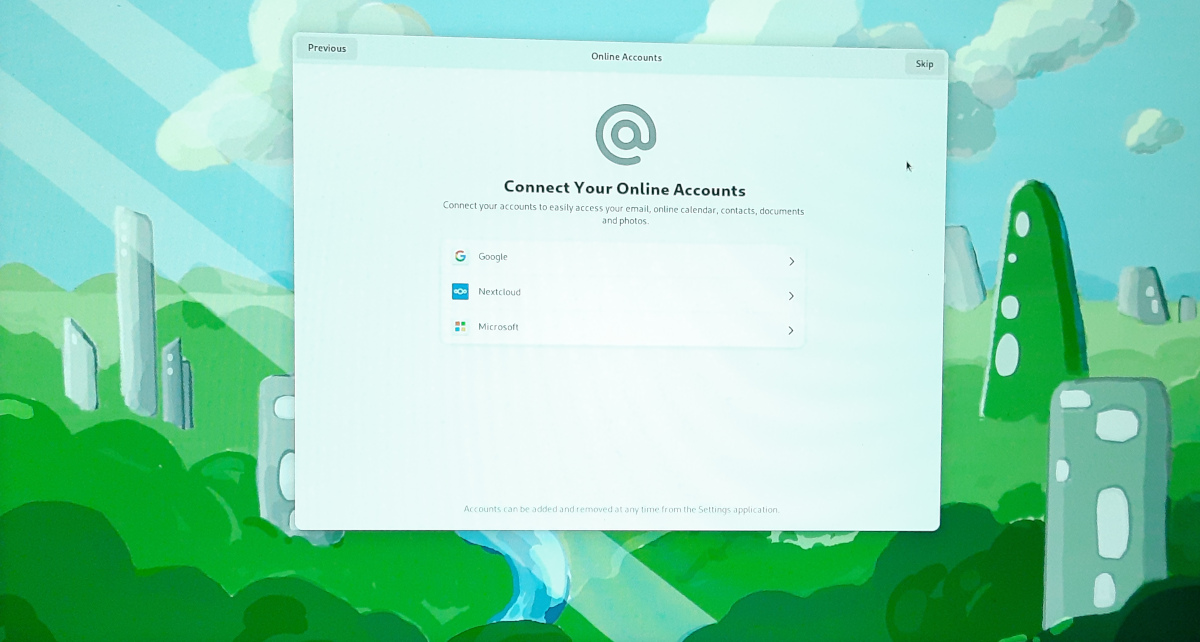
Now you can link and authenticate your Online accounts to get online services activated in your Fedora installation. You can do this operation at this stage or skip it and do it at any time from Fedora Settings:
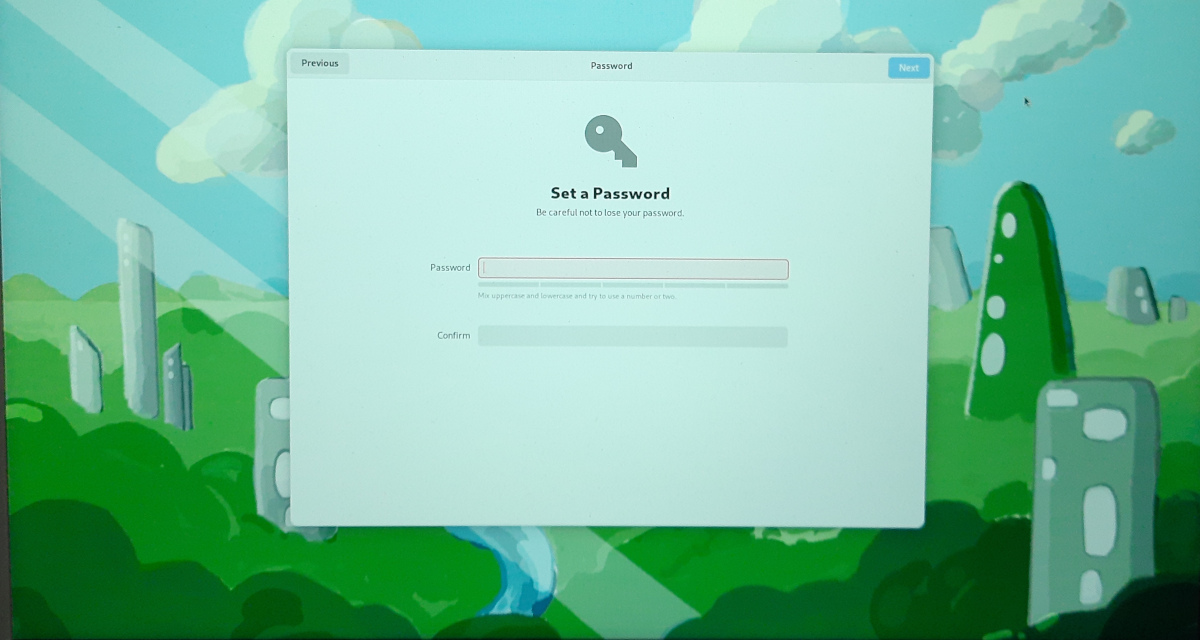
The following page will allow you to set your user:

Followed, with the “Next” button, by your password:
After this step, our setup is complete and the final page will confirm that everything went correctly:

By clicking “Start Using Fedora Linux”, a welcome tour is proposed for the new Fedora user:
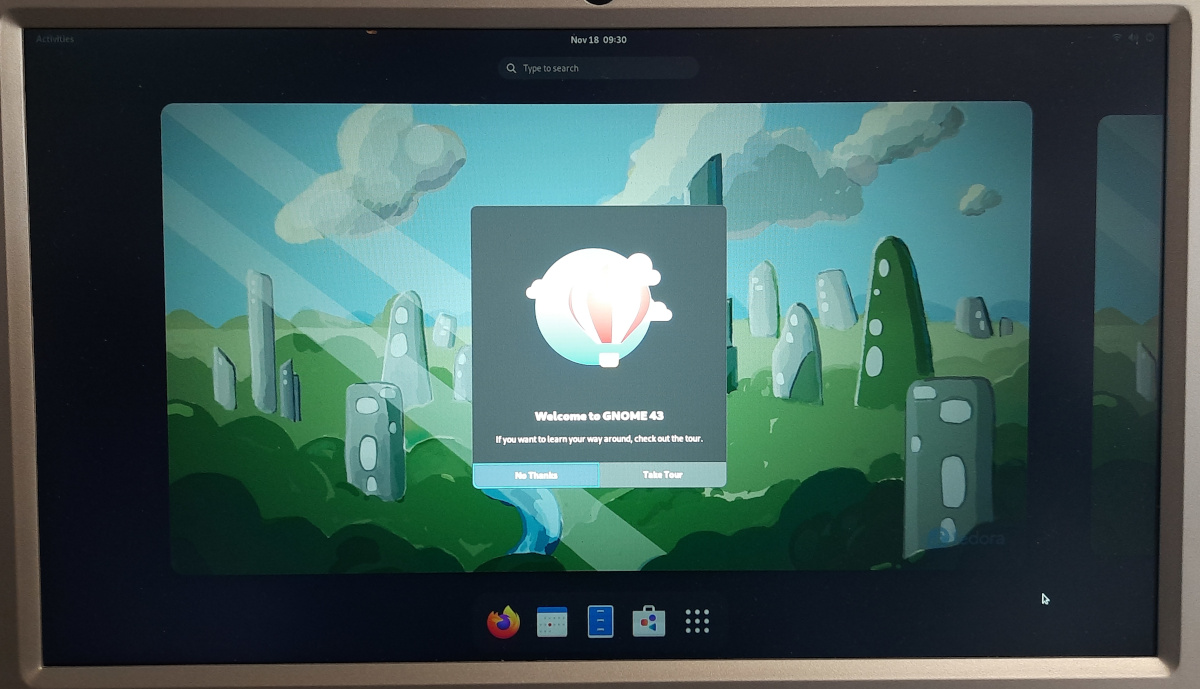
Again, you can choose to do the tour or not.
At this point, Fedora is completely installed and working in your Raspberry PI.
Final Fedora Operations
For those coming from Debian based operating system (like Raspberry PI OS), one of the most important differences is that Fedora uses “yum” package manager instead of “apt” when working from the terminal. Yum uses some commands similar to apt.
The first example of using yum is by performing a system update. Open the terminal and use the following:
sudo yum updateTo install a general “pkg” package (change “pkg” with the name of a real package):
sudo yum install pkgTo uninstall a package:
sudo yum erase pkgor
sudo yum remove pkgFinal Toughts
Fedora on raspberry PI is a really interesting alternative. Even if it isn’t surely the older OS for our beloved computer board, it has a consistent community and great potential.
On my very first uses as desktop computer with Raspberry PI, I felt Fedora a bit slower that Raspberry PI OS Desktop as it includes a Gnome Desktop Environment that offers more funny desktop effects. But I thing that there is a lot of room to improve and the Fedora community has all the capacity to do it.
For example, it would be useful to identify how to manage the GPU memory split, in order to give more RAM to the poor GPU of Raspberry PI and increase the graphic performance.
Other Raspberry PI Projects
If you want to discover many other projects for your Raspberry PI, you can take a look at peppe8o Raspberry PI tutorials.
Enjoy!

Open source and Raspberry PI lover, writes tutorials for beginners since 2019. He's an ICT expert, with a strong experience in supporting medium to big companies and public administrations to manage their ICT infrastructures. He's supporting the Italian public administration in digital transformation projects.
![]()
![]()
![]()
![]()
![]()
![]()
![]()


