
Last Updated on 16th May 2026 by peppe8o
In this tutorial, I’m going to show you how to install FireFly III on Raspberry PI computer boards with Docker.
What is Firefly III
Firefly III, a free and open-source personal finance manager, aims to get you aware of where your money is spent so that you can better manage your payments and verify where you should look if you want to make savings.
It is self-hosted, meaning that it can run on a home computer, or you can alternatively find a hosting service to install it.
Firefly III installation can be performed on Docker, Kubernetes, LAMP server or via hosting tools (like Softaculous). For this project, I’m going to use the Docker procedure on a small Raspberry PI Zero 2 W, but this guide also applies to newer Raspberry PI computer boards (compatible with 64-bit OS).
What We Need
As usual, I suggest adding from now to your favourite e-commerce shopping cart all the needed hardware, so that at the end you will be able to evaluate overall costs and decide if to continue with the project or remove them from the shopping cart. So, hardware will be only:
- Raspberry PI Computer Board (including proper power supply or using a smartphone micro USB charger with at least 3A)
- high-speed micro SD card (at least 16 GB, at least class 10)
Step-by-Step Procedure
Prepare the Operating System
The first step is to install the Raspberry PI OS Lite (64-bit version) to get a fast and lightweight operating system (headless). If you need a desktop environment, you can also use the Raspberry PI OS Desktop (also here, 64-bit version), in which case you will work from its terminal app. Please find the differences between the 2 OS versions in my Raspberry PI OS Lite vs Desktop article.
Please make sure that your Operating System is up to date. From your terminal, use the following command:
sudo apt update -y && sudo apt full-upgrade -yWe also need to install Docker on Raspberry PI (please refer to the linked tutorial).
With boards having low RAM (1GB or less), I also suggest increasing the Raspberry PI’s SWAP memory and reducing the Raspberry PI’s GPU memory (for boards where this is applicable).
Prepare the Docker Files
With Docker, the installation process is very simple. We’ll need to prepare:
- the Docker Compose file, which instructs Docker about the container images to use
- the environment files, which set some internal variables to pass to the container
After preparing these 2 files, we’ll be able to install Firefly III on our Raspberry PI computer board with one terminal command.
Before all, let’s create a new folder which will include all the required files and enter it:
mkdir fireflyIII
cd fireflyIII/
Prepare the Docker Compose File
Different from the official file, available at https://raw.githubusercontent.com/firefly-iii/docker/main/docker-compose.yml, I suggest you use the following, which includes a few modifications.
So, let’s create the Docker compose file:
nano docker-compose.yamlAnd fill it with the following content:
services:
  app:
    image: fireflyiii/core:latest
    hostname: app
    container_name: firefly_iii_core
    restart: unless-stopped
    volumes:
      - ./firefly_iii_upload:/var/www/html/storage/upload
    env_file: .env
    ports:
      - 80:8080
    depends_on:
      - db
  db:
    image: mariadb:lts
    hostname: db
    container_name: firefly_iii_db
    restart: unless-stopped
    env_file: .db.env
    volumes:
      - ./firefly_iii_db:/var/lib/mysql
  cron:
    image: alpine
    restart: unless-stopped
    container_name: firefly_iii_cron
    env_file: .env
    command: ["sh", "-c", "apk add tzdata && \
      (ln -s /usr/share/zoneinfo/$$TZ /etc/localtime || true) && \
      echo \"0 3 * * * wget -qO- http://app:8080/api/v1/cron/$$STATIC_CRON_TOKEN;echo\" \
      | crontab - && \
      crond -f -L /dev/stdout"]
    depends_on:
      - app
Save and close the file.
Besides the network definition, here we find 3 main parts.
The app service is where Firefly III runs. It uses the fireflyiii/core:latest Docker image. Different from the original script, I prefer to use the restart policy to unless-stopped, as this allows me to manually stop the service, and the container will automatically reboot on Raspberry PI reboots if not manually stopped. Moreover, I prefer to use local volumes: this allows me to keep all the data and configuration script in the current folder.
Also, according to the original Docker compose file, for this app, we’ll add a reference to the related environment file (.env) and the port mapping will enable us to use the “80” port from the Raspberry PI (instead of the container’s 8080 port).
The db service is where the database runs, and it is based on mariadb:lts image. We don’t need to use ports here, as the Docker internal network will allow the app service to communicate with it. Also, here, I changed the restart policy and used a local volume. The environment file for this service will be the .db.env.
Finally, the cron service will periodically trigger some Firefly III jobs. This service uses the .env environment file too.
The Environment files
Now, please download the official environment templates with the following terminal commands:
wget https://raw.githubusercontent.com/firefly-iii/firefly-iii/main/.env.example -O .env
wget https://raw.githubusercontent.com/firefly-iii/docker/main/database.env -O .db.env
Before installing Firefly III, we must change a few variables in these files.
We must generate a random token to use with the cron service. You can generate it from your terminal with the following command:
openssl rand -hex 16This will create a text string composed of 32 characters.
We also need a password for our database. In this case, you can choose whatever password you like.
Please open the .env file for editing:
nano .envFind the DB_PASSWORD variable and set it according to the database password you choose. For example:
DB_PASSWORD=my_db_secretMoreover, find the STATIC_CRON_TOKEN variable and set it according to the random token previously generated. For example:
STATIC_CRON_TOKEN=677bd979c0b7b6f9342d5a466df6b182Save and close the file.
Now, let’s set the database password also in the .db.env file. Open it:
nano .db.envPlease find and set the MYSQL_PASSWORD with the same value you used for the DB_PASSWORD in the previous file. According to our example:
MYSQL_PASSWORD=my_db_secretSave and close the file.
Install Firefly III on Raspberry PI
We can now install Firefly III with the following terminal command, run in the folder where the Docker Compose and environment files are stored:
docker compose up -dYour Raspberry PI will automatically start downloading the required Docker images.
It will also initialise the MariaDB database before running the Firefly III app. This operation could take a bit of time (only for the first start), so please check the Firefly III app logs with the following command:
docker compose logsThe logs could show you warning lines. Please give it time to execute all of its tasks. Operations will end when this command results in something similar to the following:
firefly_iii_core  |
firefly_iii_core  |               ______ _           __ _            _____ _____ _____
firefly_iii_core  |              |  ____(_)         / _| |          |_   _|_   _|_   _|
firefly_iii_core  |              | |__   _ _ __ ___| |_| |_   _       | |   | |   | |
firefly_iii_core  |              |  __| | | '__/ _ \  _| | | | |      | |   | |   | |
firefly_iii_core  |              | |    | | | |  __/ | | | |_| |     _| |_ _| |_ _| |_
firefly_iii_core  |              |_|    |_|_|  \___|_| |_|\__, |    |_____|_____|_____|
firefly_iii_core  |                                        __/ |
firefly_iii_core  |                                       |___/
firefly_iii_core  |        "Be there or forever wonder."
firefly_iii_core  |
firefly_iii_core  | +------------------------------------------------------------------------------+
firefly_iii_core  | |                                                                              |
firefly_iii_core  | | Thank you for installing Firefly III, v6.6.2!                                |
firefly_iii_core  | | There are no extra installation instructions.                                |
firefly_iii_core  | | Firefly III should be ready for use.                                         |
firefly_iii_core  | |                                                                              |
firefly_iii_core  | | Did you know you can support the development of Firefly III?                 |
firefly_iii_core  | | You can donate in many ways, like GitHub Sponsors or Patreon.                |
firefly_iii_core  | | For more information, please visit https://bit.ly/donate-to-Firefly-III      |
firefly_iii_core  | |                                                                              |
firefly_iii_core  | +------------------------------------------------------------------------------+
firefly_iii_core  | [09-May-2026 10:46:22] NOTICE: fpm is running, pid 410
firefly_iii_core  | [09-May-2026 10:46:22] NOTICE: ready to handle connections
firefly_iii_core  | Health check waiting for NGINX + PHP-FPM to start...
firefly_iii_core  | ✅ NGINX + PHP-FPM is running correctly.
At this point, you may note some errors similar to the following:
firefly_iii_core | [2026-05-09 10:45:48] production.ERROR: Directory "/var/www/html/storage/upload" is not writeable. Uploading attachments may fail silently.This is a permission error that you can fix with the following terminal command:
sudo chown -R www-data:www-data ./firefly_iii_uploadFirst Steps with Firefly III on Raspberry PI
From here, your FireflyIII service should be ready. From this point, you should be able to work with any web browser, but I found that there are some problems to use FireFox browser with the first form (the registration page). I suggest you use Chrome or any compatible browser at least for the first access and to define the first user.
So, in your web browser, use your Raspberry PI’s IP address (mine is 192.168.1.18) as the URL. The page will redirect to the Firefly III registration URL:
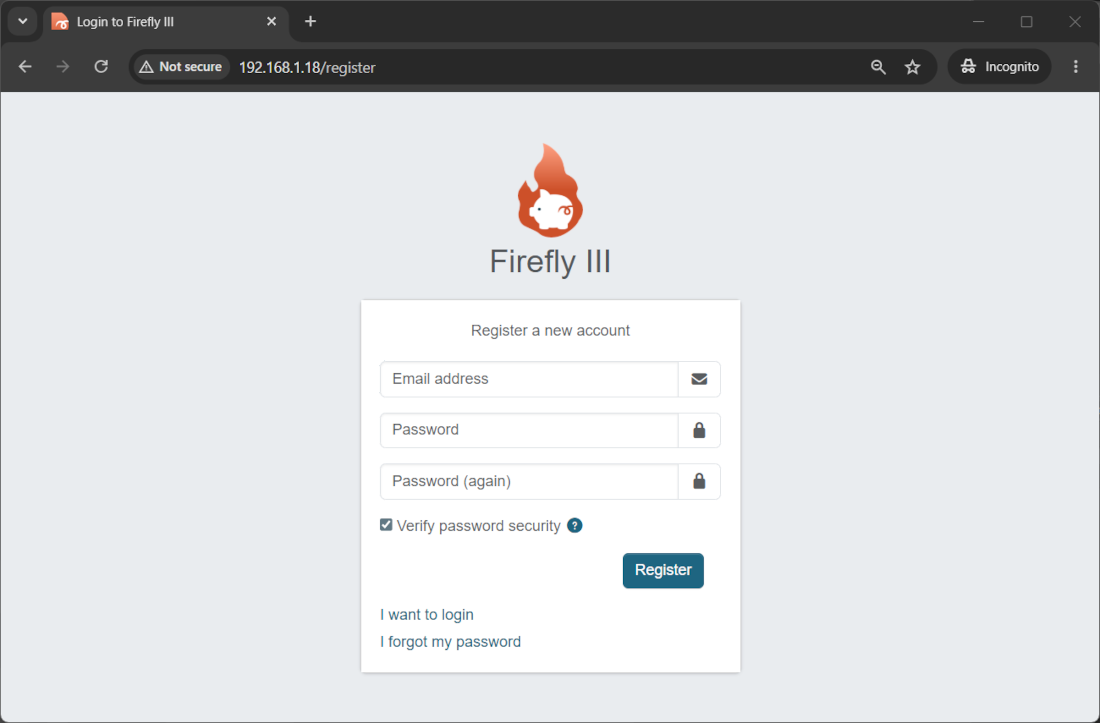
Insert your email address and choose your password. Please consider that your password must be at least 16 digits, including upper case, symbols, characters, and numbers. Then click the “Register” button. This will bring you to the Firefly III welcome page:
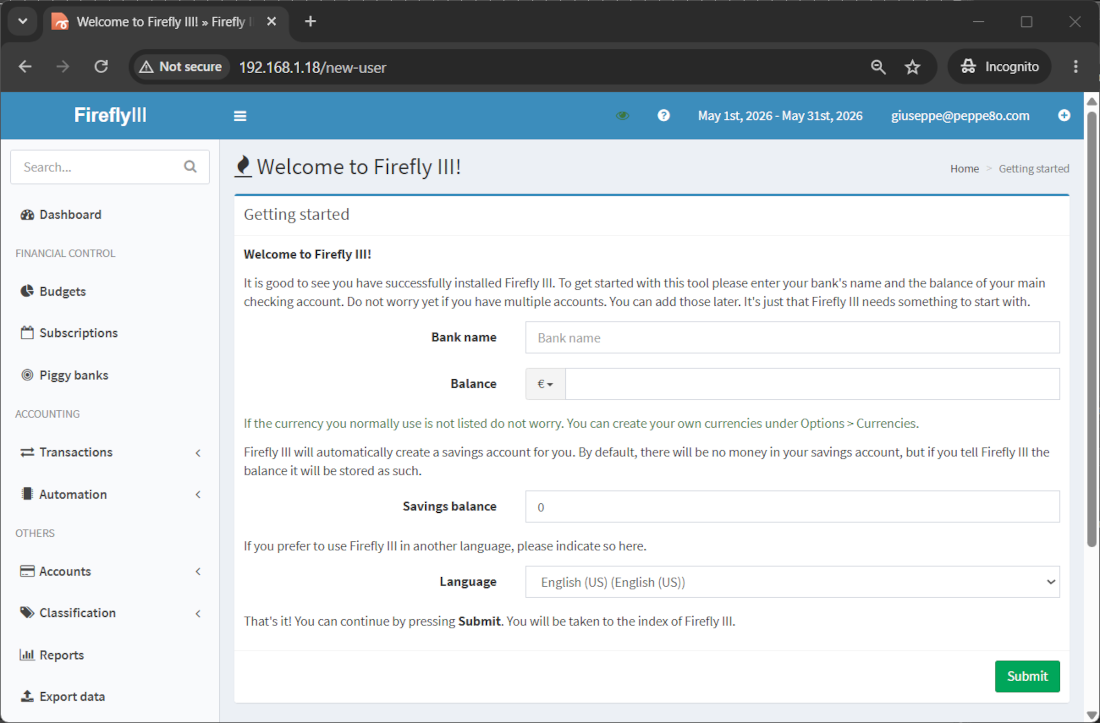
Now, you must add at least a bank account to use Firefly III with your Raspberry PI. Please fill in the “Bank name” and “Balance” fields, together with the currency. Then, click the “Submit” button.
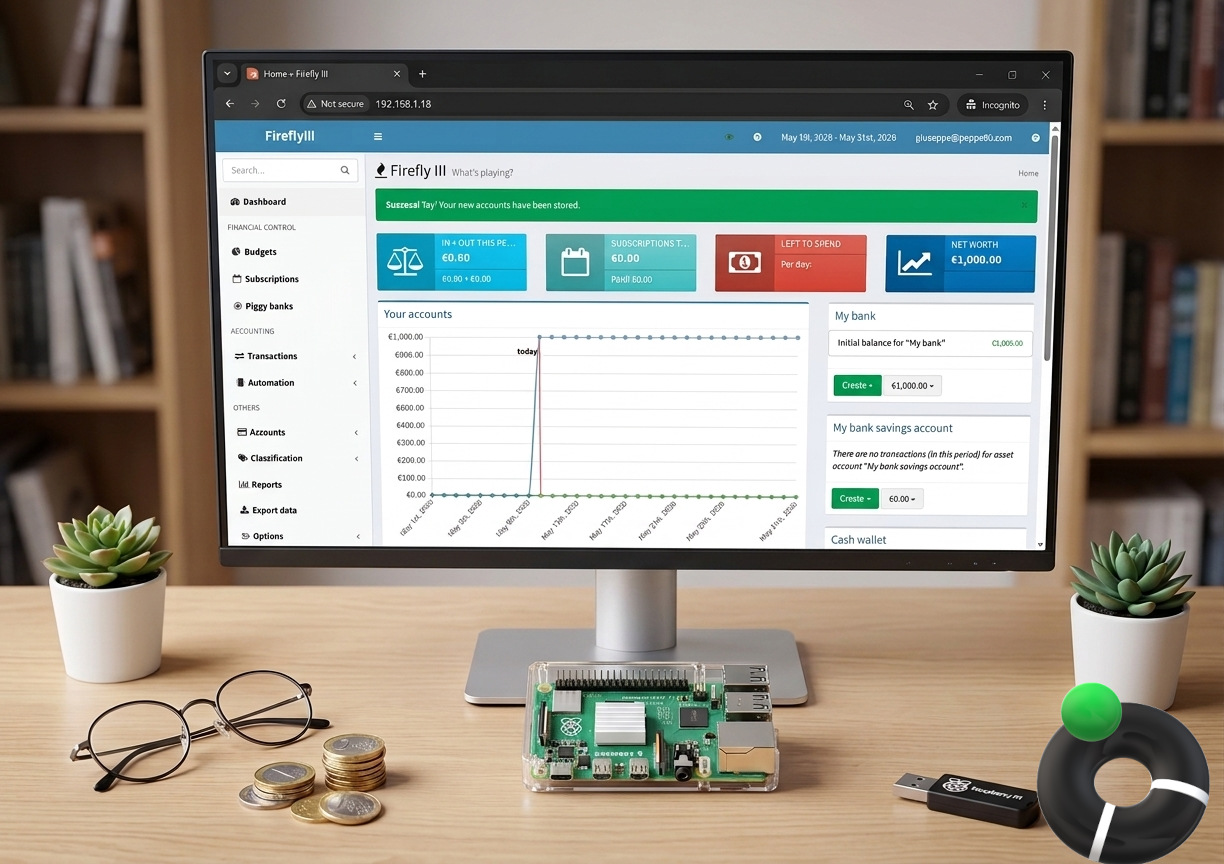
You will finally reach your Firefly III homepage:
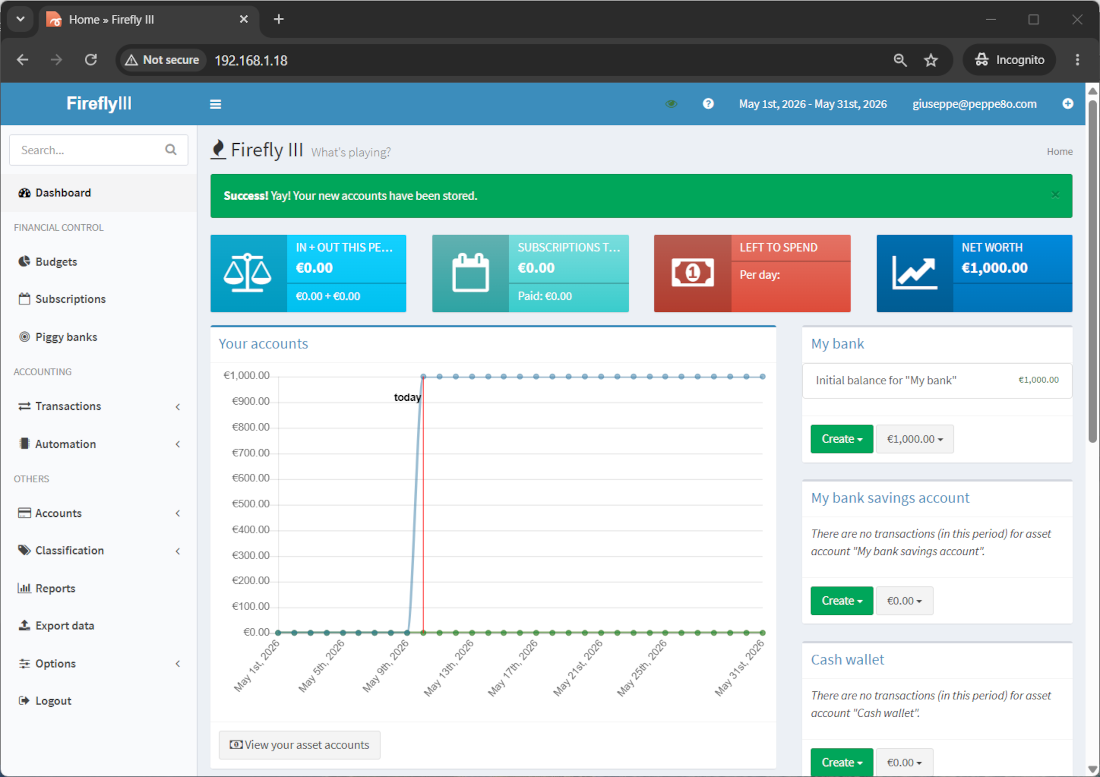
Here, the left side menu will allow you to track any expense and any money transaction, as well as classify any cost. You are now ready to use your Firefly III service!
For more info and a user guide, please refer to the Firefly III official documentation page.
Next Steps
Interested in more RPI projects? Take a look at peppe8o Raspberry PI tutorials to get new ways to use your powerful board!
Enjoy!

Open source and Raspberry PI lover, writes tutorials for beginners since 2019. He's an ICT expert, with a strong experience in supporting medium to big companies and public administrations to manage their ICT infrastructures. He's supporting the Italian public administration in digital transformation projects.
![]()
![]()
![]()
![]()
![]()
![]()
![]()


Hi and thanks for that. Your Dockerfile contains an error : “source /mysql_scripts/mySqlScript.$ (I found the corrected version in the linked page which has more details).
Also, when I run docker-compose up -d I am getting the following error:
ERROR: yaml.scanner.ScannerError: mapping values are not allowed here
in “./docker-compose.yml”, line 2, column 8
Thank you Angelos, found and corrected error in docker compose file. This is a common copy (from terminal) – paste (to editor) problem with WordPress editor which sometimes skips spaces or chars.
I’m also going to publish files from a download area which will solve these issues.
Thank you! It worked now! Stupid me, I didn’t realise the first line should be a comment
Hi Peppe!
With this guide i was able to run Firefly III on the raspberry and use it. Unfortunatly if I try to connect from my PC to the IP of the raspberry i got a connection time out (raspberry and PC are in the same network). There are other passagges to reach this goal?
Hi Andrea,
does your comment mean that you are running on Raspberry PI OS Desktop and it works only locally?
Yes, if I type “localhost” from the browser on the raspberry everything is work. From my pc if I use in http the ip address of my raspberry i got a connection time out. I work from my pc in ssh so everything in the network is ok.
I think that docker is binding only in localhost.
Ok. Please, can you provide me result from “docker ps” terminal command?
I solved the problem.
Basically i had to open the http port on my router (it seeems that the fastweb router has a firewall always active).
Thank you for your guide!
Ottimo. Thank you, Andrea
Unfortunately i get an error when building:
ERROR 2002 (HY000): Can’t connect to local MySQL server through socket ‘/var/run/mysqld/mysqld.sock’ (2)
I followed exactly the instructions and am using an raspberry pi 4 (4gb)
What does “docker ps -a” command give to you?
I get this
Step 2/7 : RUN apt update -y && apt install mariadb-server -y
—> Running in e68a5c1249b4
/bin/sh: 1: Syntax error: “&” unexpected
Check the dockerfile, the “&&” should just be “&&”
it worked for me when I changed it. I believe & is & for HMTL
Thank you Will, HTML error found and corrected
I followed your instructions and attempted an install on an older pi 2 board. Everything seemed to go well until I attempted to start the service with the docker-compose command. Step 6/7 resulted in an error. Is this a limitation with the Pi 2 or is something else required?
Step 6/7 : RUN /etc/init.d/mysql start && mysql -uroot –password=”” -e “source /mysql_scripts/mySqlScript.sql”
—> Running in 5779d8309d80
/bin/sh: 1: /etc/init.d/mysql: not found
ERROR: Service ‘fireflyiiidb’ failed to build: The command ‘/bin/sh -c /etc/init.d/mysql start && mysql -uroot –password=”” -e “source /mysql_scripts/mySqlScript.sql”‘ returned a non-zero code: 127
Hi Bob, you are right. From a few time MariaDB doesn’t like anymore being called as “mysql”, so they changed its executable name from mysql to mariadb.
The post has been updated, please copy the new Dockerfile (the rest should remain unchanged).
Many thanks, Giuseppe
Thanks again Giuseppe. I successfully started the docker-compose but firefly will not start.
When issuing the docker logs command, the pi response is:
standard_init_linux.go:219: exec user process caused: exec format error
Hi Bob,
sorry, but also the previous docker image for firefly III has changed and now doesn’t support armv7 architecture (that’s the reason of your error). In the meanwhile, Firefly added their own docker image and now they support armv7, so please try the updated docker-compose.yml file from this post and let me know.
Giuseppe — thanks so much. Everything is working now. on an older Pi 2. Couldn’t have done it without you.
Hello
Thanks for this walk through unfortunately I am a UNIX / raspberrypi newbie and am banging my head trying to get firefly3 installed and running. I think all was going well untill i ran the following.
pi@raspberrypi:~/fireflyIII $ docker-compose up -dBuilding db
Step 1/7 : FROM debian
latest: Pulling from library/debian
c0b863d4b31f: Pull complete
Digest: sha256:3e82b1af33607aebaeb3641b75d6e80fd28d36e17993ef13708e9493e30e8ff9
Status: Downloaded newer image for debian:latest
---> 05db4696ee37
Step 2/7 : RUN apt update -y && apt install mariadb-server -y
---> Running in 0eb2178ef0ca
WARNING: apt does not have a stable CLI interface. Use with caution in scripts.
Get:1 http://deb.debian.org/debian bullseye InRelease [116 kB]
Get:2 http://deb.debian.org/debian-security bullseye-security InRelease [48.4 kB]
Err:1 http://deb.debian.org/debian bullseye InRelease
At least one invalid signature was encountered.
Get:3 http://deb.debian.org/debian bullseye-updates InRelease [44.1 kB]
Err:2 http://deb.debian.org/debian-security bullseye-security InRelease
At least one invalid signature was encountered.
Err:3 http://deb.debian.org/debian bullseye-updates InRelease
At least one invalid signature was encountered.
Reading package lists...
W: GPG error: http://deb.debian.org/debian bullseye InRelease: At least one invalid signature was encountered.
E: The repository 'http://deb.debian.org/debian bullseye InRelease' is not signed.
W: GPG error: http://deb.debian.org/debian-security bullseye-security InRelease: At least one invalid signature was encountered.
E: The repository 'http://deb.debian.org/debian-security bullseye-security InRelease' is not signed.
W: GPG error: http://deb.debian.org/debian bullseye-updates InRelease: At least one invalid signature was encountered.
E: The repository 'http://deb.debian.org/debian bullseye-updates InRelease' is not signed.
ERROR: Service 'db' failed to build: The command '/bin/sh -c apt update -y && apt install mariadb-server -y' returned a non-zero code: 100
pi@raspberrypi:~/fireflyIII $ docker logs fireflyiii_fireflyiii_1
Error: No such container: fireflyiii_fireflyiii_1
pi@raspberrypi:~/fireflyIII $ docker-compose up -d
Building db
Step 1/7 : FROM debian
---> 05db4696ee37
Step 2/7 : RUN apt update -y && apt install mariadb-server -y
---> Running in a3bdc1fca179
WARNING: apt does not have a stable CLI interface. Use with caution in scripts.
Get:1 http://deb.debian.org/debian bullseye InRelease [116 kB]
Get:2 http://deb.debian.org/debian-security bullseye-security InRelease [48.4 kB]
Err:1 http://deb.debian.org/debian bullseye InRelease
At least one invalid signature was encountered.
Get:3 http://deb.debian.org/debian bullseye-updates InRelease [44.1 kB]
Err:2 http://deb.debian.org/debian-security bullseye-security InRelease
At least one invalid signature was encountered.
Err:3 http://deb.debian.org/debian bullseye-updates InRelease
At least one invalid signature was encountered.
Reading package lists...
W: GPG error: http://deb.debian.org/debian bullseye InRelease: At least one invalid signature was encountered.
E: The repository 'http://deb.debian.org/debian bullseye InRelease' is not signed.
W: GPG error: http://deb.debian.org/debian-security bullseye-security InRelease: At least one invalid signature was encountered.
E: The repository 'http://deb.debian.org/debian-security bullseye-security InRelease' is not signed.
W: GPG error: http://deb.debian.org/debian bullseye-updates InRelease: At least one invalid signature was encountered.
E: The repository 'http://deb.debian.org/debian bullseye-updates InRelease' is not signed.
ERROR: Service 'db' failed to build: The command '/bin/sh -c apt update -y && apt install mariadb-server -y' returned a non-zero code: 100
Could you shed some light on what went wrong?
Hi
I did the additional step listed on the “Create a Custom MariaDB Container with Raspberry PI and Docker” but the work around didn’t work..
pi@raspberrypi:~/myMariaDB $ wget http://ftp.de.debian.org/debian/pool/main/libs/libseccomp/libseccomp2_2.5.1-1_armhf.deb--2022-10-03 20:07:27-- http://ftp.de.debian.org/debian/pool/main/libs/libseccomp/libseccomp2_2.5.1-1_armhf.deb
Resolving ftp.de.debian.org (ftp.de.debian.org)... 141.76.2.4
Connecting to ftp.de.debian.org (ftp.de.debian.org)|141.76.2.4|:80... connected.
HTTP request sent, awaiting response... 404 Not Found
2022-10-03 20:07:28 ERROR 404: Not Found.
pi@raspberrypi:~/myMariaDB $ sudo dpkg -i libseccomp2_2.5.1-1_armhf.deb
dpkg: error: cannot access archive 'libseccomp2_2.5.1-1_armhf.deb': No such file or directory
pi@raspberrypi:~/myMariaDB $ docker ps
CONTAINER ID IMAGE COMMAND CREATED STATUS PORTS NAMES
pi@raspberrypi:~/myMariaDB $
Also I’m being thick but should i be be running each in their own directories. myMariaDB and /fireflyIII as each tutorial states?
Sorry but have been trying various tutorials to get this running for days and am getting nowhere fast.