
Last Updated on 13th April 2024 by peppe8o
In this tutorial, I’m going to show you how to design your PCB with Raspberry PI and Fritzing, then exporting the required files to require them to be produced.
Once your first electronic circuit is working and stable, sometimes you may need to move it into a printed board in order to make connections fixed and avoid cables from moving away from your breadboard. With Raspberry PI and Fritzing you can replicate your project into a digital design and send it to PCB manufacturers for live production
What is Fritzing
By itself, Fritzing is an open-source hardware initiative aiming to make it possible for the community to make electronics accessible to everyone. Besides the different services, they offer a great and very simple to use software allowing you to draw your circuit with a drag-and-drop GUI and including by default a lot of components.
Sometimes, if your component is not available from Fritzing database, you can anyway google for the ones already created from the community or create your one.
For this tutorial, I’m going to use a simple RC circuit with a resistor and a capacitor. This is one of the simplest circuits, and of course, it’s not worth requesting a PCB. But it is a very clear example enabling us to understand how to use Fritzing and how to get the PCB design.

What We Need
As usual, I suggest adding from now to your favourite e-commerce shopping cart all the needed hardware, so that at the end you will be able to evaluate overall costs and decide if to continue with the project or remove them from the shopping cart. So, hardware will be only:

- a Raspberry PI Computer board (including proper power supply or using a smartphone micro USB charger with at least 3A). The Raspberry PI 4 Model B is suggested
- high speed micro SD card (at least 16 GB, at least class 10)
- a USB/wireless keyboard
- an HDMI monitor (with its proper HDMI cable, based on your Raspberry PI computer board)
Step-by-Step Procedure
Prepare Raspberry PI OS and Install Fritzing
Start installing the Raspberry PI Operating System. This tutorial requires a desktop environment, so you will need to install Raspberry PI OS Desktop.
After the installation process has finished, please make your OS up to date. From the terminal, please issue the following command:
sudo apt update -y && sudo apt upgrade -yWe can now install Fritzing in a really easy way from the terminal. The command will be just:
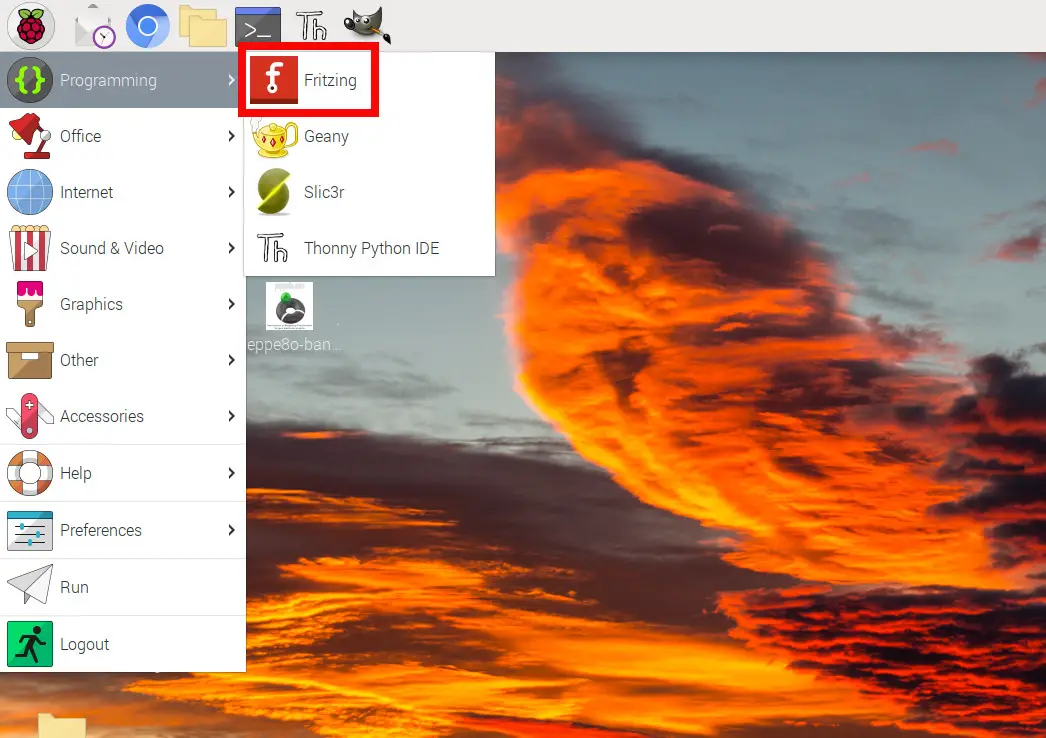
sudo apt install fritzingOnce installed, you will be able to run Fritzing in your Raspberry PI OS from the “Programming” menu:
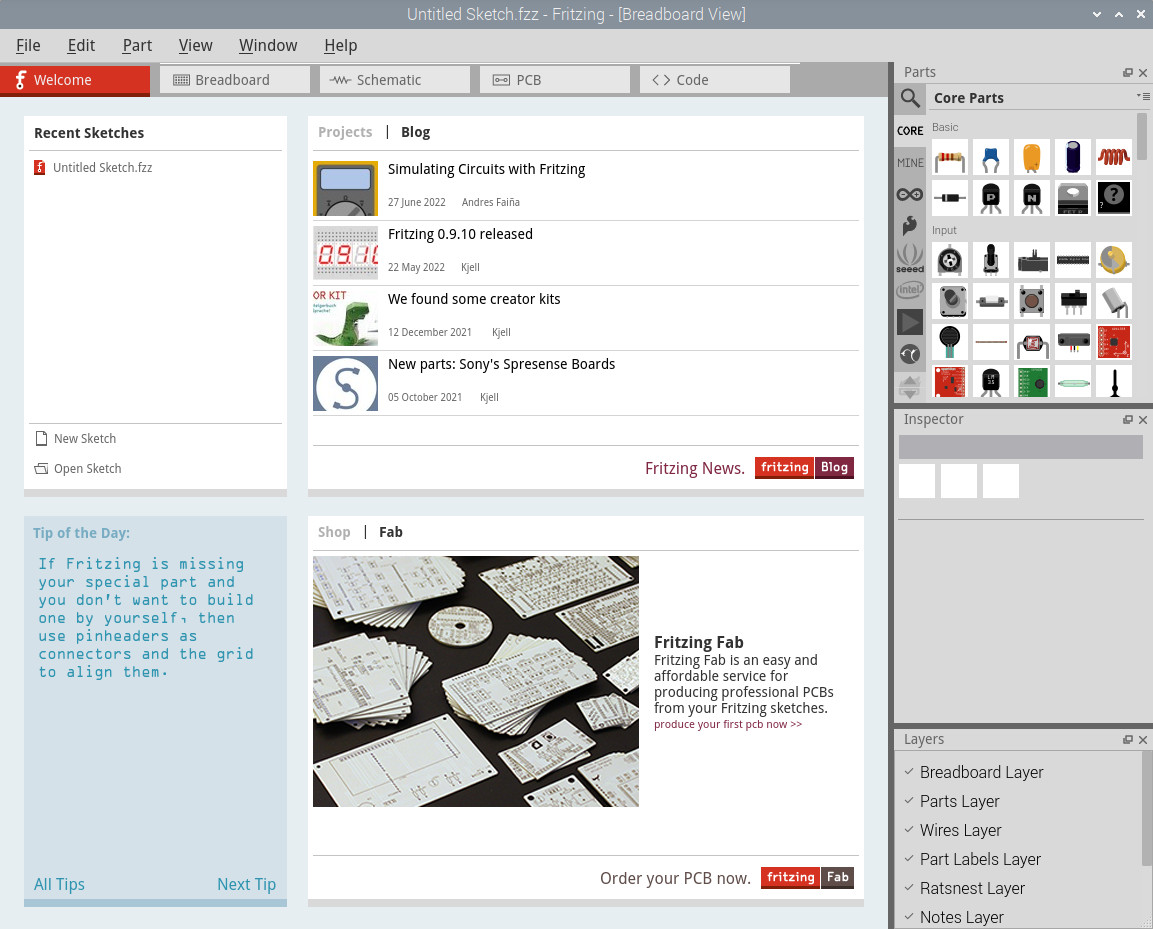
Launch Fritzing. By default, it opens the Welcome page:
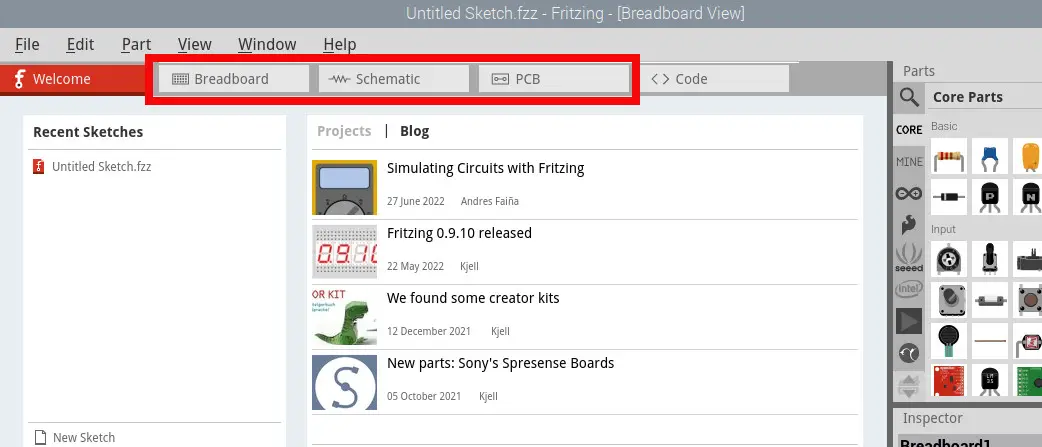
The Fritzing Views
There are 3 main views that you can select from Fritzing window:
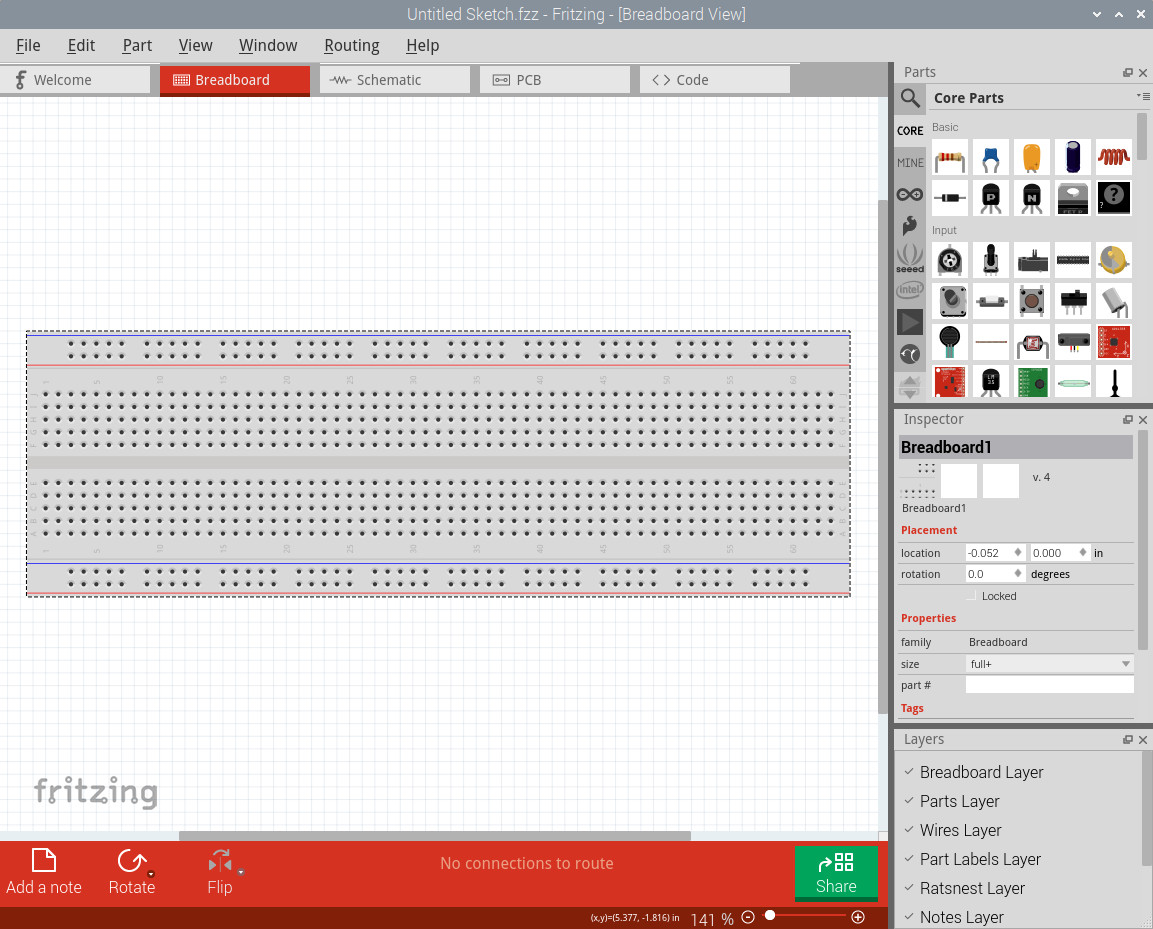
The Breadboard view will show you the physical connections between your project parts. This is the main view where you can start assembling your parts according to your physical prototype and it starts always from an empty breadboard (eve you can also connect your parts without using the breadboard):
It will be easier to understand the other 2 tabs later, once we start adding our pieces to the project.
Adding Parts to your Project
Another important note, on the right side menu you can already look at the parts available by default in Fritzing database. There’s also a lens icon letting you perform a text search in your local part database. You can drag and drop each item from here in your Fritzing breadboard in order to include the part in your project:
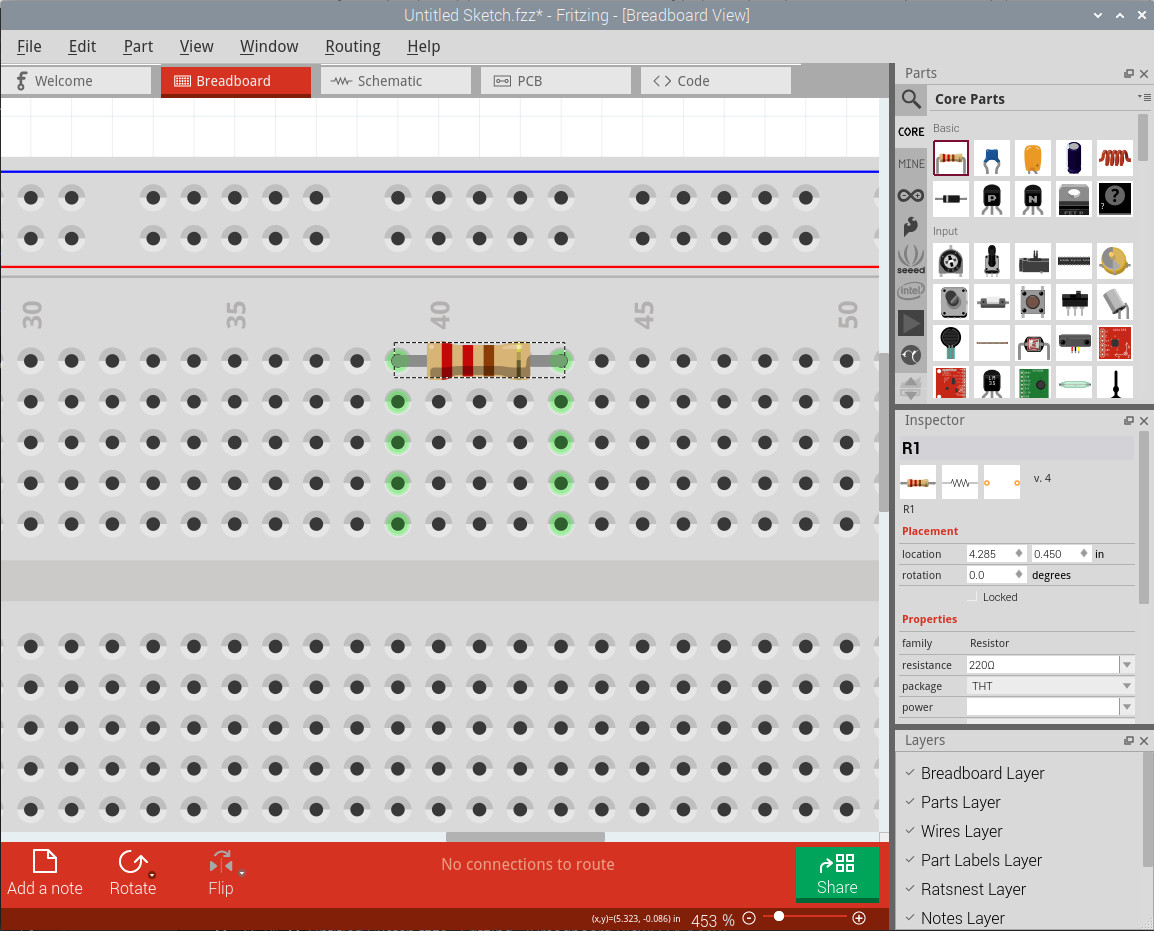
With the part placed on the breadboard, the connected lines will be highlighted in green in order to make connections visible. Moreover, with the part selected, you will find in the right menu the “Inspector”: this will allow you to configure your part when multiple options are available (for example, with resistors you can change the resistance value).
With the part added, a right-click with your mouse will allow also rotating the part.
Now, add a Capacitor inside the breadboard, by selecting the part from your menu. Position it according to the following picture:
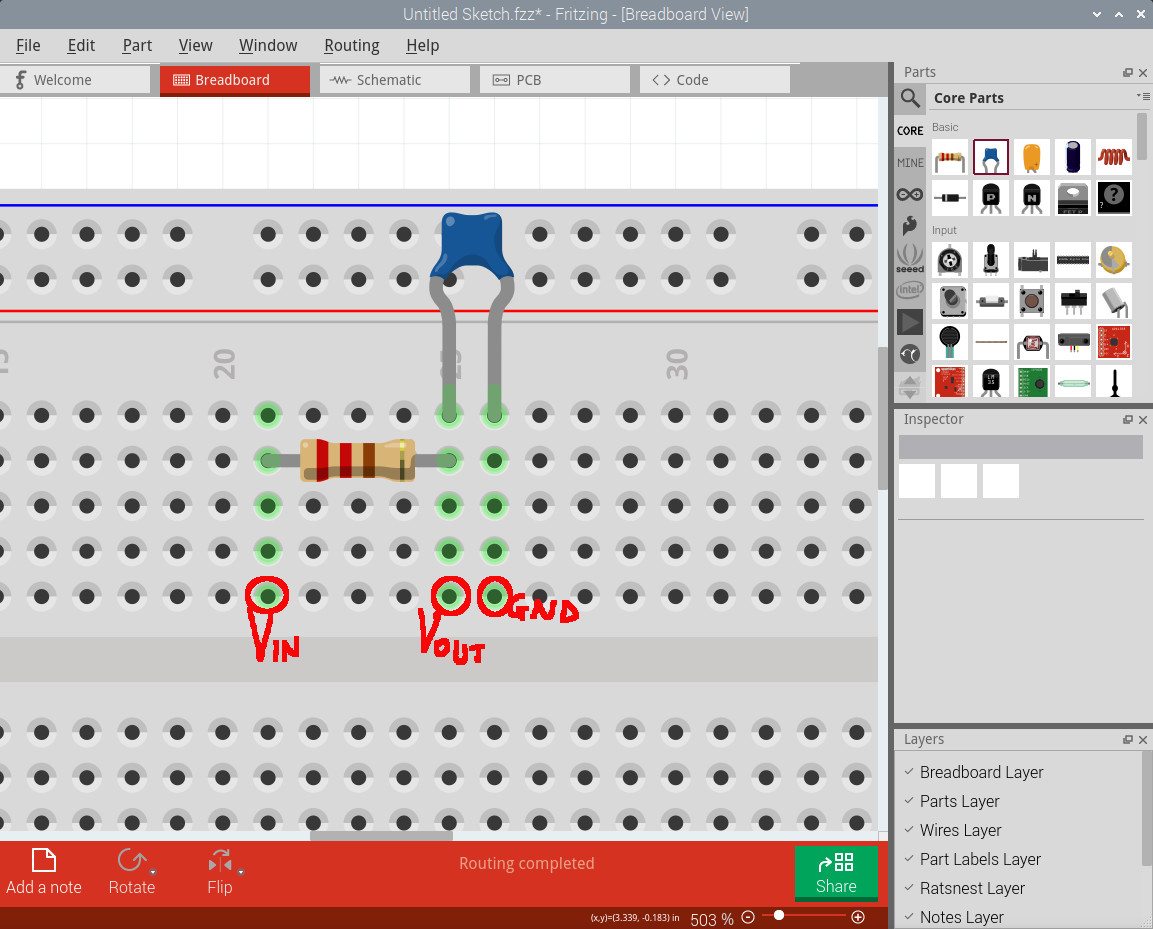
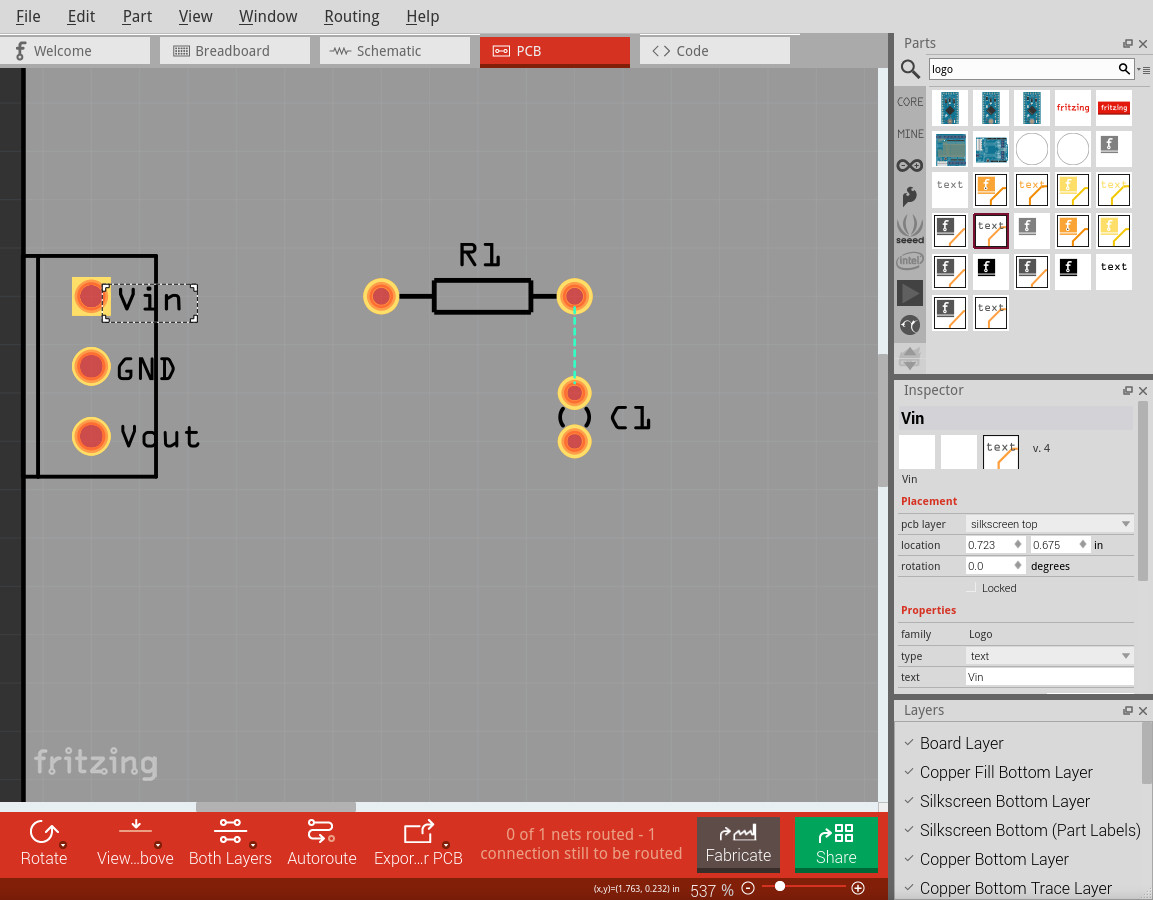
As marked, our circuit has the corresponding Vin, Vout and GND.
You can also add wires (when required) to your circuit, by selecting the generic “Wire” part or creating them from breadboard holes and dropping them to join the needed holes.
The Fritzing Schematic View
Moving to the schematic view, you will get a picture of your circuit with a quite random disposition. You can move the parts (and rotate them) in order to get a better view:
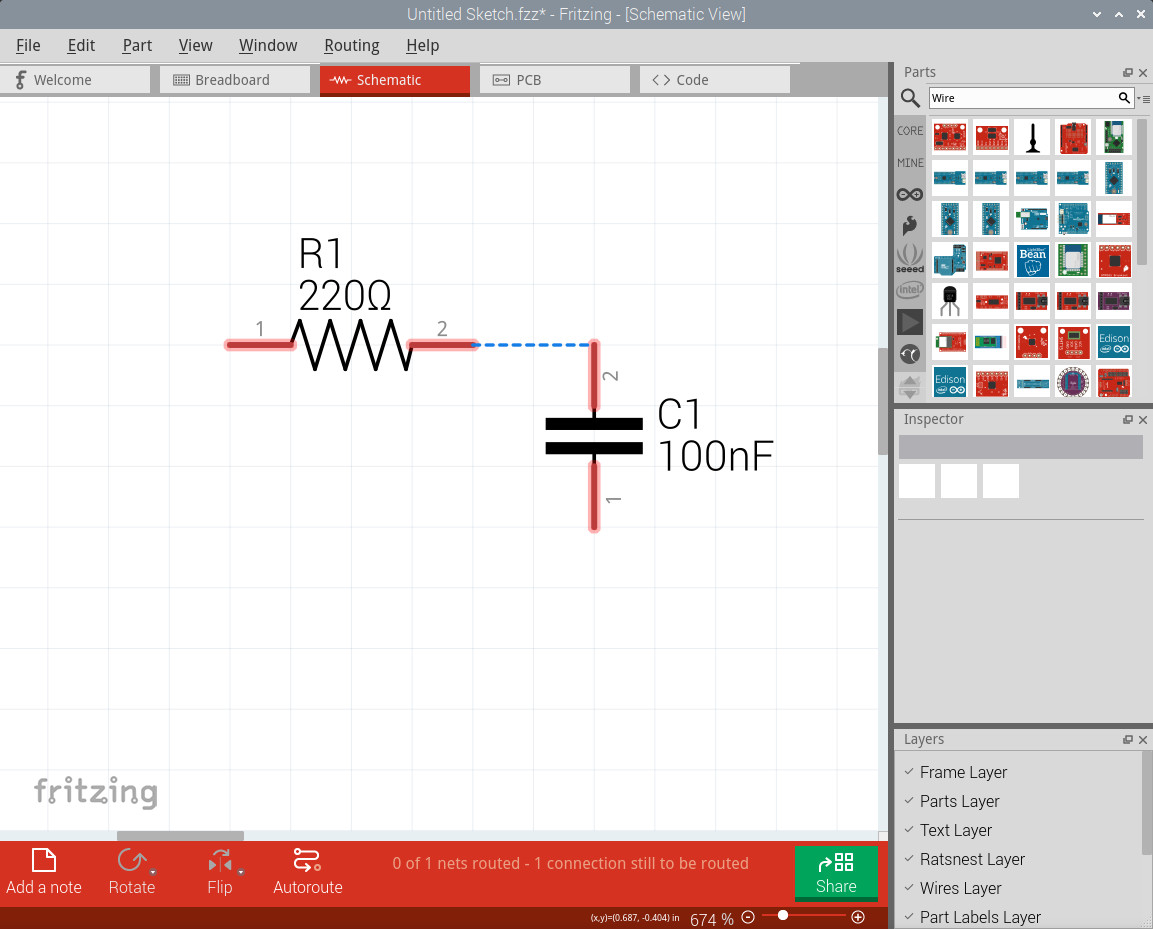
The dashed line show what are the connections in your breadboard, even if the related PCB traces haven’t been still “routed”: moving from a circuit design to a PCB design usually requires explicitly declaring (or drawing) the traces ad they can have different routes depending on how parts are disposed of. We’ll perform this step in the following chapter. From here, you can check that your circuit is going to adhere to your circuit idea.
Also note that the Vin, Vout and GND connections are still not explicit.
The Fritzing PCB View
The following view shows how your PCB is going to be physical.
At the start, all your parts will be randomly disposed of, so you will need a bit of manual work to rearrange and position them correctly:
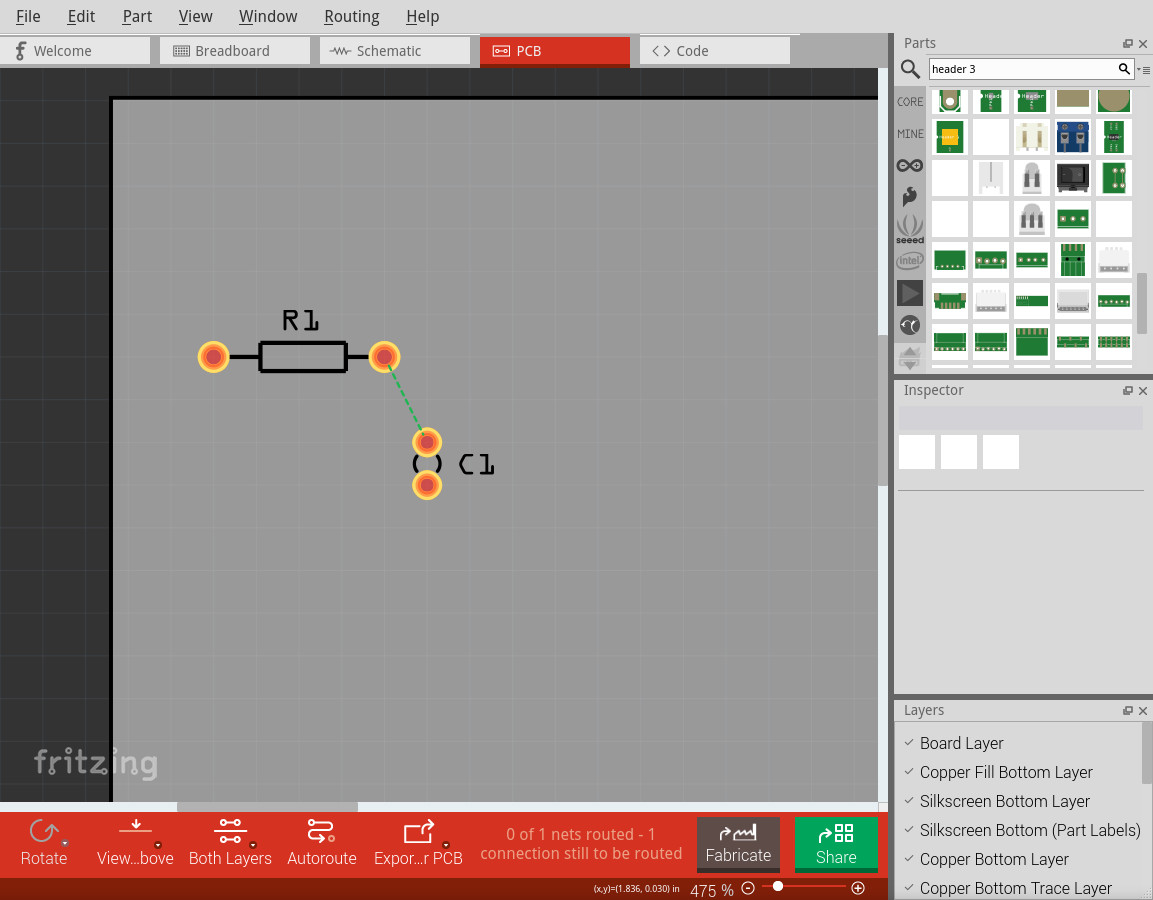
As you can see, our PCB is still missing the traces and the headers (where to connect the Vin, Vout and GND PINs). We can start adding the headers, by searching in Fritzing parts database for the related item and placing it in our PCB (I’m going to add the “Header 3”, which is already configured with 3 headers). You can also add text by selecting the “Silkscreen Logo” part. The outcome should be like the following:
You can now add the PCB traces both by drawing them manually (from a whatever pin to its connected one) or using the Routing -> Autoroute function. This last function will be useful for complex projects, as it will send on different layers the traces that are going to cross themselves. For our simple case, changing the parts positioning and wiring manually the wires will be easy:
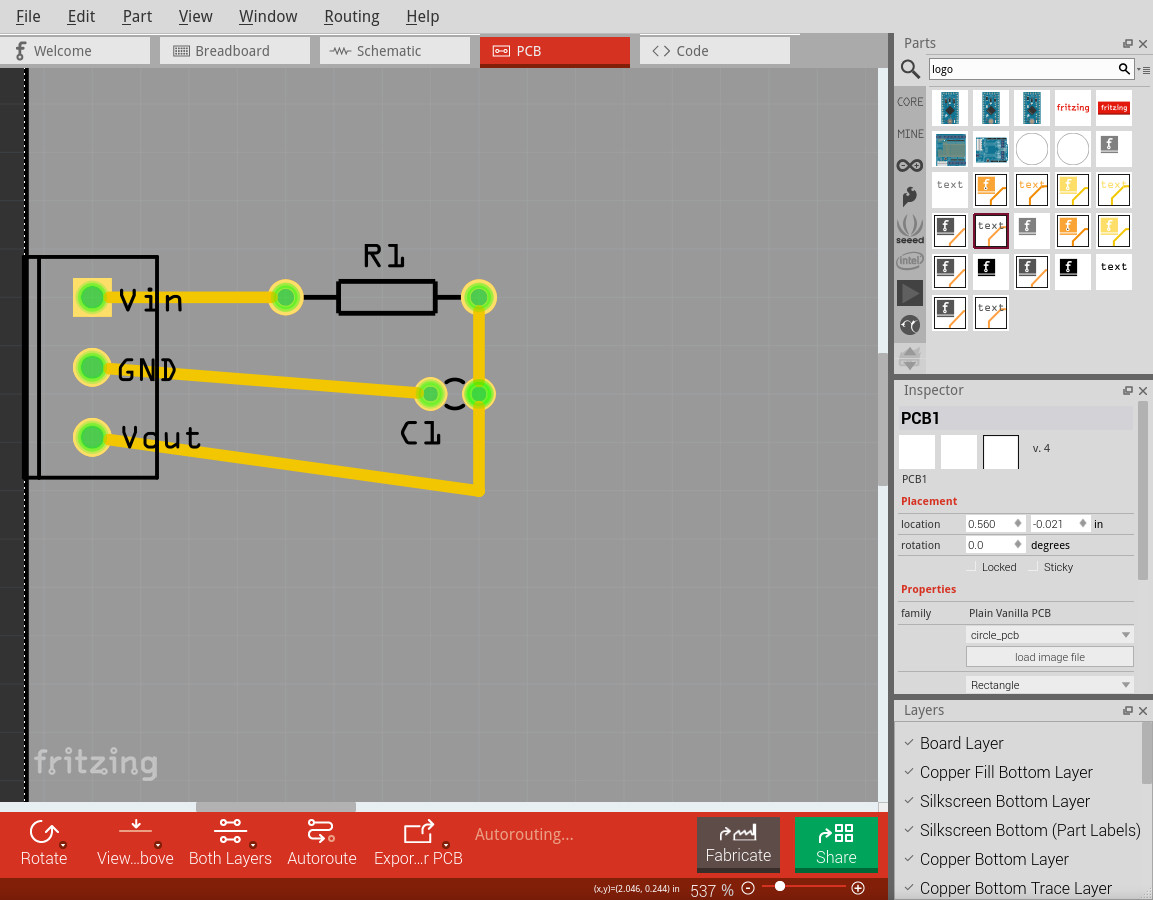
You can reduce the PCB plan by dragging the corners to the required space in order to make your PCB large only for what is needed.
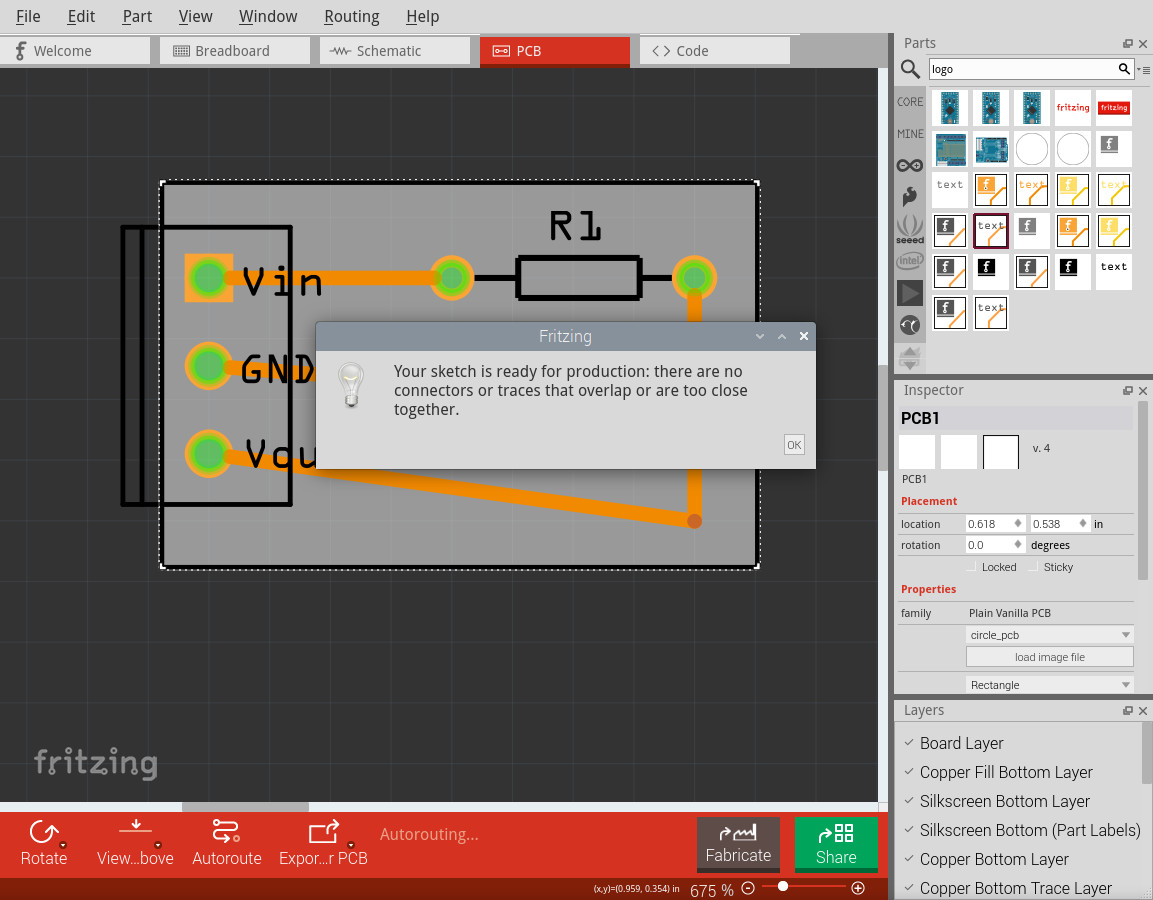
Checking Design Rules
At this point, our PCB is quite ready. We’ve created all the needed part connections.
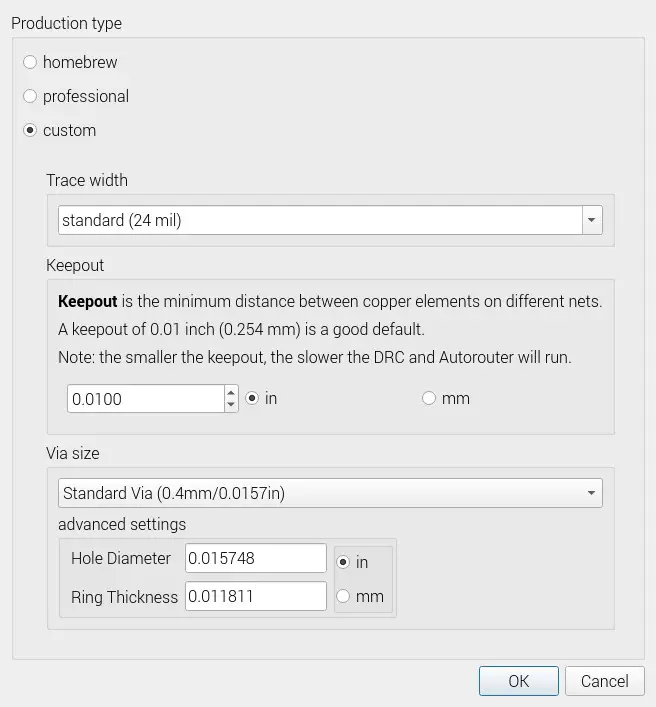
Before sending to production, we need to check that the design rules are honoured. The design rules identify the minimum requirements for a PCB to be manufactured like, for example, the minimum distance between copper elements.
Of course, these rules may vary depending on manufacturer technology and you can update them from the “Routing” -> “Autorouting/DRC Settings…” menu, choosing “Custom” if you need to add your ones.
You can now run the “Routing” -> “Design Rules Check” menu function in order to get the rules automatically verified before sending your board to production. A message will give you the result:
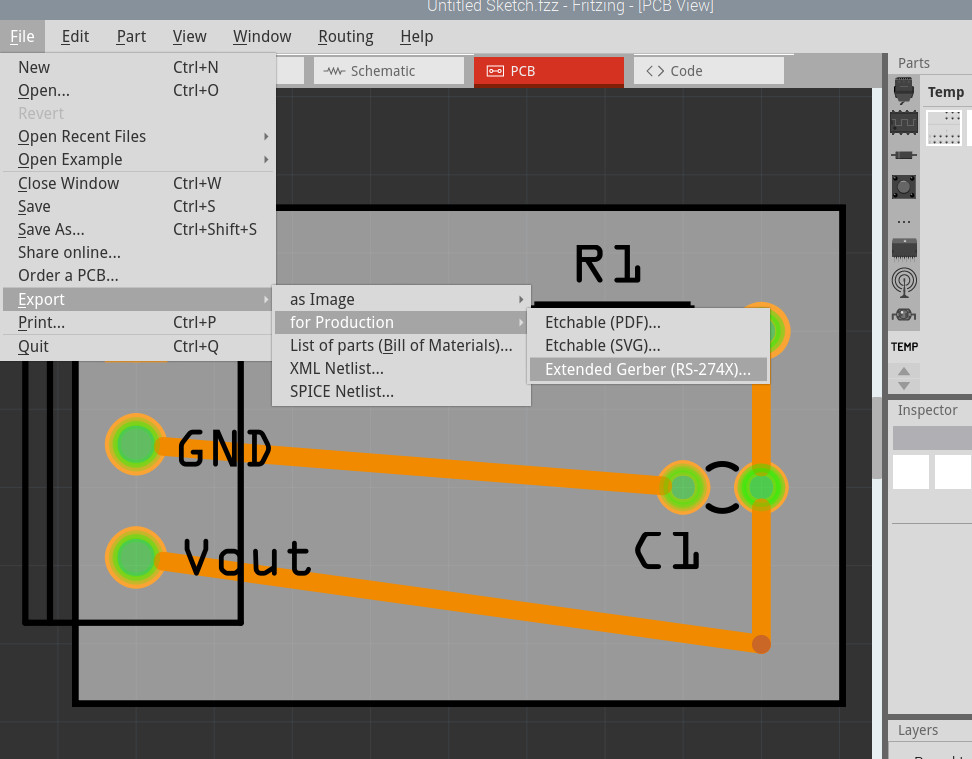
Exporting Fritzing Projects
Exporting projects with Fritzing is a straightforward task. You can both export as images with the related menu:
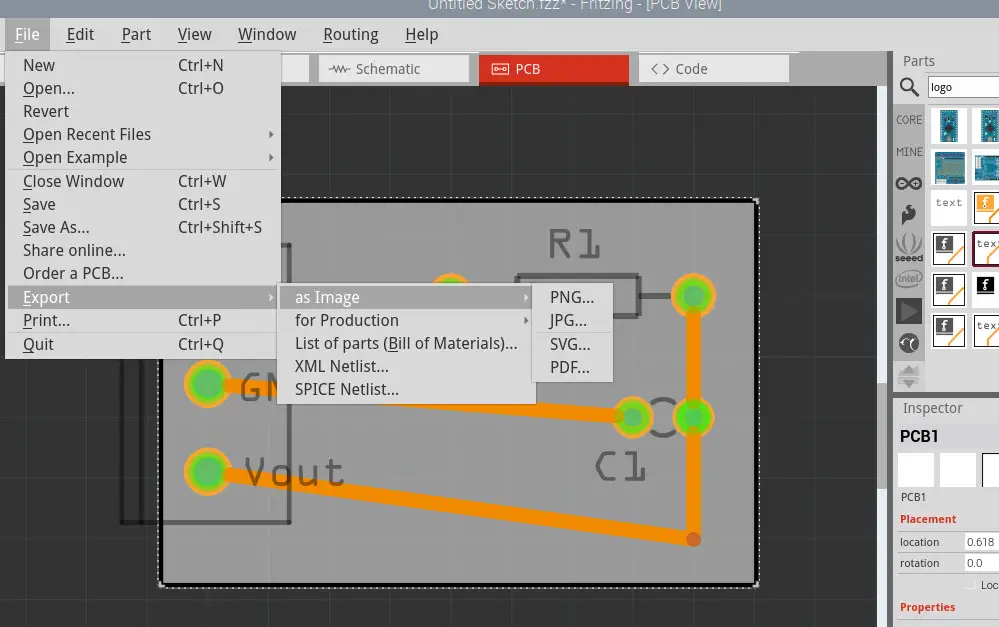
When you need to send the PCB to a manufacturer, you may prefer exporting a Gerber file, which is a format including all the info required to produce your PCB:
The Gerber files export will create a list of files with different formats:
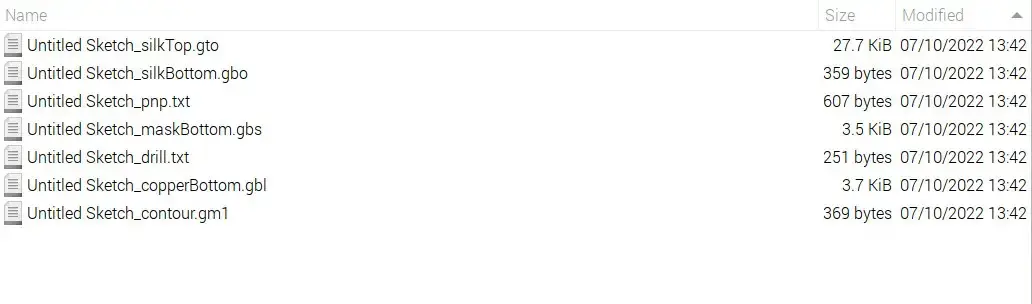
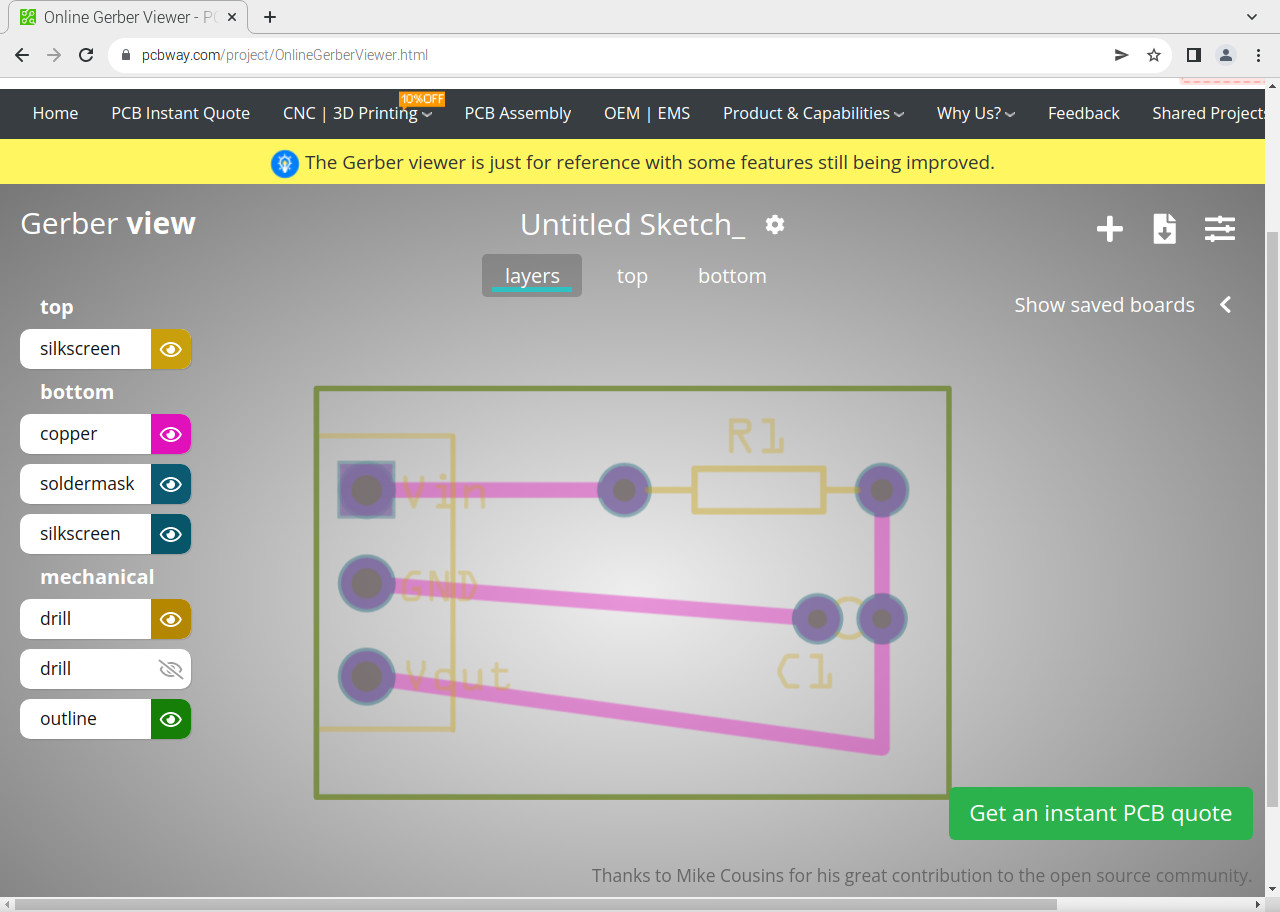
Compress all the files together in order to get a single “.zip” file. You can now use the PCBWay online viewer to get a preview of your PCB:
You are now ready to get a quote for your PCB to get it produced.
Now you may find hard to manage the number of settings required from the PCB manufacturers. An help comes from Ordering your PCB: a Beginners Guide for Manufacturer Options tutorial.
What’s Next
Interested in more cool projects for your Raspberry PI computer board? Take a look at peppe8o Raspberry PI tutorials.
Enjoy!

Open source and Raspberry PI lover, writes tutorials for beginners since 2019. He's an ICT expert, with a strong experience in supporting medium to big companies and public administrations to manage their ICT infrastructures. He's supporting the Italian public administration in digital transformation projects.
![]()
![]()
![]()
![]()
![]()
![]()
![]()


