
Last Updated on 2nd September 2023 by peppe8o
In this tutorial, we’ll interface the Neopixel LEDs with Arduino Uno. This tutorial provides the coding, wiring diagram and component list for Neopixel with Arduino. To have the controlled LED decoration Neopixel is best to use for lighting as it has the ability to give multi-colors. The purpose of this post is to present the basics of Neopixel, it’s working and integrate it with Arduino. WS2812B and WS2811B are the types of Neopixel LEDs.
To have colored animations for beautiful displays, Neopixel is good as it can give any color combination. It looks like a RGB LED, but can work with one pin to control all in series. It’s cheap and easy to install for room decoration.
Introduction
Neopixel LEDs are addressable RGB LEDs which be accessed one by one and collectively. Each LED can be turned on and off with a color defined by the user. Every LED is an RGB whose possible states are red, green and blue. By using a combination of the RGB scale, you can get any color. Neopixels can give every color in the rainbow as well as white.
There are different shapes containing a different number of LEDs in it.
Working Phenomena
NeoPixels need an Arduino-compatible microcontroller and some programming in order to turn on; they do not turn on by themselves. They work with a one-wire control interface, NeoPixel RGB color pixels and strips from Adafruit are based on the WS2812 and WS2811. The latest development in the search for a scalable, and reasonably priced full-color LED. A compact surface-mount package with red, green, and blue LEDs integrated along with a driver chip is controlled by a single wire. There are 3 pins of the NeoPixel LEDs which are signal, power and GND. Each LED is connected to the driver to get the signal to turn on itself and share with the next LED. Data sharing and transferring are performed by the driver IC.
What We Need

As usual, I suggest adding from now to your favourite e-commerce shopping cart all the needed hardware, so that at the end you will be able to evaluate overall costs and decide if to continue with the project or remove them from the shopping cart. So, hardware will be only:
Check hardware prices with the following links:


Step-by-Step Procedure
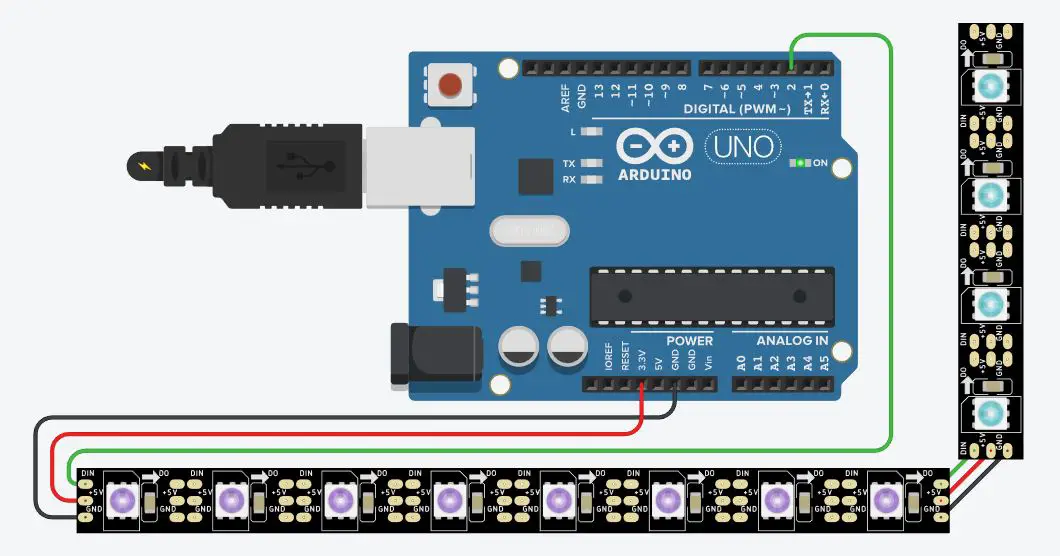
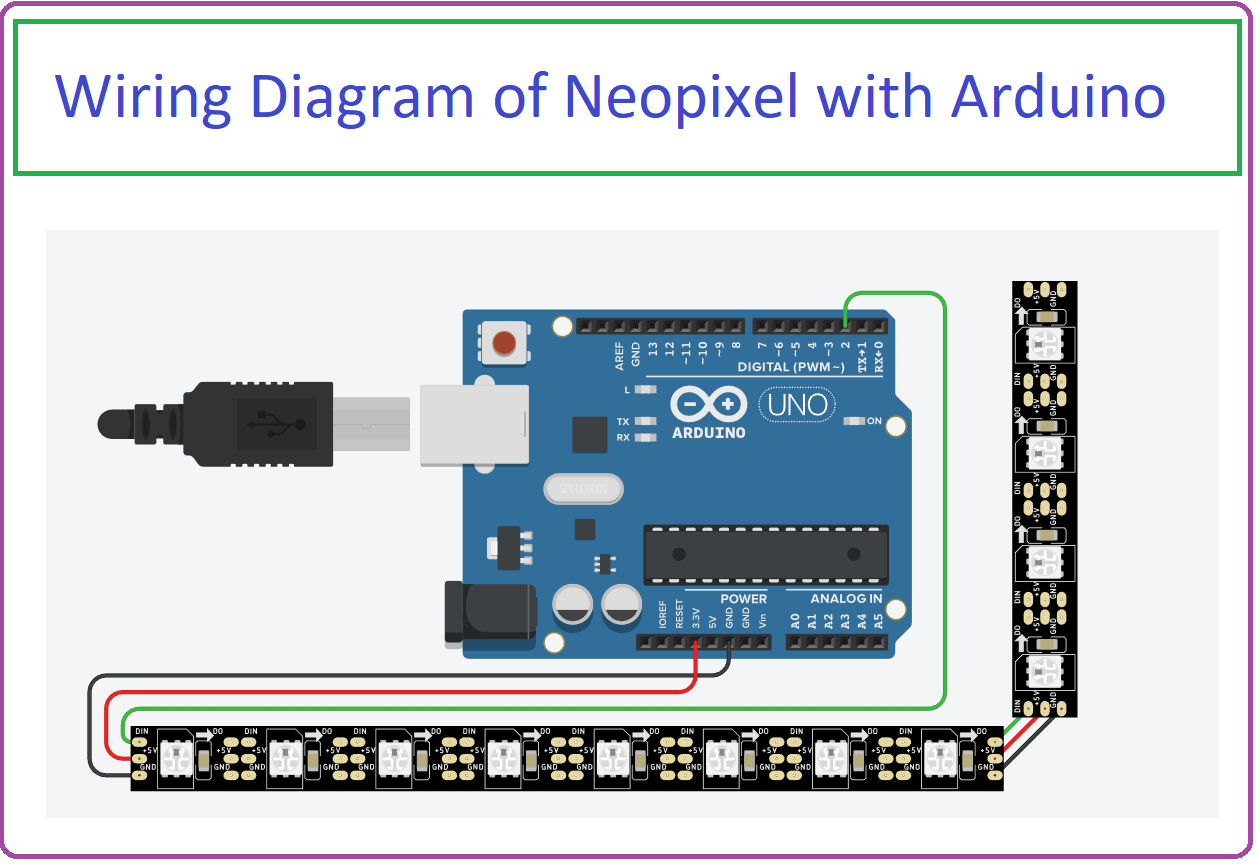
Wiring Diagram of NeoPixel with Arduino
In the circuit, NeoPixel LED deals with the 3.3V power PIN of Arduino, but we also can connect it to the 5V. According to the following diagram, we connect:
- Neopixel PIN 1 with Arduino PIN 2
- Neopixel PIN 2 with Arduino 3.3V (or 5V)
- Neopixel PIN 3 with Arduino GND.
Please follow the wiring from the following picture, according to Arduino Uno Pinout:
Get the code and Neopixel library
Connect your PC to Arduino and open Arduino IDE. For the very first steps, you can refer to Connecting Windows PC with Arduino tutorial. You can get the .ino code and libraries from my download area with the following link:
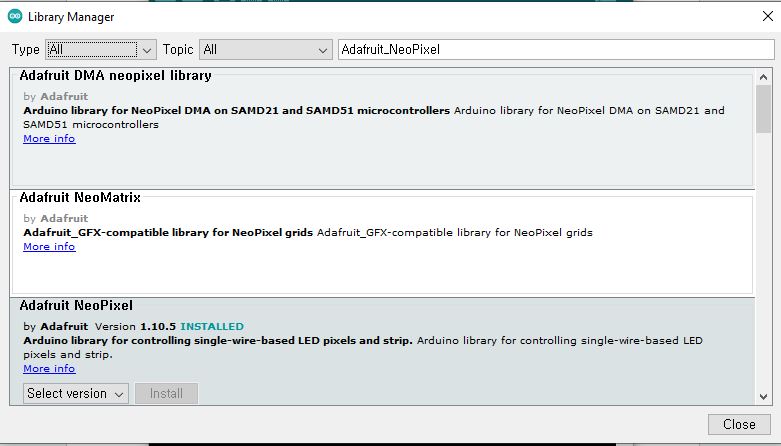
You also need to install the following library, according to my Install Arduino Libraries: methods to add libraries with Arduino IDE tutorial. Please get the .zip file from the following link or add it from the available libraries in your Arduino IDE.
neopixelcode.ino Explanation
Section 1
We start including the Adafruit Neopixel library, then defining both the signal PIN number and the LEDs number according to your NeoPixel device.
We initialize a “pixels” object, passing the following arguments:
- the no. of LEDs
- the signal PIN number
- the LEDs type (NEO_RGB for wire red-green-blue, NEO_GRB for wired green-red-blue). For pixels with 400 kiloHertz bistream we’ll use the NEO_KHZ400. Similarly, NEO_KHZ800 deals with 800 kiloHertz bistream pixels.
The “delayval” constant will manage the time (in milliseconds) between LEDs changes. The “redColor”, “greenColor” and “blueColor” will identify the RGB composition for our colors.
In the Setup, the NeoPixel LEDs are finally initialized.
#include <Adafruit_NeoPixel.h>
#define PIN 2   // input pin Neopixel is attached to
#define NUMPIXELS      12 // number of neopixels in strip
Adafruit_NeoPixel pixels = Adafruit_NeoPixel(NUMPIXELS, PIN, NEO_GRB + NEO_KHZ800);
int delayval = 100; // timing delay in milliseconds
int redColor = 0;
int greenColor = 0;
int blueColor = 0;
void setup() {
  // Initialize the NeoPixel library.
  pixels.begin();
}
Section 2:
In the main loop section, we call the “setcolor()” function: this gets a random value for each of red, green and blue from 0 to 255.
In the for loop, we set each LED with the RGB color value, with increments of 1 for each LED update. Pixels.show() function will update the color on the device, performing the color showing on the hardware. The delay will create an interval to avoid the color update happening too fast compared with the human eye capability.
void loop() {
setColor();
for (int i=0; i < NUMPIXELS; i++) {
// pixels.Color takes RGB values, from 0,0,0 up to 255,255,255
pixels.setPixelColor(i, pixels.Color(redColor, greenColor, blueColor));
// This sends the updated pixel color to the hardware.
pixels.show();
// Delay for a period of time (in milliseconds).
delay(delayval);
}
}
// setColor()
// picks random values to set for RGB
void setColor(){
redColor = random(0, 255);
greenColor = random(0,255);
blueColor = random(0, 255);
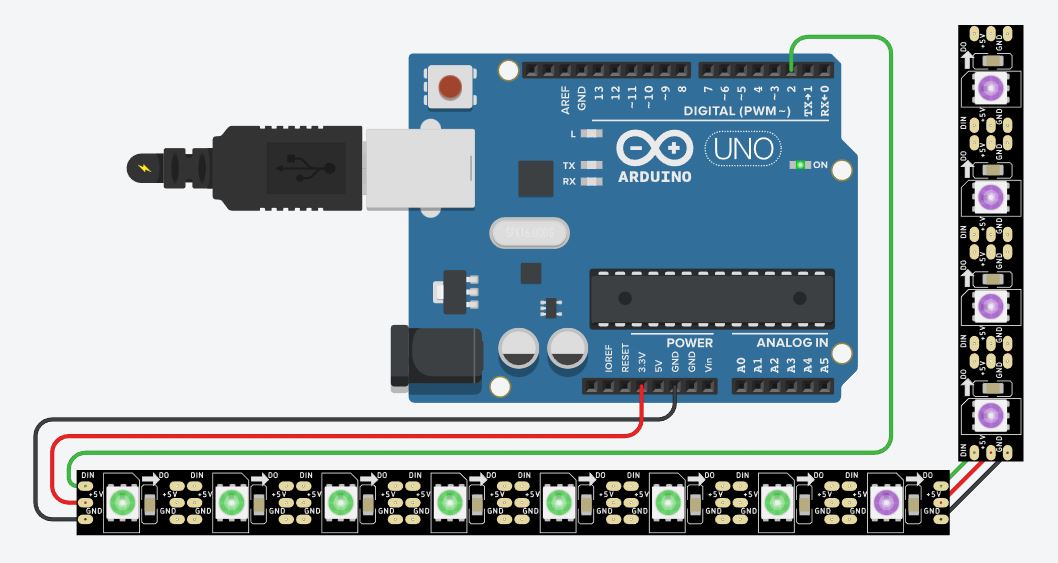
}NeoPixel Serial Connection
You can connect multiple NeoPixel strips (at least until you don’t reach the max Arduino output current) by performing a serial connection. In the following picture, we use two LEDs strips: one with 8 LEDs and a second with 4 LEDs. The total is 8+4 = 12 LEDs, which matches the NUMPIXELS constant in our code.
You can perform this serial connection by using the Data Out PINs from the first string and connecting them to the Data In of the second strip.
What’s Next
Please find more tutorials on Arduino in peppe8o Arduino archives.
Enjoy!
Umar Jamil
For any queries and help for work, please contact me at:
Whatsapp: +92-346-661-7017/ Link
Email: umarjamil0007@gmail.com

I'm an Electronic Engineer, well-skilled to solve the issues of hardware and software. I do have laboratory which contains unlimited sensors and modules for testing the working. Also, I am experienced in Arduino programming, Android mobile application, microcontroller programming, IOTs and embedded projects. I provide services to control, realize the sensor data in the Mobile Application. For any queries and help for work Contact: Whatsapp:+92-346-661-7017 Email: umarjamil0007@gmail.com
![]()


