
Last Updated on 13th December 2024 by peppe8o
In this tutorial, I will show you how to install Plex on your Raspberry PI computer board. This article will guide you through preparing the Raspberry PI board and installing a Plex server so that you will be able to reach it from all the devices in your home.
Being one of the most famous media servers, Plex brings your media on a single app available for any device and from everywhere. Raspberry PI computer boards fit perfectly the Plex server requirements and are a good option to run your server from your home.
What Is Plex
Plex has a huge number of followers. It is flexible and makes your media together, accessible in a simple way from any device. Moreover, it allows you to reach a number of new services, so discovering web TVs, Shows, channels, podcasts and so on.
It also runs from NAS, but Raspberry PI boards can give great results as they have better performances of NAS in the same price range.
Plex can run well on every recent computer. Besides Raspberry PI, it is compatible with Windows, OS X / macOS, Linux, NVIDIA SHIELD, Netgear Nighthawk X10 router and many popular NAS devices such as Drobo, Netgear, Synology, and more. The minimum recommended CPU is Intel Core i3 (or equivalent) or faster, but the Cortex ARM CPU of Raspberry PI models do a great job. The typical RAM suggested by Plex is 4GB.
For this tutorial I’ll use a Raspberry PI 5 Model B, but the same procedure should work on other Raspberry PI computer boards.
What We Need
As usual, I suggest adding from now to your favourite e-commerce shopping cart all the needed hardware, so that at the end you will be able to evaluate overall costs and decide if to continue with the project or remove them from the shopping cart. So, hardware will be only:
- Raspberry PI Computer Board (including proper power supply or using a smartphone micro USB charger with at least 3A)
- high speed micro SD card (at least 16 GB, at least class 10)

Step-by-Step Procedure
Prepare the Raspberry PI’s Operating System
The first step is installing the Raspberry PI OS Lite (please note that we need the 64-bit version) to get a fast and light operating system (headless). In this case, you will need to work from a remote SSH terminal. If you need a desktop environment, you can also use the Raspberry PI OS Desktop, in this case working from its terminal app. Please find the differences between the 2 OS versions in my Raspberry PI OS Lite vs Desktop article.
Make sure that your OS is up to date. From your terminal, use the following command:
sudo apt update -y && sudo apt upgrade -yTo install the correct Plex version, you must know what is the ARM version of your Raspberry PI. If you’re not sure about it, you can check it by using the following terminal command:
cat /proc/cpuinfoIt will output multiple info for each Core of your CPU. Usually, all the Cores have the same features in the same CPU. The most important parameter from the output is the “CPU architecture”:
CPU architecture: 8This tells me that I have an ARMv8, so I will need the package for it. Please keep this result in mind.
Get the Plex Server Installer
For this tutorial, I’m going to use use the official Plex installation procedure. I will copy the latest installer link from my browser and use this link with a “wget” command directly into my Raspberry PI. Of course, you can alternatively download the same installer on your local PC and transfer it to Raspberry PI with an SFTP program (like Filezilla).
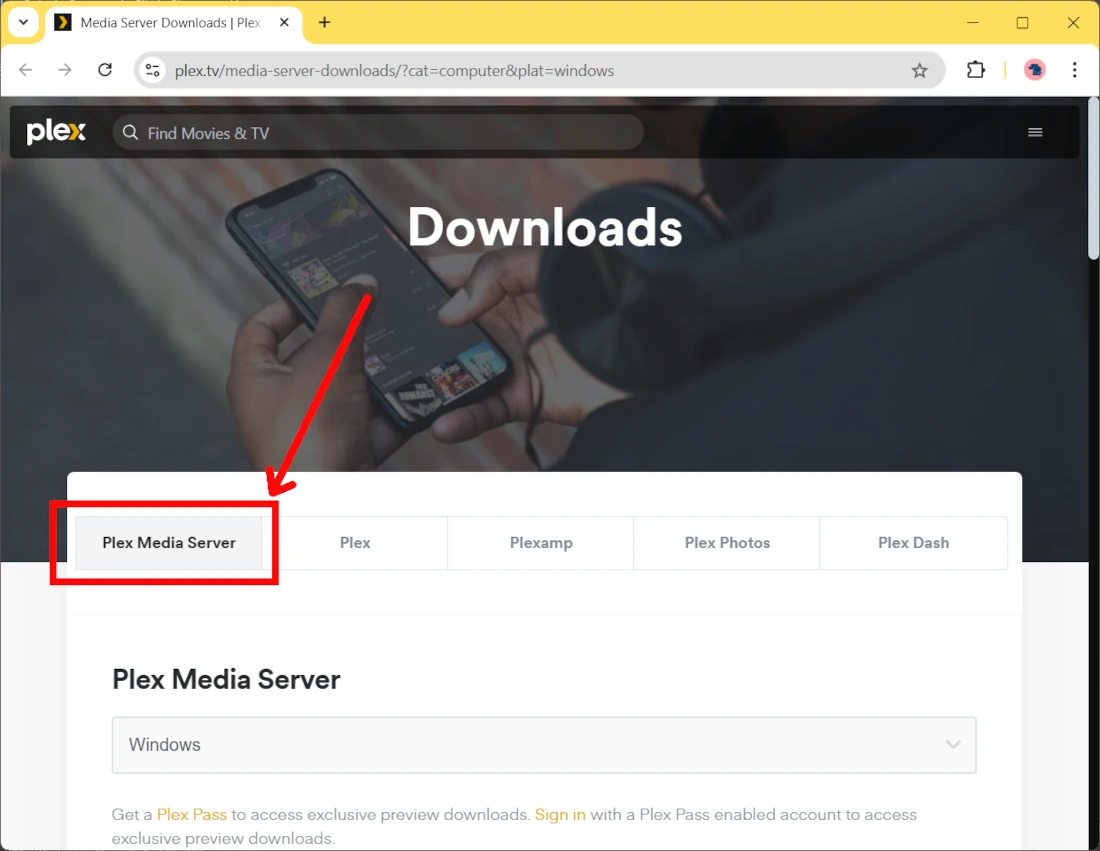
With your favourite browser, go to the Plex Download page and make sure that the Plex Media Server button is selected:
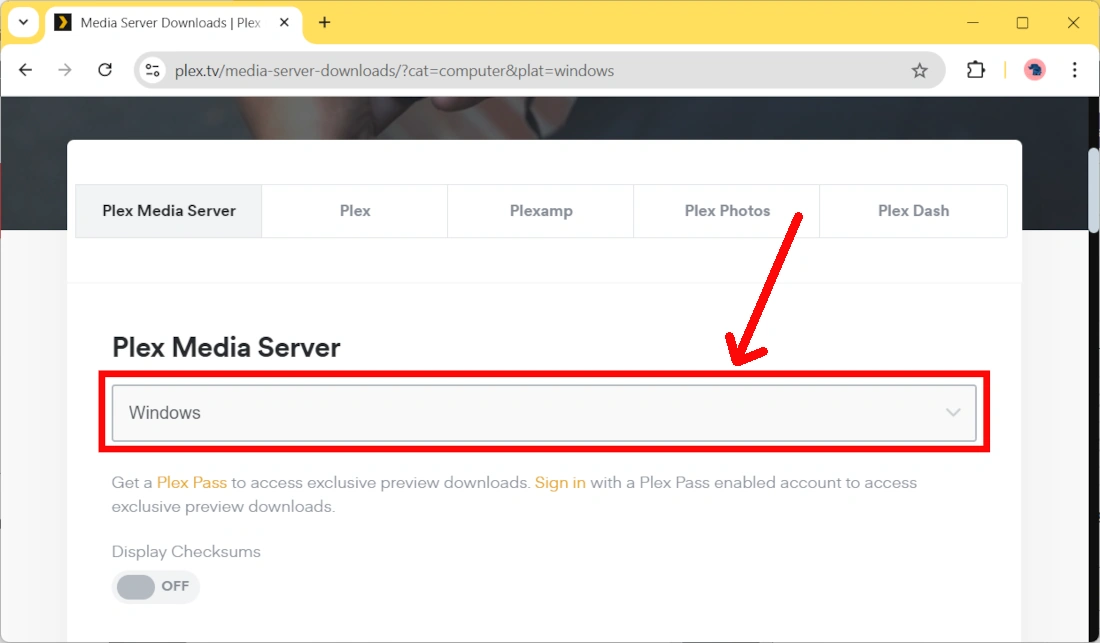
If you accessed the link from a PC with a different OS than Linux, you should change the OS selection from the platform selector highlighted in the following picture:
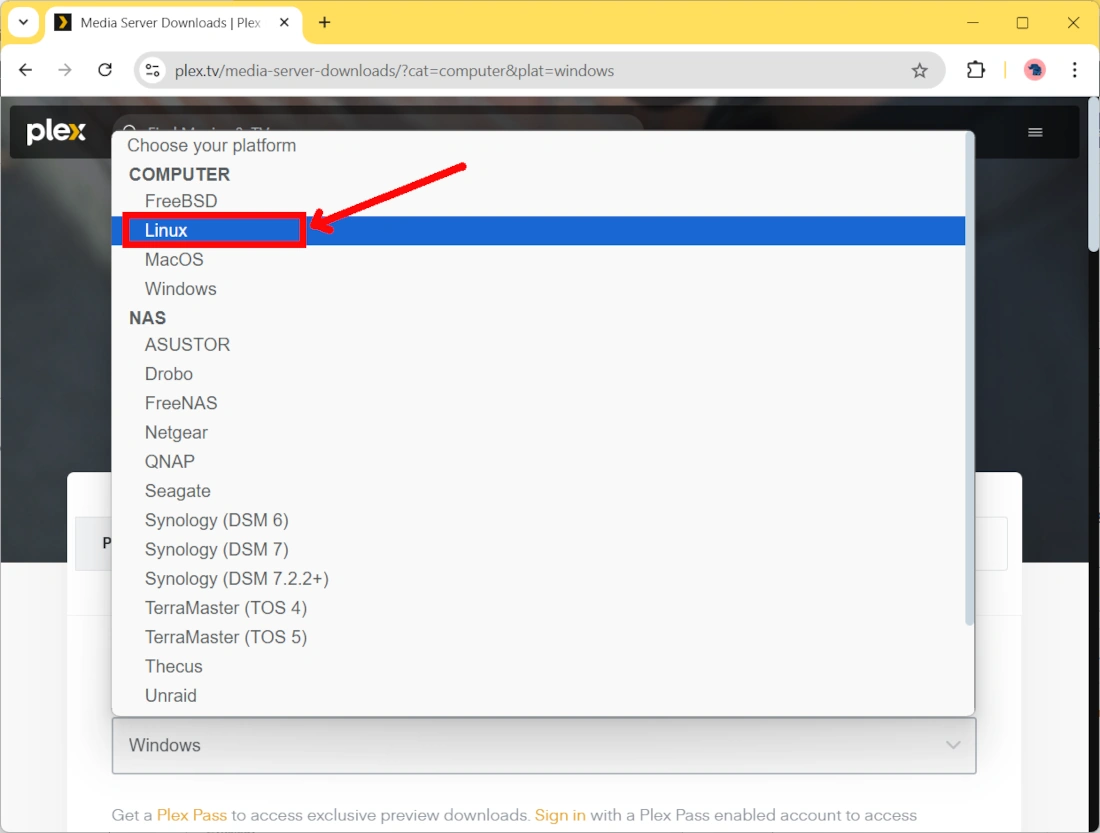
By clicking it, please select the “Linux” distribution:
Now, please identify the “Choose Distribution” button on the same page:
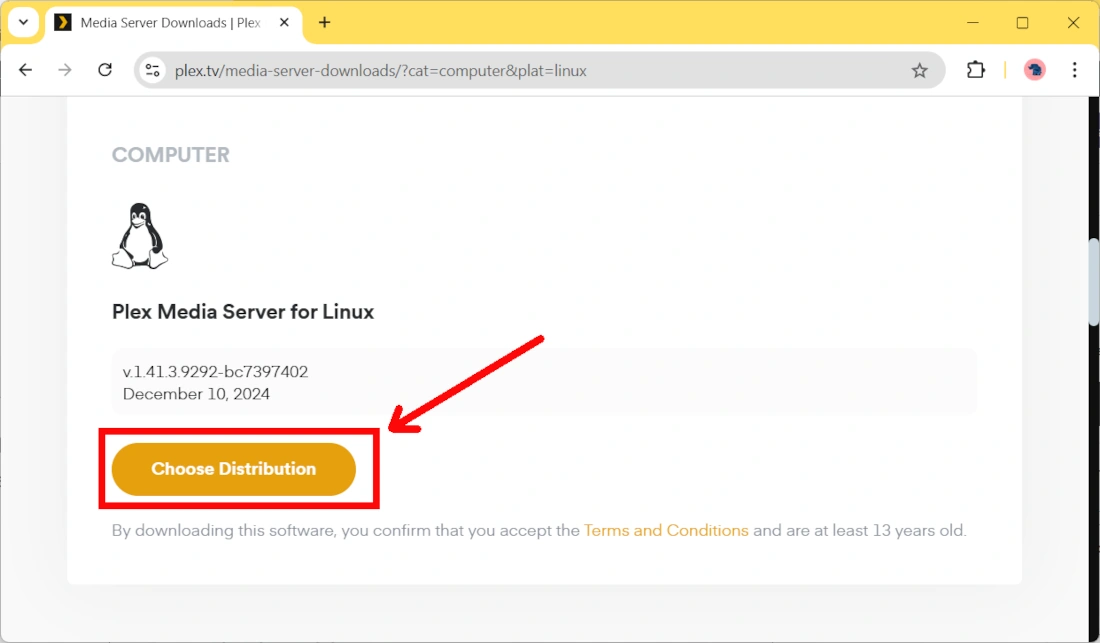
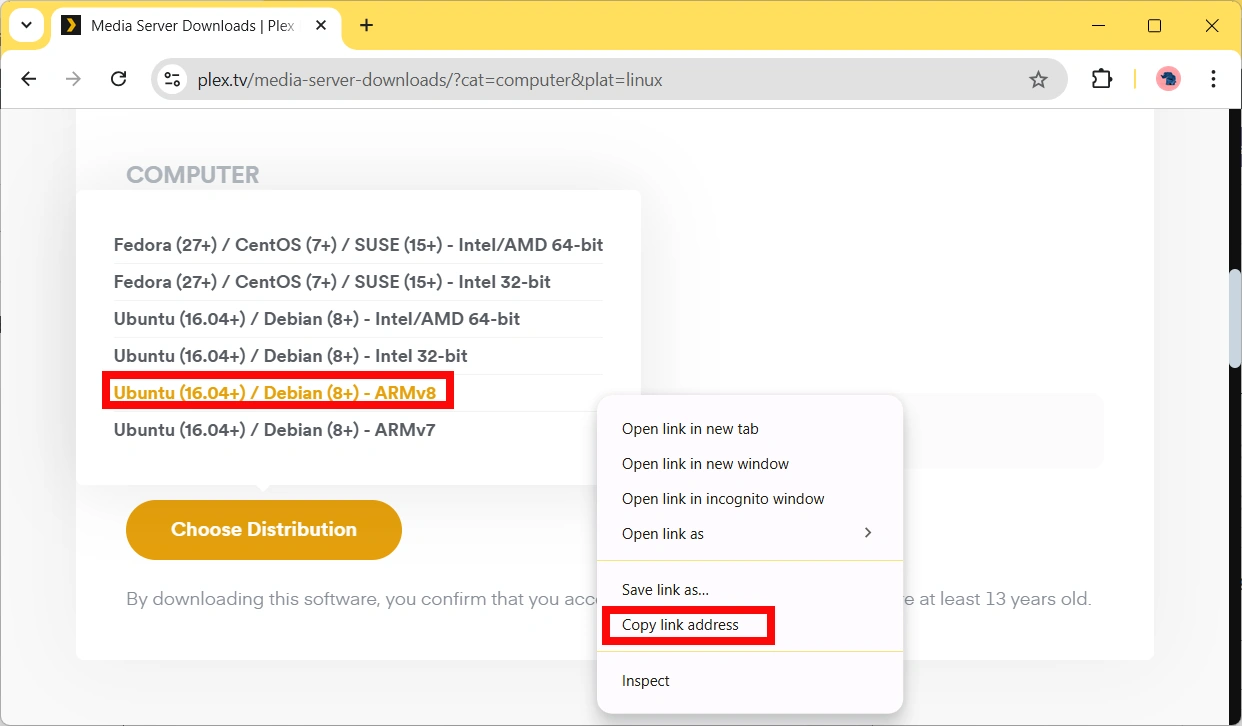
Click this button. It will open a new drill-down menù, where you can select the Plex distribution for your CPU architecture (ARMv8 in my case).
By clicking it with the right button of your mouse, you will be able to copy the link address in your PC memory:
Back to the Raspberry PI terminal, write “wget” and paste the copied link. You will have something like the following:
wget https://downloads.plex.tv/plex-media-server-new/1.41.3.9292-bc7397402/debian/plexmediaserver_1.41.3.9292-bc7397402_arm64.debIf this doesn’t work, you can also use my wget terminal command to get the Plex Server v.1.41 installer for ARMv8.
Install Plex on Raspberry PI
As said, the previous command will download the official Plex Installer, a “.deb” file in your current folder. Use the dpkg command with the “-i” option (from sudo) to start the installation (please replace the “.deb” filename with the one you just downloaded, also available in your Raspberry PI terminal with the ls command):
sudo dpkg -i plexmediaserver_1.41.3.9292-bc7397402_arm64.debPlease wait for the installation process to end.
now, you can use your Raspberry PI’s IP address (followed by “:32400/web”) in your browser to start the setup process (in the following screens I’ll use “192.168.1.218” as this is my RPI address, so my URL will be “http://192.168.1.218:32400/web”).
At the very first screen you could be asked to login with your Plex account, while it warns that you are running Plex Server on a localhost (not on Plex online services).
The next screen starts showing briefly how Plex works. When ready, click the “GOT IT!” button at the bottom part of this page:

The next screen allows you to configure your server name and set if you want to enable remote access from the outside home network. you can change these settings according to your preferences. When finished, please click the “next” button:

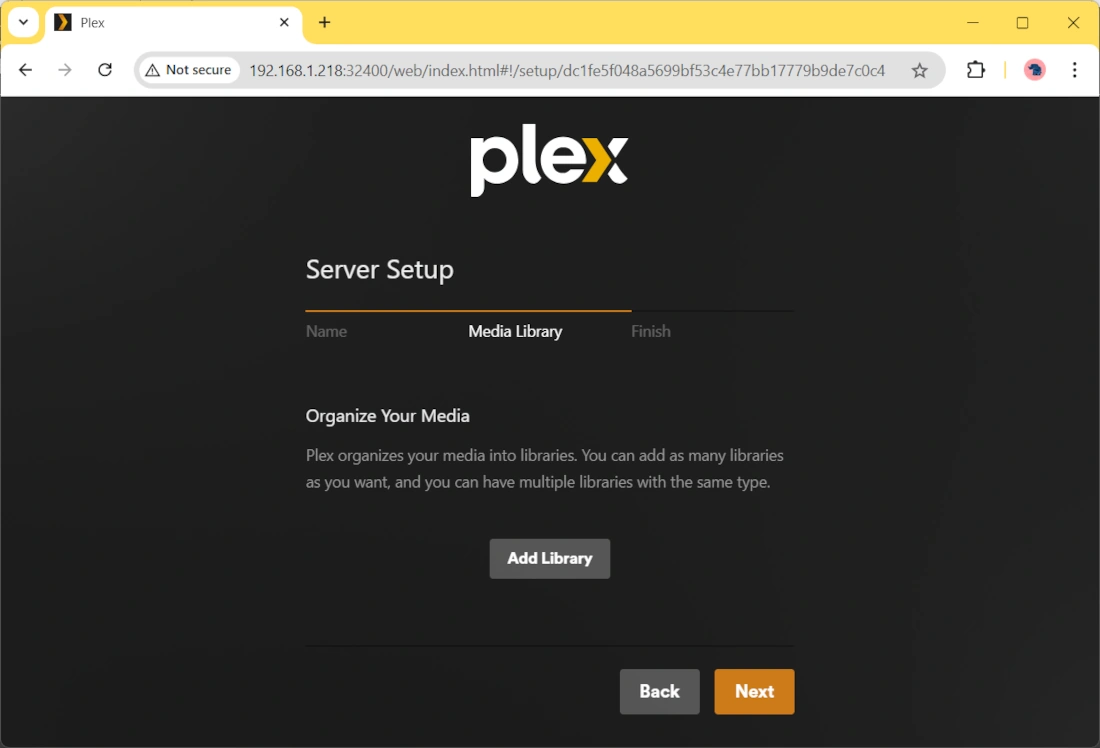
The following screen allows you to add your libraries. You can also add them later. When ready, click “Next”:
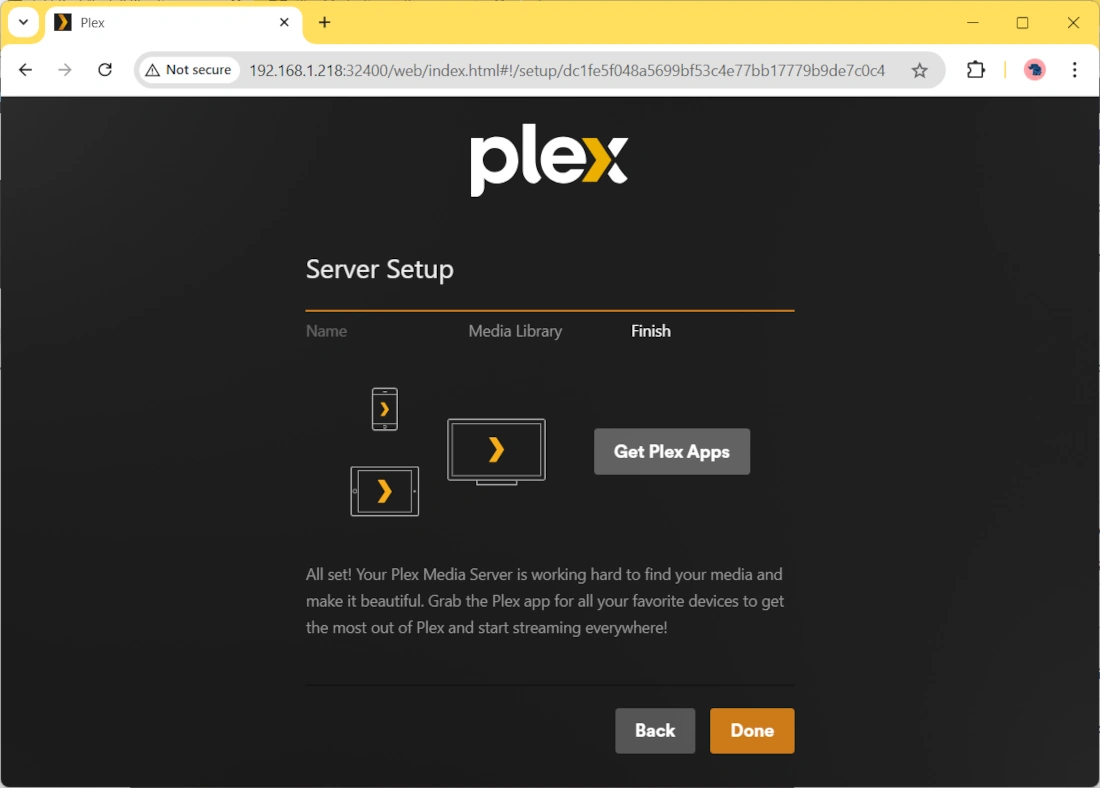
The final page from this brief wizard notifies you that you can enrich your Plex experience with the Plex app universe (available from the related button). It’s more about Plex apps that you can install in other devices. Please click the “Done” button:
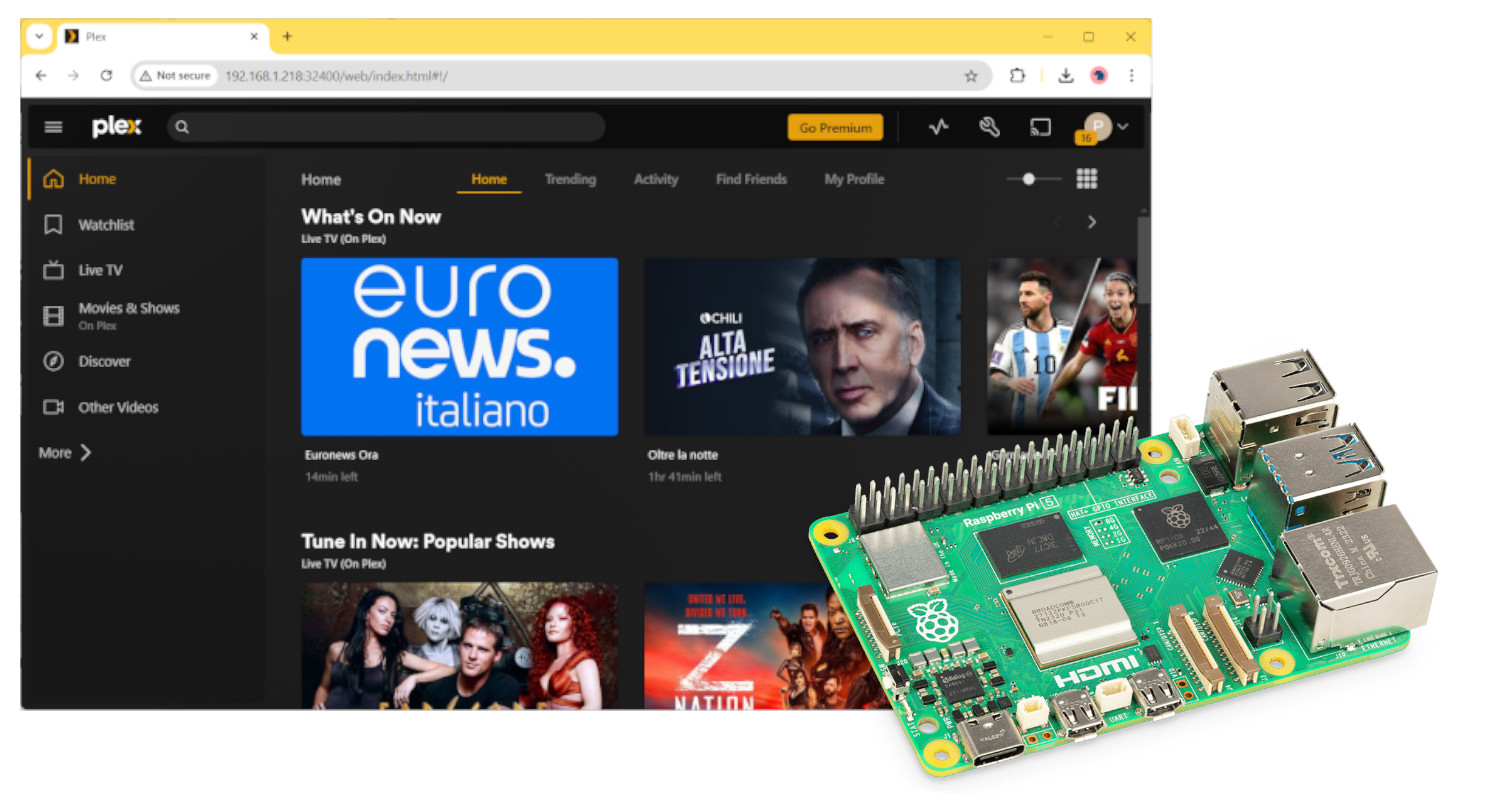
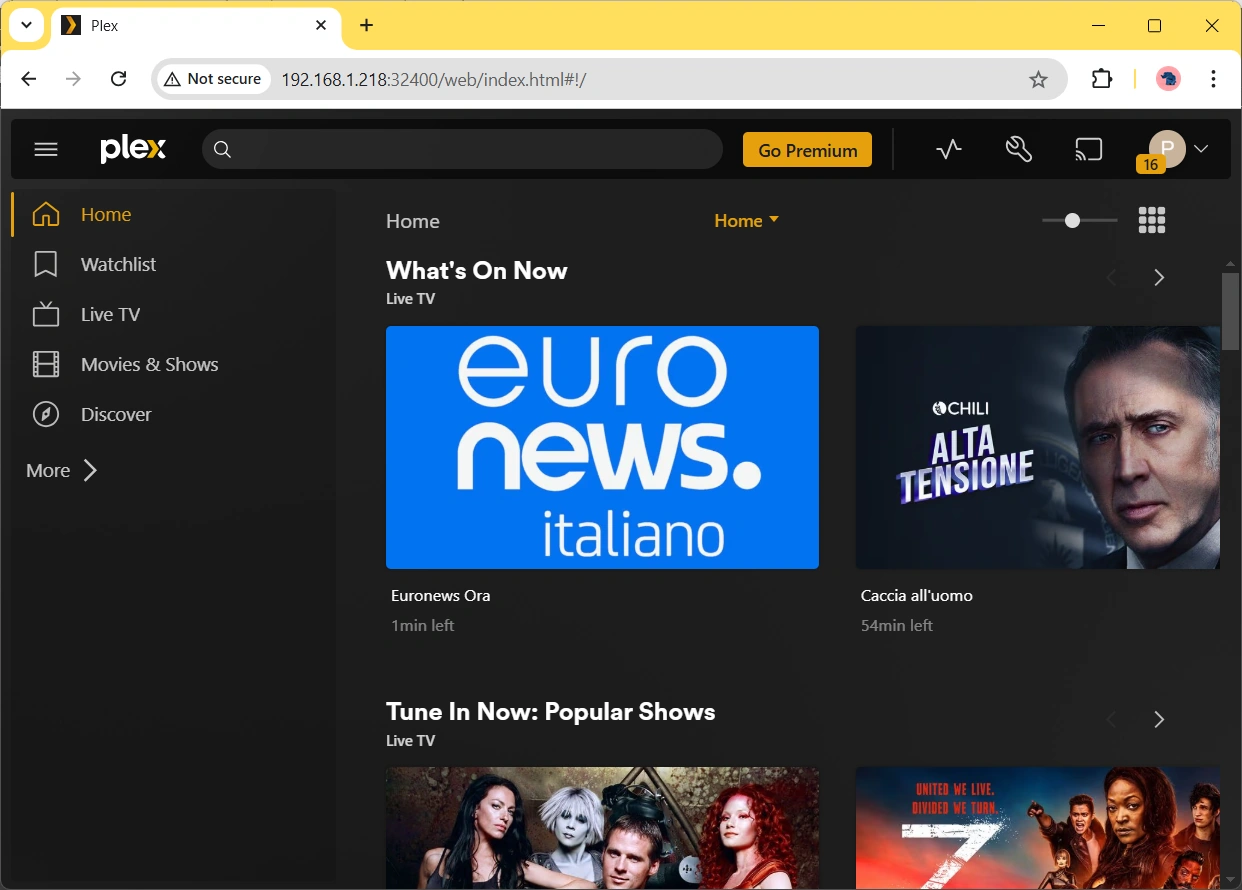
You will be finally redirected to Plex Server home page:
Adding Libraries to Plex on Raspberry PI
When you add your files to the Raspberry PI’s storage, you will need to make them available on your Plex server. To do this, you must add “libraries” to Plex.
Libraries for Plex are collections of media files with common file types. Each library contains a specific media type (for example movies, music, photos, and so on). Moreover, each library can include one or more folders where these files are stored.
To give you an example, we’ll create a folder in our Raspberry Pi storage with a video file and set a Video library in Plex.
Please note that you should create your libraries folders in the /var/lib/plexmediaserver/Library/ folder of your Raspberry PI to avoid permission issues.
From the Raspberry PI’s terminal, let’s create a specific folder named generically “myvideos”. Let’s move to the Plex libraries folder and create our one. Then enter it:
cd /var/lib/plexmediaserver/Library/
sudo mkdir myvideos
cd myvideos
Now, you can get a free sample video (for example from the free videvo.net service) directly in this folder with the following command:
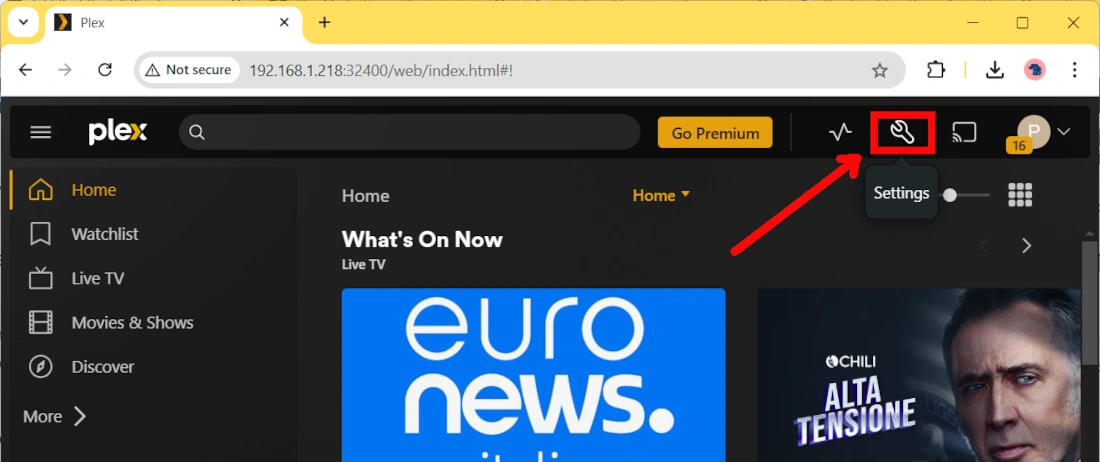
sudo wget https://v5.cdnpk.net/videvo_files/video/premium/video0510/large_watermarked/DAYLIGHT_HAMBURG_AERIAL_00048_preview.mp4Back to the Plex window in your browser, please click the “Settings” link:
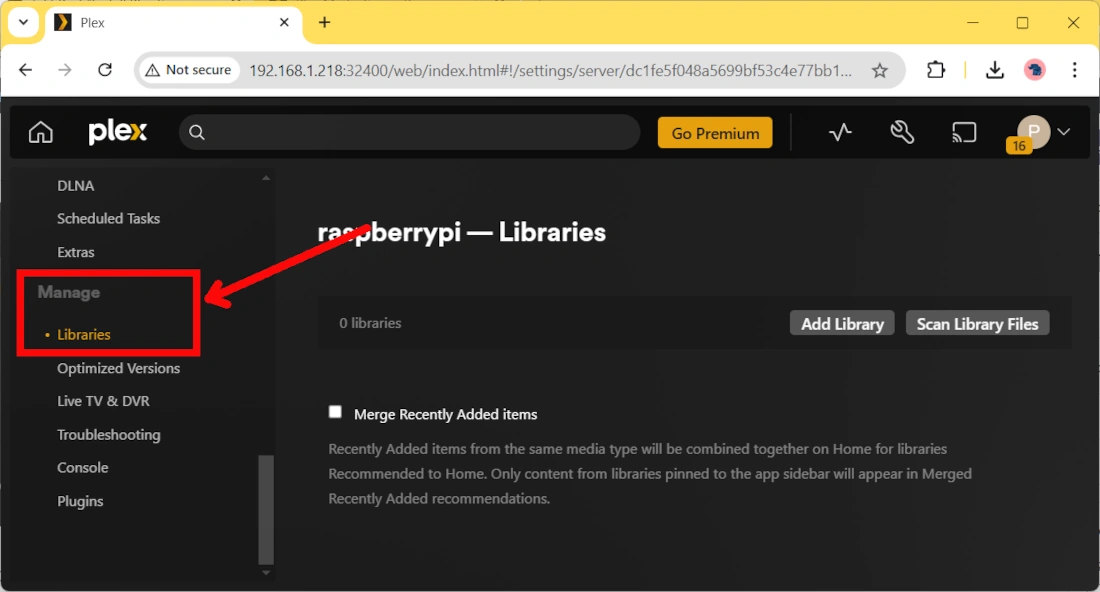
From there, please click the “libraries” link in the Manage section from the left sidebar. Note that the menu includes 2 “library / libraries” links, you must use the one inside the “Manage” section:
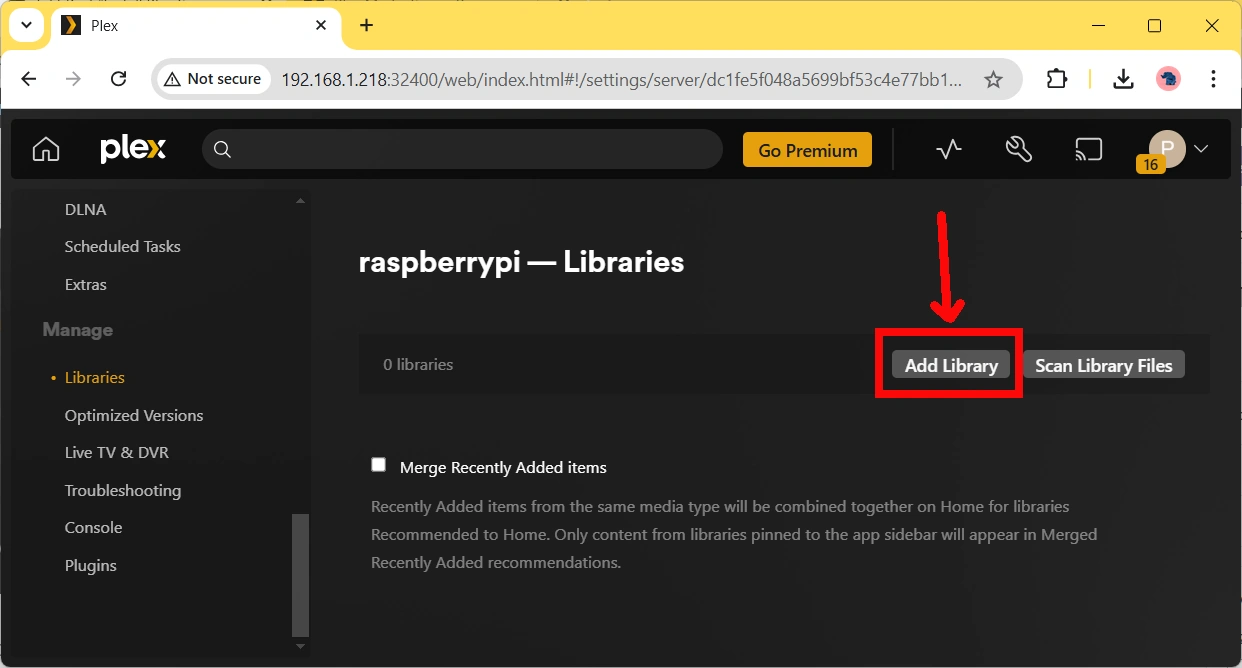
You can now use the “Add Library” button to open the libraries wizard:
The “Add library” wizard will ask you to select the media type first. Please select “Other Videos”. This will also unhide the name of the library and the Language. You can leave them as they are:
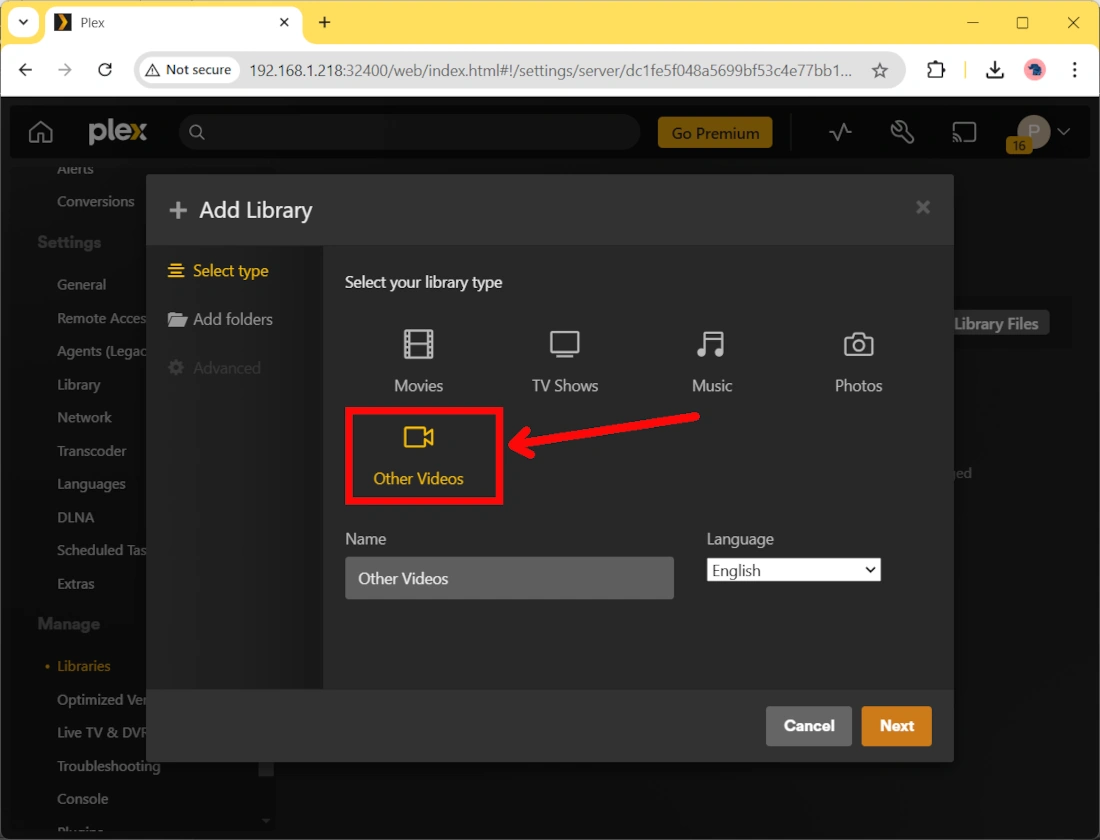
Please click the “Next” button.
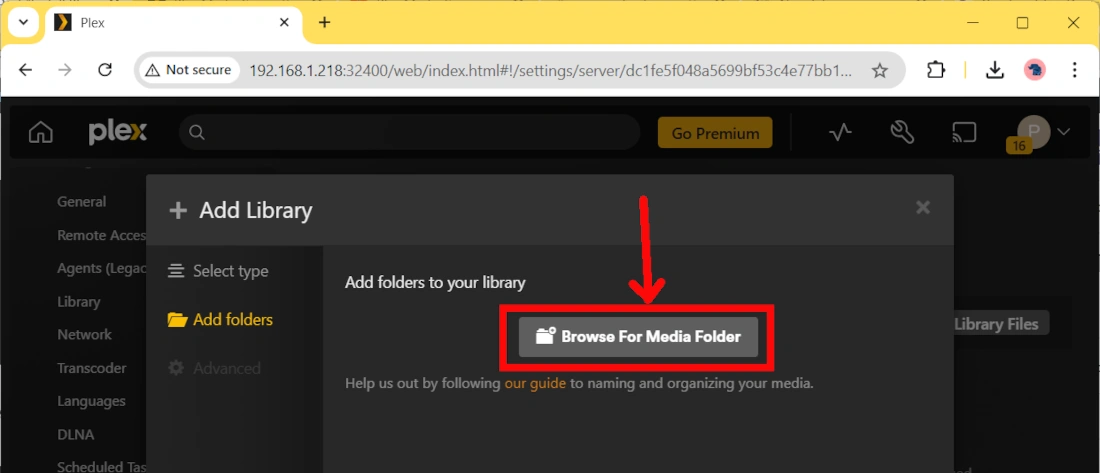
In the following page, please click the “Browse For Media Folder” button:
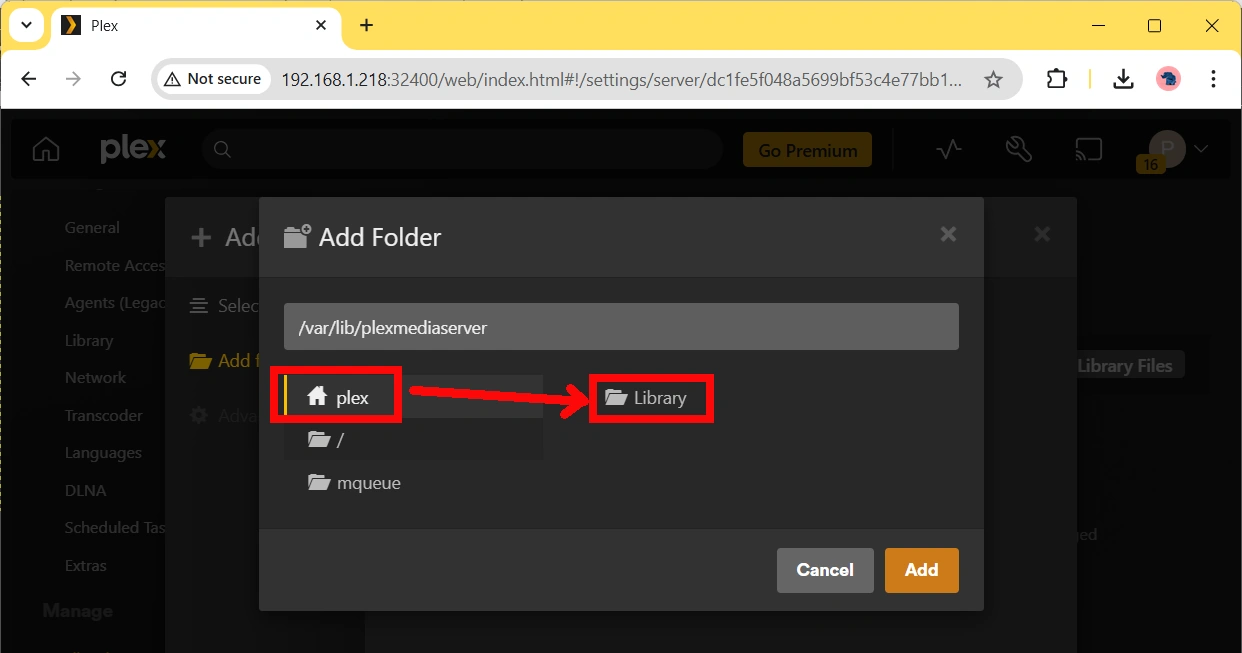
This will show you a file browser. By default you show already be in the “plex” home folder (highlighted on the left side of the following picture). Please click the “Library” link (highlighted on the right side of the following picture) to enter the related folder:
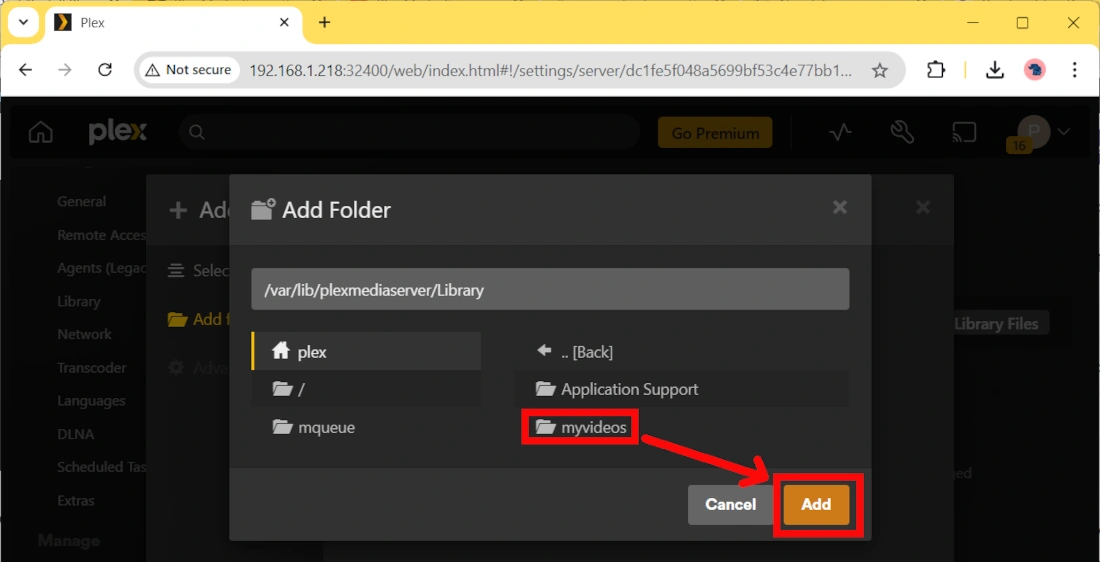
Now you should see the “myvideos” folder we created previously. Please click it and then the “Add” button:
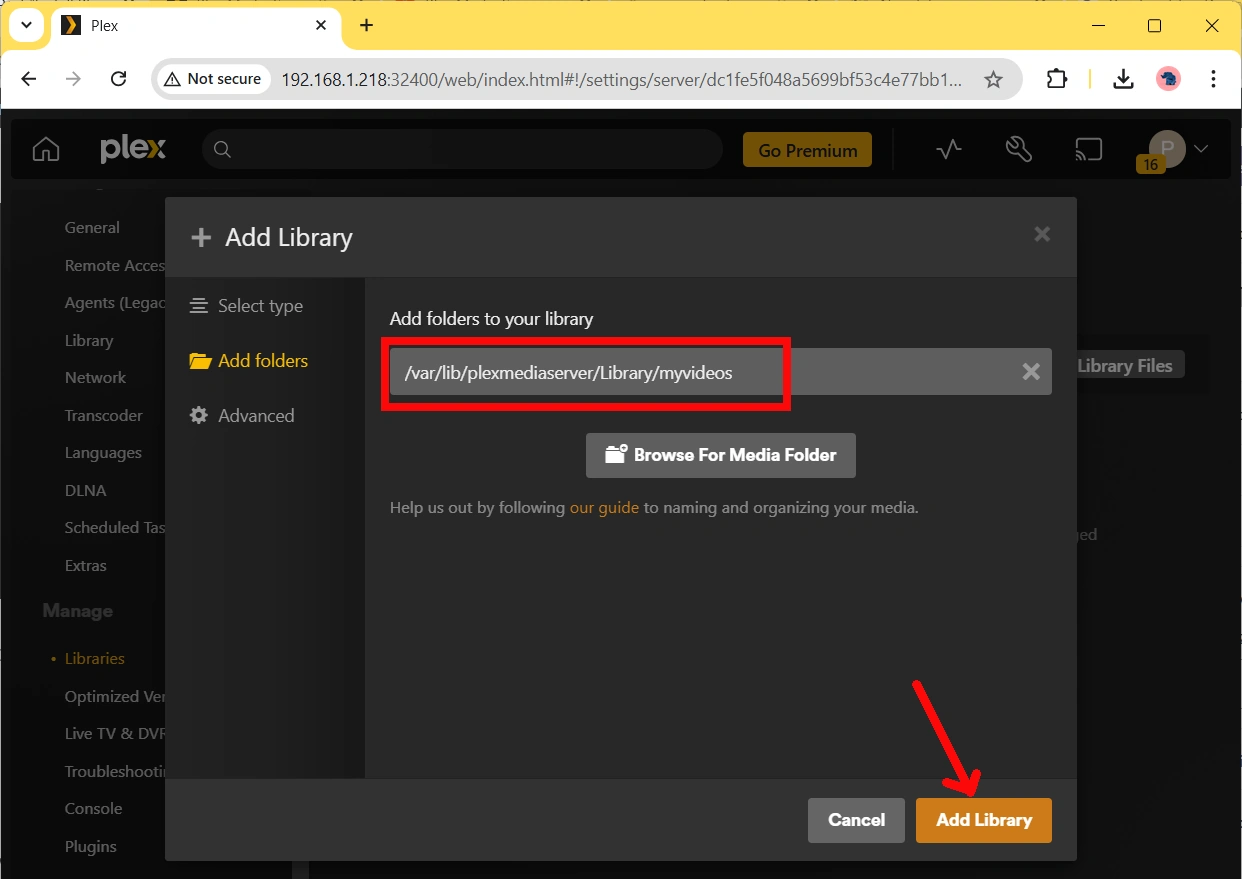
The following picture will confirm the selected folder. You can now click the “Add library” button:
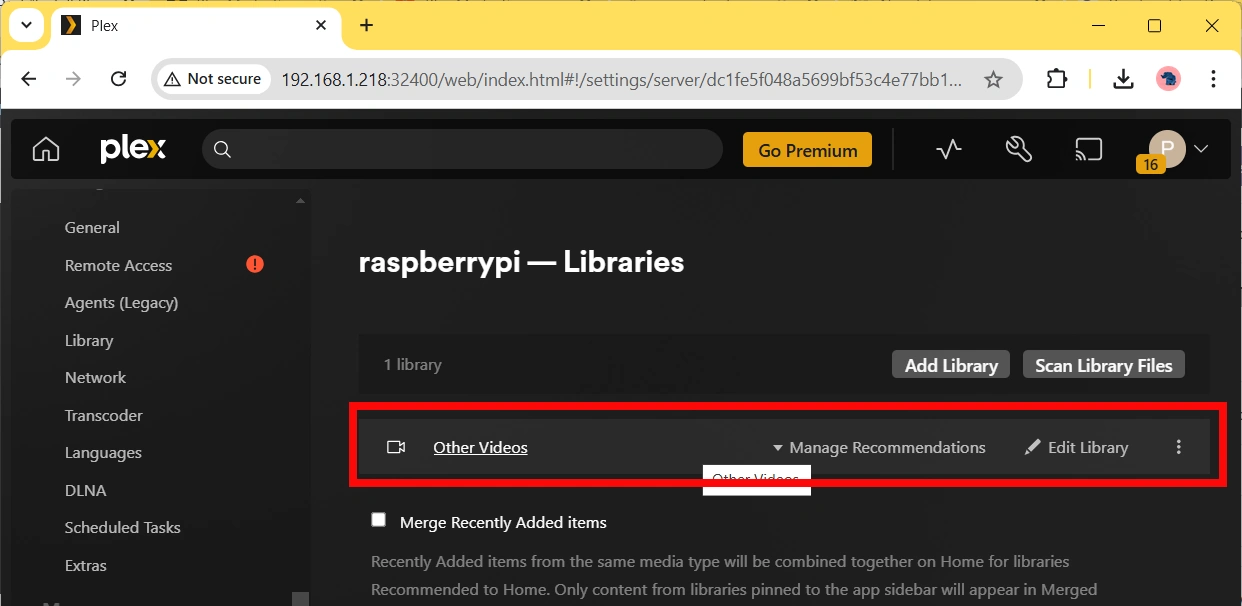
The new library is now added and you should see it in the “Manage” -> “Libraries” menu. By moving your mouse over the item, Plex will unhide the options to manage this library:
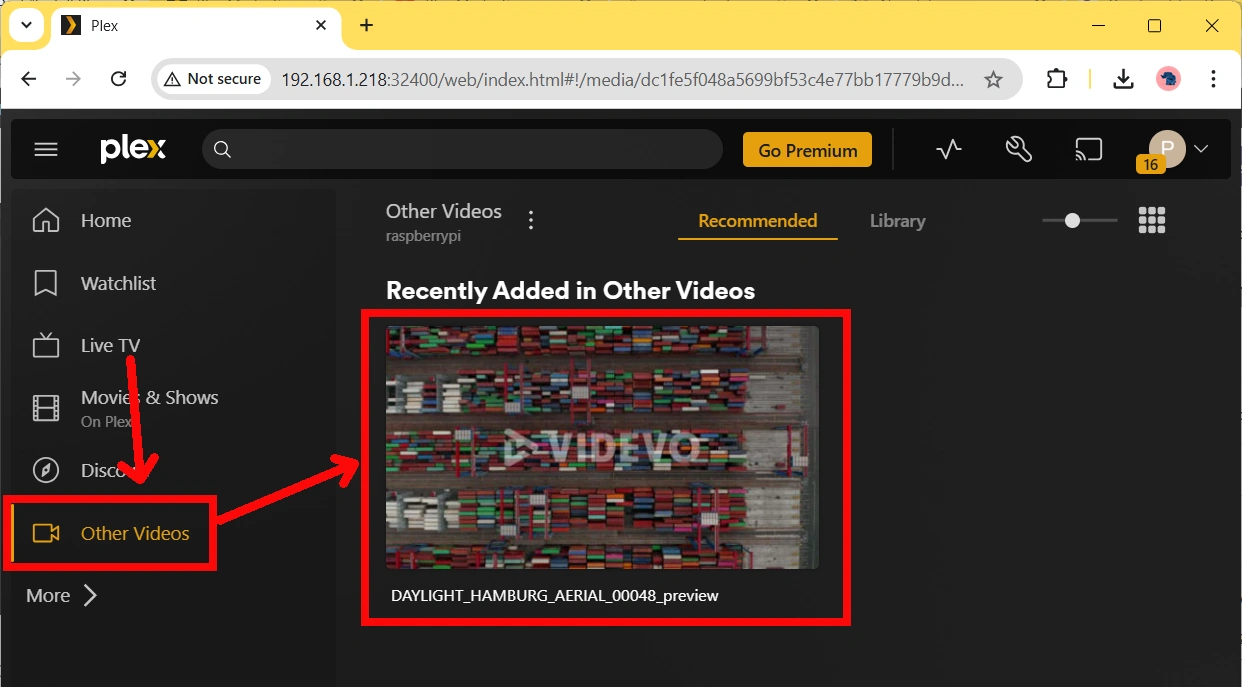
Back to the Plex home page, you will find the added clip inside the “Other Videos” section:
Plex Official Docs
If you need more info on how to use Plex Server, please refer to the official Plex Docs pages.
What’s Next
Interested in what you can do with your Raspberry PI? Take a look at my Raspberry PI tutorials and subscribe my newsletter!
Enjoy!

Open source and Raspberry PI lover, writes tutorials for beginners since 2019. He's an ICT expert, with a strong experience in supporting medium to big companies and public administrations to manage their ICT infrastructures. He's supporting the Italian public administration in digital transformation projects.
![]()
![]()
![]()
![]()
![]()
![]()
![]()


