

Last Updated on 4th August 2026 by peppe8o
This guide will provide you with a very simple way to get a personal cloud with Nextcloud on Raspberry Pi.
I’ll use my Raspberry Pi 4 Model B (4GB RAM). On the software side, we’ll use Docker to leverage the enhancements obtained from a container platform.
Nextcloud Versions
When choosing Nextcloud, you will need to opt between 2 possible versions. The first is the classic version, with a minimal set of packages. At the same time, the other option is the Nextcloud AIO (All-In-One), where you will find some packages already installed (in the form of Docker microservices) and ready to be used.
Before showing you how to install them, let’s look at the performance differences on Raspberry Pi. I’ve measured the resource usage from the two versions. For the classic one, instead of installing it directly on Raspberry Pi, I’ve tested the Docker Official image (maintained by the community with the minimal packages set).
Quick Comparison: Classic Nextcloud vs. Nextcloud AIO on Raspberry Pi
| Feature | 🛠️ Classic Nextcloud (LAMP/LEMP) | 🚀 Nextcloud AIO (Docker) |
|---|---|---|
| Setup Complexity | Low (if you use the Docker Image from the community) | Low (single docker-compose.yml + Web GUI) |
| Maintenance & Updates | Manual with Docker containers | Automated with one-click updates & automatic backups |
| Built-in Modules | Requires manual installation for Talk, Office, etc. | Pre-configured microservices toggled via Web UI |
| Idle Memory Footprint | Low (~300 MB – 600 MB RAM) | Moderate (~1.5 GB – 1.8 GB RAM with full suite) |
| Idle CPU Load | Very Low (< 5% idle) | Low to Moderate (< 15% overall idle) |
| Total Storage Used (OS + Images) | Minimal (~3 GB – 5 GB initial footprint) | High (~23 GB total: ~15 GB uncompressed Docker images + OS) |
| Backup System | Custom scripts required | Native encrypted backups via BorgBackup |
The values for Nextcloud AIO on Raspberry Pi 4 in the previous table come with an installation including EuroOffice and Talk. Besides the Nextcloud modules, with AIO I also used Tailscale to expose it in my Tailscale private network.
It is important to note the minimal hardware requirements recommended by Nextcloud for the AIO version, as the installed modules can vary the resource usage:
When any optional container is enabled, at least 2GB RAM, a dual-core CPU and 40GB system storage are required.
When enabling ClamAV, Nextcloud Talk Recording-server or Fulltextsearch, at least 3GB RAM are required.
For Talk Recording-server additional 2 vCPUs are required.
When enabling everything, at least 5GB RAM and a quad-core CPU are required.
Recommended are at least 1GB more RAM than the minimal requirement.
With Nextcloud AIO installed in my Raspberry Pi 4 (4GB RAM), once all microservices were healthy and active, the total RAM usage hovered around 1.70 GB, taking up roughly 46% of the total memory. Overall idle CPU utilisation remained safely below 15%.
Here is the exact breakdown sorted by container memory consumption:
CONTAINER NAME                  CPU %     MEM USAGE / LIMIT     MEM %
nextcloud-aio-eurooffice        4.67%     725.3MiB / 3.707GiB   19.11%
nextcloud-aio-nextcloud         6.34%     329.2MiB / 3.707GiB    8.67%
nextcloud-aio-imaginary         0.16%     226.9MiB / 3.707GiB    5.98%
nextcloud-aio-talk              0.12%      91.8MiB / 3.707GiB    2.42%
nextcloud-aio-whiteboard        0.24%     75.71MiB / 3.707GiB    1.99%
nextcloud-aio-apache            0.17%      69.8MiB / 3.707GiB    1.84%
nextcloud-aio-mastercontainer   0.10%     54.22MiB / 3.707GiB    1.43%
nextcloud-aio-database          1.26%      46.3MiB / 3.707GiB    1.22%
nextcloud-aio-talk-recording    0.10%      39.7MiB / 3.707GiB    1.05%
nextcloud-tailscale             0.09%     36.61MiB / 3.707GiB    0.96%
nextcloud-aio-notify-push       0.08%     8.258MiB / 3.707GiB    0.22%
nextcloud-aio-redis             0.45%     5.664MiB / 3.707GiB    0.15%
Domain Name Requirements
The classic Nextcloud installation can also run locally, using a local IP as URL in your browser (like, for example, 192.168.7.107).
When using Nextcloud AIO, on the other hand, you must also use a valid domain name to get it working, and you can’t use a raw IP address. To make it free, you have a few options: you can use a dynamic DNS (like, for example, a No-IP service) or you can use Tailscale.
In the first case, you must set up port forwarding in your home router, and it will work only if your Internet Service Provider offers you a public IP.
In this tutorial, I will focus more on the second method (with Tailscale), as in this way you don’t need any public IP and any port forwarding settings in your home router.
What We Need
As usual, I suggest adding from now to your favourite e-commerce shopping cart all the needed hardware, so that at the end you will be able to evaluate overall costs and decide if to continue with the project or remove them from the shopping cart. So, hardware will be only:
- Raspberry PI Computer Board (including a proper power supply or using a smartphone micro USB charger with at least 3A)
- High-speed microSD card (at least 64 GB, at least class 10)
Step-by-Step Guide
Prepare the OS environment
The first step is to install the Raspberry PI OS Lite to get a fast and lightweight operating system (headless). If you need a desktop environment, you can also use the Raspberry PI OS Desktop, in which case you will work from its terminal app. In both cases, you must install the 64-bit release. Please find the differences between the 2 OS versions in my Raspberry PI OS Lite vs Desktop article.
Please make sure that your Operating System is up to date. From your terminal, use the following command:
sudo apt update -y && sudo apt full-upgrade -yWe are now ready to install Docker on Raspberry Pi (please use the linked tutorial).
Install Classic Nextcloud on Raspberry Pi
If you want to use Nextcloud AIO, please skip this chapter and use the following one.
Please create a folder in your Raspberry Pi where we’ll store all the configuration files:
mkdir ~/nextcloud/
cd ~/nextcloud/
Please create the Docker Compose file to install the classic Nextcloud:
nano docker-compose.yamlFill it with the following content. Please remember to change the bolded passwords with your preferred:
services:
  db:
    image: mariadb:latest
    restart: unless-stopped
    command: --transaction-isolation=READ-COMMITTED --log-bin=binlog --binlog-format=ROW
    volumes:
      - ./db:/var/lib/mysql
    environment:
      - MYSQL_ROOT_PASSWORD=ncpassword
      - MYSQL_PASSWORD=ncpassword
      - MYSQL_DATABASE=nextcloud
      - MYSQL_USER=nextcloud

  app:
    image: nextcloud
    restart: unless-stopped
    ports:
      - 8080:80
    links:
      - db
    volumes:
      - ./nextcloud:/var/www/html
    environment:
      - MYSQL_PASSWORD=ncpassword
      - MYSQL_DATABASE=nextcloud
      - MYSQL_USER=nextcloud
      - MYSQL_HOST=db
Save and close.
You can perform the installation process with the following terminal command:
docker compose up -dYou will be able to monitor the installation process by typing:
docker compose logs -fOnce the initialisation has been completed, open with your browser the address http://<<YOUR_RPI_IP_ADDRESS>>:8080 and follow the instructions shown there.
Install the Nextcloud AIO on Raspberry Pi
Please note that the Nextcloud AIO installation will require around 2 hours to download a long list of container images. So, I suggest starting this procedure only when you have enough time to deal with this process.
Step 1. Before Starting the Installation Process
With my Raspberry PI 4 model B (4GB RAM), I experienced random crashes when downloading the EuroOffice image. To fix this problem, I suggest setting the Swap Memory of Raspberry PI (with the linked tutorial), changing it to 4GB (4096 MB).
Step 2. Install Nextcloud AIO MasterContainer
The Nextcloud AIO master container is the main container which orchestrates the whole process.
As said, Nextcloud AIO can’t work on a raw IP address and requires a complete DNS name. Please use my How to Use Tailscale on Raspberry PI with Docker to initialise your Tailscale dashboard and authenticate the Raspberry Pi in it. Please make sure to accept the subnet route in this step.
After this, you can delete the old Tailscale container:
docker compose downThis will leave a tailscale folder in the current folder. Let’s create a new folder for Nextcloud and move the tailscale folder there:
mkdir ~/nextcloud/
sudo mv tailscale ~/nextcloud/
cd ~/nextcloud/
Create a new Docker Compose file to install Nextcloud AIO:
nano docker-compose.yamlPlease fill it with the following content. Please remember to change the advertise route to the one from your home (usually setting to 0 the last part of the IP address of your Raspberry Pi) and your Raspberry Pi’s IP address. You can identify these parts in the following code lines as they’re bolded:
services:
  tailscale:
    image: tailscale/tailscale:latest
    hostname: nextcloud-aio
    container_name: nextcloud-tailscale
    network_mode: host
    environment:
      - TS_EXTRA_ARGS=--advertise-routes=192.168.7.0/24
      - TS_STATE_DIR=/var/lib/tailscale
      - TS_USERSPACE=false
    volumes:
      - ./tailscale/state:/var/lib/tailscale
    devices:
      - /dev/net/tun:/dev/net/tun
    cap_add:
      - net_admin
    restart: unless-stopped

  nextcloud-aio-mastercontainer:
    dns:
      - 100.100.100.100  # Tailscale Magic DNS (leave it as is)
      - 192.168.7.107    # your Raspberry PI's IP address change it with your own
      - 1.1.1.1          # Fallback DNS
    environment:
      - APACHE_PORT=11000
      - APACHE_IP_BINDING=127.0.0.1
      - SKIP_DOMAIN_VALIDATION=true
    image: ghcr.io/nextcloud-releases/all-in-one:latest
    init: true
    restart: unless-stopped
    container_name: nextcloud-aio-mastercontainer # do not change this line!
    volumes:
      - nextcloud_aio_mastercontainer:/mnt/docker-aio-config
      - /var/run/docker.sock:/var/run/docker.sock:ro
    network_mode: bridge
    ports:
      - "80:80"
      - "8080:8080"
      - "8443:8443"

volumes:
  nextcloud_aio_mastercontainer:
    name: nextcloud_aio_mastercontainer
Save and close.
As you can see from the previous compose file, to prevent proxy connection mismatches (such as HTTP 502 Bad Gateway errors caused by binding Apache to 127.0.0.1), Tailscale must run in network_mode: host.
Now, please run the following command to start the first stage of Nexcloud AIO installation:
docker compose up -dAfter Docker pulls the container images and creates the containers, you can check the installation progress with the terminal command:
docker compose logs -fThis command should give you something like the following:
(...)
nextcloud-aio-mastercontainer  | If your server has port 80 and 8443 open and you point a domain to your server, you can get a valid certificate automatically by opening the Nextcloud AIO Interface via:
nextcloud-aio-mastercontainer  | https://your-domain-that-points-to-this-server.tld:8443
nextcloud-aio-mastercontainer  | [03-Aug-2026 15:44:45] NOTICE: fpm is running, pid 167
nextcloud-aio-mastercontainer  | [03-Aug-2026 15:44:45] NOTICE: ready to handle connections
nextcloud-tailscale            | 2026/08/03 15:44:56 control: controlhttp: forcing port 443 dial due to recent noise dial
nextcloud-tailscale            | 2026/08/03 15:44:58 localapi: [POST] /localapi/v0/debug
nextcloud-tailscale            | boot: 2026/08/03 15:44:58 Startup complete, waiting for shutdown signal
(...)
Step 3. Linking Tailscale Serve to Apache
Because Apache listens locally on port 11000, run the following command to proxy HTTPS traffic inside your Tailnet:
docker exec -it nextcloud-tailscale tailscale serve --bg --https=443 http://127.0.0.1:11000Step 4. Open the Nextcloud Installation Wizard
Now, Nextcloud is available in your private Tailscale network. This will use a specific domain name, which you can get from the Tailscale admin dashboard (opening the Machine details), or by running the following terminal command on your Raspberry PI:
docker exec nextcloud-tailscale tailscale status --json | python3 -c "import sys, json; print(json.load(sys.stdin)['Self']['DNSName'].rstrip('.'))"This command will return a specific URL, similar to the following:
pi@raspberry:~/nextcloud $ docker exec nextcloud-tailscale tailscale status --json | python3 -c "import sys, json; print(json.load(sys.stdin)['Self']['DNSName'].rstrip('.'))"

nextcloud-aio.tail5c0c0c.ts.net
In my case, the URL is nextcloud-aio.tail5c0c0c.ts.net.
The following installation process will require both the Raspberry Pi’s IP address (for phase 1) and this domain (for phase 2).
Step 5. Start the Nextcloud Wizard Phase 1 on Raspberry PI
In your browser, please use the Raspberry Pi’s IP address, with port 8080, to reach the first phase wizard. In my case, as my Pi’s IP address is 192.168.7.107, my URL will be http://192.168.7.107:8080.
Please note that the following page could give you a warning about the missing privacy certificate. You can proceed, as it will be automatically fixed in the following steps.
You will reach the first Nextcloud AIO setup page. Here you can copy the passphrase of your installation. Please copy it in a safe place, as it may be useful in the future for recovery actions, if required:
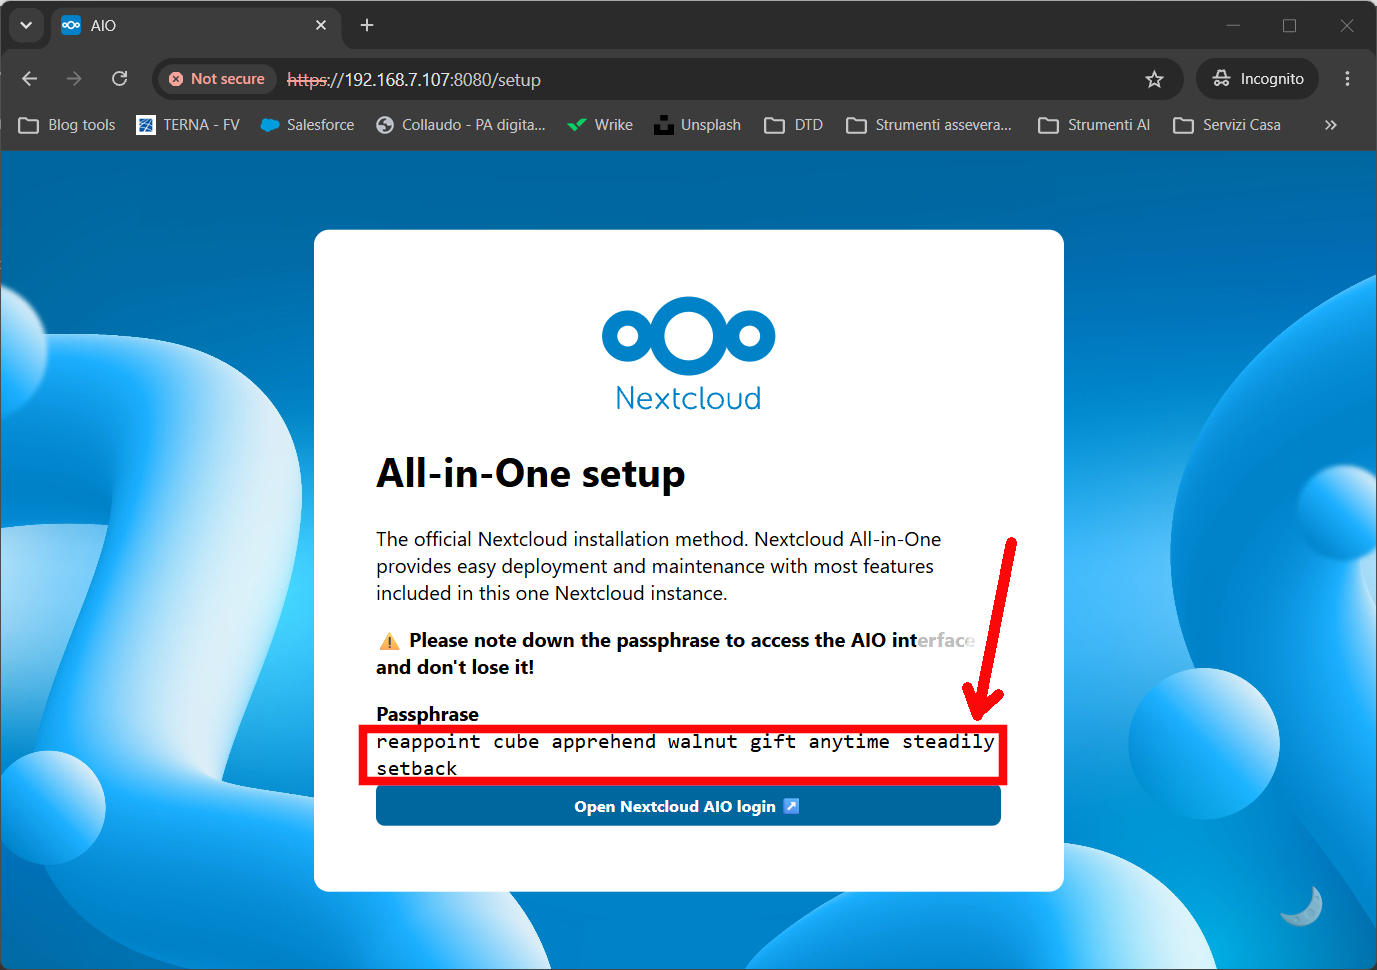
Then, please click the “Open Nextcloud AIO login” button.
On the following page, please use the previous passphrase for the very first login:
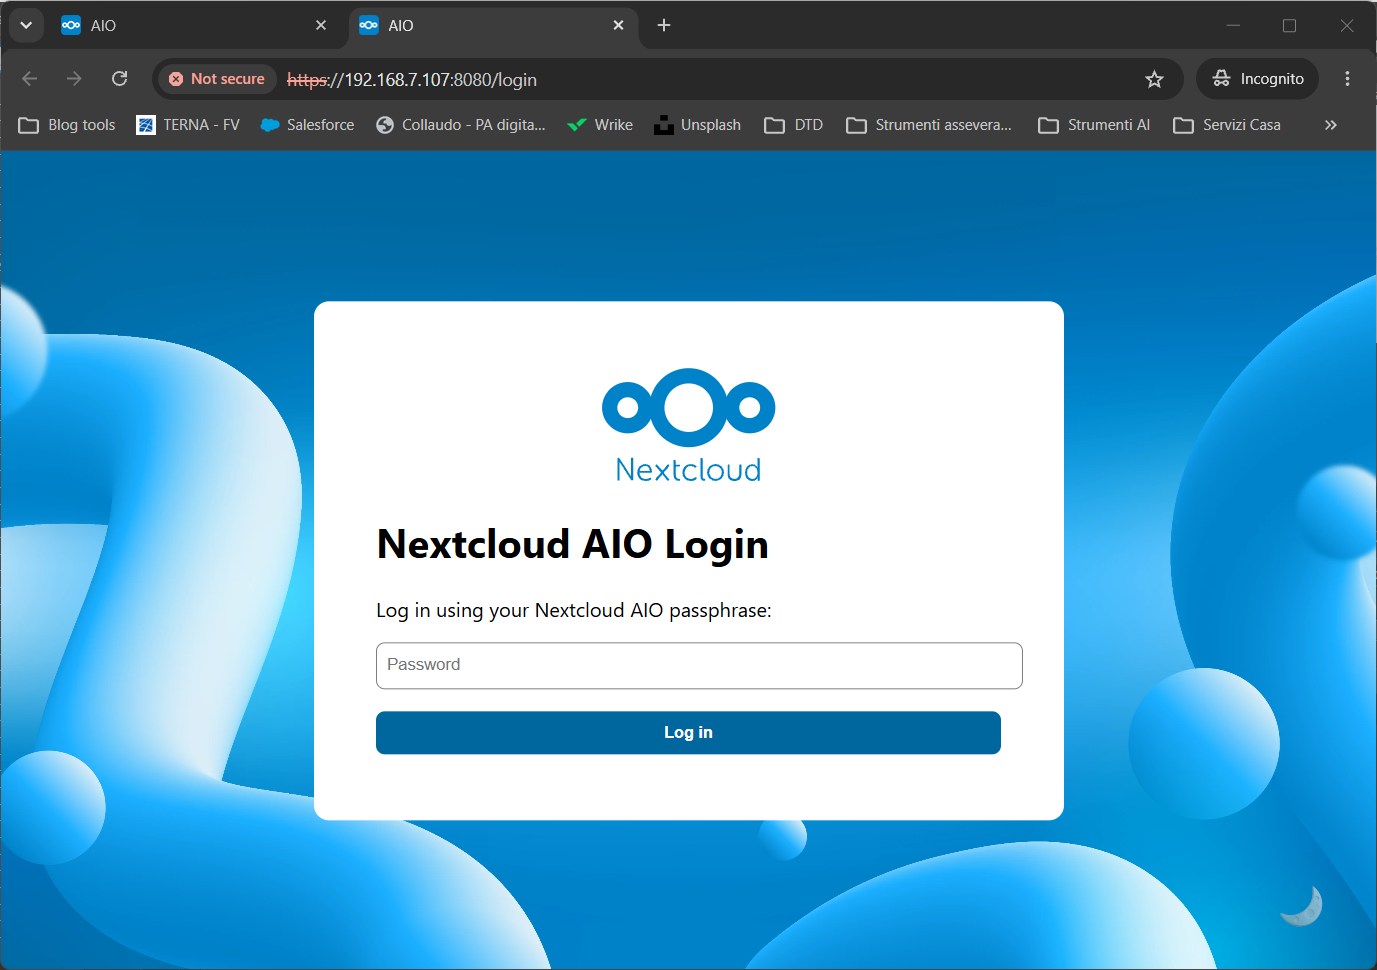
Now, you must paste the domain we got from Tailscale to the area highlighted in the following screenshot:
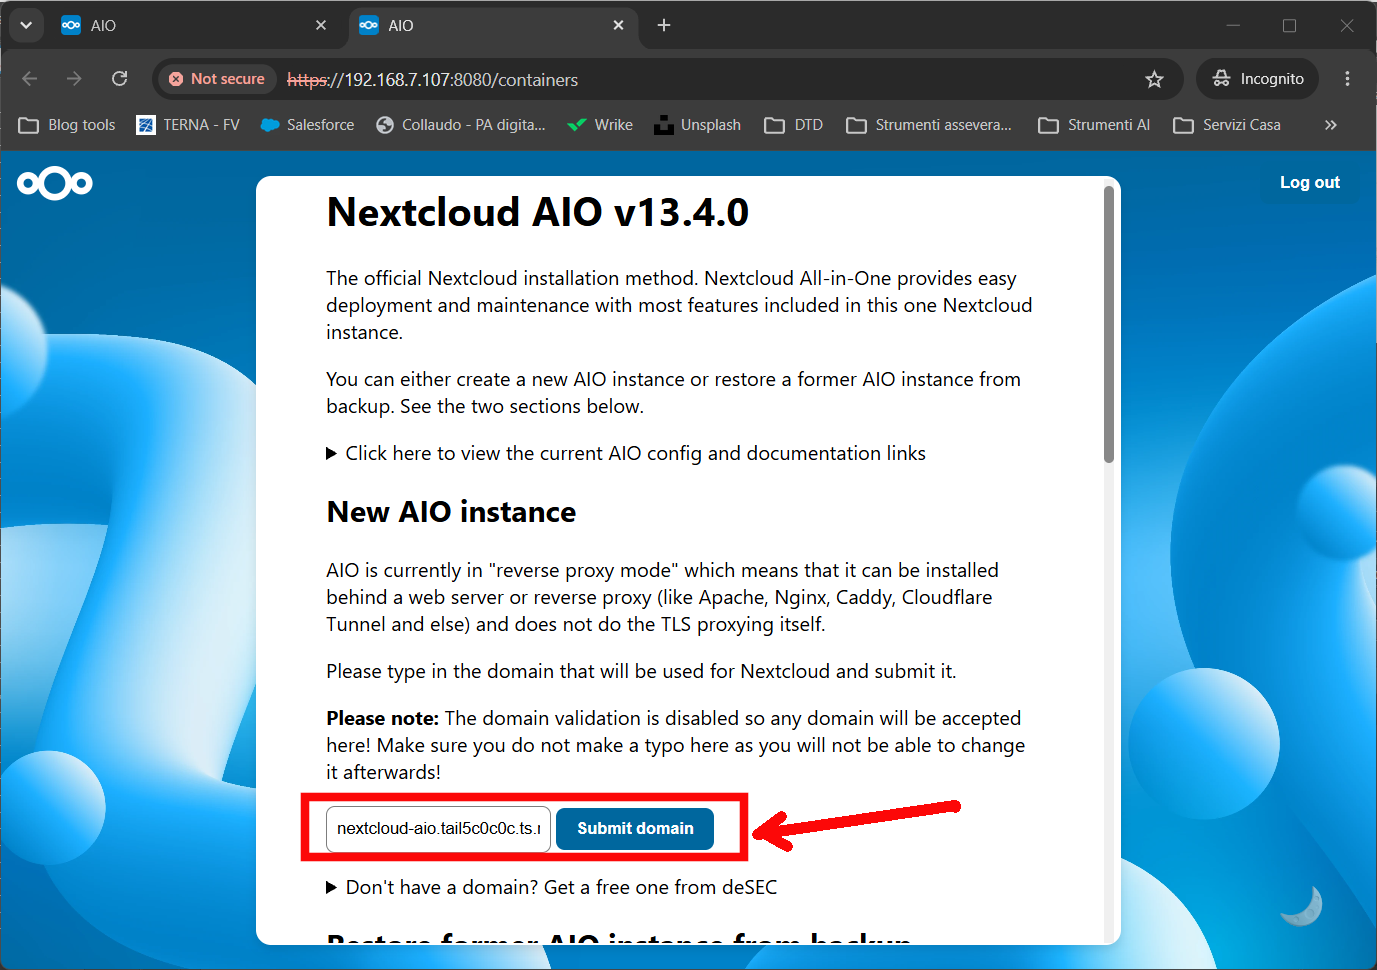
Then click the “Submit domain” button.
Step 6. Start the Nextcloud Wizard Phase 2
The following page will allow you to install the latest Nextcloud version. You can select it at your choice.
Moreover, by scrolling this page, you can also select more functions to enable (or disable), as well as you can opt between different office packages.
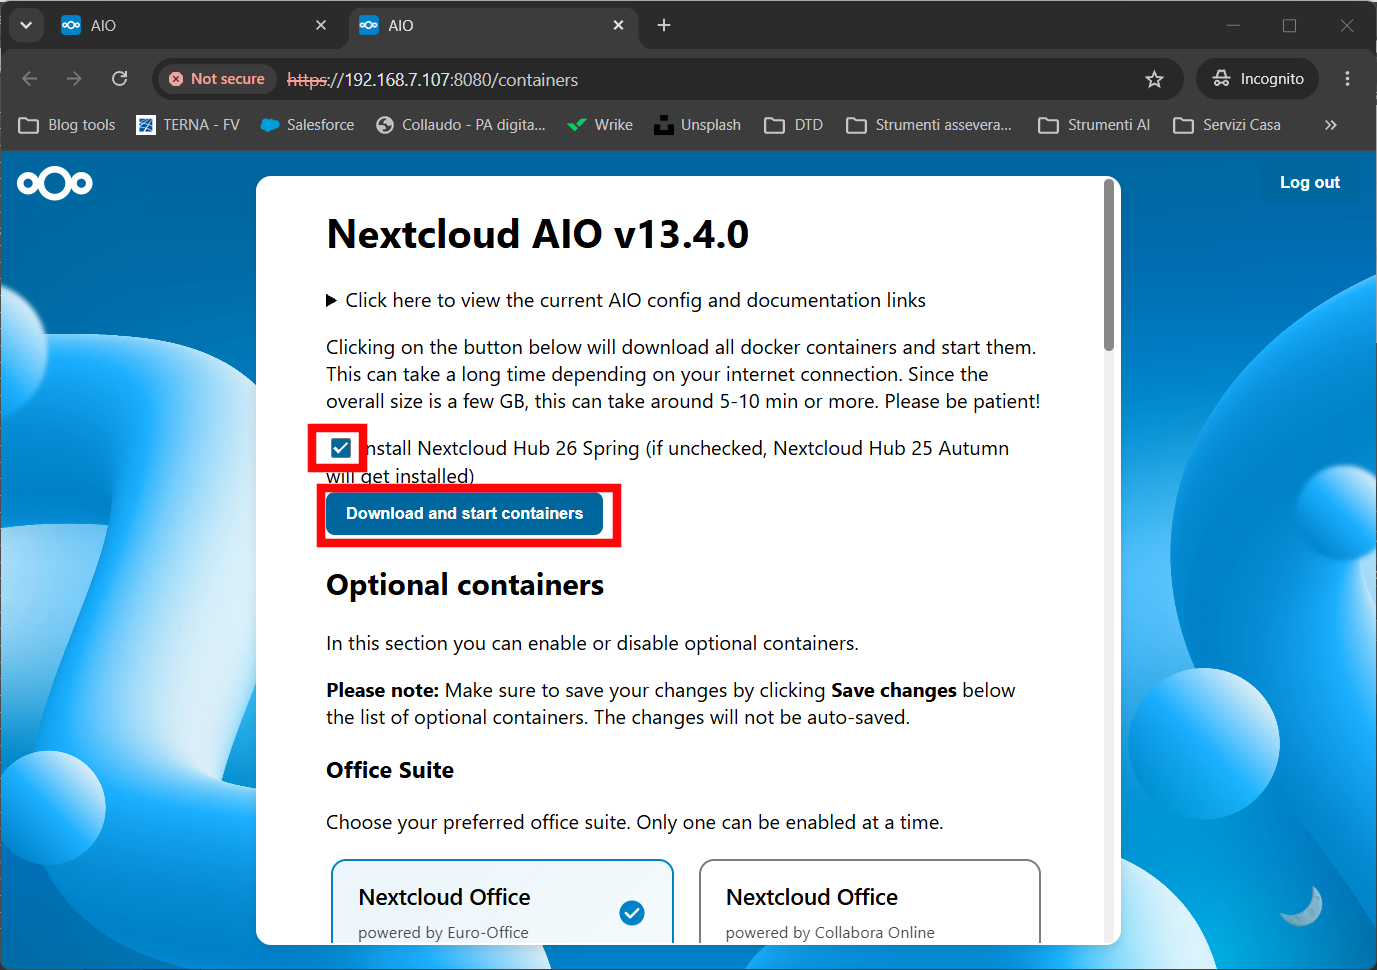
After this, please click the “Download and start containers” button.
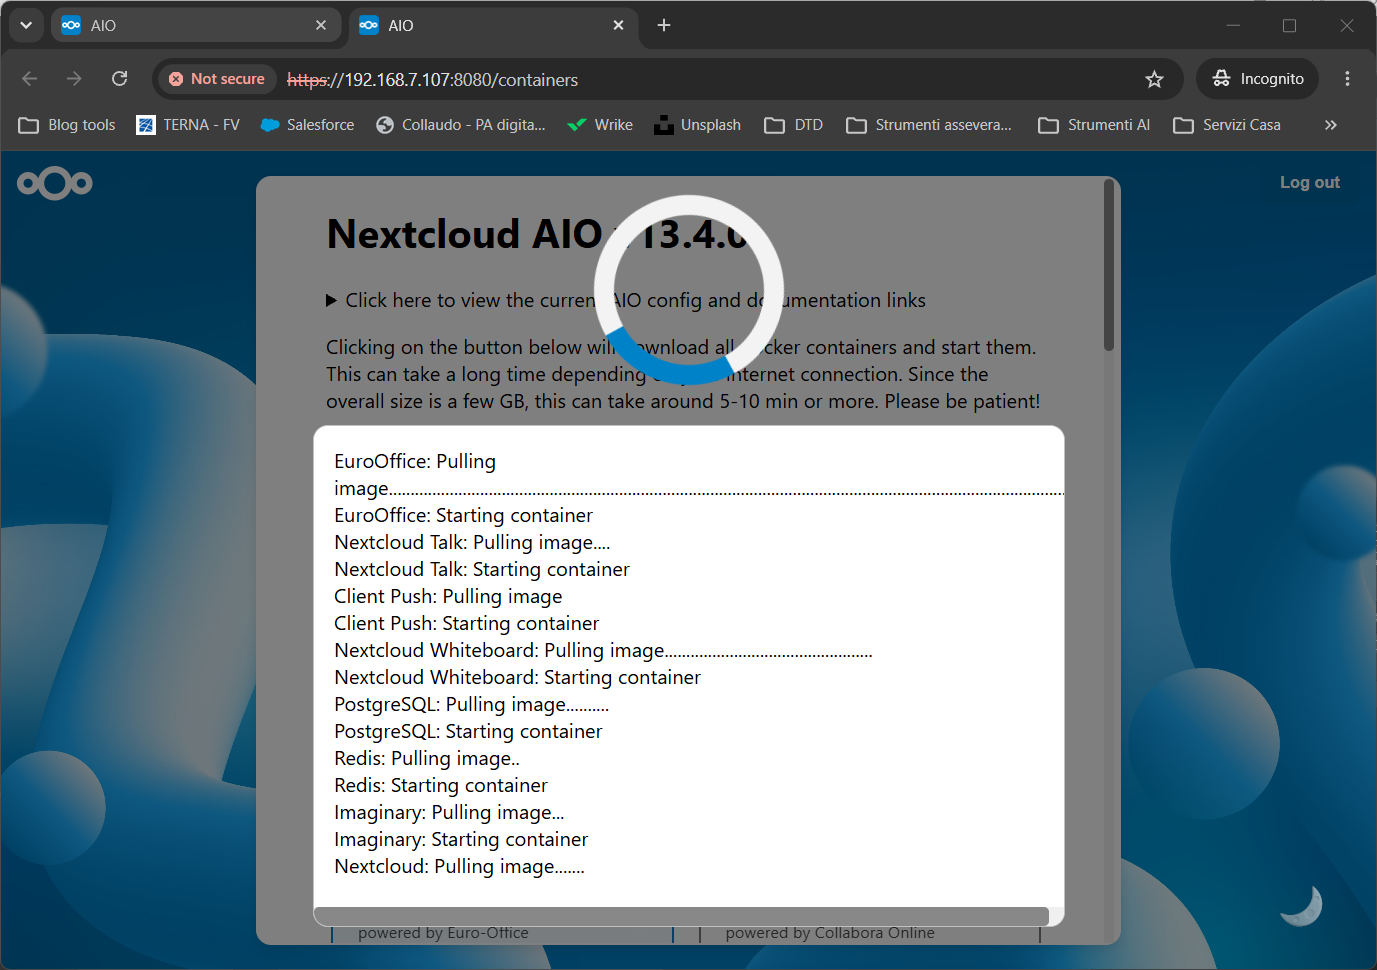
Here comes the longest part, as you must wait for Nextcloud AIO to download all the Docker images required for the complete installation. Be patient and wait for the whole process to complete. From my experience, the EuroOffice image pull was the longest part (its compressed size is around 2.5 GB). On my Raspberry PI, this step took 20 minutes.
The progress will be shown on the current page:
After this step, Nextcloud will start and configure the containers. You can see this progress in the following page, but you can see the logs for each container by clicking the “Starting” link near each microservice name:
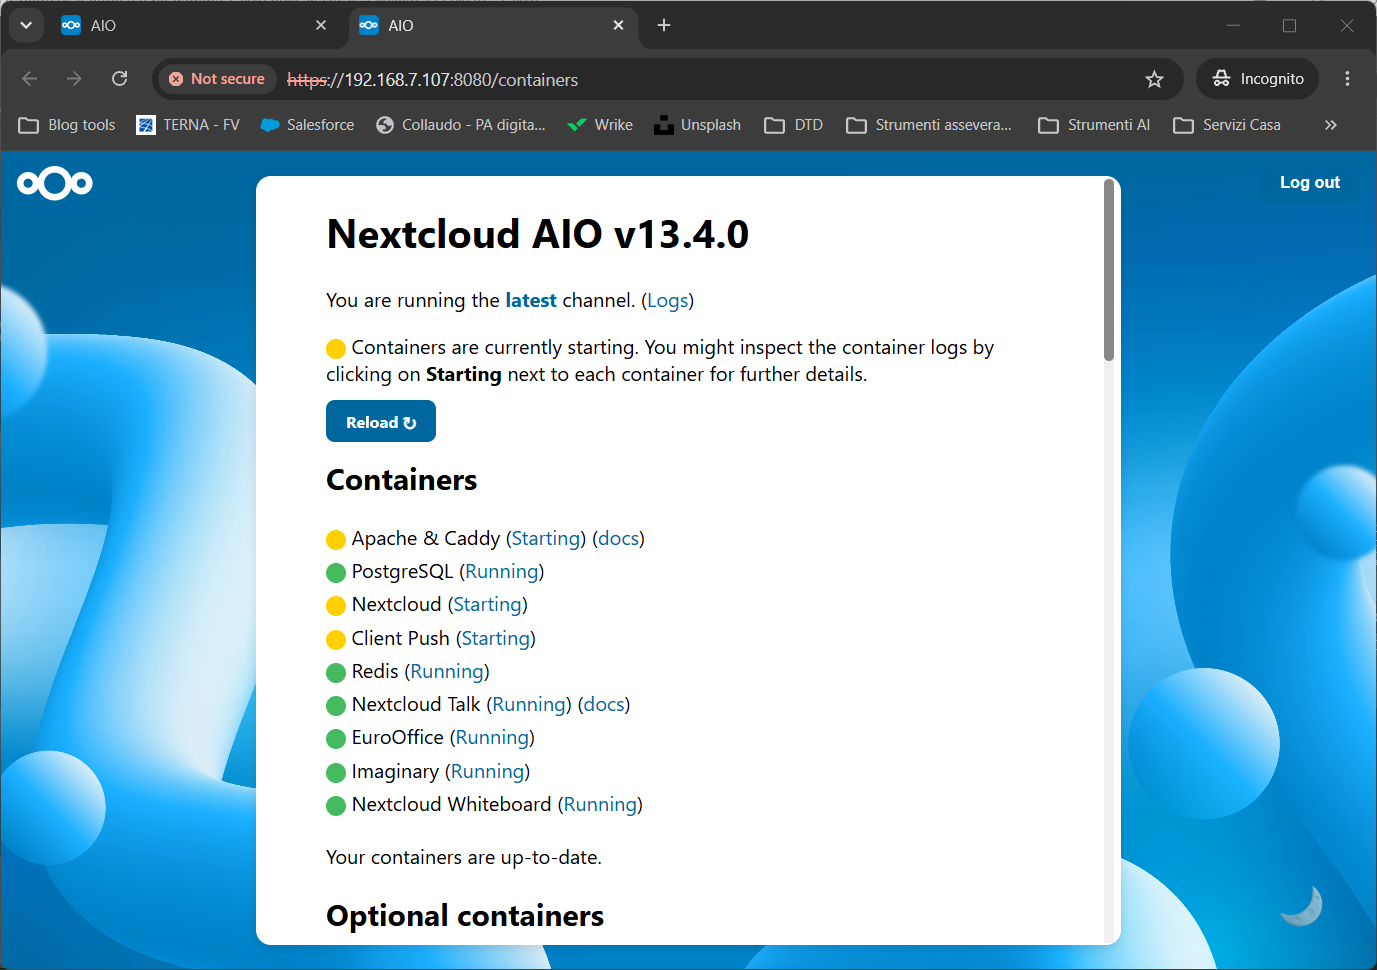
In this case, the Nextcloud container was the one requiring more time, as it will set the database tables and update the application (if updates are available). It required me 15 minutes.
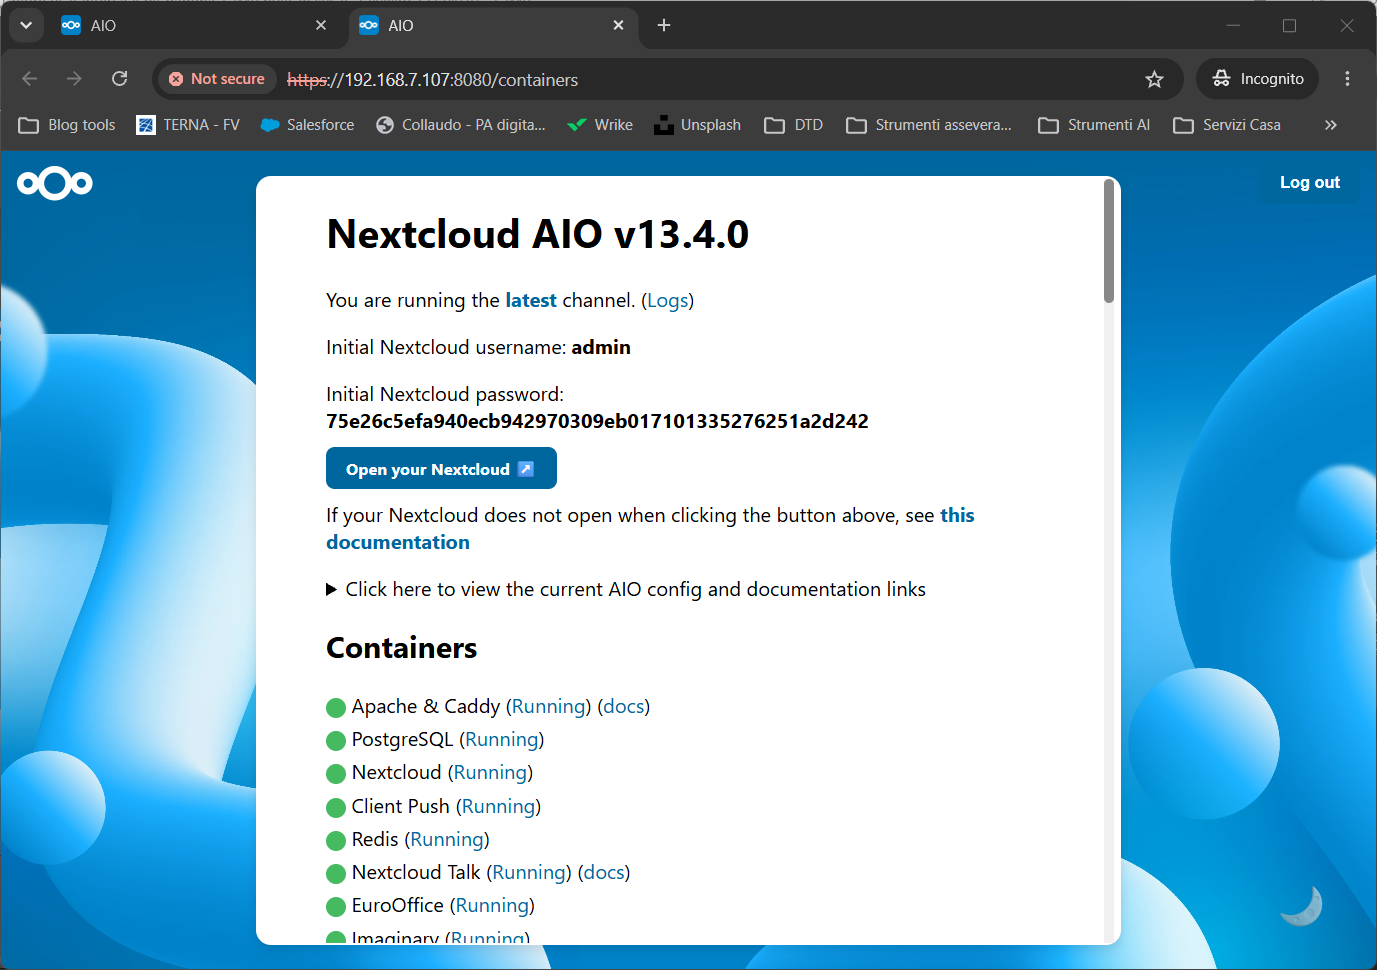
At the end, you will have all the services installed and the credentials for the first admin user:
Step 7. Log In your Nextcloud AIO on Raspberry Pi
From here, your remote client must be connected to your Tailscale network, as Nextcloud will start using the domain name configured in Tailscale.
Use the “Open your Nextcloud” button to get the login page:
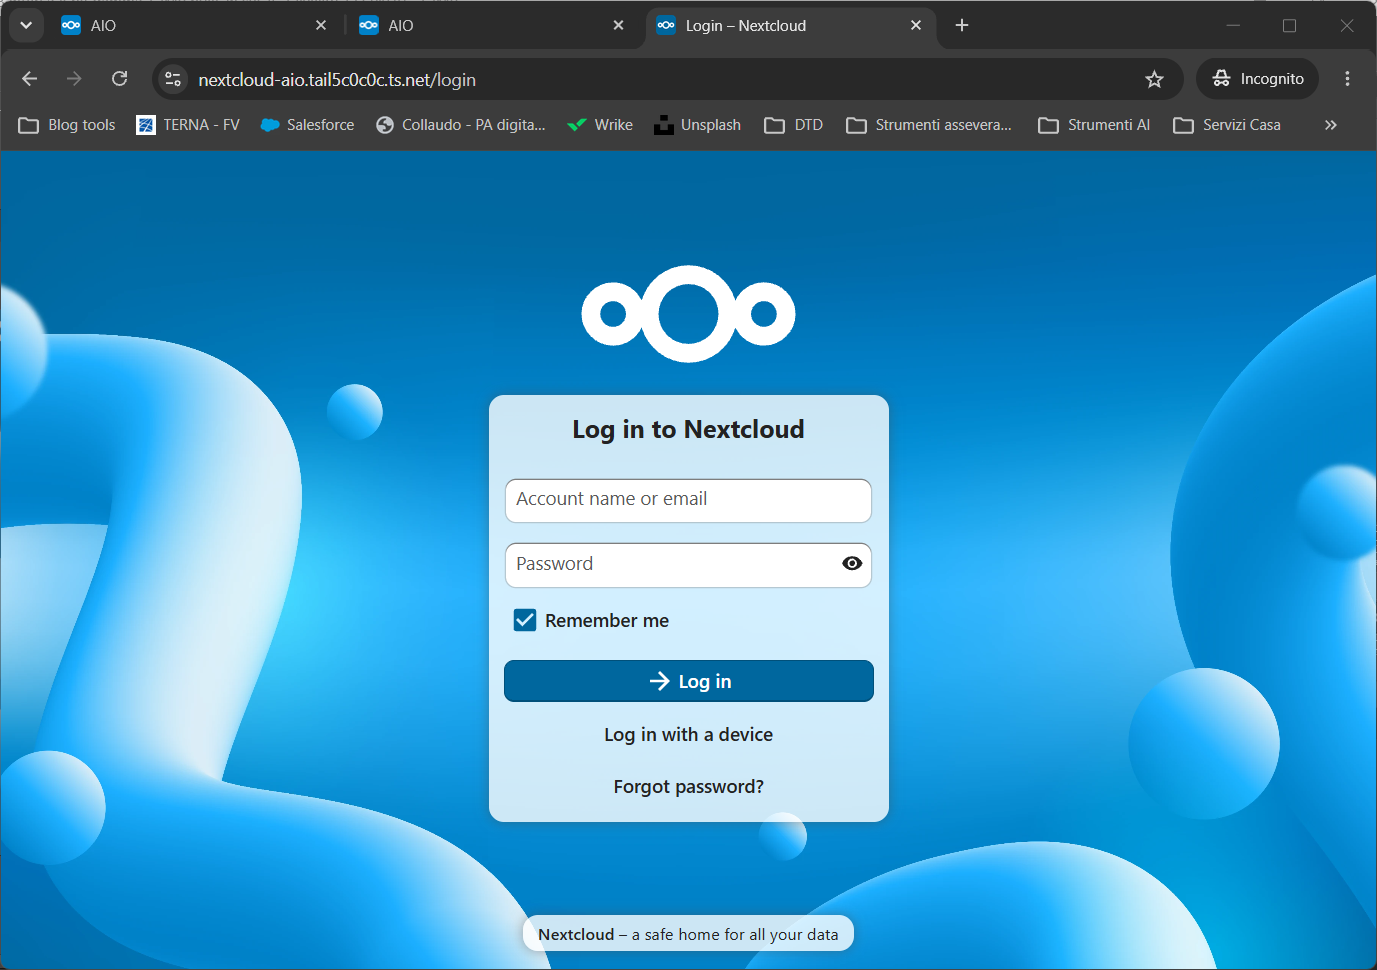
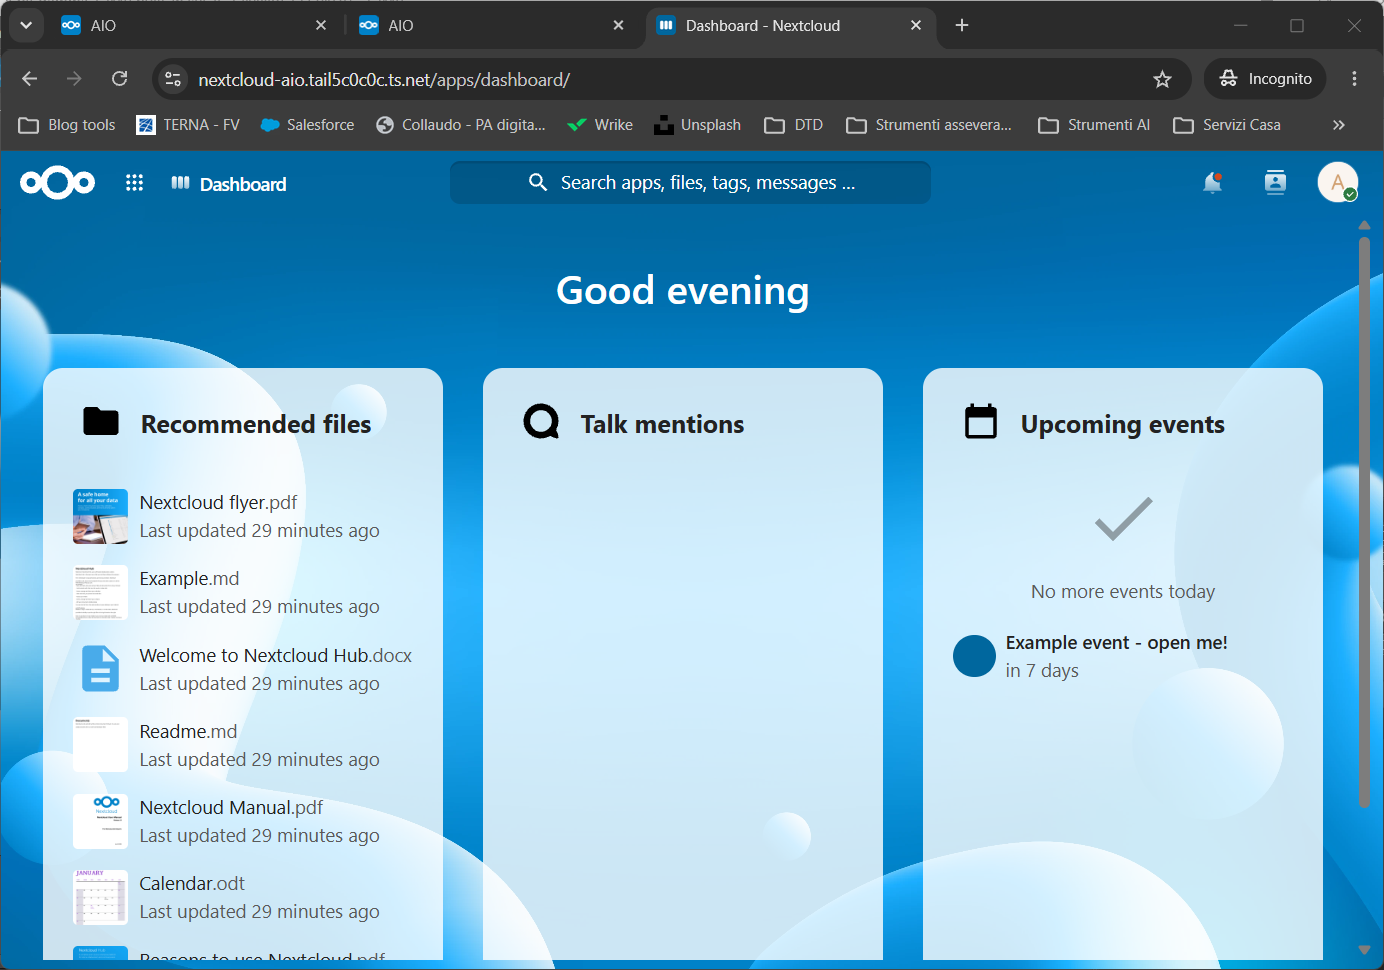
Use the previous admin credentials to perform the first login. After a few notices, you will reach the Nextcloud dashboard:
Uninstalling Nextcloud AIO from Raspberry Pi
IMPORTANT NOTE: If you want to uninstall Nextcloud AIO, if you run a pure docker compose down from Raspberry Pi models with low RAM can bring your computer board into a crash loop. My suggestion is:
- start by stopping the containers one by one:
docker stop <<container_name>>(use the container names; I suggest starting from the nextcloud-aio-eurooffice container) - remove all the pending containers:
docker rm $(docker ps -a -q --filter "name=nextcloud-aio-") - remove the Nextcloud network:
docker network rm nextcloud-aio - remove the Nextcloud volume (if you don’t want to keep the data):
docker volume rm $(docker volume ls -q --filter "name=nextcloud_aio_")
Nextcloud Docs
You can find the complete user manual and administration manual at the official Nextcloud docs.
What’s Next
Interested in more projects for your Raspberry Pi computer board? Take a look at peppe8o Raspberry PI tutorials!
Enjoy!

Open source and Raspberry PI lover, writes tutorials for beginners since 2019. He's an ICT expert, with a strong experience in supporting medium to big companies and public administrations to manage their ICT infrastructures. He's supporting the Italian public administration in digital transformation projects.







Is there a wasy way to add a ssl layer to this install?
Hi Aaron,
to add SSL encryption to your connection, Nextcloud suggests to use a reverse proxy in front of nextcloud container. This means that reverse proxy is https termination and forwards calls to nextcloud container. Some examples are available in https://github.com/nextcloud/docker/tree/master/.examples
Hi, awesome tutorial. I have some other apps running through containers and I need to change the ports. I put 8085:85 but it’s not working, do you know if changing the ports is possible or it should be always 8080:80?
Hi Axel.
You found the right parameter to change. First number is the port binded externally (the one you use in your browser). The second number is the port (inside the container) where service is published (and should stay unchanged until you don’t change the web server configuration files). To be short, you have to use 8085:80 in order to get your goal.
Hope this helps
Hey, I know this has been posted for a while, but I referenced it today. Thanks. Where can I edit the apache VirtualHost for nextcloud? I’ve looked in the usual place “sites-available” but there’s just the default VirtualHost there. I usually use nginx, so not familiar with apache at all. Any suggestions? Just need to update some headers. Thanks!
Hi Clayton,
this installation runs inside a docker container. So, to edit them you need to enter the docker container running NextCloud and change it inside the container (by using the “
docker exec -it container_name bash“).But, in order to use the containers in the right way, it would be better to map the volumes containing the sites-available / sites-enabled. This strategy allows you to keep your configuration edits even moving to new container versions
Hi there, I get an error while the container starts and it reboots constantly. The themes folder was empty, so I downloaded manually the nextcloud zip and tried to copy files to the themes folder but the same error occurs. Any suggestions?
Initializing nextcloud 24.0.4.1 …
rsync: [generator] stat “/var/www/html/themes” failed: No such file or directory (2)
default_perms_for_dir: sys_acl_get_file(themes, ACL_TYPE_DEFAULT): No such file or directory, falling back on umask
rsync: [generator] recv_generator: mkdir “/var/www/html/themes/example” failed: No such file or directory (2)
*** Skipping any contents from this failed directory ***
default_perms_for_dir: sys_acl_get_file(themes, ACL_TYPE_DEFAULT): No such file or directory, falling back on umask
rsync: [receiver] mkstemp “/var/www/html/themes/.README.ipzcBz” failed: No such file or directory (2)
rsync error: some files/attrs were not transferred (see previous errors) (code 23) at main.c(1333) [sender=3.2.3]
Thanks,
Martin
Hi Martin,
where is the themes folder mounted? Locally or in a remote folder?
This was a helpful guide, though it glosses over Nextcloud’s built in recommendation to use an external database instead of the packages SQLite. The official image documentation (https://hub.docker.com/_/nextcloud/) recommends installing a MariaDB docker image, but then Nextcloud’s first time set up requires additional variables. Covering the set up of MariaDB for Nextcloud would be a big help!
the best nextcloud installation you have found on the internet could you please add about adding a fail2ban filter
best regards