
Last Updated on 24th June 2023 by peppe8o
This tutorial will show you how to create a NAS (Network Attached Storage) with OpenMediaVault and Raspberry PI.
What is OpenMediaVault
OpenMediaVault is an open-source software enabling Debian-based computers to deploy NAS services.
It supports remote access via services like SSH, (S)FTP, SMB/CIFS, RSync.
OpenMediaVault allows you to customize your installation with the help of plugins, which make it modular and fitting the needs both for home and small office use.
It is a solution that will allow everyone to easily install and manage a NAS without deeper technology knowledge.
Hardware requirements for OpenMediaVault are:
- CPU: Any x86-64 or ARM compatible processor
- RAM: 1 GiB capacity
- HDD:
- System Drive (for OS): min. 4 GiB capacity (but more than the capacity of the RAM)
- Data Drive: capacity according to your needs
According to these requirements, OpenMeviaVault can run in a Raspberry PI computer board 2 or 3, but it would offer limited performances even if could be enough for a home/personal installation. Better performance will be granted with a Raspberry PI 4. For this tutorial I will use a Raspberry PI 3 Model B.
What We Need
As usual, I suggest adding from now to your favourite e-commerce shopping cart all the needed hardware, so that at the end you will be able to evaluate overall costs and decide if to continue with the project or remove them from the shopping cart. So, hardware will be only:

- Raspberry PI Computer Board, at least RPI 3 model B, (including proper power supply or using a smartphone micro USB charger with at least 3A)
- high speed micro SD card (at least 16 GB, at least class 10)
- USB storage device
Step-By-Step Procedure
Install Raspberry PI OS
OpenMediaVault requires Raspberry PI OS Lite to work (with desktop OS, the installation will not complete). So, please start installing Raspberry PI OS Lite (64-bit) in your computer board.
Make your OS updated. From terminal:
sudo apt update -y && sudo apt upgrade -yIn order to get the best performances, especially from older RPI computer models, I also suggest the following performance tricks:
- Change GPU Memory split to the minimal amount (16MB). Use my Manage Raspberry PI GPU Memory Split tutorial, if needed).
- Change the swap memory to 1000MB (Set Raspberry PI Swap Memory).
As you’re creating a NAS, you also need a storage where to place your shared files. You can use a USB storage and plug it into your Raspberry PI from now.
Install OpenMediaVault in Raspberry PI
The default OpenMediaVault installation also reconfigures your Raspberry PI network, sometimes forcing you to use an external keyboard and display to set it accordingly to your router configuration.
In order to avoid problems with your current home DHCP, I suggest using the installation procedure which avoids reconfiguring the network. On the other hand, you already reach your Raspberry PI and if this works there’s no reason
To install skipping the Network setup during installation you need just the following 3 commands:
wget https://github.com/OpenMediaVault-Plugin-Developers/installScript/raw/master/install
chmod +x install
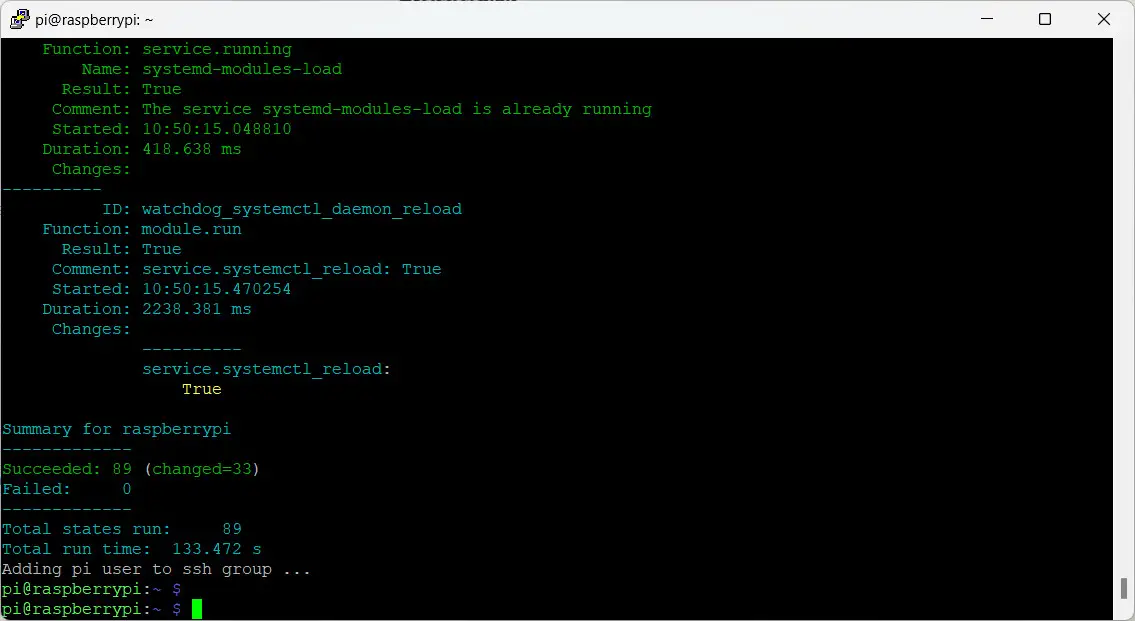
sudo ./install -nThe last command will take a bit of time (also depending on your Raspberry PI capabilities and disk speed. Give it time and wait for completion. It took more than 30 minutes to install in my Raspberry PI 3 Model B.
Please note that during the installation you may note the following error:
[ERROR ] Unable to connect pusher: Stream is closed
According to the OpenMediaVault forum, you can ignore it.
The installation process will complete by returning the prompt:
From here, you can reach the Wen GUI by using the Raspberry PI’s IP address (the mine for this example is 192.168.1.26) in your favourite browser:
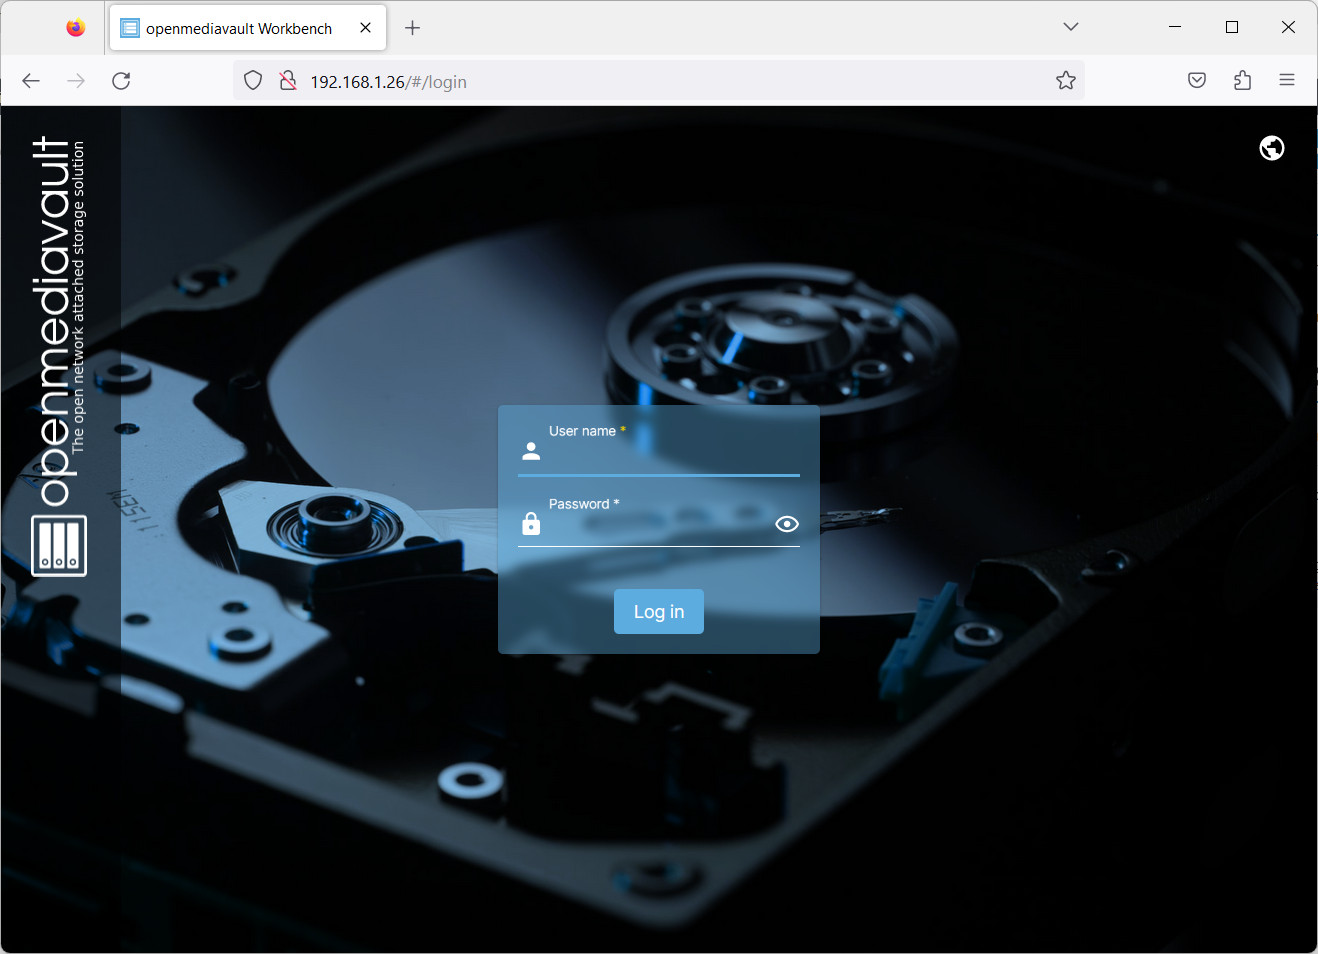
The OpenMediaVault default user is “admin” with the password “openmediavault“.
After successfully logged in, it will show you a welcome banner, where you can place a donation if you want to support OpenMediaVault:
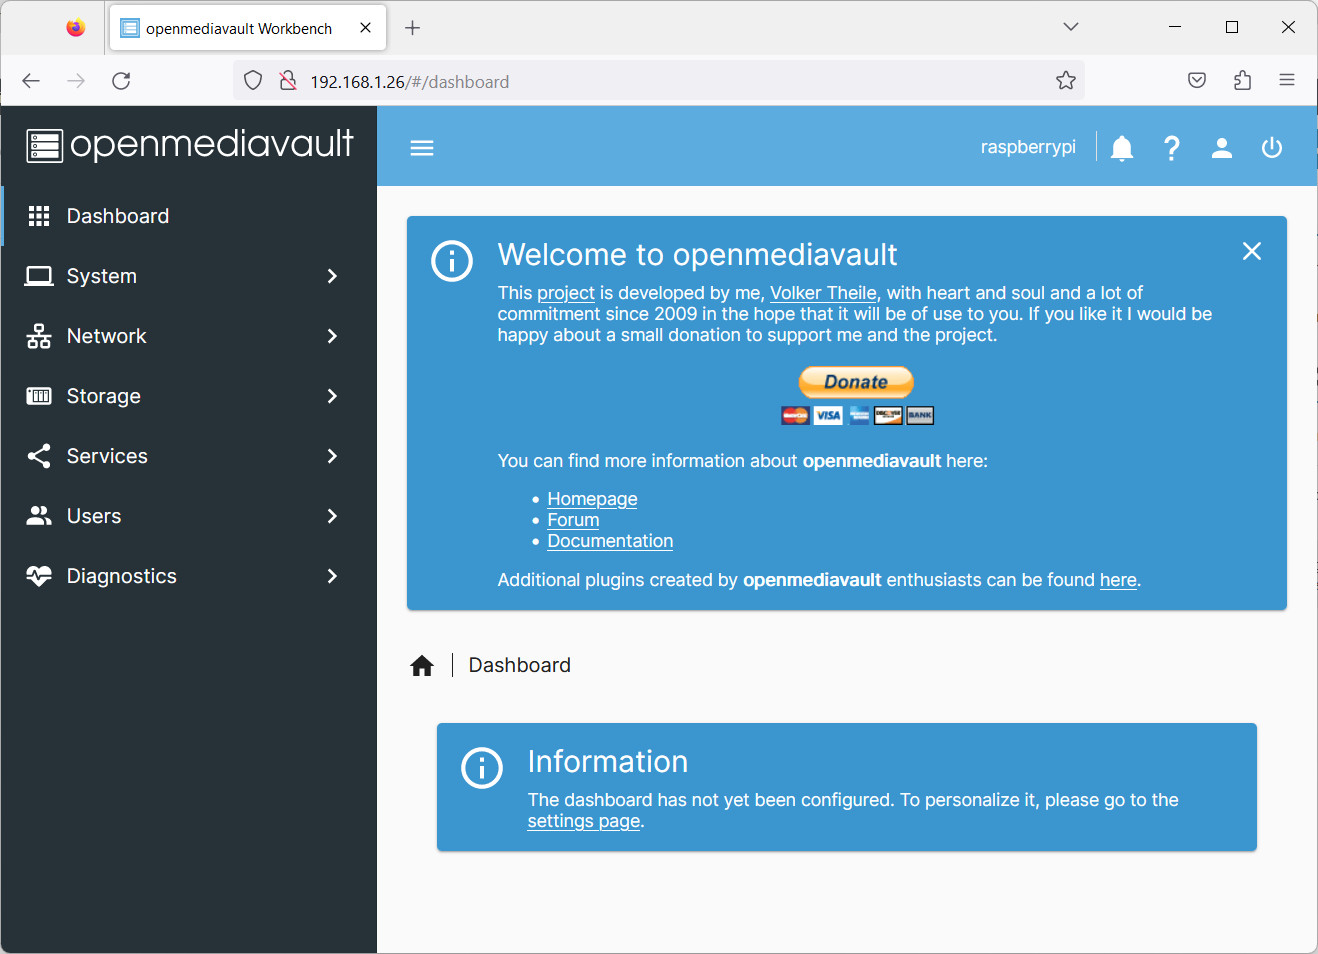
You can also close the Welcome banner in order to have more space for your dashboard.
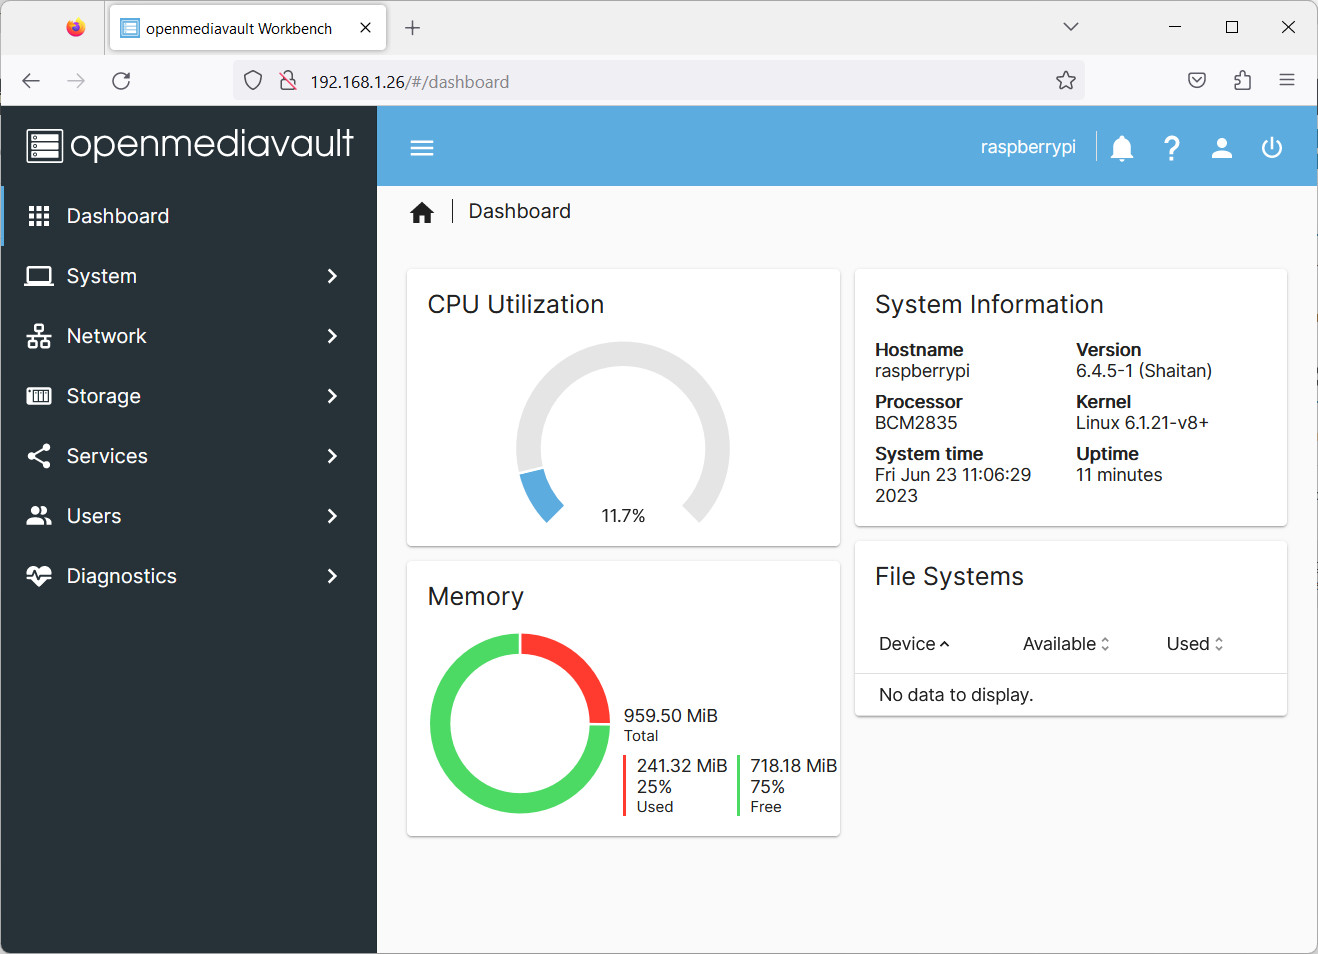
In the lower section of the previous page, the Information container will warn you that you can customise your dashboard. By clicking the “settings page” link here, you will have some widgets which you can select to make your dashboard more informative. For example, selecting the “CPU Utilization”, “File Systems”, “Memory”, and “System Information” (then saving), we’ll have a more useful dashboard:
Also, please note that you can customize again this dashboard from the “User Settings” menu -> “Dashboard” button:
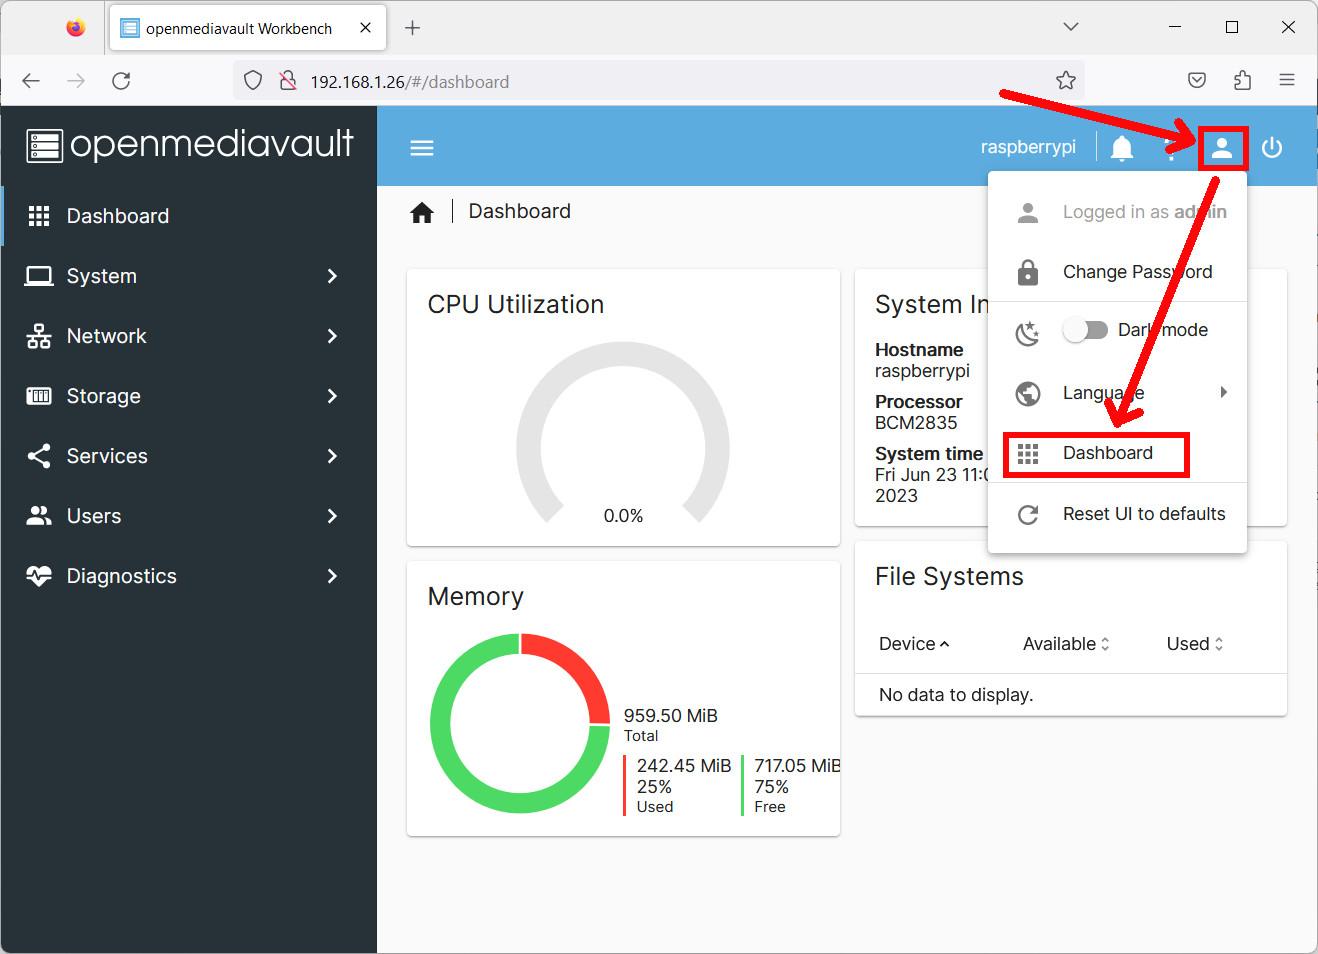
The same “User Settings” menu will also allow you to change the GUI Language to your favourite.
Configure OpenMediaVault in Raspberry PI
Change User Password
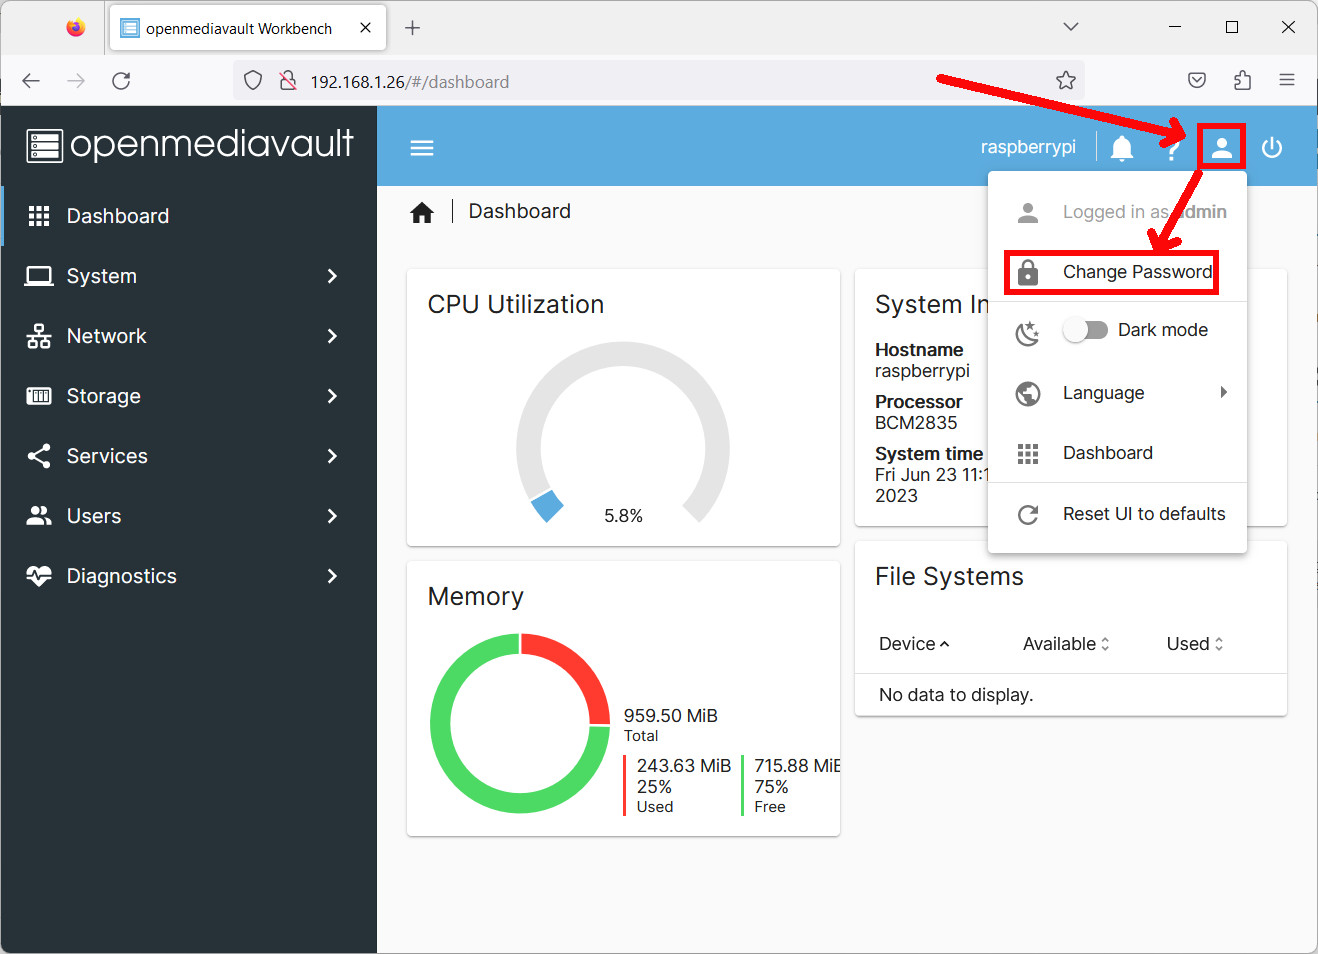
Default passwords are always the most insecure part of every system. So, the first job will be changing it for your admin user. From the “User Settings” menu, there’s a direct link to change your password:
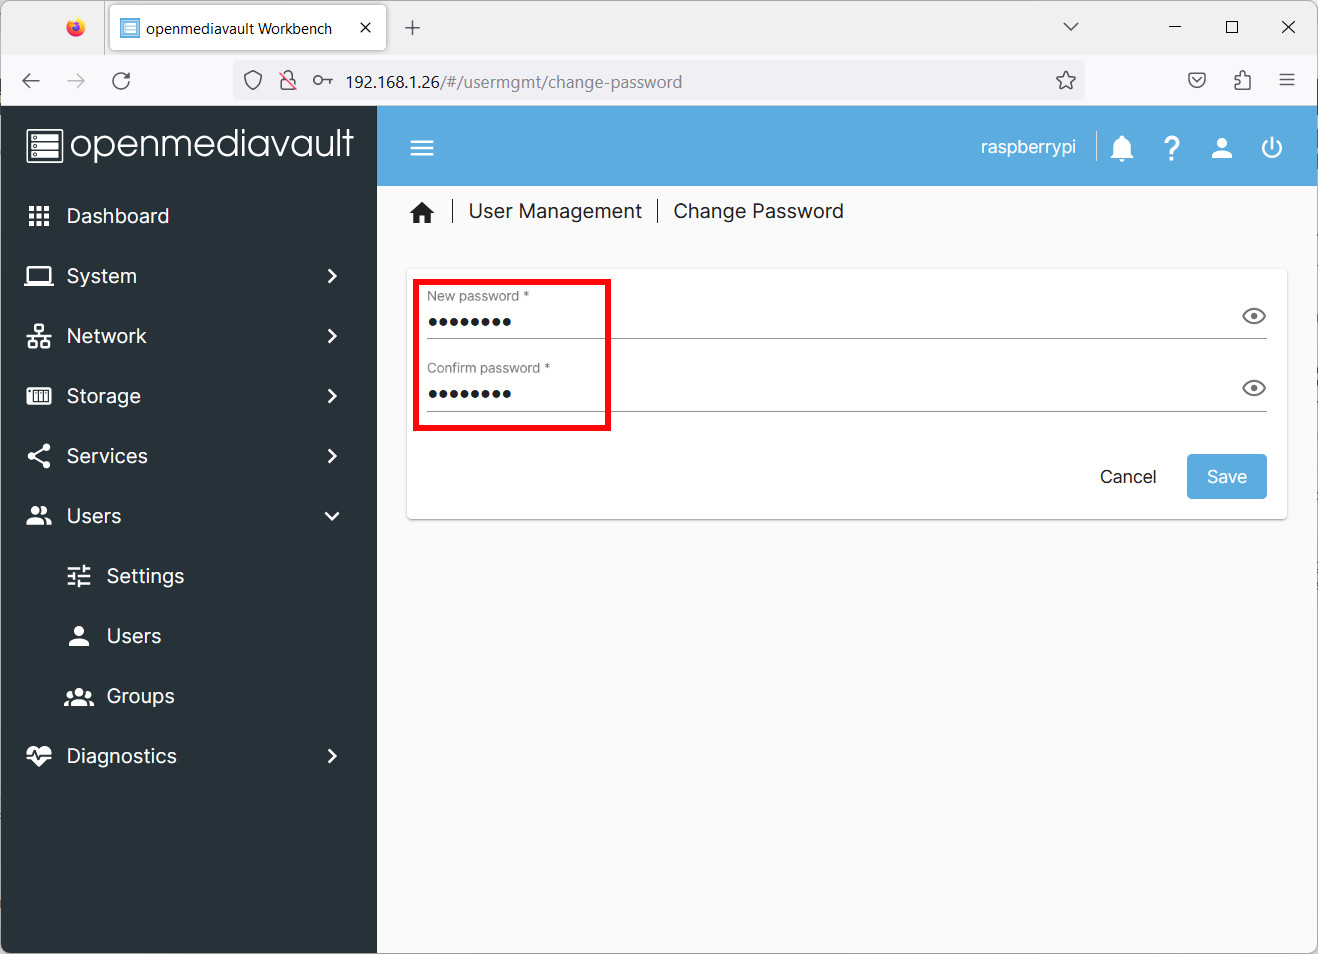
This will allow you to easily change your admin password and save it:
Setup a Data Drive
Before using the available disk space, we need to configure OpenMediaVault to use a specific disk for data. It is important to know that OpenMediaVault DOESN’T allow using the disks managed from the File System as part of the OS for keeping data.
Also note that the following operation will erase all the data from the external disk, so take a copy of them if you have something to save.
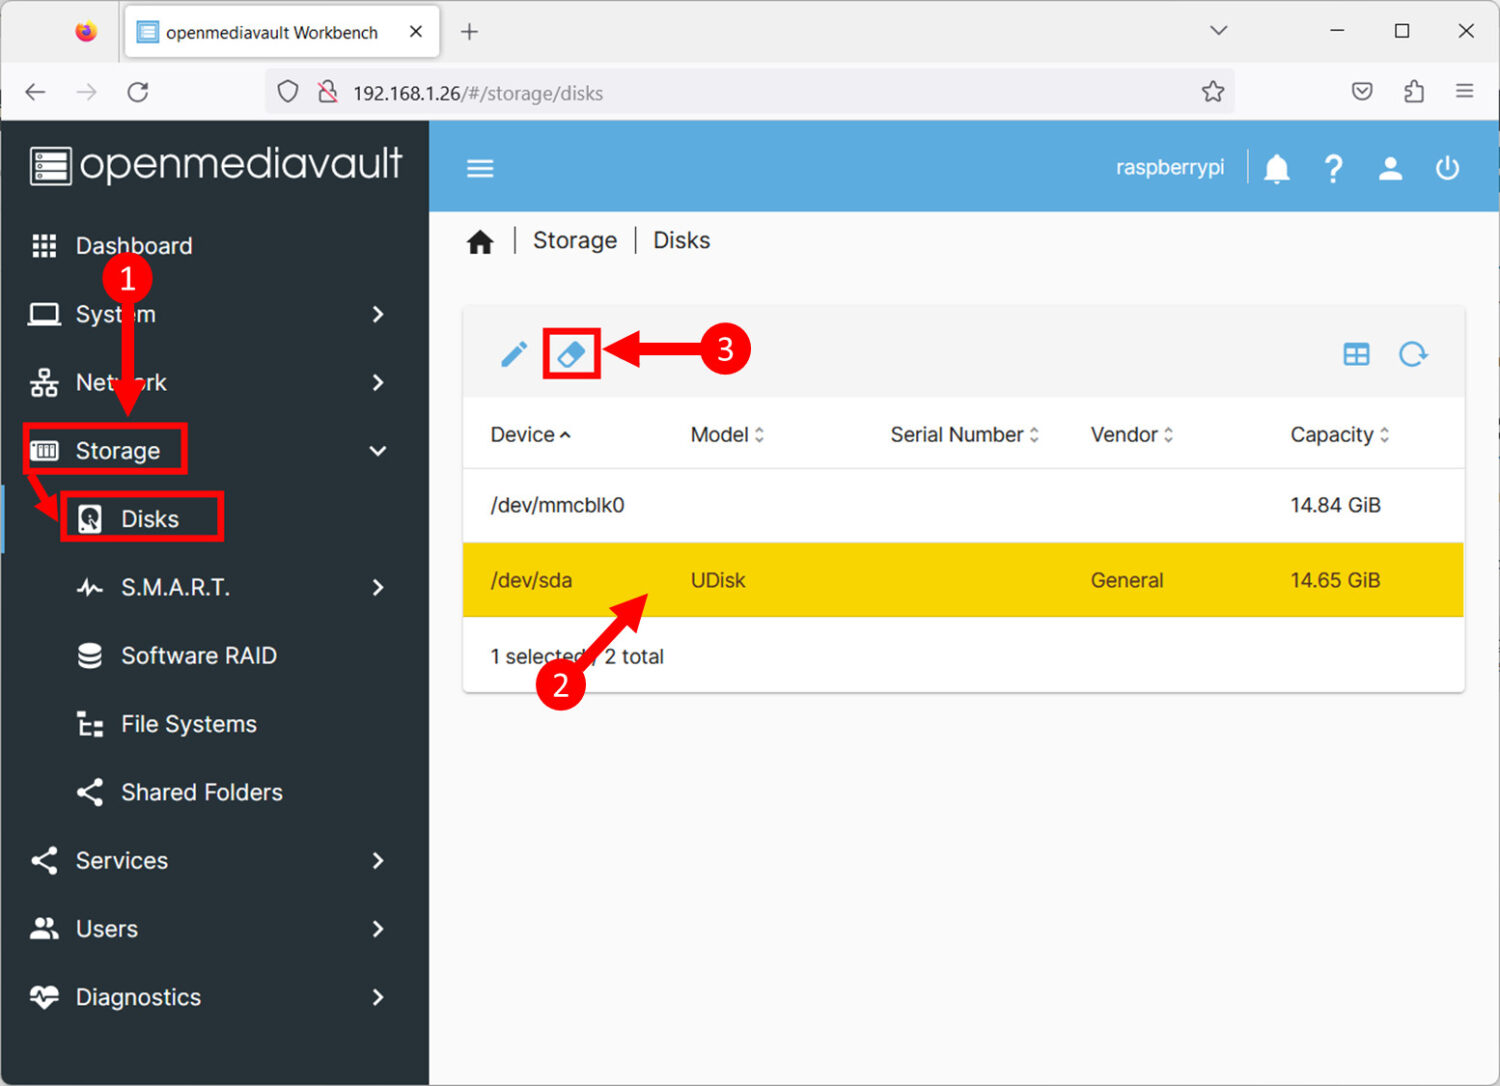
To do this job, please go to Storage -> Disks (1), select the disk to use for sharing folders/dats (2) and use the ribbon to perform the disk Wipe (3):
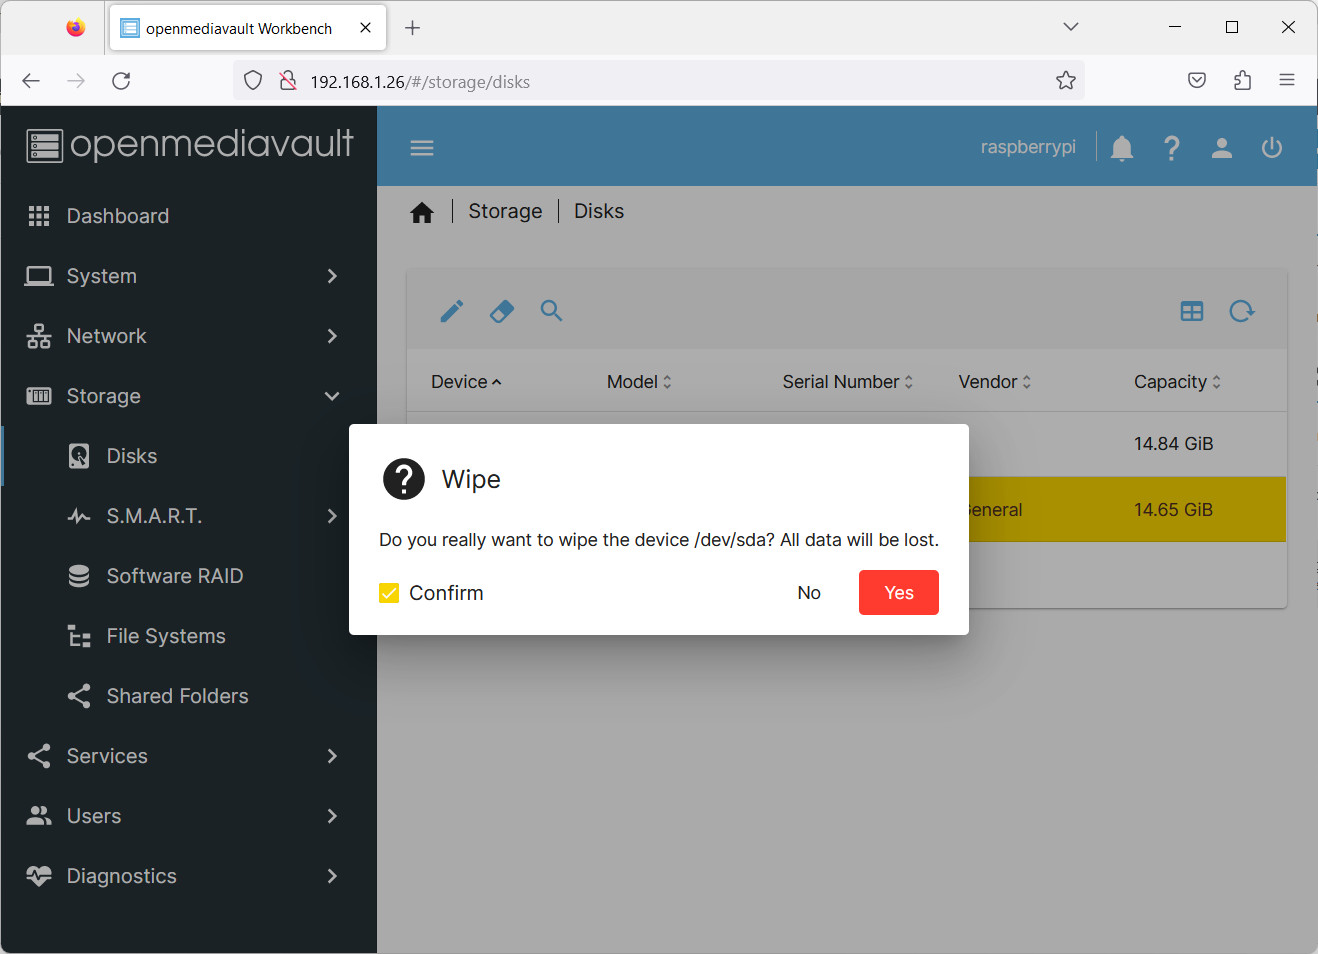
This operation will require a confirmation (please select the “Confirm” option to enable the “Yes” button):
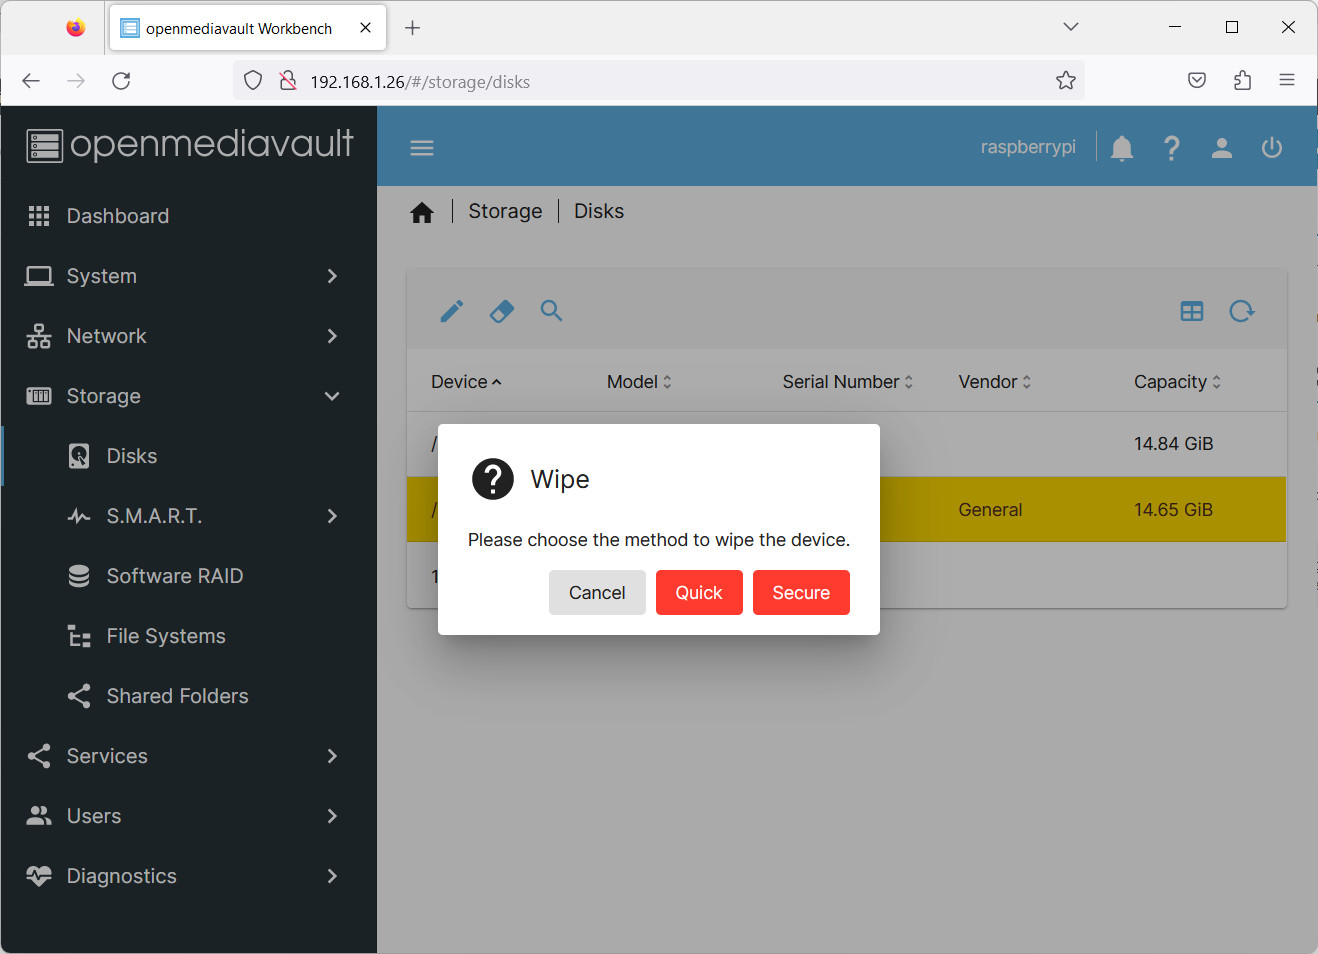
And then select the wipe type:
- Quick = will remove any signatures at the beginning of the drive.
- Secure = will erase/wipe the complete drive, so depending on the drive size will depend on the time it takes to complete (ref. https://forum.openmediavault.org/index.php?thread/25074-wipe-secure-or-quick-what-is-the-difference/).
Note that a Secure wipe could take a very long time for bigger storage devices and the Web GUI logout could not allow you to check the wiping progress. If you really need a Secure wipe, I suggest changing the Auto Logout from “System” -> “Workbench” to a longer time.
The disk wiping will start. A quick wipe will last a few seconds and end with something similar to the following:
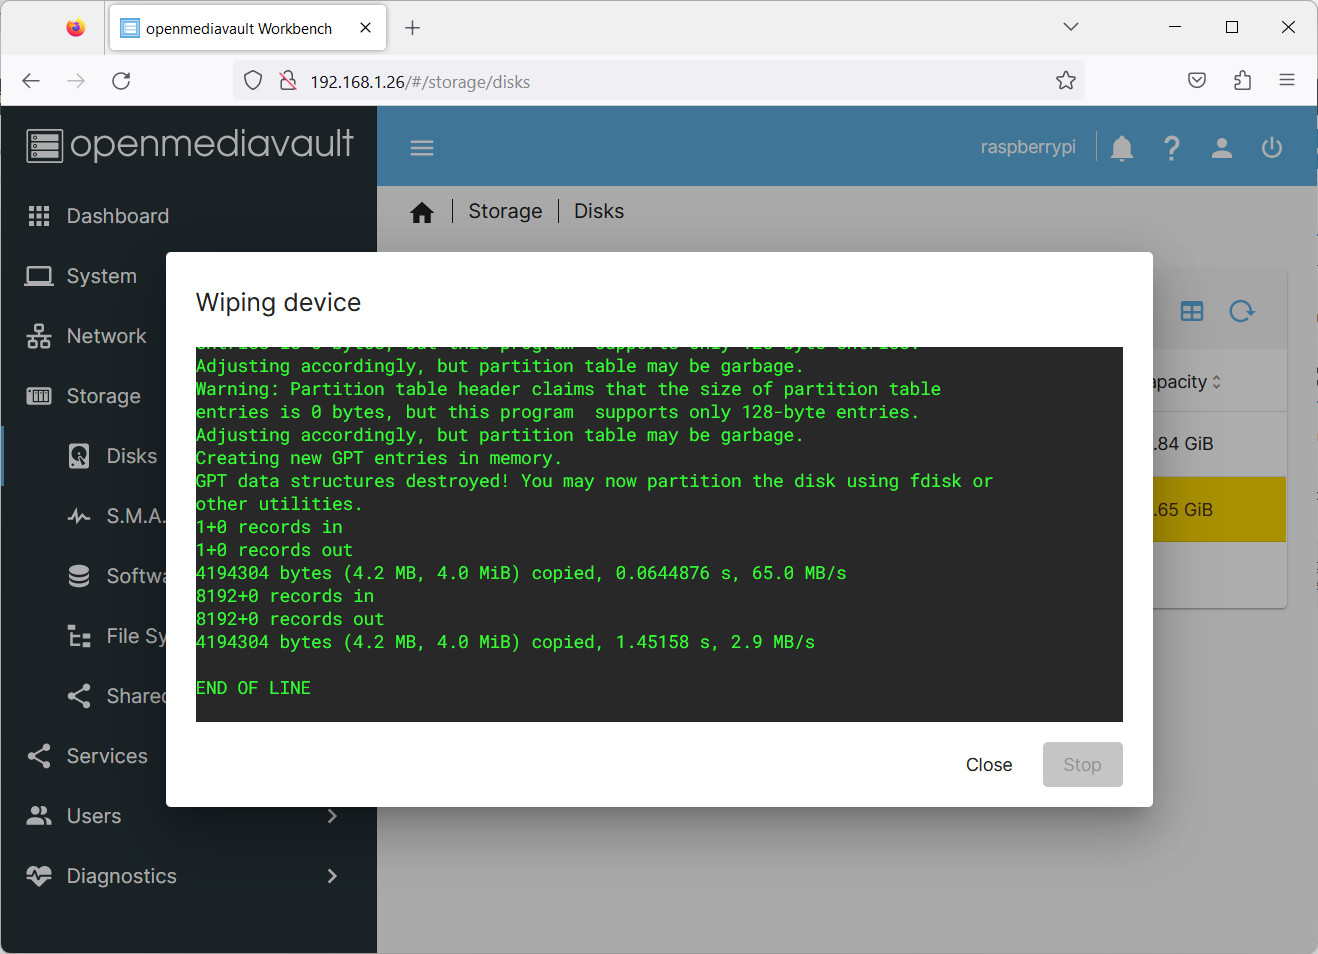
You can click “Close” to exit from the Wiping shell.
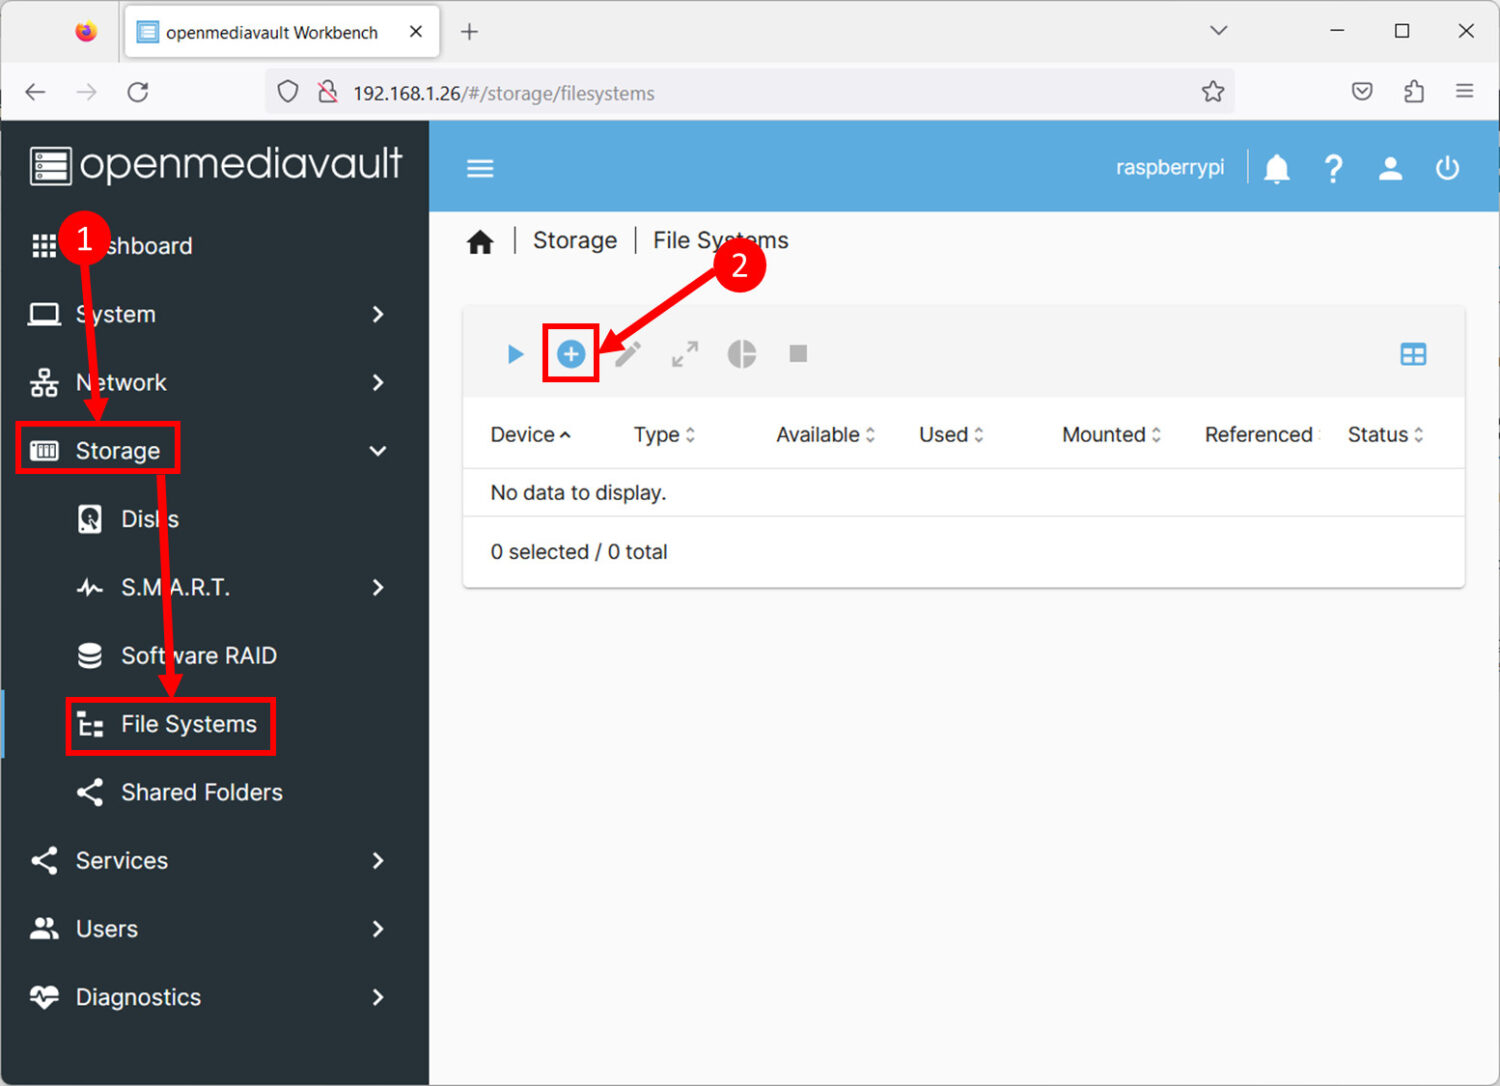
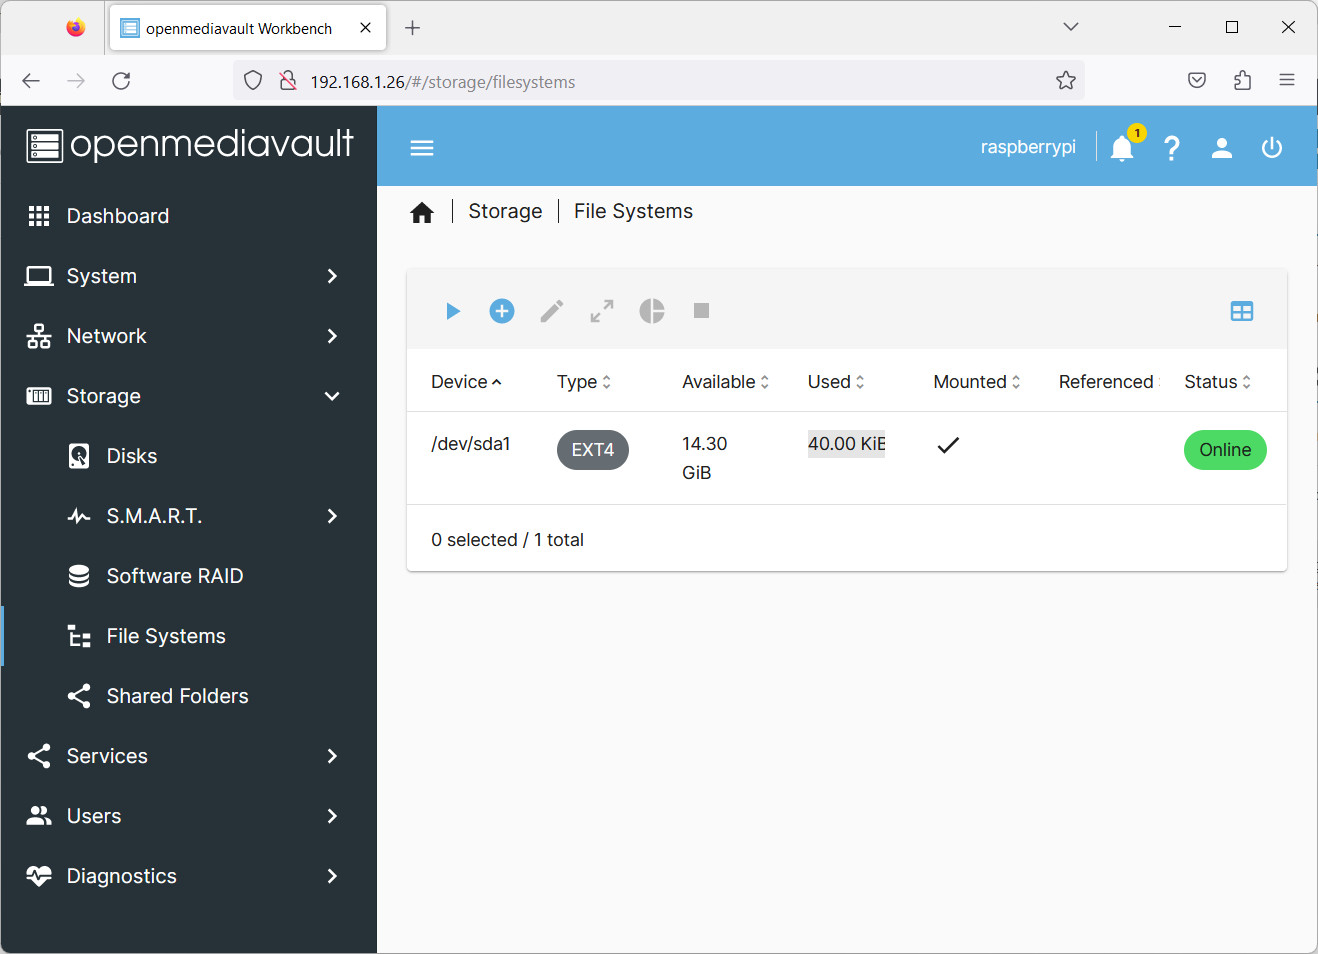
Now, we’ll create a partition for this disk. Please go to “Storage” -> “File System” (1) and click the Create icon (2):
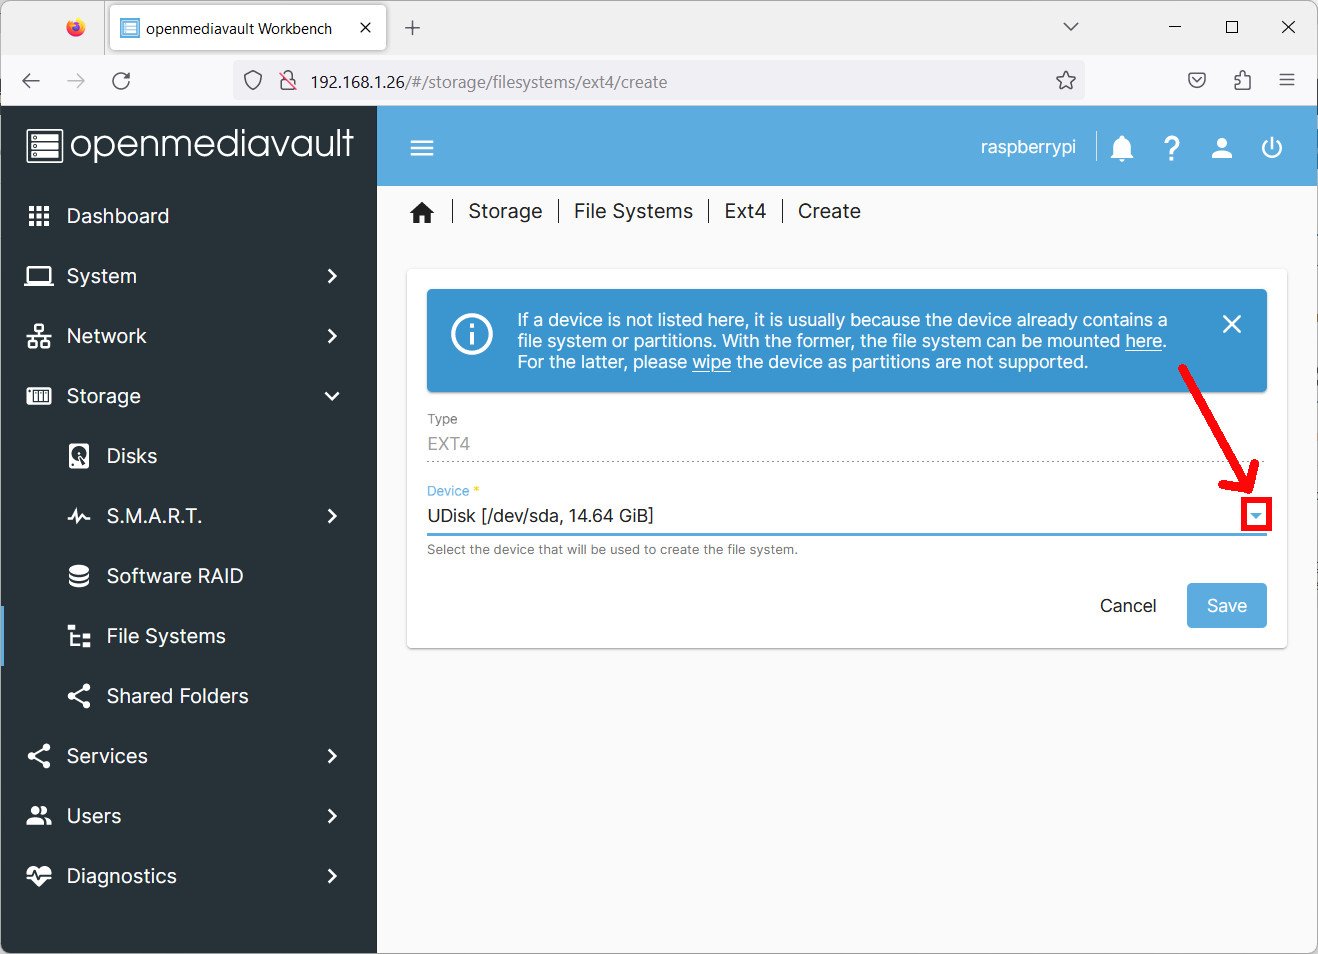
From the drop-down menu. you can choose your favourite File System type, I will choose “EXT4” for this example.
On the following page, please use your drive with the selector available at the right side of the “Device” input field:
Then click “Save”. It will perform the operations to setup the file system on the drive and show an “END OF LINE” message that warns for the completion:

Click Close. After this step, OpenMediaVault will automatically propose the mount menu. Please select your file system here:
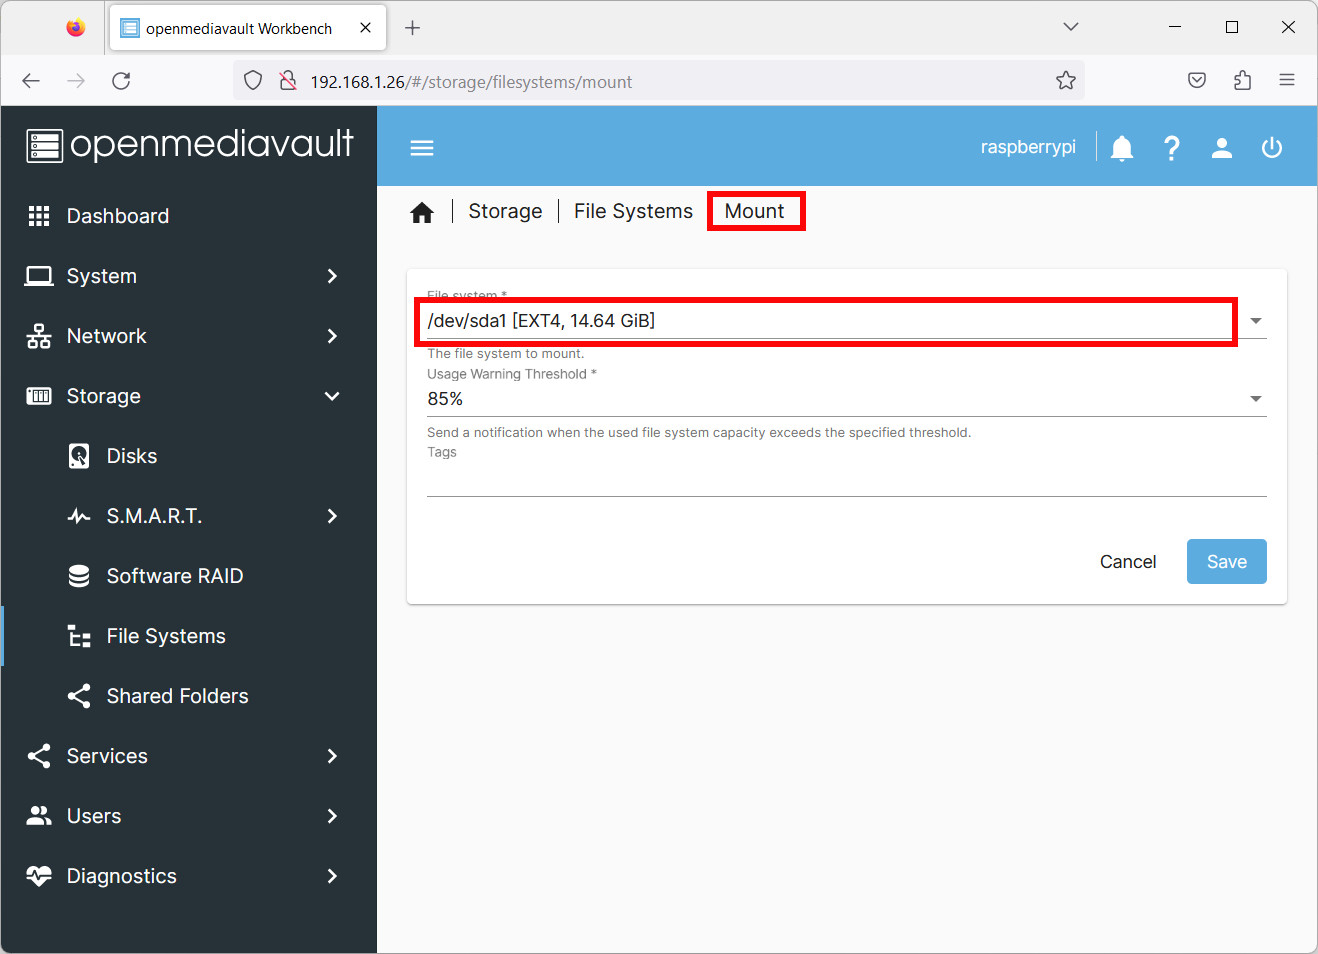
And then click “Save”. It requires a final Apply with the following banner to make the changes effective:
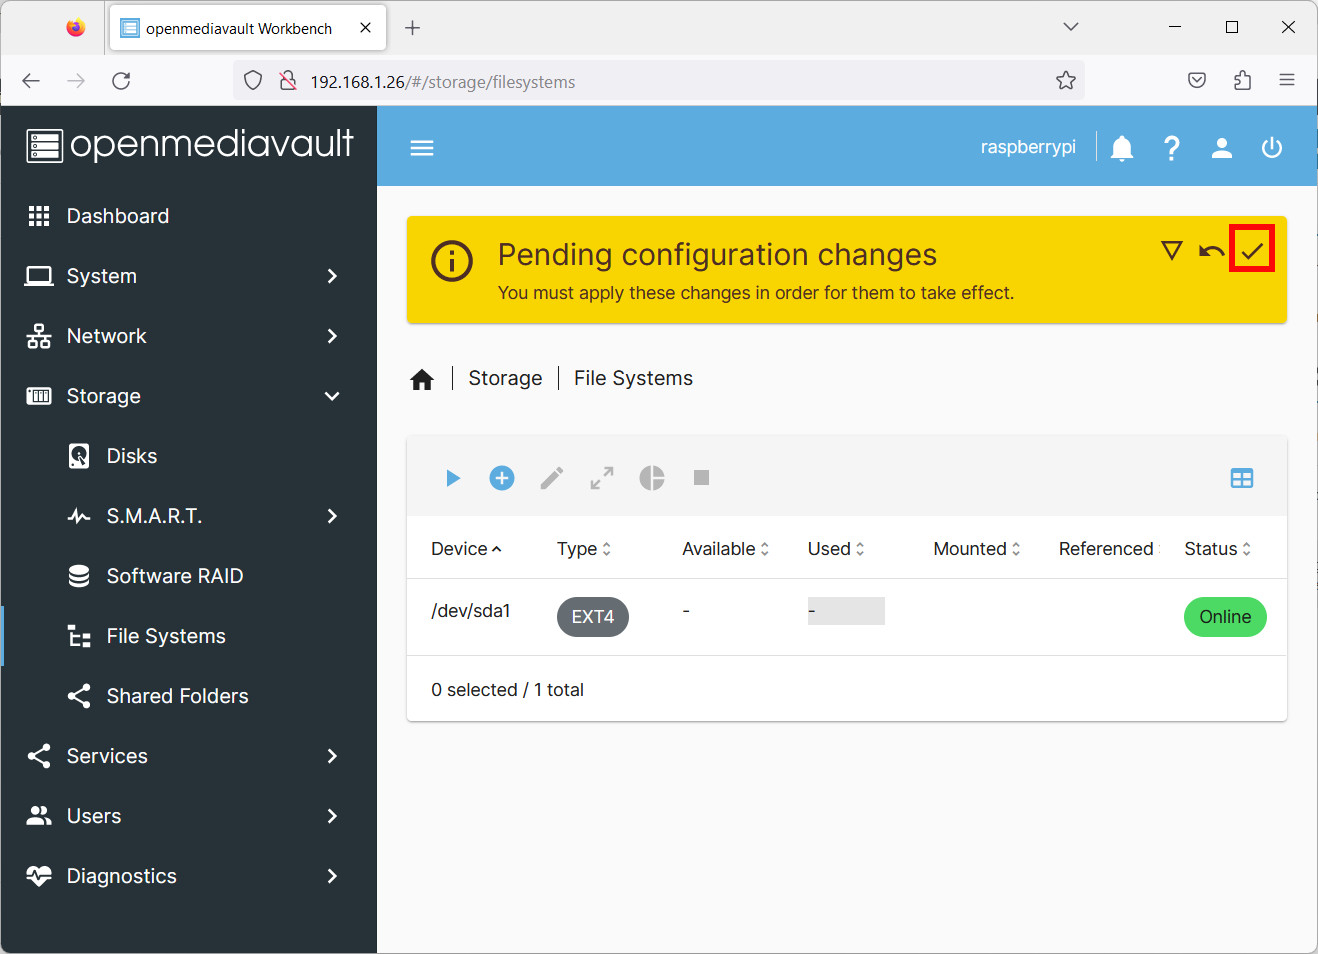
The Drive is finally ready for your shares:
Setup a Shared Folder
You installed OpenMediaVault in your Raspberry PI mainly because you want to share a folder… So this is going to show how to reach your main goal.
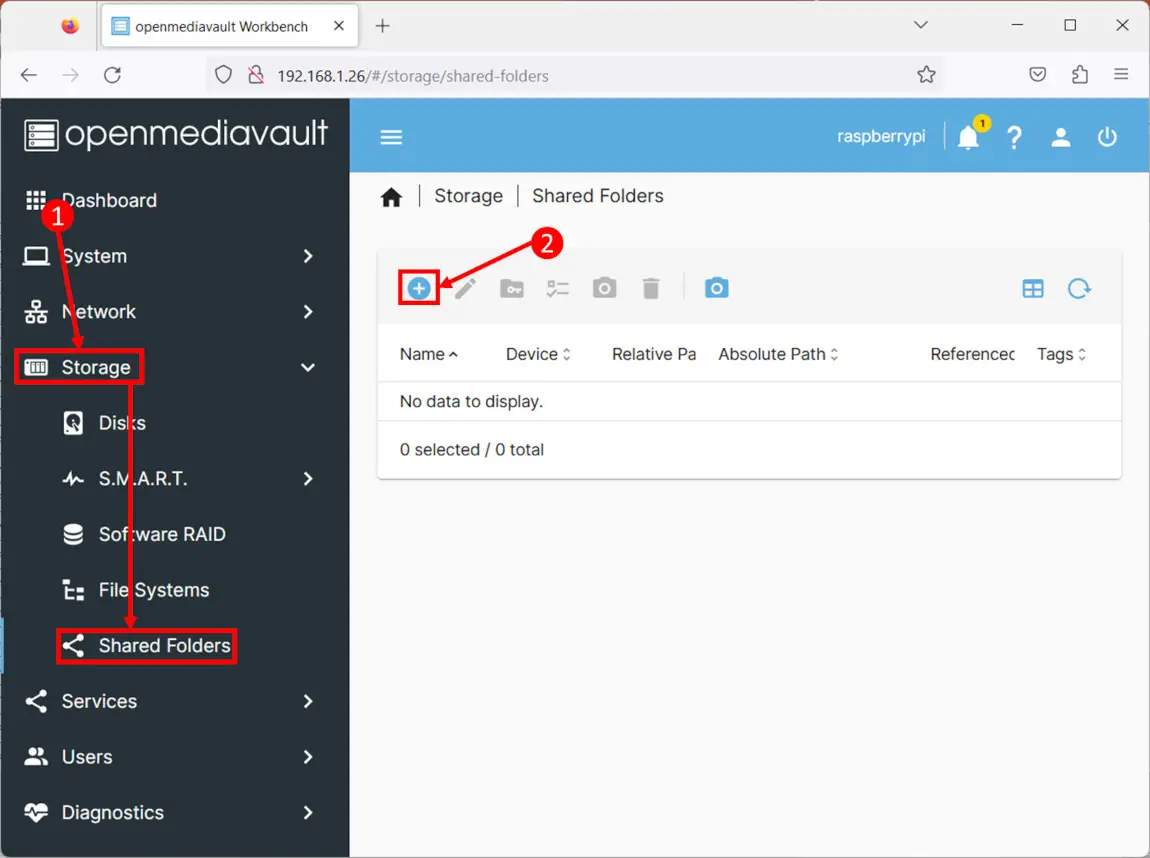
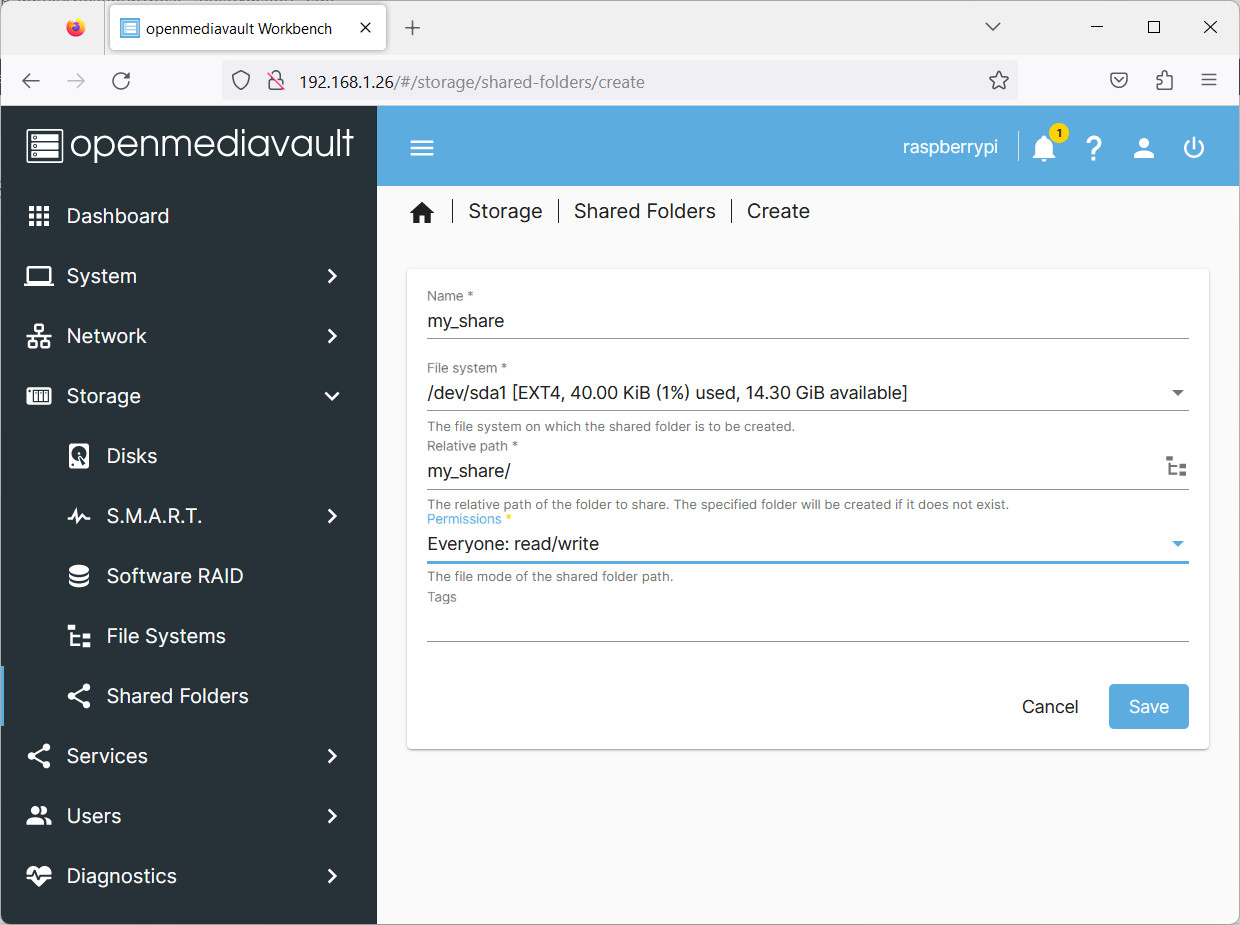
In the following page, please give a name for your share, select the file system already created and give permissions according to your security need. Then click Save:
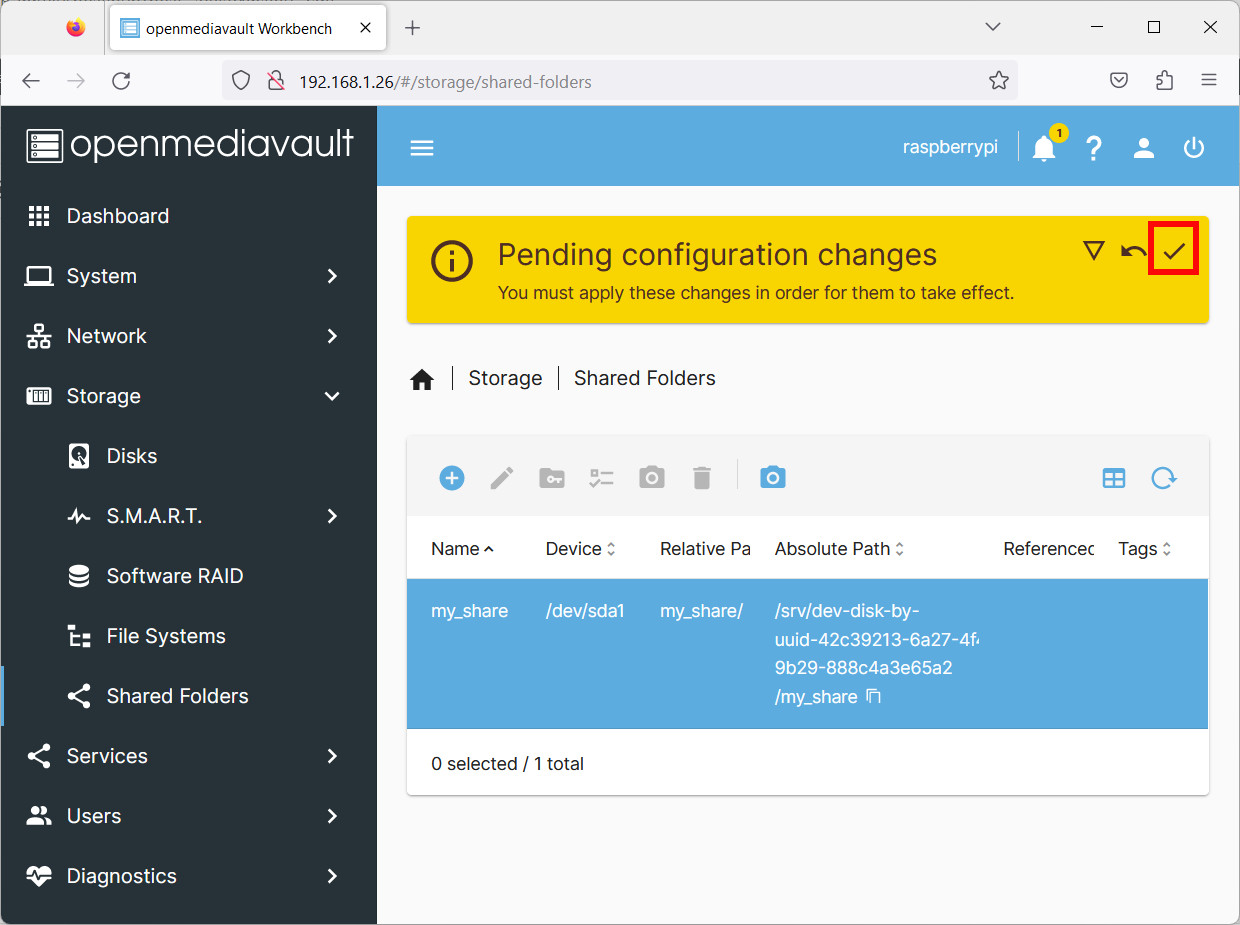
Also here an Apply is required for confirmation:
The share is now ready. But from a network with, maybe, a MS Windows computer you will need a simple way to reach it. The MS Windows “File Explorer” uses Samba (SMB) to automatically discover network resources. This protocol is also supported by many Linux OSes.
We have just to enable the related service from our OpenMediaVault configuration. From “Services” -> “SMB/CIF” -> “Settings”, please enable this service. If required, please also update here the default Workgroup:
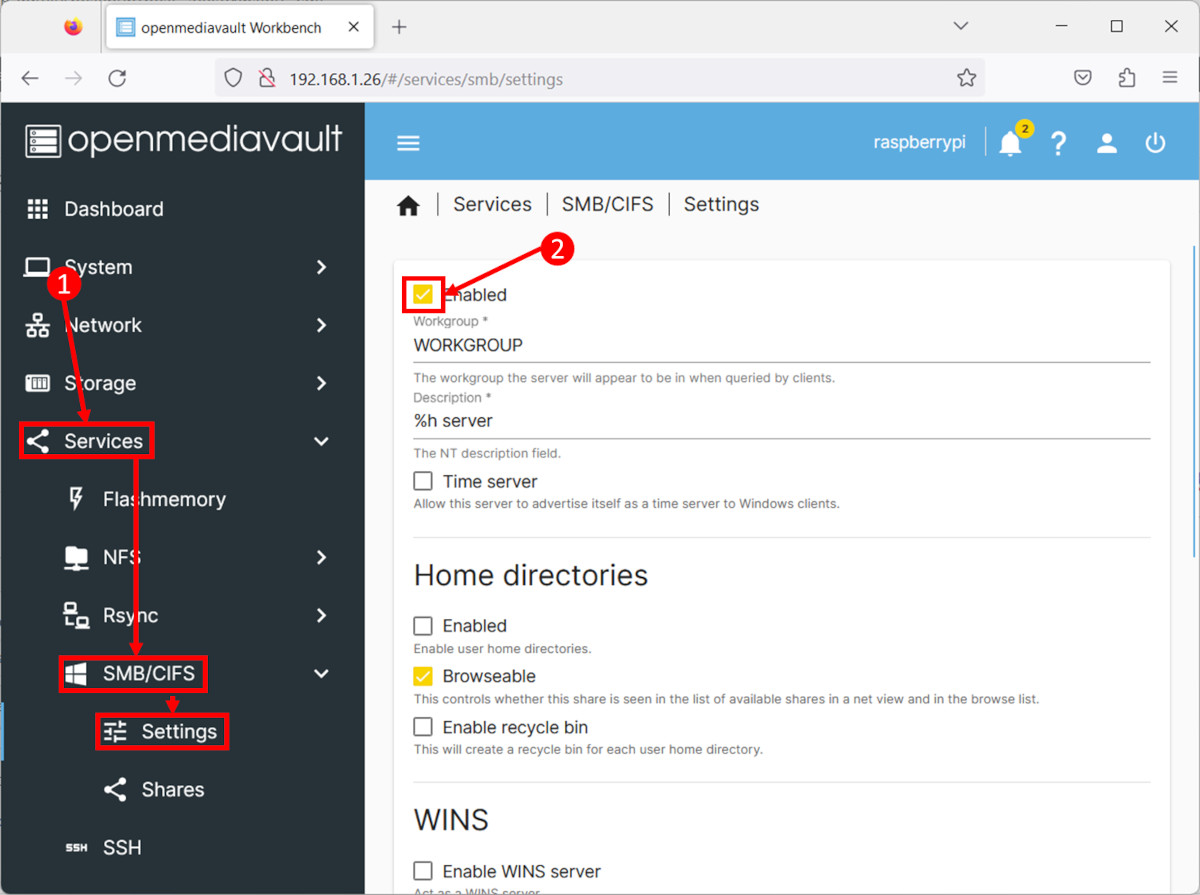
Scroll down and click “save”, followed by the usual “Apply”.
Move to the “Shares” menu and click “Create”:
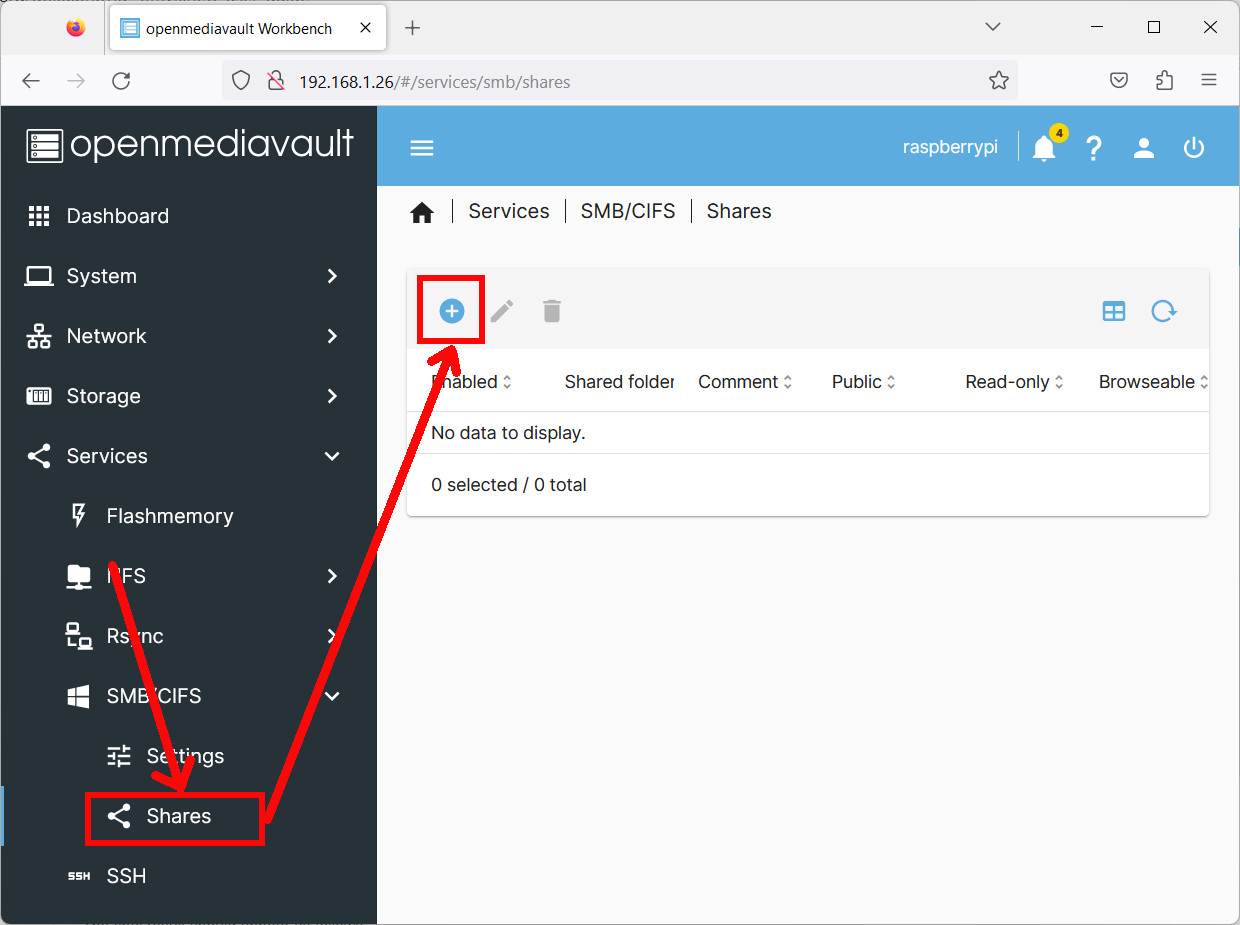
In the creation form, please set the following:
- Check the “Enabled” option
- Select your Shared Folder (my_share in my example)
- Select the Public (“guests allowed” in my example to make it reachable from everyone)
- Check the Inherit permissions option
- Check the Extended attributes option
- Check the Store DOS attributes option

then click Save and, in the following banner, Apply. Your share will be listed here:
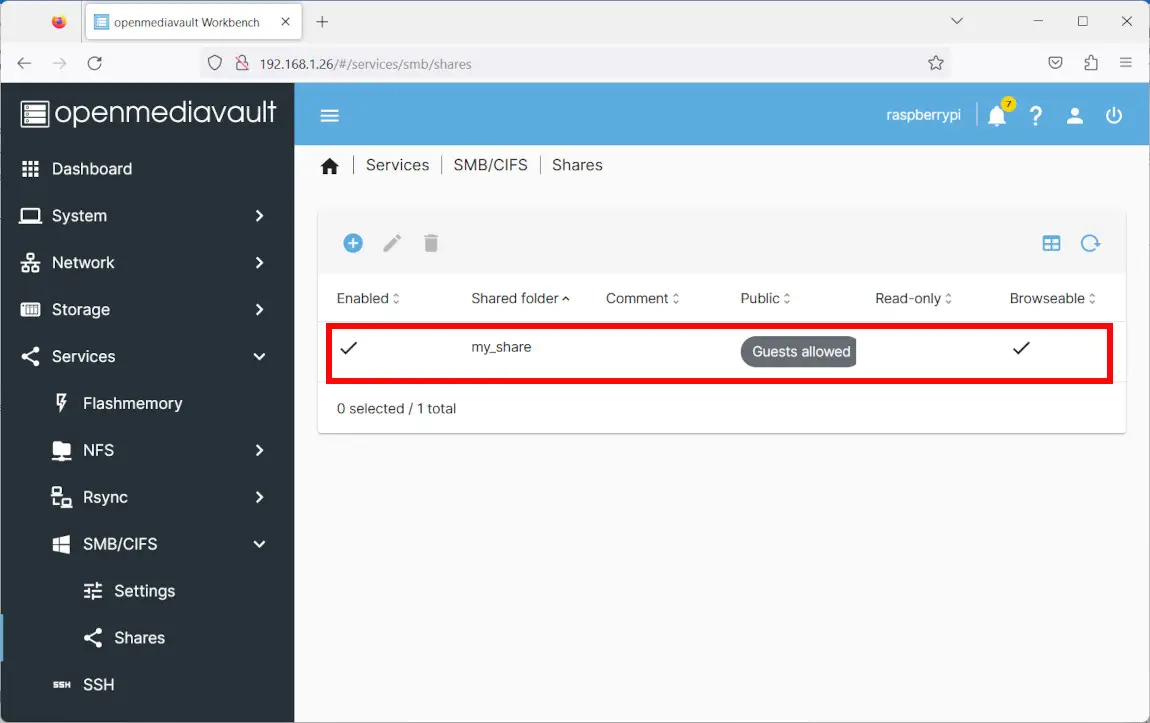
The new share is now available in your network. Please note that it may take a few minutes before Windows discovers the new service.
If you want to enter fastly your share on OpenMediaValut in Raspberry PI, you can also use in your File Explorer the remote resource URL, by pre-pending a double backslash to your Raspberry PI’s IP address. In my case, it will be “\\192.168.1.26”.
OpenMediaVault User Guide
The official OpenMediaVault user guide is available at https://wiki.omv-extras.org/doku.php?id=omv6:new_user_guide.
Next Steps
Are you interested in more projects with your RPI computer board? Take a look at peppe8o Raspberry PI computer tutorials pages.

Open source and Raspberry PI lover, writes tutorials for beginners since 2019. He's an ICT expert, with a strong experience in supporting medium to big companies and public administrations to manage their ICT infrastructures. He's supporting the Italian public administration in digital transformation projects.
![]()
![]()
![]()
![]()
![]()
![]()
![]()


