In this post, I will show you how to install Motioneye on the Raspberry PI computer board.
One of the most powerful things you can accomplish with a Raspberry Pi computer board is that you can use it for a multipurpose home server installing many services each one independent from others. Today, we are going to setup one of the most known, open-source, motion detection software inside a container.
Until the Bullseye version of Raspberry PI OS, MotionEye was working without problems in Raspberry PI and you were able to use Docker to install it. From the Bookworm release, Raspberry PI OS adopted the libcamera library to manage CSI cameras and MotionEye had some problems with it. The solution has been to install a compatibility package (libcamera-v4l2) to simulate the backward compatibility.
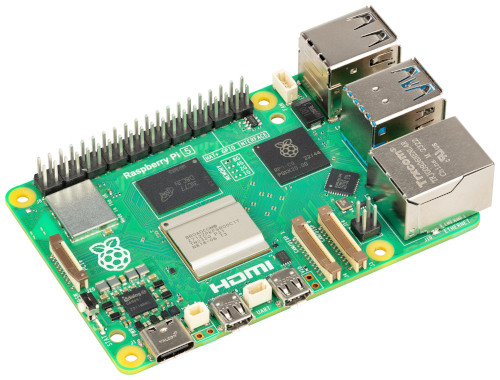
For this tutorial, I’ve used my Raspberry PI 3 Model B+ computer board.
What We Need
As usual, I suggest adding from now to your favourite e-commerce shopping cart all the needed hardware, so that at the end you will be able to evaluate overall costs and decide if to continue with the project or remove them from the shopping cart. So, hardware will be only:
- Raspberry PI Computer Board (including proper power supply or using a smartphone micro USB charger with at least 3A)
- high speed micro SD card (at least 16 GB, at least class 10)
Step-by-Step Procedure
Prepare the Raspberry PI Operating System
The first step is installing the Raspberry PI OS Lite (I suggest the 64-bit version, for boards supporting it) to get a fast and light operating system (headless). If you need a desktop environment, you can also use the Raspberry PI OS Desktop, in this case working from its terminal app. Please find the differences between the 2 OS versions in my Raspberry PI OS Lite vs Desktop article.
Please make sure that your OS is up to date. From your terminal, use the following command:
sudo apt update -y && sudo apt upgrade -yAs the new Raspberry PI OS uses the libcamera library for managing the camera inputs, we also need the two libcamera utils (libcamera-v4l2 and libcamera-tools) to make the camera working. We can install the with the other required packages with the following command, that are different depending on you Raspberry PI model. Please check your ARM architecture with the command uname -a where you will be able to get the arm version within the running kernel version.
For 32-bit ARMv6 and ARMv7 (older Raspberry PI), we must use the following command:
sudo apt --no-install-recommends install python3-pip libcamera-v4l2 libcamera-tools python3-distutils -yWith all the other Raspberry PI models (Raspberry PI 3 and newest) we can use the following command:
sudo apt --no-install-recommends install python3-pip libcamera-v4l2 libcamera-tools python3-dev libcurl4-openssl-dev libssl-dev -yInstall MotionEye in Raspberry PI
The MotionEye project includes a comfortable pip installation method making it simple to install it. By the way, in their official guide they require you to disable the new requirement from Python to create a Virtual Environment system-wide. I suggest avoiding it, as you can skip this limitation by using the --break-system-packages option.
So, the command to install Motioneye is the following:
sudo python3 -m pip install --pre motioneye --break-system-packagesThis command will install all the requirements and prepare the Motioneye installation files in your Raspberry PI. Then, we can complete the installation with the following command:
sudo motioneye_initWait for the prompt to be back.
We need now to aff the libcamerify compatibility layer to Motioneye. For this, please open the sudo nano “motioneye.service” file for your systemd configuration files:
sudo nano /etc/systemd/system/motioneye.serviceIdentify the following line:
ExecStart=/usr/local/bin/meyectl startserver -c /etc/motioneye/motioneye.confand change it with the following line:
ExecStart=/usr/bin/libcamerify /usr/local/bin/meyectl startserver -c /etc/motioneye/motioneye.confSave and close.
We finally need to reload the systemd settings and restart the motioneye service, with the following 2 commands:
sudo systemctl daemon-reload
sudo systemctl restart motioneye.service
Use MotionEye with Raspberry PI
Our video surveillance service is quite ready. Complete the setup with your favourite web browser (from a remote PC or your Raspberry PI OS Desktop. With your Raspberry PI’s IP address in mind (in my case “192.168.1.7”, but use your one), browse the address:
http://<<YOUR_RPI_IP_HERE>>:8765
to retrieve the Motioneye login page:
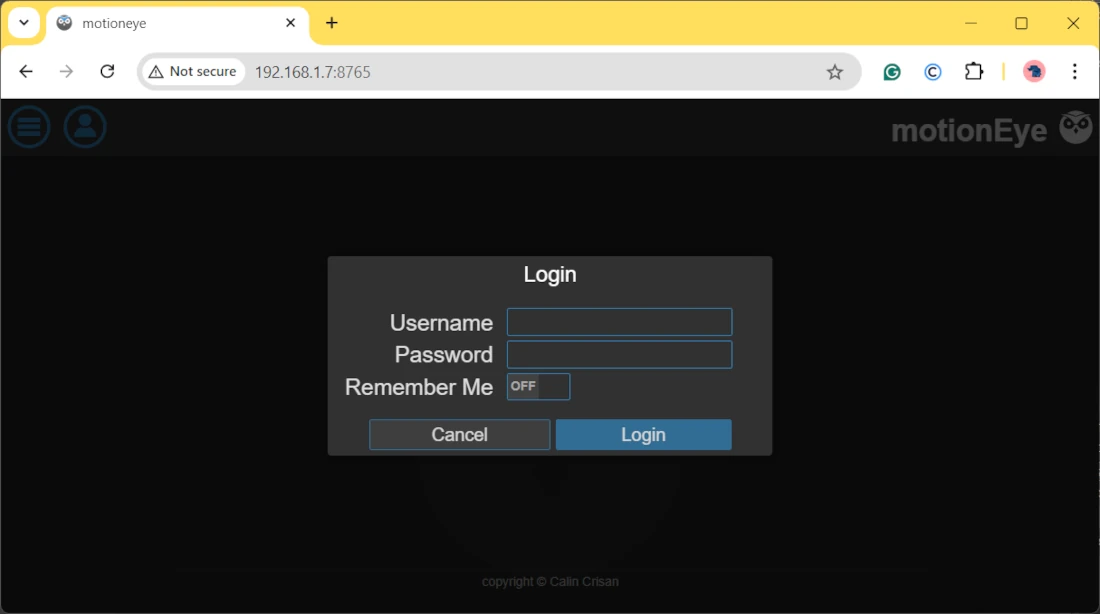
To log in, you can use the default Motioneye credentials:
- Username: admin
- Password:
(blank password)
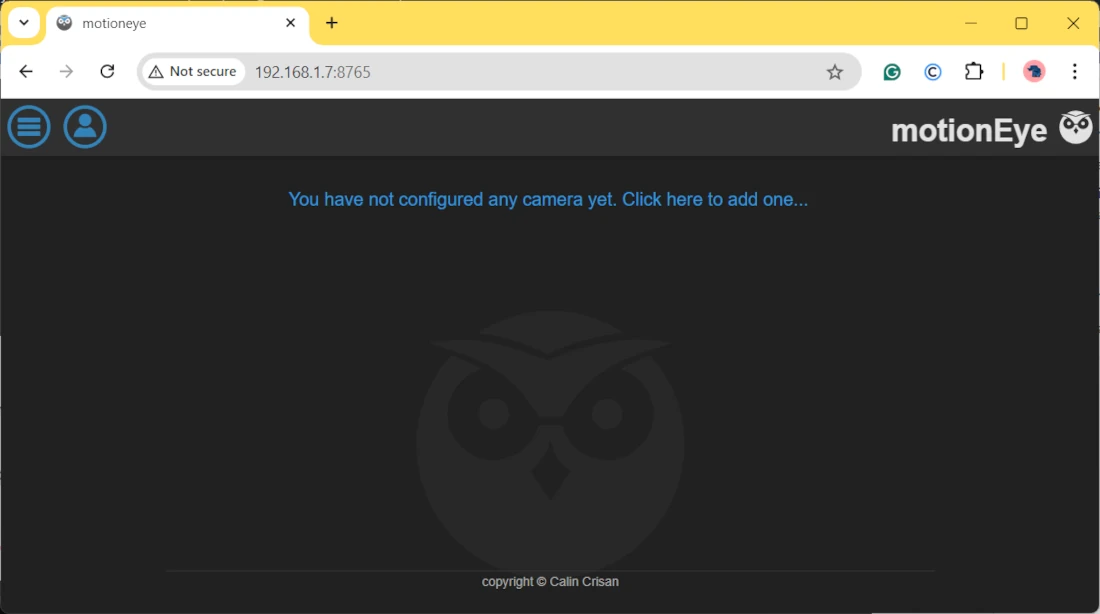
The next screen notifies (only for the first login) that there aren’t yet any cameras configured. Click “Click here to add one…”:
Configure camera settings by selecting the “Local V4L2 Camera” Camera Type and the first Camera available:
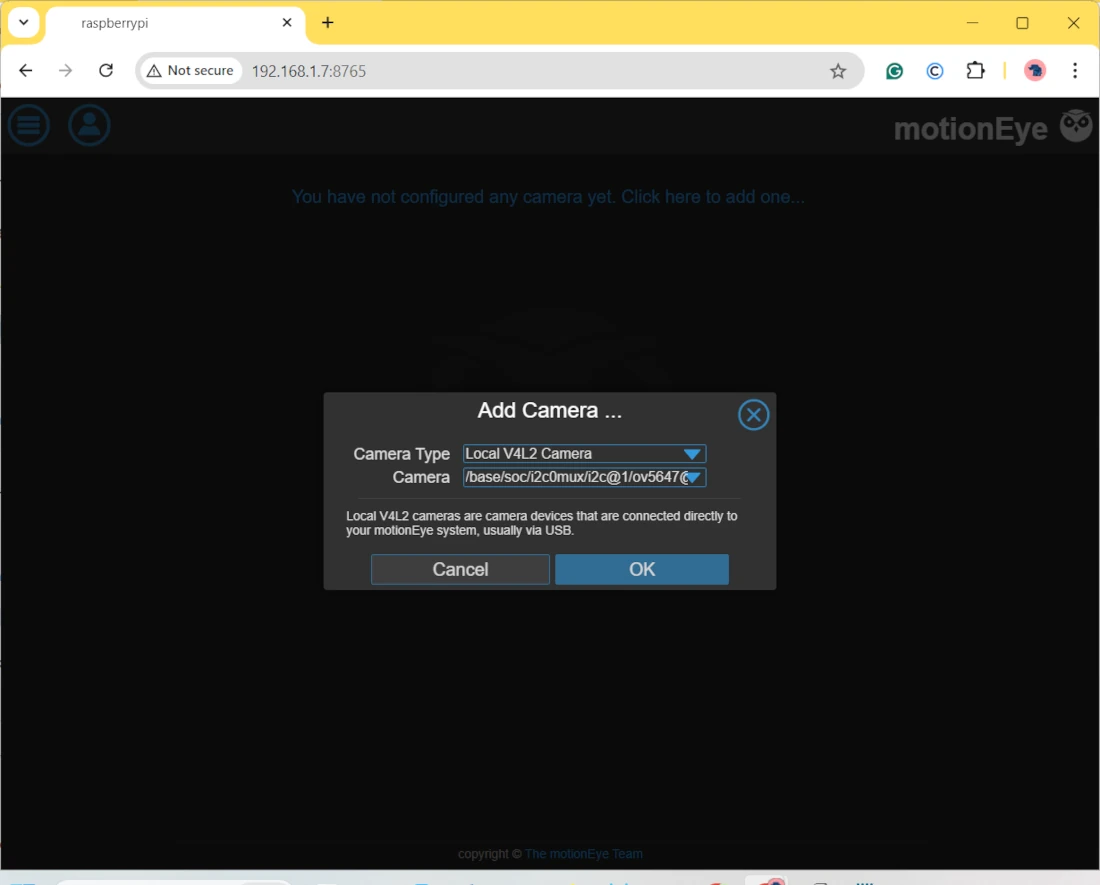
and confirm clicking “OK”. The next screen will show you the Motioneye service working (with your camera stream online) and ready to be configured at your preference:
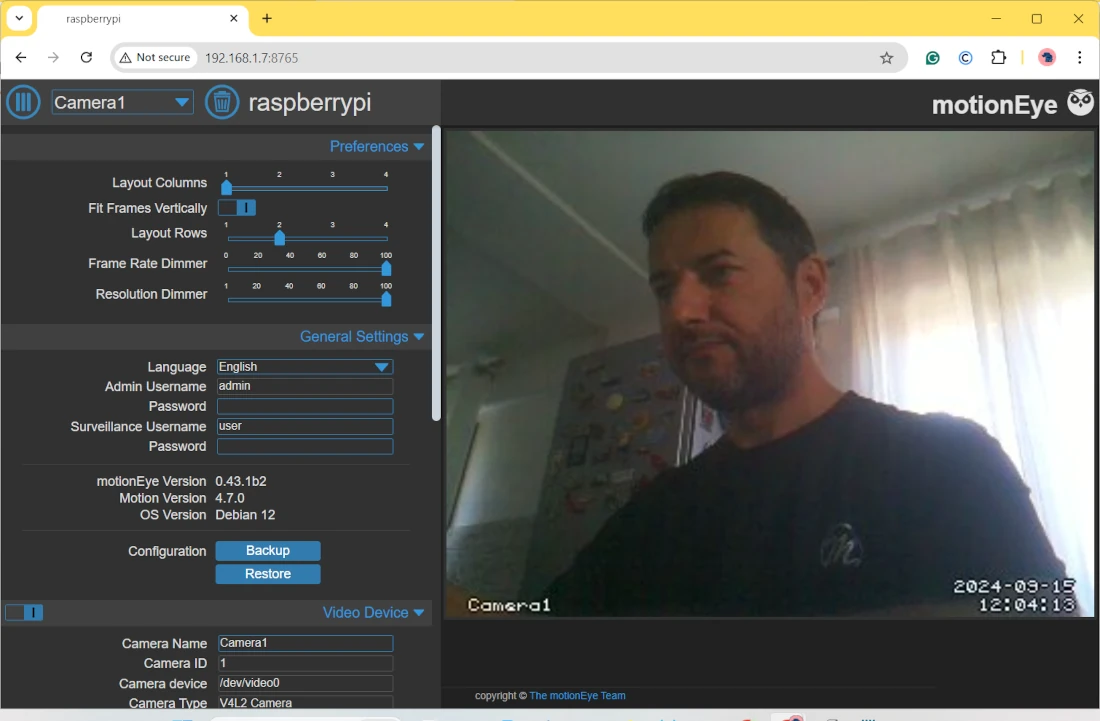
Settings for Motioneye with Raspberry PI Camera
With the default setting, your camera will appear slow and with low quality. You can set it by scrolling down the settings in the left-side menu. Here, you can change the Video resolution and Frame rate, setting more performing values. At each change, you will see the “Apply” button: when you finish modifying the settings, you must click it to make your changes effective:
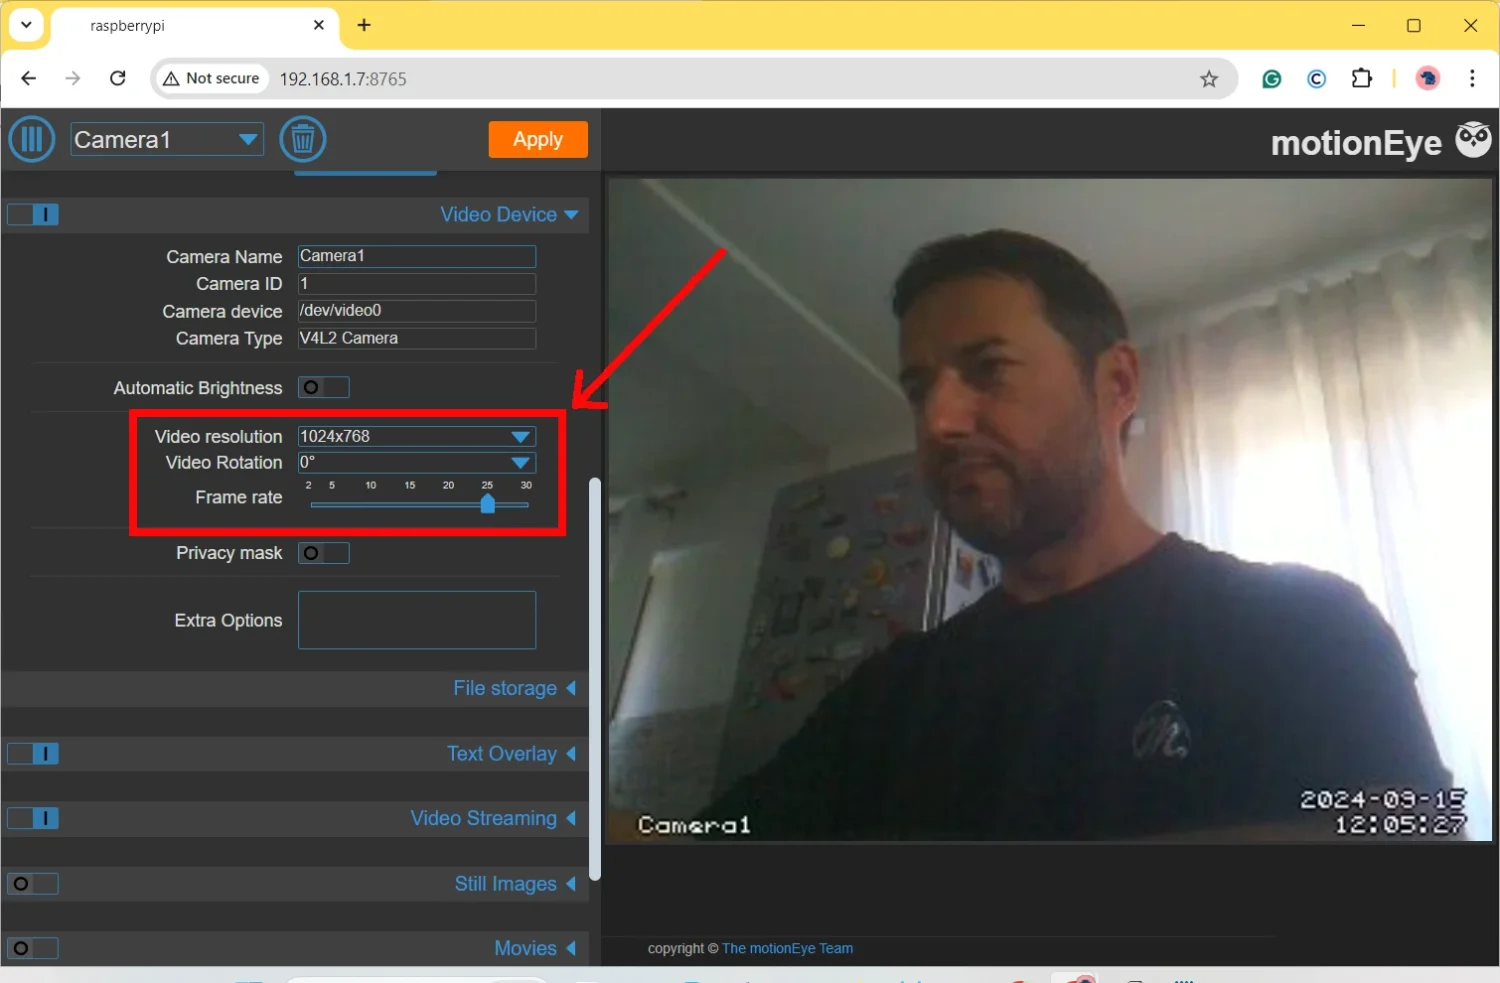
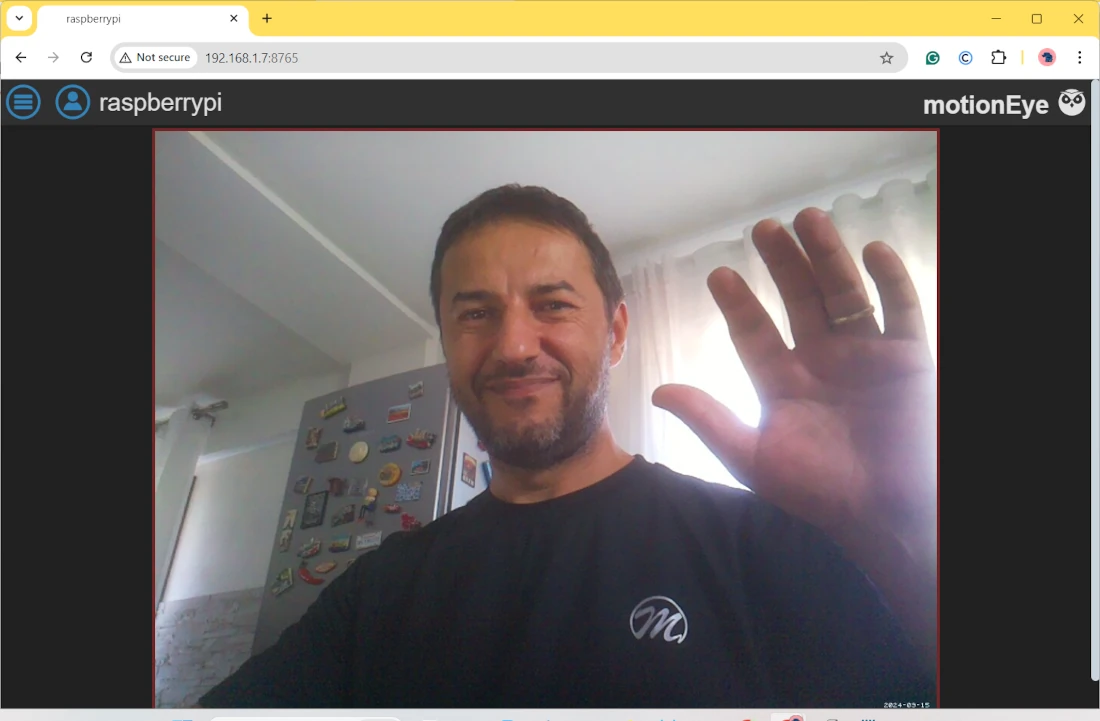
After clicking “Apply”, you will get a better video streaming:
With the same menu, you can also change other settings like enabling motion notifications, setting up motion detection trigger, and so on.
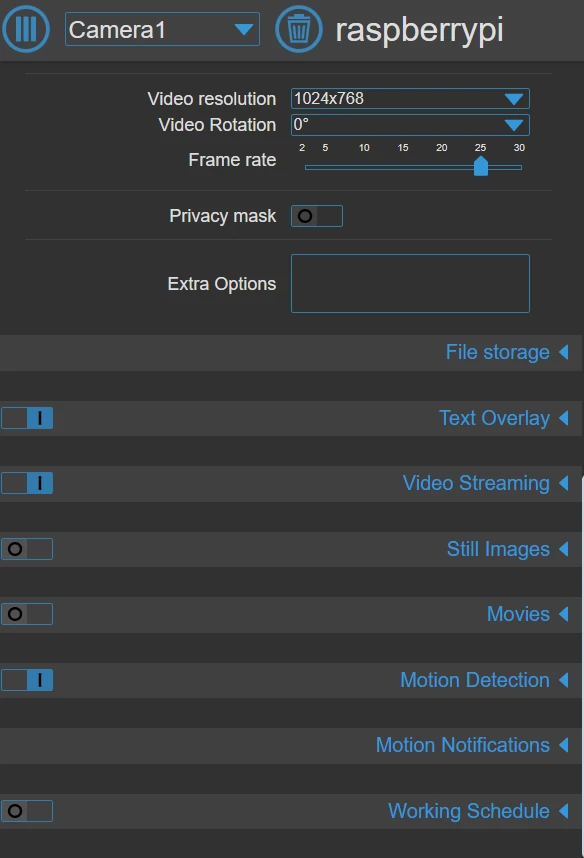
For example, we can enable the shapshot feature, allowing us to take a manual snapshot from our video. to do this, please open the “Still Images” feature and set to on the “Enable Manual Snapshot”:
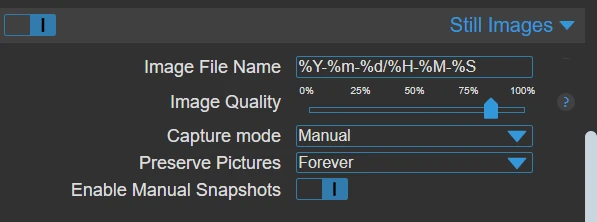
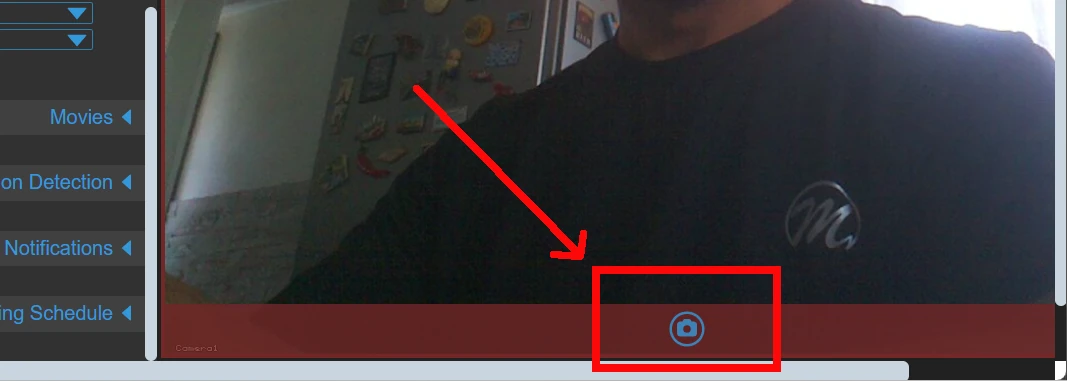
With this, that snapshot button will be enabled in the lower part of your camera stream, as shown in the following picture:
Motioneye will save all the recorded files (snapshots and videos) in the following folder (assuming that you used the default “Camera1” label):
/var/lib/motioneye/Camera1/
Moreover, you will be able to manually change the camera settings from the following folder:
/etc/motioneye/
Here you will be able to find the “camera-1.conf” file with your camera settings
What’s Next
Interested in more cool projects for your Raspberry PI? Take a look at peppe8o Raspberry PI tutorials.
Enjoy!

Open source and Raspberry PI lover, writes tutorials for beginners since 2019. He's an ICT expert, with a strong experience in supporting medium to big companies and public administrations to manage their ICT infrastructures. He's supporting the Italian public administration in digital transformation projects.

Hi
I have RPi 3 Model B (aarch64) and a new Camera 3. I followed your steps but for some reason I don’t see the option: /base/soc/i2c0mux/i2c@1/ov5…. when adding a new camera.
I only have multiples of those two:
bcm2835-codec-decode
bcm2835-isp
And obviously I’m not getting any picture from the camera with those.
Any idea why? What have I missed?
Hi Wojtek. It’s hard to debug the reason why it doesn’t work for you. My suggestion is to try opening an issue to the motioneye page on GitHub (https://github.com/motioneye-project/motioneye/issues) and/or try with a different software like ZoneMinder or ISpy / Agent DVR.
Sorry for this
Thank you so much. After many frustrating attempts to make my project (motioneye on rp_zero_2w in combination with a camera_module_3) work I was close to giving up.
Accidently, I stumbled across your post. I gave it a try and, what can I say, it works. It just works!
Thank you so much again!
Thank you for your feedback, Stefan. Happy this was useful for you too! Please remember to share the tutorial with your friends in your social channels! 🙂
Bruh. Thank you so much for this write up. I tried a handful of other options and my cheap Freenove camera simply would not detect. After following your guide and adding one extra line to config.txt to add the imx219 camera (which I also had done in the other attempts), everything works mint. Thank you!
Thank you for your feedback, Rob. Please don’t forget to share my post in your social networks 😉
Thank you for this tutorial Peppe. I spent few days to make it working, until I find this. Well explained, and works great.
Thank you for your feedback! It’s really appreciated and I’m happy that my work has been an help for you
Worked perfectly on Pi 3b , Bookworm Lite 64bit , Official raspberry pi camera 3. Thank you!
Glad it helped you too, Andy. Thank you for your feedback!