
Last Updated on 19th September 2025 by peppe8o
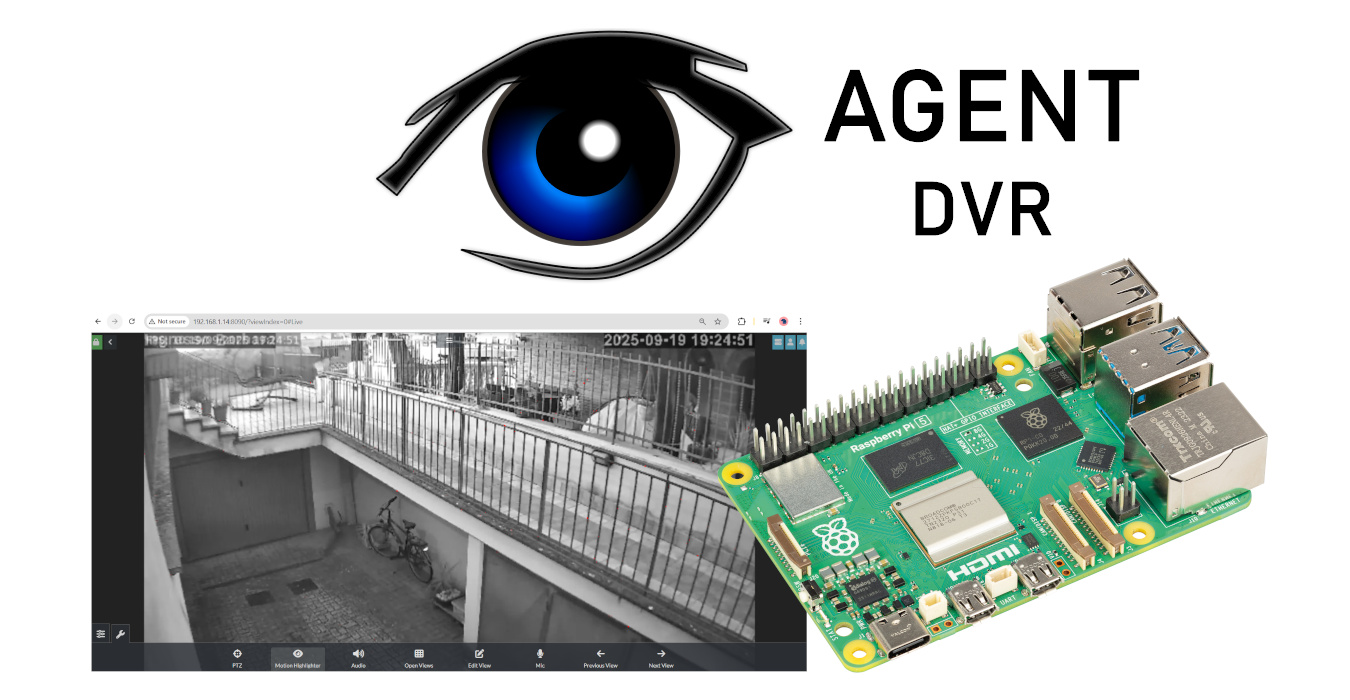
In this tutorial, I’m going to show you how to install the Agent DVR of iSpy on a Raspberry PI computer board.
Tired of having a lot of low-cost surveillance cameras, everyone with its app and everyone requiring a fee for cloud storage? With iSpy and Raspberry PI, you can get your self-hosted and open-source DVR compatible with hundreds of IP cameras.
What is iSpy and Agent DVR
iSpy is an open-source video surveillance application, widely spread around the world. It’s compatible with a lot of consumer webcams and IP cameras. The list of compatible cameras can be found at the following link: https://www.ispyconnect.com/cameras. Please remember that their software is free only for personal, local use.
Agent DVR is a standalone replacement for iSpy that runs as a service, uses less CPU and features a web user interface that is accessible from a web browser. Moreover, differently from iSpy, the Agent DVR can be installed on a Linux server, thus making it a must to be tested on low-cost computers like our Raspberry PI.
So, from what I understand from the developer page, the difference between iSpy and Agent DVR is that the first one runs as a Service on the web, where you can connect your cameras for central monitoring, while Agent DVR works as a service that can be installed locally in your home network and manages your cameras directly from there.
Agent DVR offers a lot of features. Besides supporting a long list of cameras, it offers motion detection (with intelligent face detection), alert generation, customising actions on alerts, and so on.
Finally, you can also set the iSpy Agent DVR to run in kiosk mode with a touchscreen display by referring to my Raspberry PI Kiosk: creating a touchscreen, informative stand.
What We Need
As usual, I suggest adding from now to your favourite e-commerce shopping cart all the needed hardware, so that at the end you will be able to evaluate overall costs and decide if to continue with the project or remove them from the shopping cart. So, hardware will be only:
- Raspberry PI Computer Board (including proper power supply or using a smartphone micro USB charger with at least 3A)
- high-speed micro SD card (at least 16 GB, at least class 10)
- IP Cameras (I suggest using those supporting ONVIF)

Step-by-Step Procedure
Prepare the Raspberry PI Operating System
The first step is installing the Raspberry PI OS Lite (I suggest the 64-bit version, for boards supporting it) to get a fast and light operating system (headless). If you need a desktop environment, you can also use the Raspberry PI OS Desktop, in this case working from its terminal app. Please find the differences between the 2 OS versions in my Raspberry PI OS Lite vs Desktop article. For low RAM Raspberry PI computer models, the Lite OS is strongly suggested.
For this test, I will use a Raspberry PI OS Lite headless installation. However, a Desktop installation also works by using the terminal.
Please make sure that your OS is up to date. From your terminal, use the following command:
sudo apt update -y && sudo apt full-upgrade -yThe Agent DVR installation process requires curl. It sould be already installed on your Raspberry PI, but you can be sure with the following command:
sudo apt install curl -yInstall the Agent DVR
Installing the iSpy Agent DVR is a straightforward process. Everything is done with the following command:
curl -sL "https://www.ispyconnect.com/install" | bashIt requires a few minutes, as it installs several packages. At the beginning, it will require an installation confirmation:
Would you like to install libva 2.22.0? (y/n)Please answer “y”.
Also, the process asks if you want to run the Agent DVR as daemon (without needing to run it manually at every Raspberry PI reboot:
Setup AgentDVR as a system service (y/n)?Please answer “y” again.
Finally, you will get the following messages:
Started AgentDVR service.
Use the application shortcuts or go to http://localhost:8090 to configure AgentDVR.
Now you are ready to complete the installation from a browser.
Accessing Agent DVR on Raspberry PI from a Browser
With a remote computer (or from the browser in your Raspberry PI desktop, if you choose this OS), you will need to use the Raspberry PI’s IP address as the URL, followed by the “8090” port.
As my Raspberry PI has IP 192.168.1.14, I will access it with the URL http://192.168.1.14:8090, getting the following initial page where it asks you to choose a language, where you can select your preferred:
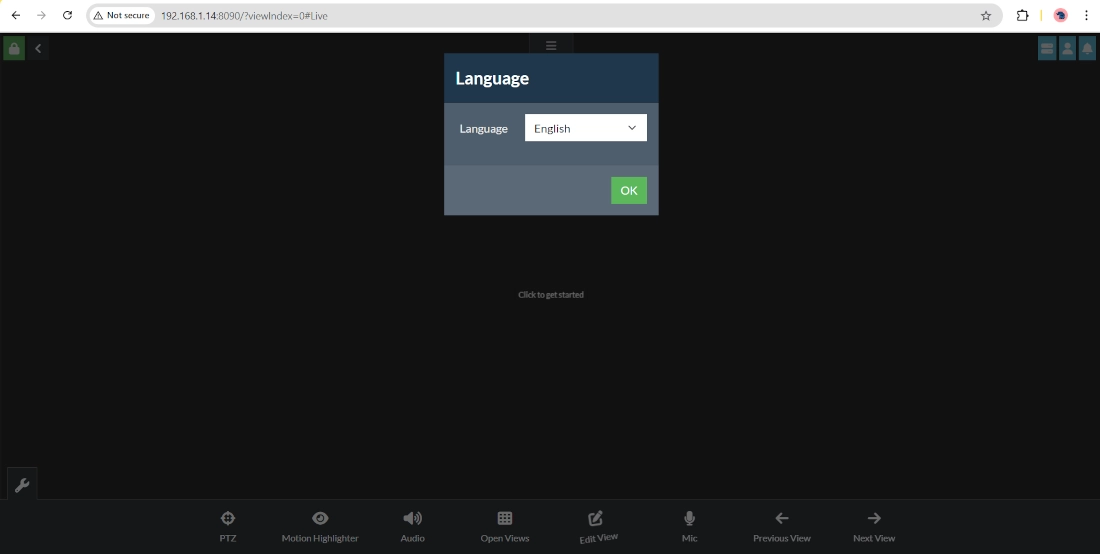
Select your language and click “OK”.
After this, it will give you some useful links for your installation.
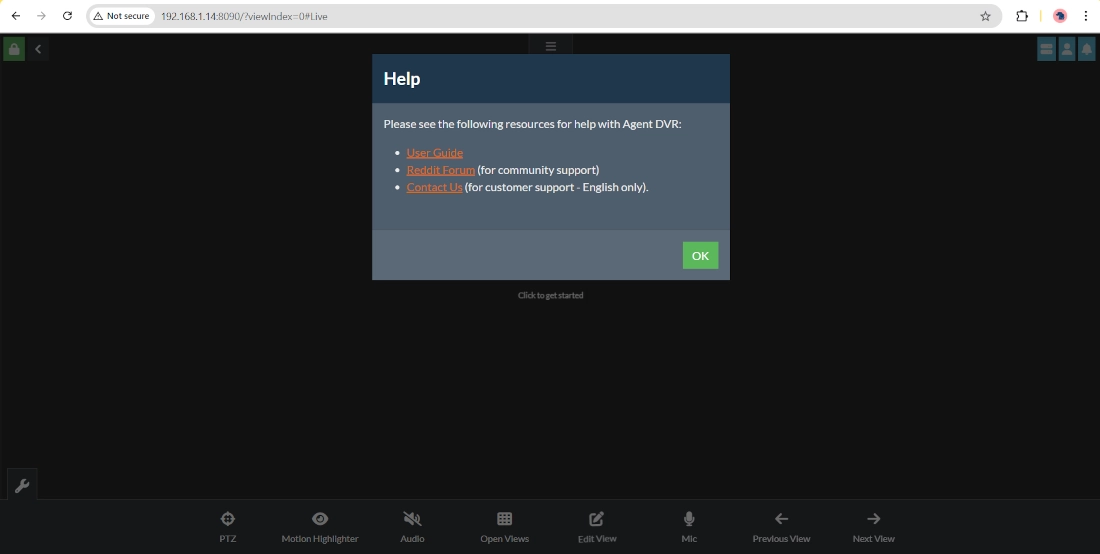
Please click the “OK” button.
Set Agent DVR User and Password
The first access shows you an empty page as you didn’t set up any camera. But you probably noticed that it required no user/password authentication. Even if it currently runs only in a local network area, I strongly suggest setting it as it enables system authentication.
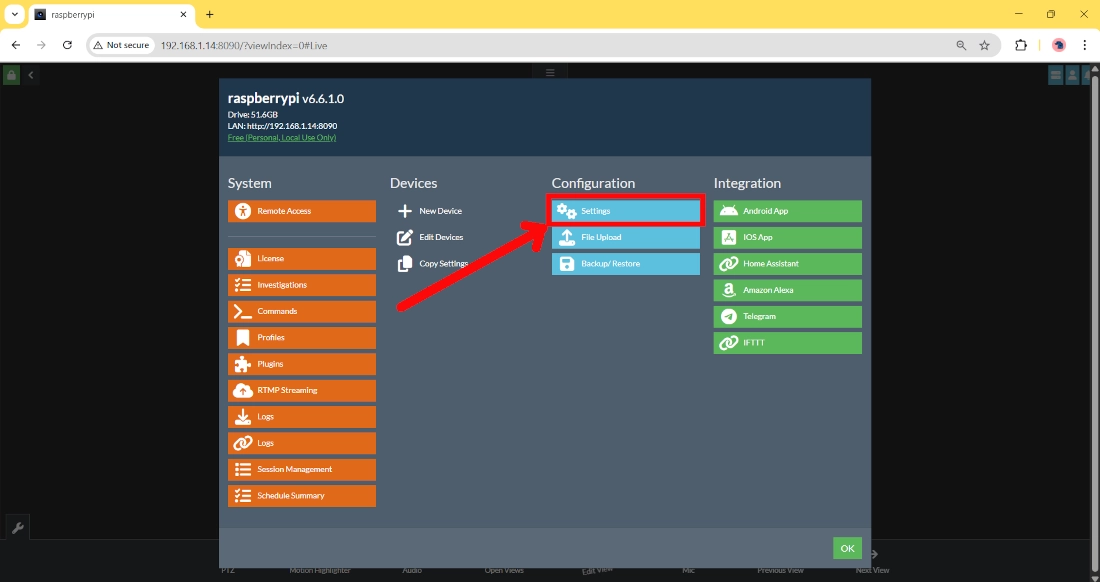
You can do this job by clicking the “Server menu” button in the top-right corner:

This will open a pop-up window, where you can control everything of your Agent DVR server.
Now, please click the “Settings” button:
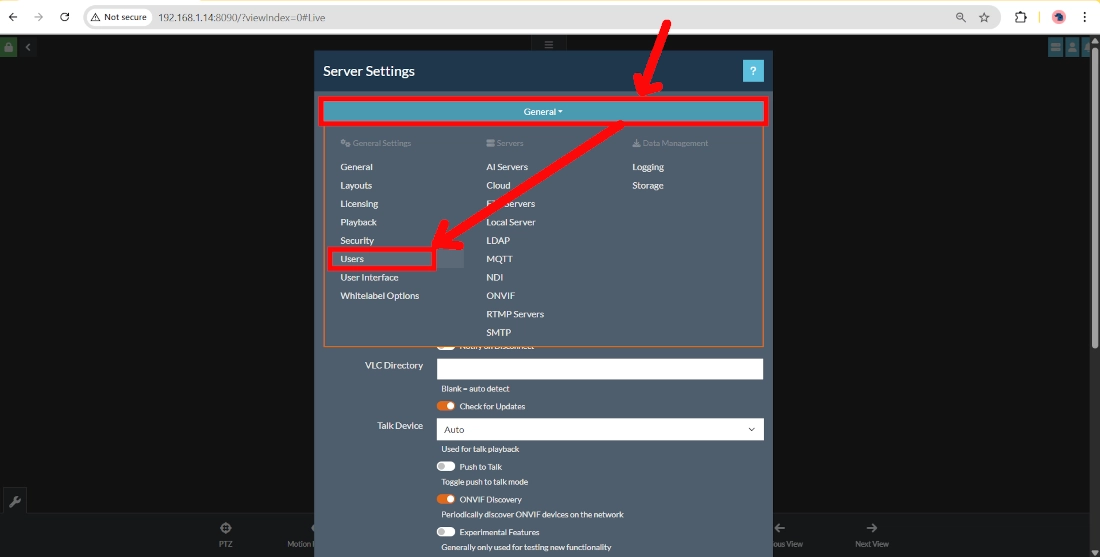
At this point, by clicking the blue tab labelled as “General” you can reach a new list of possible settings, please select the “Users” links:
With the “+” button highlighted in the following screenshot, you can add your

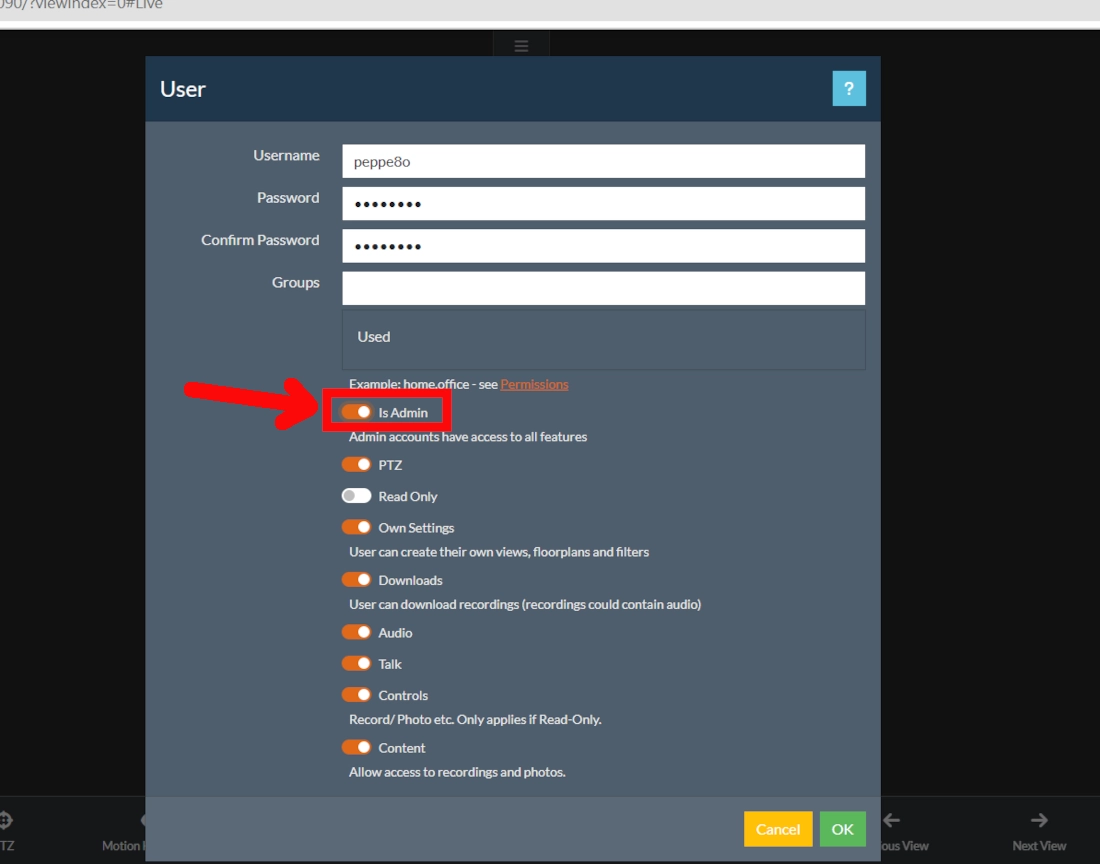
In the following form, you can add your username and password (confirming it). I also suggest you enable the “Is Admin” option for your first user, so that you can be sure that this will allow you to manage every setting from the installation:
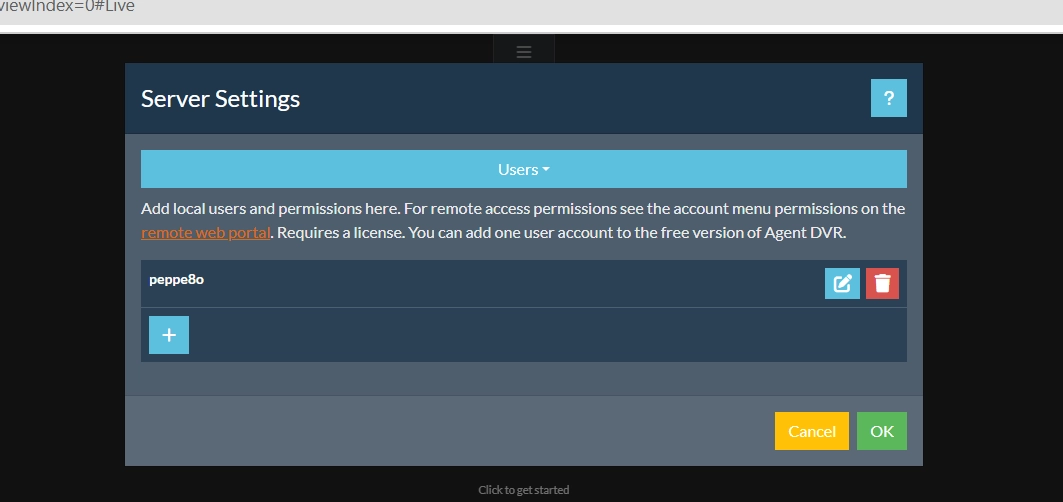
At the end, please click the “OK” button, and your user should now appear in the users list:
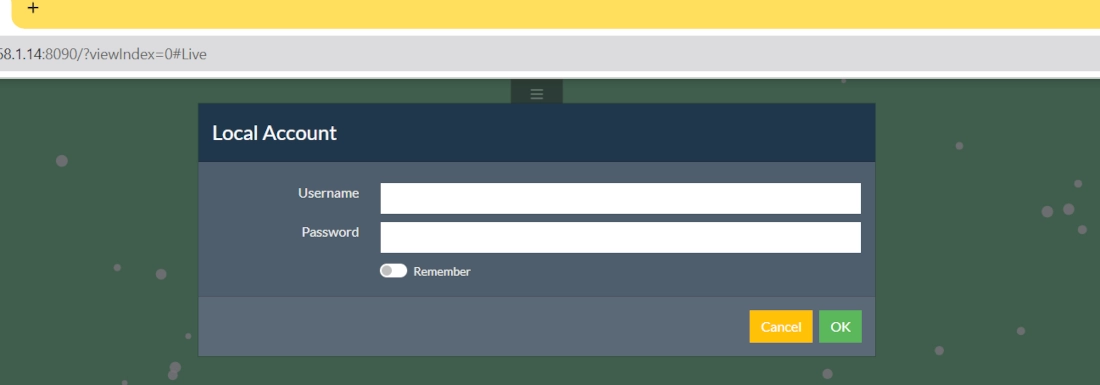
Please click “OK” again; this will show you the login page where you can use your credentials.
Add Your First Camera
Now we are ready to add our cameras. For this example, I will use my IeGeek IG62, which supports ONVIF.
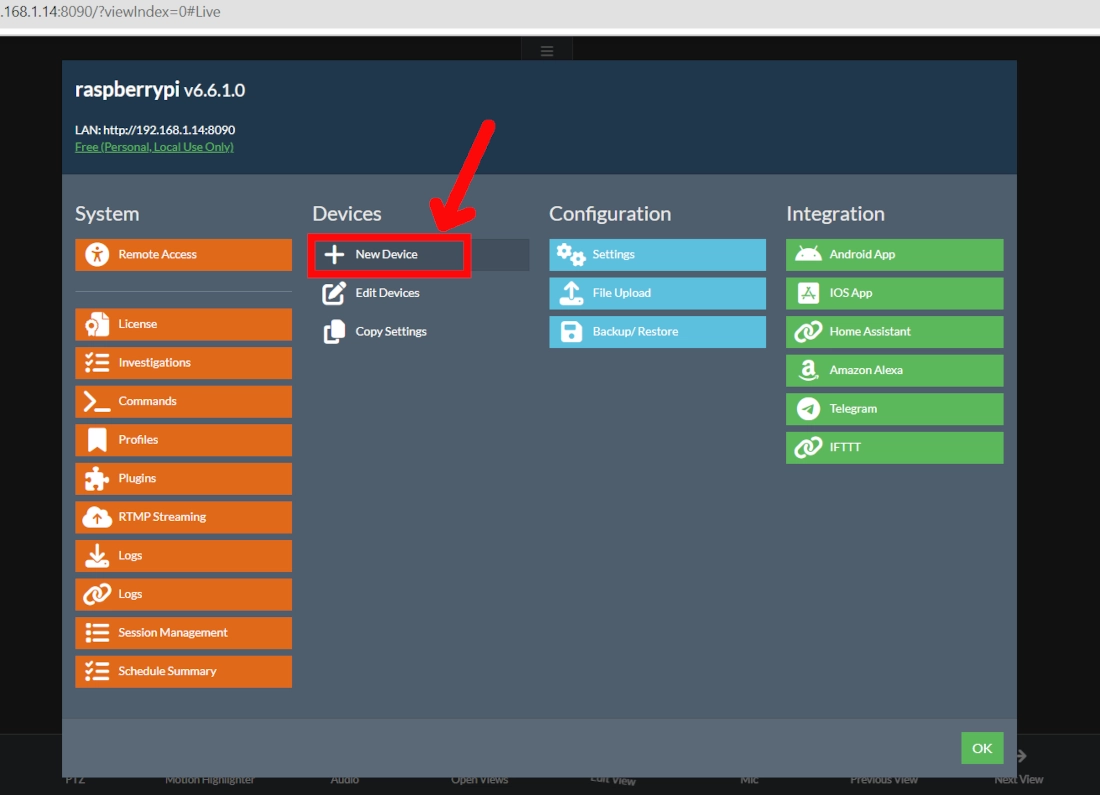
From the Server menu, this time please select “New Device” within the Devices section:
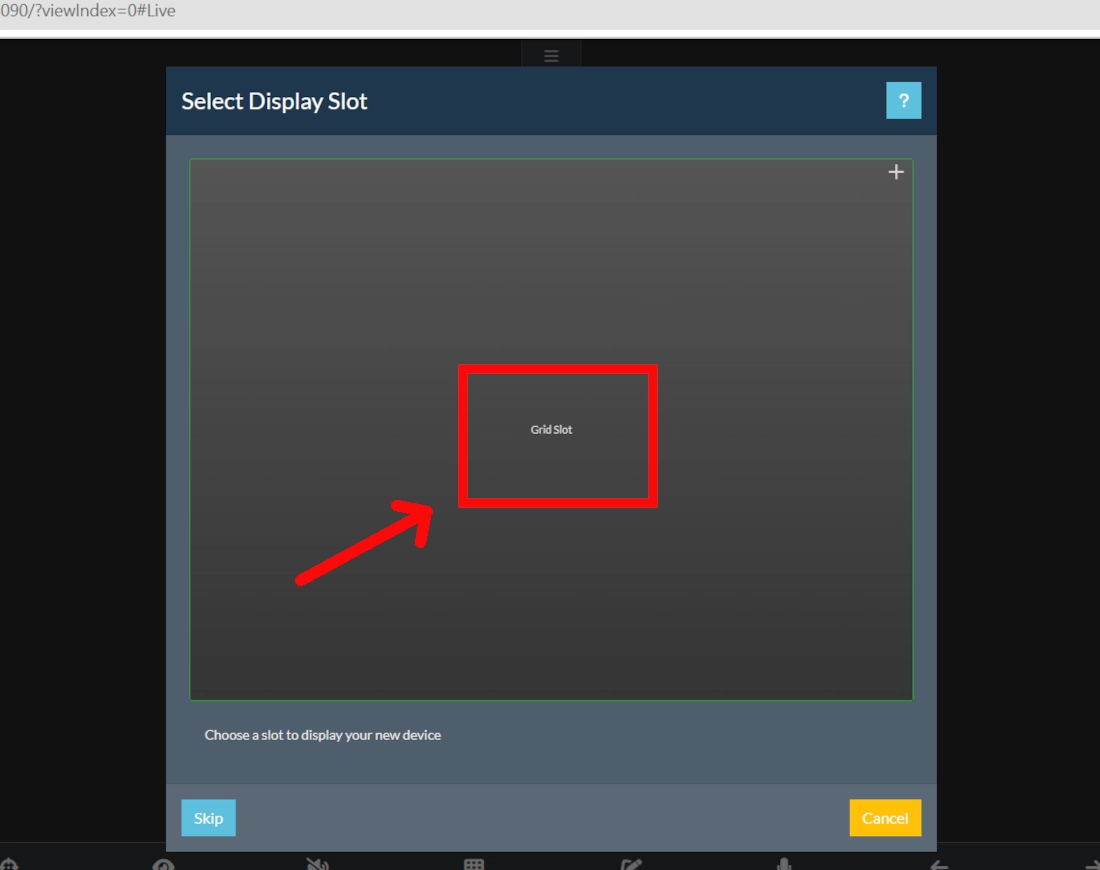
In the next window, you can choose the default Grid Slot by clicking on it:
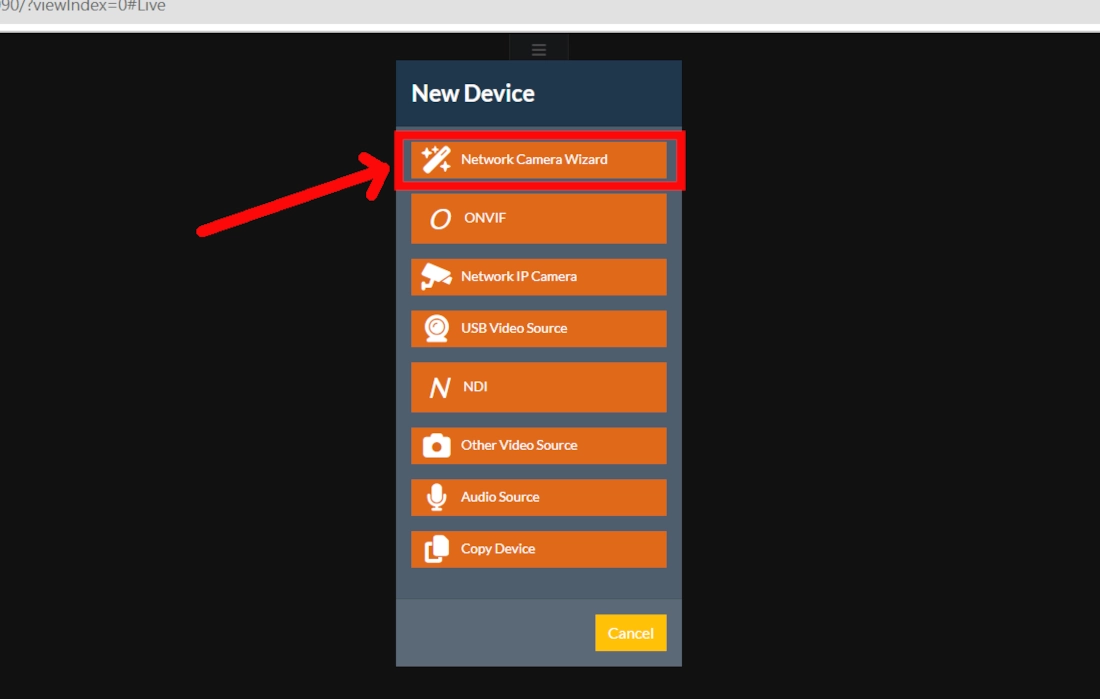
Please select the “Network Camera Wizard” button:
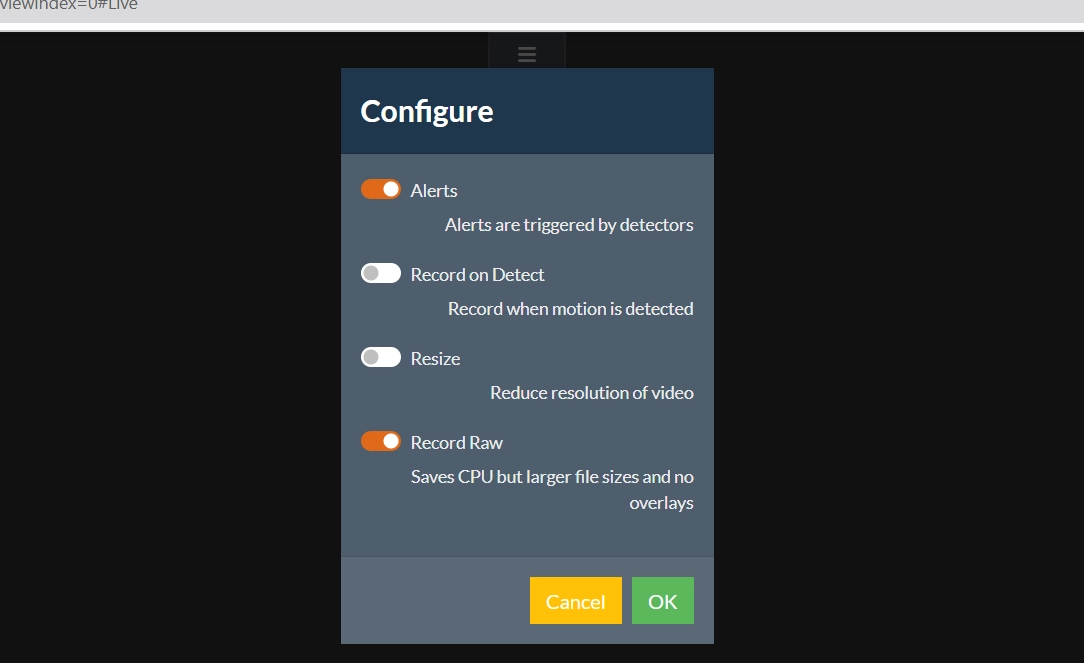
Then you can add a few more settings, then press “Ok”:
We reach now the camera settings:
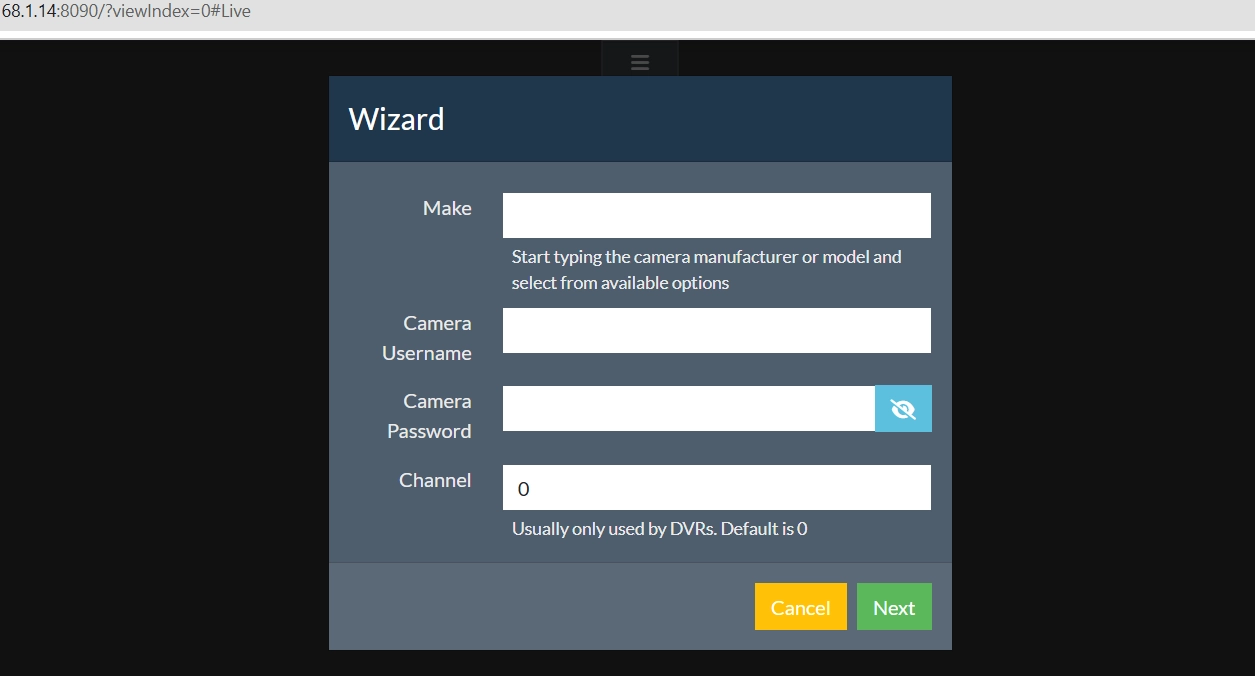
The “Make” area requires identifying the camera vendor and model. After starting to type the first digits of your vendor or model, the form will propose a list. As this list is limited, I suggest starting to type directly your camera model or the full string composed as “vendor: model”. For example, mine IeGeek IG62 will match the string “Iegeek: ig62”:
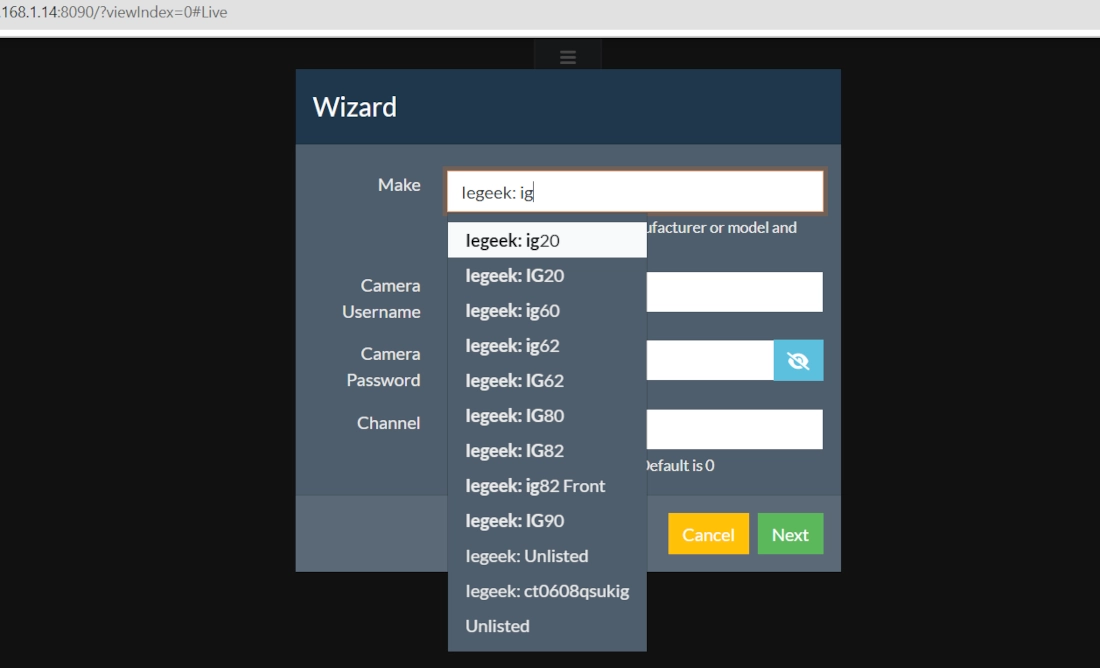
The username and password depend on the cameras. Usually, these are not the same as those you use to enter the camera app, even if they can be set from their apps. Sometimes, when the username change option is missing, this may be a default value that can be found with a little research on forums. For example, my ieGeek IG62 camera has “admin” as a user, and you can change the password from its app.
Once set, please click the “next” button.
Agent DVR will try to discover all the devices in your network, enabling you to select the one matching the IP address of your IP Camera:
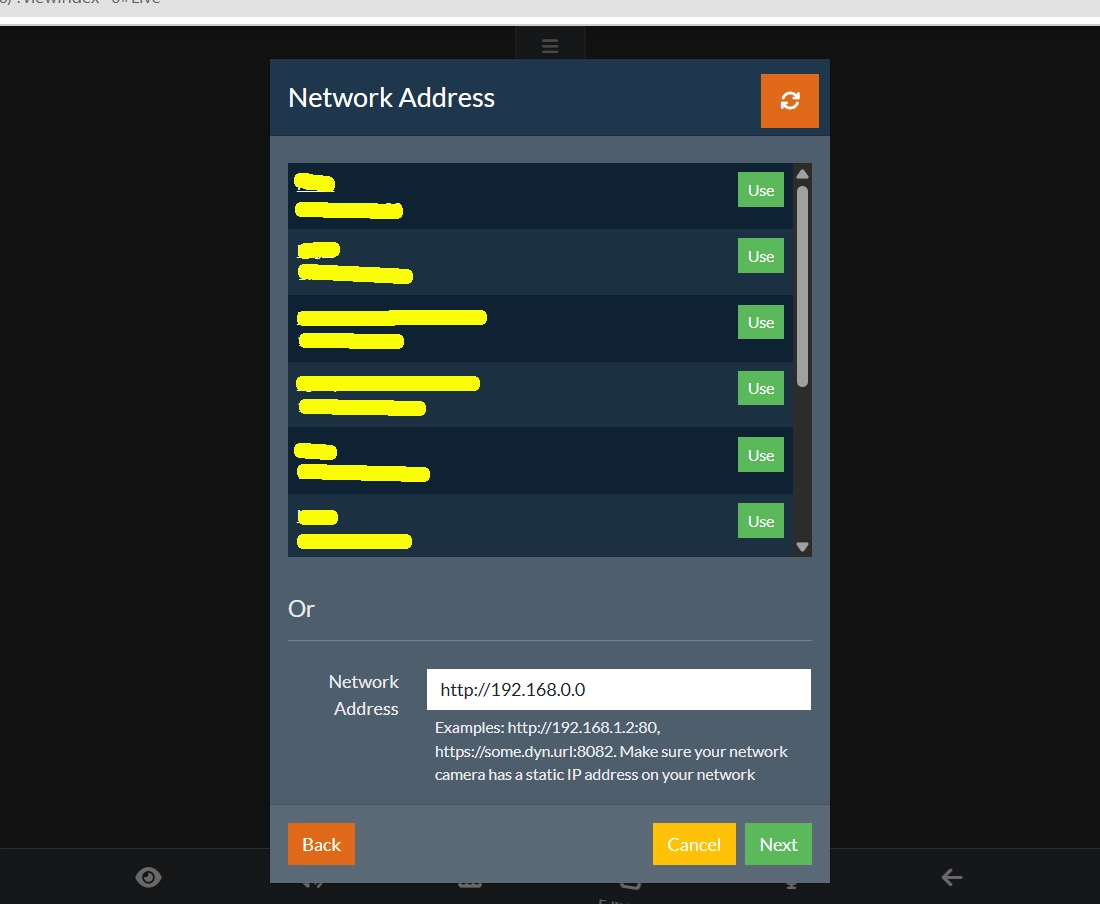
You can just click the “Use” button in the record matching the Camera’s IP. From this, you will get a list of the services exposed by your camera:
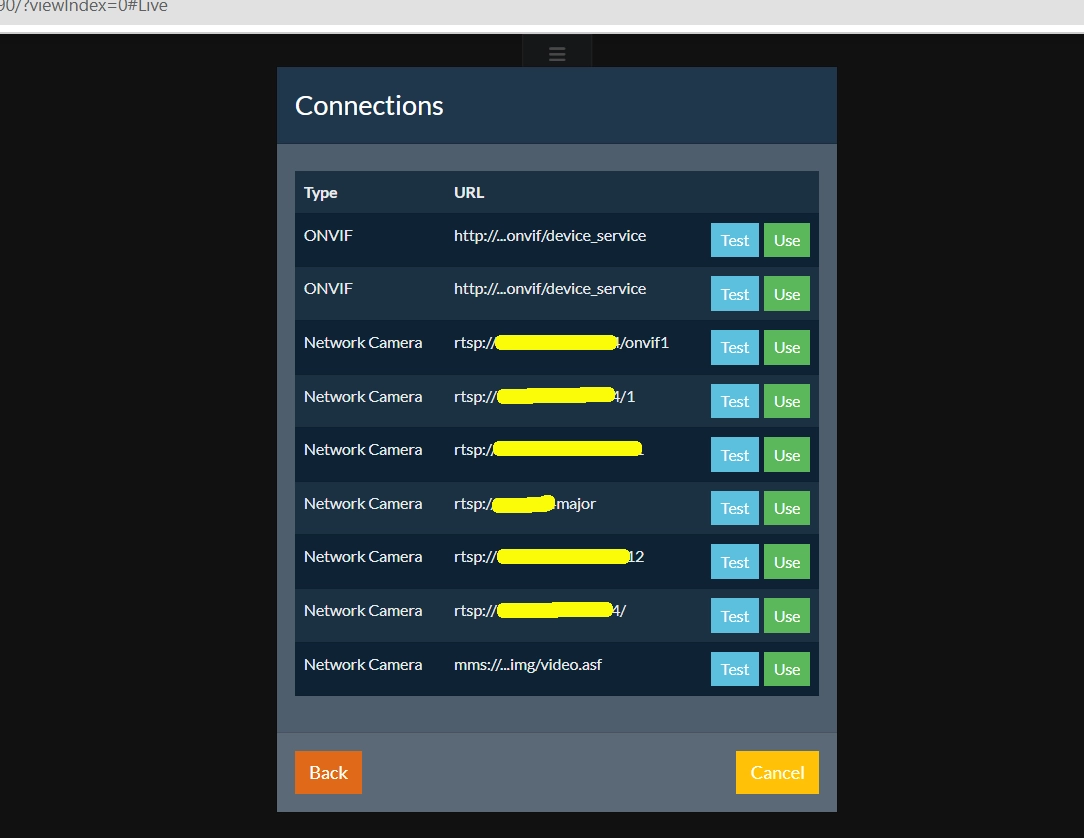
Clicking the “Test” button in one of these rows will run a connection test, which will return a small “ok” message if the connection works:
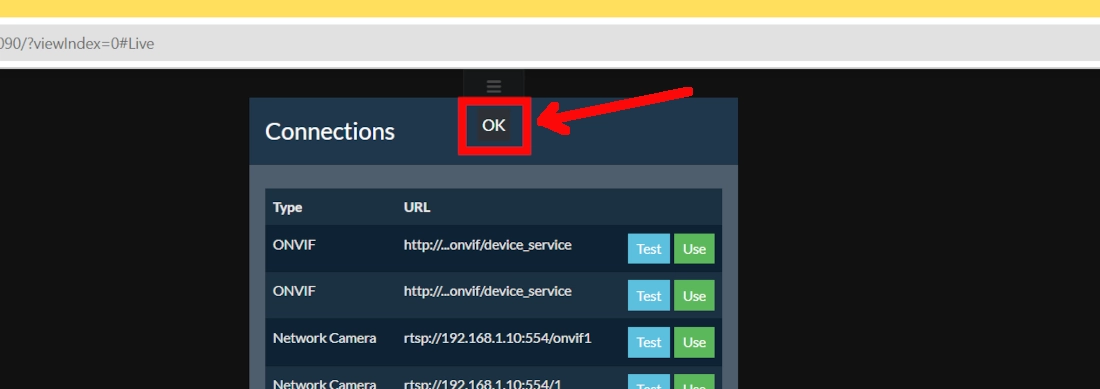
If you get that message, you can click the “Use” button.
This will move you to the final camera settings, where you can, besides other things, give this camera a name:
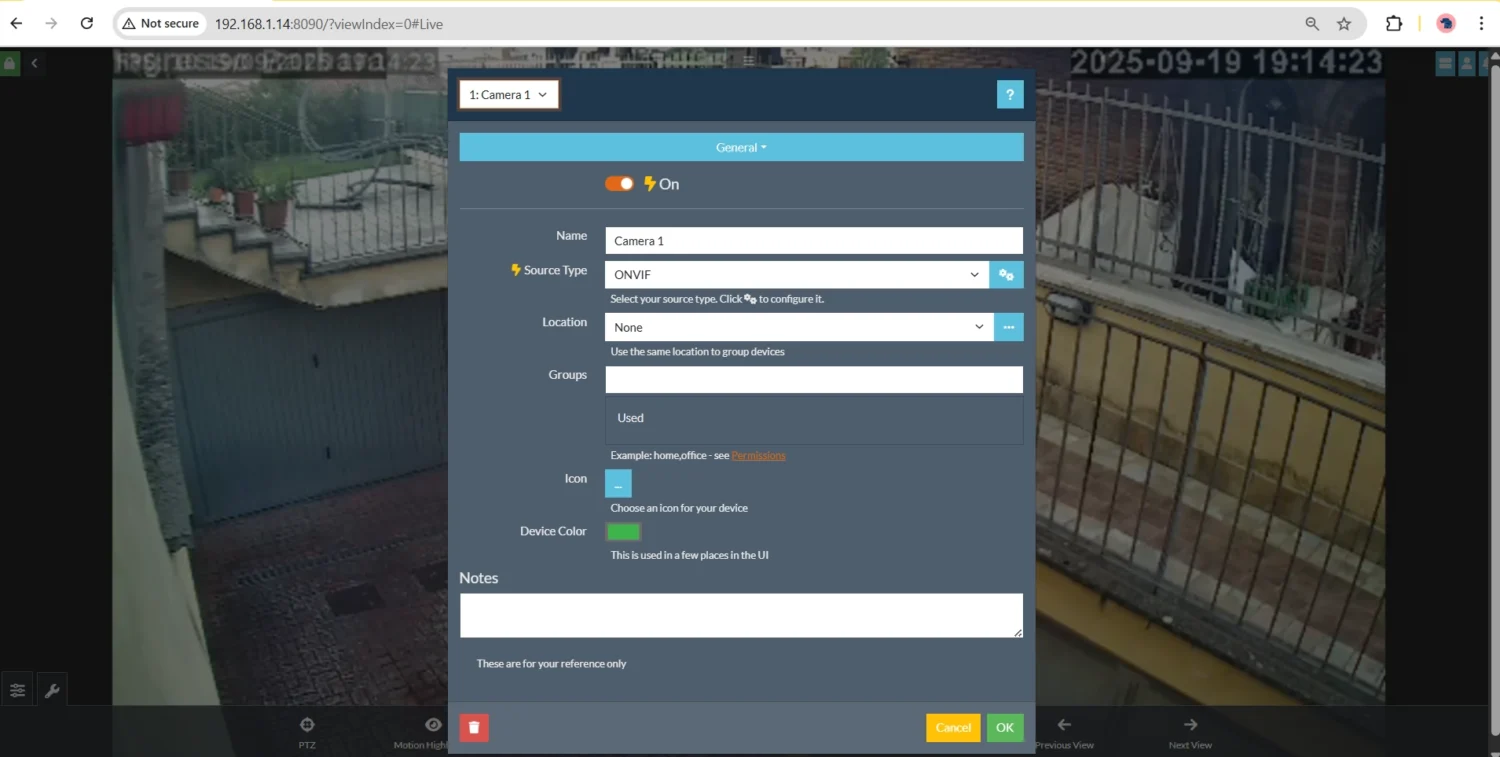
The final “OK” button will move you to the “Server menu”. Exiting from this you will see your Camera.
Follow up
From here, you will be able to add customisations to your Agent DVR installation. A possible need may be adding external storage to save the recordings. Raspberry PI OS Lite doesn’t mount external USB drives automatically by default. You can mount automatically external storage devices by referring to my Automount USB storage with Raspberry PI OS Lite: fstab and autofs.
Also, you can go on with more customisation options by using the official AgentDVR User Manual.
What’s Next
If you want to discover many other projects for your Raspberry PI, you can take a look at peppe8o Raspberry PI tutorials.
Enjoy!

Open source and Raspberry PI lover, writes tutorials for beginners since 2019. He's an ICT expert, with a strong experience in supporting medium to big companies and public administrations to manage their ICT infrastructures. He's supporting the Italian public administration in digital transformation projects.
![]()
![]()
![]()
![]()
![]()
![]()
![]()


You can also run Plate Recognizer Snapshot SDK on the Pi! This way, you can get license plate recognition alongside Agent DVR. Just FYI, Plate Recognizer already has a pre-integration with Agent DVR (https://platerecognizer.com/vms-integrations/agent-dvr-ispy/). More info on Plate Recognizer: https://platerecognizer.com/
Great write-up! Does Agent DVR require, or benefit from, the 64-bit version of the RPi OS? And, if the 64-bit version is used, do you recommend using “zram” as a means to protect the SD card from the significant memory swap space requirements of this version of the OS? Thanks! – Duane
AgentDVR is NOT open source as far as I know! It’s free, and probably the best DVR out there, but if true FOSS is important, see this: https://github.com/ispysoftware/iSpy/issues/109
Rpi 3B inadequate in my opinion, could not get a clean feed from 2 cameras, terrible lag.
I apologize if I ask for help, but unfortunately I’m having a problem: I carefully followed the installation procedure, and I didn’t get any errors, so it seems that everything went perfectly, however, when I try to connect to:
http://192.168.1.130:8090it doesn’t connect, ERR_CONNECTION_REFUSED.Do you have any suggestions please
Thank you
Hi Arnaldo,
yes, I just checked that there’s an update in the path for the installation script. So, I just updated the tutorial:
1. added the line with the command to install curl (sudo apt install curl -y)
2. updated the install script path (the new path includes a “v2” between “main” and “install.sh”).
Please, can you try it now?
Grazie,
Giuseppe
Thank you for the quick reply. I did it all again but nothing changed.
I saw later that the same instructions were available at the link: https://www.ispyconnect.com/download.aspx?utmzz=utmcsr%253Dgoogle%257Cutmcmd%253Dorganic%257Cutmccn%253D%28not%2520set%29%257Cutmctr%253D%28not%2520provided%29&webuid=4vd3t 8, selecting DVR Agent – Linux/ macOS/ RPi, and pressing the Download button.
Tried with both RPi3B+ and RPi4-8GB, same behavior. It seems that no web service is available trying to access the RPi’s IP 192.168.1.130:8090. both from Windows 10 laptops and from smartphones with Chrome, Firefox and Edge.
Normally on Rpi4 I use Openhabian which I normally target at port 8080.
I don’t understand but I don’t know how to investigate further
In any case, thanks 1000
Arnaldo
It’s really strange as I tested it this morning with a Raspberry PI Zero 2 W and it worked. I started from a fresh Raspberry PI OS Lite installation, and I ca see that it work both from:
pi@raspberrypi:~ $ netstat -peanut | grep ":8090"(Not all processes could be identified, non-owned process info
will not be shown, you would have to be root to see it all.)
tcp 0 0 0.0.0.0:8090 0.0.0.0:* LISTEN 1000 14627 325/Agent
tcp 0 0 192.168.1.18:8090 192.168.1.111:61757 ESTABLISHED 1000 16724 325/Agent
tcp 0 0 192.168.1.18:8090 192.168.1.111:61713 TIME_WAIT 0 0 -
and
pi@raspberrypi:~ $ ps -ef | grep Agepi 325 1 27 17:40 ? 00:00:53 /home/pi/AgentDVR/Agent
pi 997 887 0 17:43 pts/0 00:00:00 grep --color=auto Age
please, can you check that you have the same outputs from the 2 commands?
This is the result of the first command:
arnaldo@raspberrypi:~ $ netstat -peanut | grep “:8090”
(Not all processes could be identified, non-owned process info
will not be shown, you would have to be root to see it all.)
arnaldo@raspberrypi:~ $
and this is the second command:
arnaldo@raspberrypi:~ $ netstat -peanut | grep “:8090”
(Not all processes could be identified, non-owned process info
will not be shown, you would have to be root to see it all.)
arnaldo@raspberrypi:~ $
I see that in the second command I didn’t get the same answer as you, I must admit my lack of experience, so I don’t know the meaning of the answers to these commands, and consequently how to make any corrections.
Thank you very much for your availability.
Arnaldo
Are you running on Raspberry PI OS?
I can’t see any result from these commands.
Please, can you try with a free MicroSD card, installing the OS with the following tutorial?
http://peppe8o.com/install-raspberry-pi-os-lite-in-your-raspberry-pi/
For history and for the users reading this comment thread, the problem has been fixed by using the 64-bit Raspberry PI OS version. Thanks to Arnaldo for the feedback
Ciao Giuseppe
mi risparmio il traduttore Google, perchè ho visto che possiamo condividere l’Italiano.
Ho rifatto l’installazione decine di volte, ho provato fino a 5 diverse schede MicroSD seguendo sia l’installazione con Raspberry Pi Imager che con Etcher, con adattatore MicroSD-USB che con Adattatore MicroSD-SD, non riscontrando mai alcun apparente anomalia. Ho pure evitato di creare l’utente: arnaldo e fatto invece quello pi, pensando che potesse in qualche modo interferire. Ogni volta sembra che tutto vada a buon fine, ma il risultato è sempre lo stesso.
Vorrei inviarti l’output dell’installazione dell’Agent, che però essendo molto lungo, evitare di fare un post kilometrico. Ho notato che ci sono 3 righe sospette, dove compare la scritta: Failed, e poi la seguente: E: Invalid operation unzip.
Eventualmente se lo ritieni opportuno e me lo acconsenti, te la invio per mail.
Intanto Grazie e buona giornata
Arnaldo
Scrivimi a giuseppe@peppe8o.com
there is something missing, you have to be root for the script, if not it runs but will not work
Hi. When I wrote this tutorial I personally tested it in my Raspberry PI and worked. Do you tested it and got errors?
Hey there!
i installed as by your tutorial from remote location, installation went smooth
i opened port 8090 in my router and forwaded to my rpi
so when i acces to it i got a different screen
says:
“Agent DVR: Installing FFmpeg 7
Feature requires a subscription or business license. (API)”
and two buttons “retry” (and does reload the site but notheing change) and “logs” (sends to a blank page)
but no login, menu or anything else.. im lost here
Hi, thank you for your feedback. From what I can read from the AgentDVR docs (https://www.ispyconnect.com/docs/agent/remoteaccess) they don’t allow port forwarding with the free version. Nevertheless, you can try accessing it from remote by using a VPN with your home router, as all of the recent routers allow you to enable it for free
Hi I have used the install script a few times on a Raspberry Pi B+ (for testing) PRETTY_NAME=”Raspbian GNU/Linux 11 (bullseye)”
,and tried to execute AgentDVR a few times and the errors always seem to be GLICXX or GLIBC not found.
The Raspberry Pi B+ OS I am using
When trying to execute AgentDVR following messages:
pinguid@rpi-b-ping-srv:~ $ cd AgentDVRpinguid@rpi-b-ping-srv:~/AgentDVR $ ls
Agent Content open_browser_macos.sh
Agent.dll.config CoreLogic.dll.config open_browser.sh
agent-register.sh Entitlements.plist PTZ.json
agent-reset-account.sh icon.png setup-ffmpeg-linux.sh
agent-reset-local-login.sh libcvextern.so setup-ffmpeg-osx.sh
agent-reset.sh libe_sqlite3.so start_agent.sh
agent-uninstall-service.sh libndi.so TURN
agent-update.sh libSystem.IO.Ports.Native.so XML
pinguid@rpi-b-ping-srv:~/AgentDVR $ ./Agent
./Agent: /lib/arm-linux-gnueabihf/libstdc++.so.6: version `GLIBCXX_3.4.29' not found (required by ./Agent)
./Agent: /lib/arm-linux-gnueabihf/libstdc++.so.6: version `GLIBCXX_3.4.30' not found (required by ./Agent)
./Agent: /lib/arm-linux-gnueabihf/libc.so.6: version `GLIBC_2.32' not found (required by ./Agent)
./Agent: /lib/arm-linux-gnueabihf/libc.so.6: version `GLIBC_2.33' not found (required by ./Agent)
./Agent: /lib/arm-linux-gnueabihf/libc.so.6: version `GLIBC_2.34' not found (required by ./Agent)
pinguid@rpi-b-ping-srv:~/AgentDVR $ gcc --version
gcc (Raspbian 10.2.1-6+rpi1) 10.2.1 20210110
Copyright (C) 2020 Free Software Foundation, Inc.
This is free software; see the source for copying conditions. There is NO
warranty; not even for MERCHANTABILITY or FITNESS FOR A PARTICULAR PURPOSE.
Hi Clive,
thank you for your feedback. I’ll try the installing procedure from scratch in this week to see if ssomething changed. I’ll be beak as soon I can verify it
Hi Clive. I found that the installation script, after installing curl, changed to the following:
curl -sL "https://www.ispyconnect.com/install" | bashIt seems to work to me. Soon I’ll update the tutorial, with the new links about the new GUI.
Please let me know if this works to you