
Last Updated on 2nd September 2023 by peppe8o
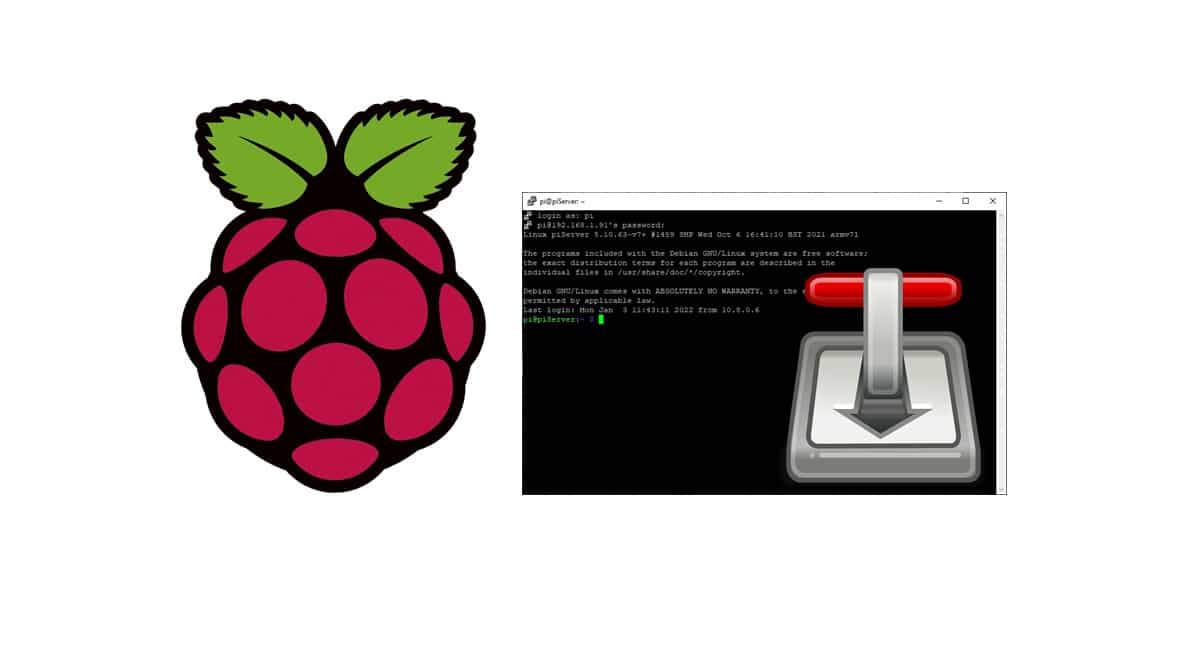
In this tutorial, I’m going to show you how to install Transmission client on a headless Raspberry PI to get files downloaded from a low power consumption computer and avoiding to keep other power-hungry PCs on.
Even if the streaming services have changed a bit the roles, internet downloads have evolved during the years to optimize the traffic load and keep simpler sharing larger files. The BitTorrent distribution has played (and still plays) a great role on file sharing. Raspberry PI also can use Trasmission client to join the torrent advantages.
Before digging into Transmission installation, let’s dig a bit on what torrent files are.
What are Torrent Files?
A torrent file (also known as a meta-info file) is a file containing information about a certain package to be distributed through the BitTorrent network (or any similar network). It usually also includes a list of trackers, computers that keep information on who is participating to download/share that package. Torrent files act as an index to make it possible for users wanting to download the same package to help themselves to find each other and to distribute the bandwidth load. With the help of a torrent file, one can download small parts of the original file from computers that have already downloaded it. These “peers” allow for downloading of the file in addition to, or in place of, the primary server.
A torrent file does not carry any package payload: it only contains information about those files, such as their names, folder structure, and sizes. Torrent files are normally named with the extension “.torrent”.
To use a torrent file, you need a proper torrent client like, in our case, Transmission. My RPI computer will be a Raspberry PI 3 Model B+, but it will be appliable to all RPI boards (except Raspberry PI Pico, which is not a computer but a microcontroller)
What We Need

As usual, I suggest adding from now to your favourite e-commerce shopping cart all the needed hardware, so that at the end you will be able to evaluate overall costs and decide if to continue with the project or remove them from the shopping cart. So, hardware will be only:
- a Raspberry PI Computer Board (including proper power supply or using a smartphone micro usb charger with at least 3A)
- high speed micro SD card (at least 16 GB, at least class 10)
Check hardware prices with the following links:


Step-by-Step Procedure
Prepare Operating System
Start installing Raspberry PI OS Lite, for a headless and performing OS. You can use also Raspberry PI OS Desktop but, in this case, you will have already installed the torrent client in your menu.
Please make sure that your OS is up to date. From terminal:
sudo apt update -y && sudo apt upgrade -yInstall Transmission
Transmission daemon can be installed from aptitude package manager with the following terminal command:
sudo apt-get install transmission-daemonBefore using it, we need to properly configure the web access from its configuration file. Stop Transmission daemon:
sudo systemctl stop transmission-daemon.serviceNow you can edit the settings.json;
sudo nano /etc/transmission-daemon/settings.jsonTo configure the web access to GUI, you can refer to all the settings starting with “rpc” (Remote Procedure Call protocol), the main being the following with my settings:
"rpc-bind-address": "0.0.0.0"
"rpc-enabled": true
"rpc-host-whitelist": ""
"rpc-host-whitelist-enabled": false
"rpc-port": 9091
"rpc-username": "transmission"
"rpc-whitelist": "127.0.0.1"
"rpc-whitelist-enabled": false
The “rpc-bind-address”: “0.0.0.0” lets your Raspberry PI listen from external connections to web interface from any of its interfaces.
Here I left the default access port (9091), also disabling whitelists (“rpc-host-whitelist-enabled”: false and “rpc-whitelist-enabled”: false). This is why my RPI is running in a private network, without external access.
If you need to expose the web GUI to the internet, it is a best practice (when doable) to limit access to some specified domains or IP Addresses. In this case, also changing the default port is a good idea.
The difference between rpc-host-whitelist-*** and rpc-whitelist-*** is that the “host” ones accept domains as comma-separated lists (for example “example.com, peppe8o.com”), while the second one specifies IP addresses (for example “127.0.0.1, 192.168.1.100, 10.0.0.30”). The rpc-username lets you set the default user to access web GUI, while the password is stored on encrypted files unless you change the rpc-password parameter.
Other common settings useful to users are the folders where to store incomplete files (which has download in progress) and completed files (those ready to be used):
"download-dir": "/var/lib/transmission-daemon/downloads"
"incomplete-dir": "/var/lib/transmission-daemon/Downloads"
Finally, with speed settings you can leverage the max bandwidth usable, which is a common practice to manage low internet connections. Consider that BitTorrent network gives lower priority to user having lower upload speed, so reducing this parameter will affect also your download speed:
"download-limit": 100,
"download-limit-enabled": 0,
"upload-limit": 100,
"upload-limit-enabled": 0,
Once your settings have been configured, we can start again the Transmission daemon:
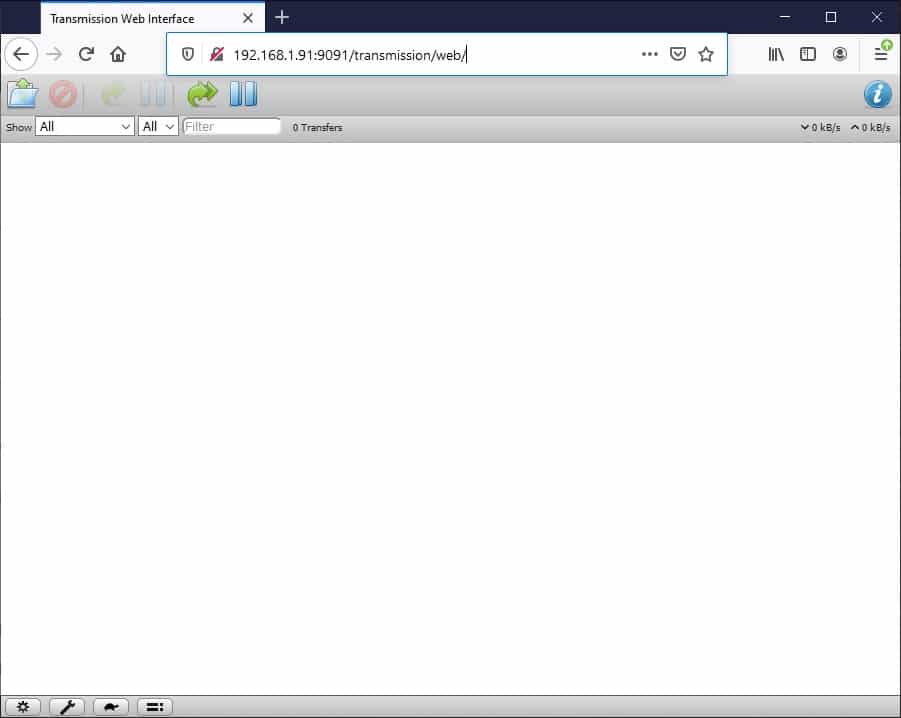
sudo systemctl start transmission-daemon.serviceYou are now ready to use your Raspberry PI Transmission client. Use your Raspberry PI’s IP Address (mine one is 192.168.1.91 in the following pictures), followed by “:9091” (or whatever port number you set) as URL in a browser. You will be prompted to login. The default Transmission user/password, if not changed in settings.json, are:
- username: transmission
- password: transmission
You will get the transmission web GUI home:
The buttons at the bottom-left part of this page will allow you to modify settings available from settings.json file.
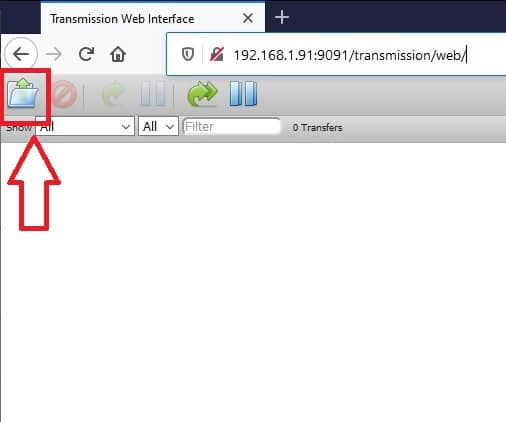
Download your first Torrent
From the Transmission web GUI home, click the Upload Torrent file button:
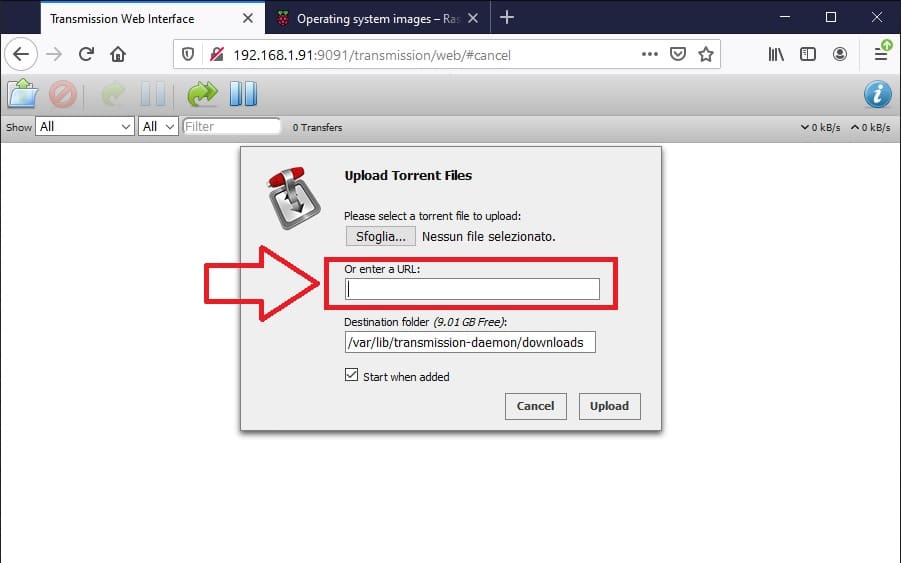
This will open a popup letting you to enter the torrent file path (or link, if you have a web link to the torrent). You can also change the destination folder where to store the downloaded file:
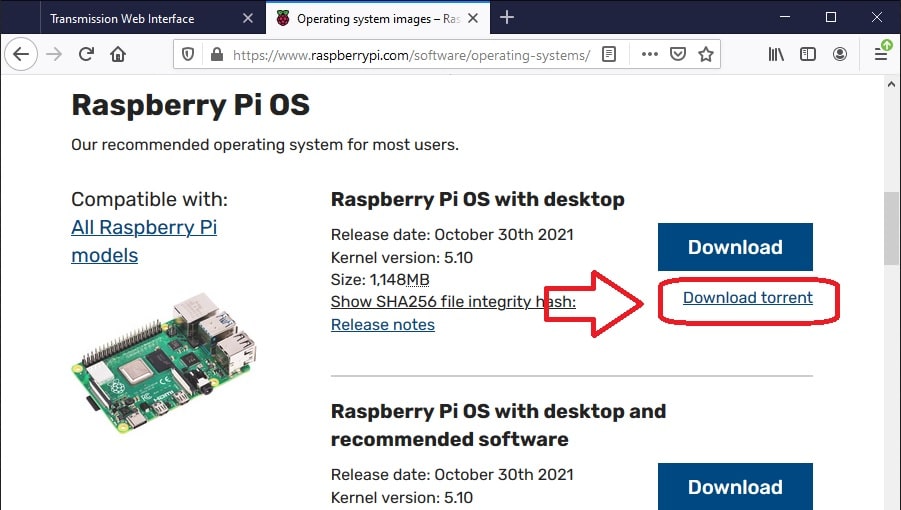
For example, I will use the torrent link from Raspberry PI Foundation official page to get a Raspberry PI OS image copy. It can be found from https://www.raspberrypi.com/software/operating-systems/. Here scroll down to your favorite OS version, right click with the mouse on “Download torrent” link and select “Copy link address”:
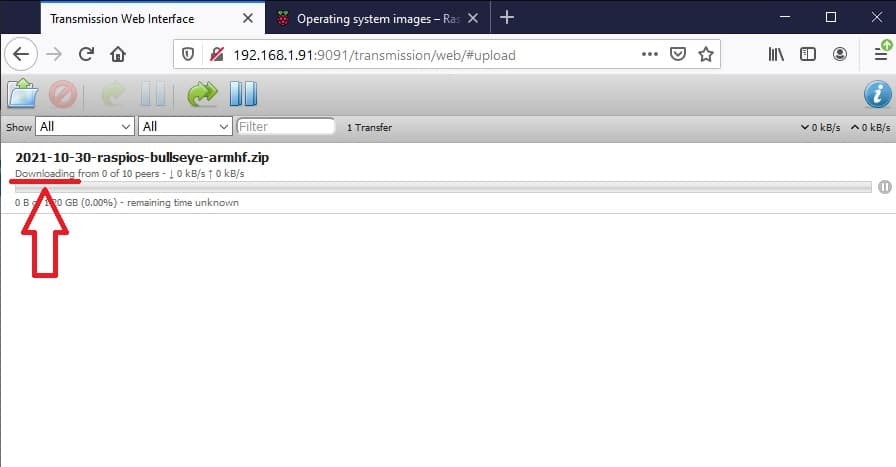
Then paste the link directly into the previous Transmission page and click “Upload”. The download will start, adding a new item to your home. You can check its status and progress:
In the end, you will find your file available from your Raspberry PI storage. You can get it into a different PC (if needed) by SFTP with Filezilla, by Samba remote access, or by any remote access to Raspberry PI.
Enjoy Transmission in your Raspberry PI OS Lite!

Open source and Raspberry PI lover, writes tutorials for beginners since 2019. He's an ICT expert, with a strong experience in supporting medium to big companies and public administrations to manage their ICT infrastructures. He's supporting the Italian public administration in digital transformation projects.
![]()
![]()
![]()
![]()
![]()
![]()
![]()


