
Last Updated on 13th April 2024 by peppe8o
In this tutorial I’m showing you how to configure and create a simple parking sensor with Raspberry PI, visually measuring proximity distance with ultrasonic sensor HC SR04 and showing it on a 10 segment LED Bar.
Park assistants were optional in older cars but soon it became a common component in recent car models. A DIY parking sensor system can be created with Raspberry PI and a few, cheap, electronic parts.
The Goal
Common parking sensors adopted by cars can use ultrasonic proximity detectors to keep the driver warned about an obstacle and its distance. They are usually mounted in front and back side of cars, as they help to keep the right distance from other vehicles in parking movements. They usually warn driver with a buzzer emitting more frequents beeps as obstacles become closer.
As modern cars are also equipped with internal displays, it’s quite common having also a visual distance indicator in your cockpit.
In this guide I’m going to merge my previous Python scripts already published to interface the HC SR04 sensor and to set a 10-segment LED bar, so that the measured distance will be shown with a decreasing led indicator.
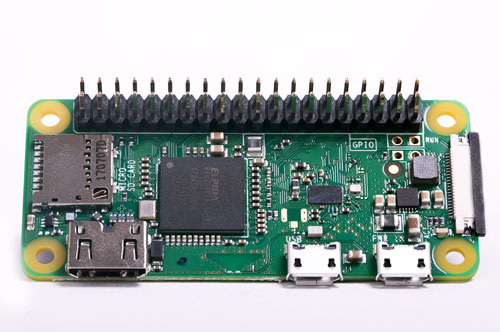
I’m going to use a Raspberry PI Zero W board, but the following steps can be also used with other Raspberry PI computer boards.
What We Need
As usual, I suggest adding from now to your favourite e-commerce shopping cart all the needed hardware, so that at the end you will be able to evaluate overall costs and decide if to continue with the project or remove them from the shopping cart. So, hardware will be only:
- Raspberry PI Zero W (including proper power supply or using a smartphone micro usb charger with at least 3A) or newer Raspberry PI Board
- high speed micro SD card (at least 16 GB, at least class 10)
- HC-SR04 ultrasonic distance sensor
- 10 segment Led bar
- resistors
- dupont wiring
- (optional) breadboard
Check hardware prices with following links:


Wiring Diagram
Please find below my wiring diagram:
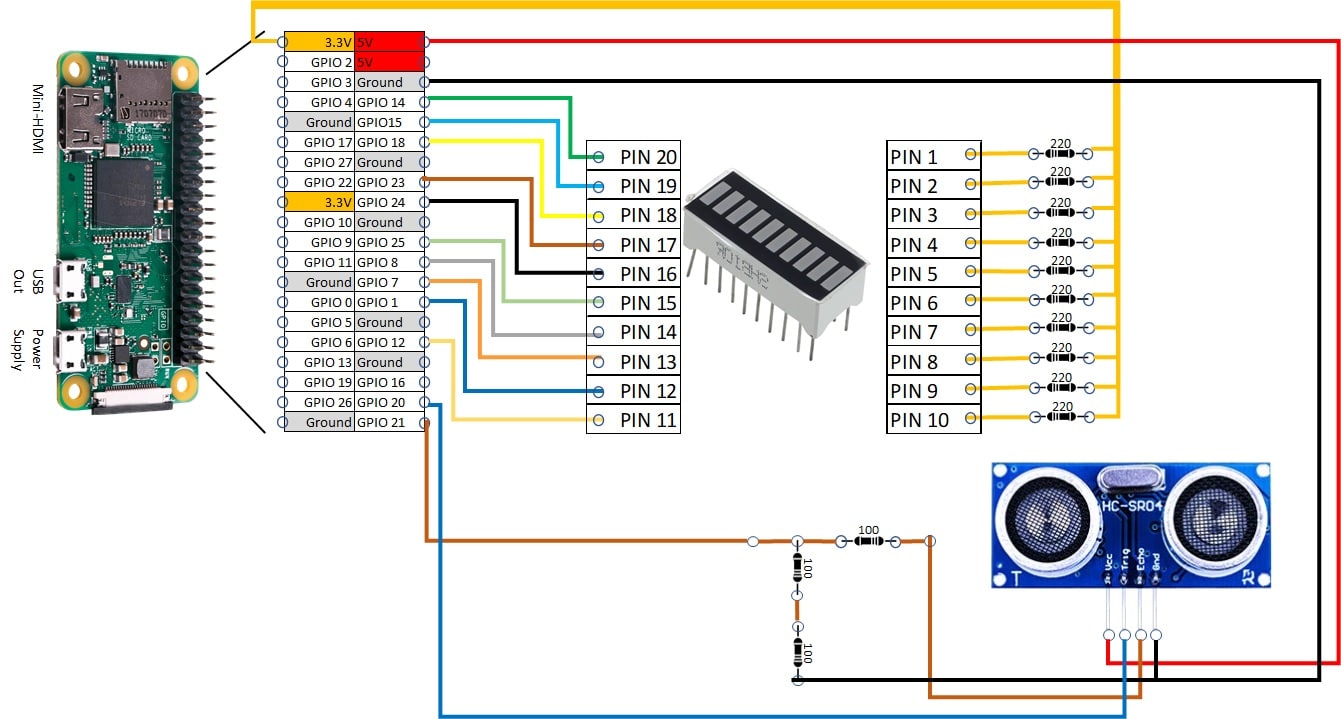
As this project wiring is a bit complex, please find full resolution image from https://peppe8o.com/wp-content/uploads/2021/05/Raspberry-PI-parking-sensor-wiring.jpg.
Important notes for cabling:
- note that LED bar is powered with 3,3V pin, while HC-SR04 requires 5V pin
- as output from HC-SR04 is at 5V, you need a resistors circuit to reduce it to 3V as shown in wiring diagram and explained in HC-SR04 tutorial
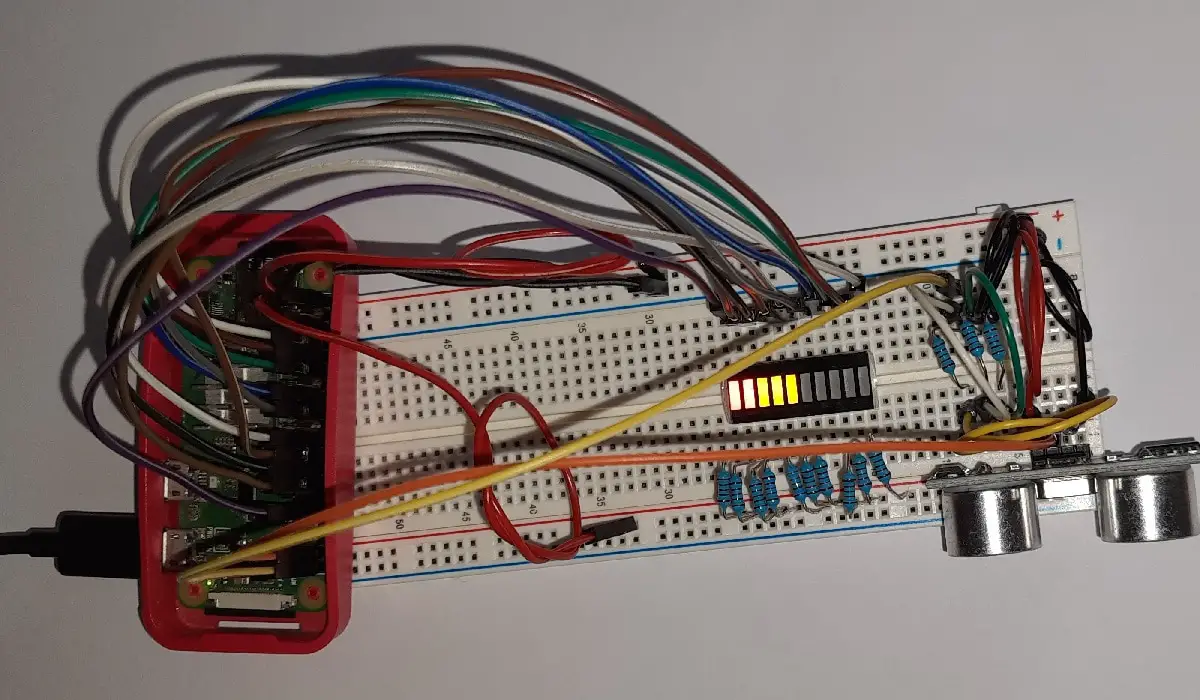
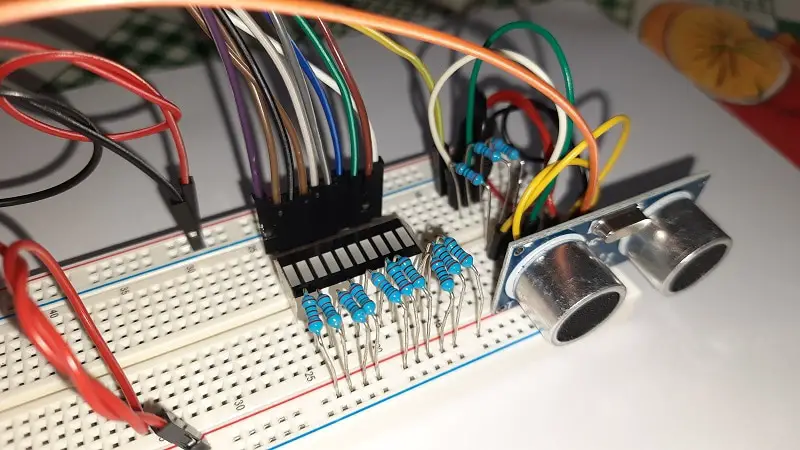
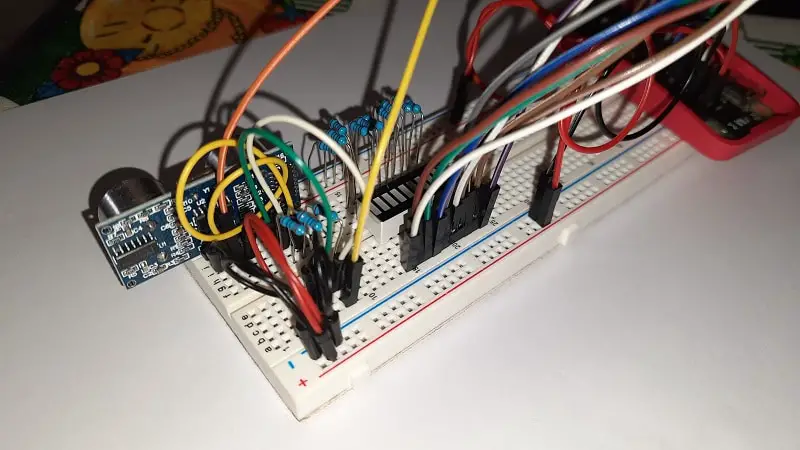
Please find below some detail pictures from my cabling:

Step-by-Step procedure
Prepare Operating System
Start from your RPI basis, its operating system. You can install Raspberry PI OS Lite (for a headless, fast OS) or Raspberry PI OS Desktop (in this case using its internal terminal).
Make your OS updated:
sudo apt update -y && sudo apt upgrade -yRPI.GPIO should be already installed (otherwise, you can get it installed with the command “sudo apt install python3-rpi.gpio”).
Prepare Parking Script for Python
You can get my parking script directly in your Raspberry PI with following terminal command:
wget https://peppe8o.com/download/python/parkSensor.pyThis script resides on merging python code from 2 tutorials of mine:
- How To Control a Ultrasonic Distance Sensor with Raspberry PI
- Using a 10-segment Led Bar with Raspberry PI and Python
parkSensor script starts importing required modules:
import sys
import time
import RPi.GPIO as GPIO
GPIO PINs are defined according to cabling. Led_list refers those PINs connected to 10 segment LED bar. Instead, ehoPIN and triggerPIN are used for HC SR04:
led_list = [14,15,18,23,24,25,8,7,1,12] # GPIO ports used for LedBar
echoPIN = 21
triggerPIN = 20
parkSensor script uses Broadcom naming convention (BCM) and then PINs are set to output/input according to referred tutorials:
GPIO.setmode(GPIO.BCM)

for pin in led_list:
  GPIO.setup(pin,GPIO.OUT)
GPIO.setup(echoPIN,GPIO.IN)
GPIO.setup(triggerPIN,GPIO.OUT)
We arrive to script functions. First 2 functions help to set LEDs for powering on/off and you can refer 10 segment LED bar tutorial for details:
def LedSegOut(array):
  array=list(map(lambda n: not(n),array))
  GPIO.output(led_list, array)

def LedSegPerc(n):
  thresholds=[100,90,80,70,60,50,40,30,20,10]
  array=list(map(lambda x: (1,0)[x>n],thresholds))
  LedSegOut(array)
Following “distance” function, on the other side, uses code from my HC-SR04 tutorial and directly returns distance measured from ultrasonic sensor:
def distance ():
 new_reading = False
 counter = 0
 distance = 0
 duration = 0

 GPIO.output(triggerPIN, 0)
 time.sleep(0.000002)
 GPIO.output(triggerPIN, 1)
 time.sleep(0.000010)
 GPIO.output(triggerPIN, 0)
 time.sleep(0.000002)

 while GPIO.input(echoPIN) == 0:
   counter += 1
   if counter == 5000:
     new_reading = True
     break
   pass
 startT = time.time()
 if new_reading:
    return False
 while GPIO.input(echoPIN) == 1: pass
 feedbackT = time.time()

 if feedbackT == startT:
  distance = "N/A"
 else:
  duration = feedbackT - startT
  soundSpeed = 34300
  distance = duration * soundSpeed / 2
  distance = round(distance, 1)
 time.sleep(0.1)
 return distance
Finally, the main loop executes a few commands which provide required work by using defined functions.
At each loop, a “measure” variable keeps distance value from HC-SR04:
while True:
  try:
   measure=distance()
Common HC-SR04 sensors can reach no more than 4 meters. But some distance samples can give wrong errors, occasionally reporting a false 10m distance. I solved this problem by considering only samples with value less than 4m (400 cm for our script), with an “if” statement where measure variable has to be less than 400cm to be showed.
As second need, instead of using my 10 LEDs spread to all the 4 meters range, I want to reduce my 10 LED indicator to last 1,5m, so that each led indicates 15 cm. This is get using a min() function and comparing distance measure with 150. As we’ll show LEDs using LegSegPerc function, we’ll need a percentage to display (without “%”). We get this by dividing for our max value, 150(cm) and multiplying by 100.
All these stuff is done in 1 simple line, associating resulting percentage to dist variable:
if measure<400: dist=min(measure,150)/150*100Following lines simply display dist variable to LED bar and prints to terminal “dist” and “measure” variables to make you able to see the difference between them. Please note that when previous “if” statement is false, dist variable will keep its value from prior loop cycle:
LedSegPerc(dist)
print (str(round(dist, 1))+ "| measure: "+str(measure))
Final except statement make your script clean on exit, as it catches “CTRL+C” events and cleans GPIO status before exiting the script:
except KeyboardInterrupt:
  GPIO.cleanup()
  sys.exit()
Run Parking Sensor Script
Finally, we can run our script by using following terminal command:
python3 parkSensor.pyIt will immediately start powering LEDs according to HC-SR04 measured distance and printing samples in your terminal.
To stop script execution, please use CTRL+C key combination.
Enjoy!

Open source and Raspberry PI lover, writes tutorials for beginners since 2019. He's an ICT expert, with a strong experience in supporting medium to big companies and public administrations to manage their ICT infrastructures. He's supporting the Italian public administration in digital transformation projects.
![]()
![]()
![]()
![]()
![]()
![]()
![]()


