Last Updated on 19th July 2026 by peppe8o
We’ve all been there: your phone starts lagging, notifications pop up warning you that storage is full, and you’re forced to choose which photos or apps to sacrifice.
But if you own a Raspberry Pi, you have a secret tech superpower sitting on your desk.
Instead of downloading sketchy “cleaner” apps from the Play Store that just bombard you with ads, I decided to hook my Samsung Galaxy M31 up to my Raspberry Pi and use the command line via ADB (Android Debug Bridge).
The result? I reclaimed a massive 10GB of storage space by bypassing Android’s built-in restrictions, forcing the removal of un-deletable system bloatware, and performing deep maintenance. Here is exactly how I did it.
The following app list refers to my Samsung smartphone, but you can apply the same procedure to any Android device by analysing the related app list.
The Power of ADB: Deleting the “Un-deletable”
If you try to uninstall apps like Bixby, AR Zone, or carrier-bundled software through the standard Android interface, you’ll quickly realise the “Uninstall” button is either greyed out or completely missing. Manufacturers lock these apps as “system packages.”
By connecting your phone to a Raspberry Pi and leveraging ADB, you can bypass this restriction. You don’t even need to root your phone. ADB allows you to execute commands under --user 0 (the primary device user), effectively stripping away the manufacturer’s locks and forcing the system to uninstall any package you want.
What We Need
As usual, I suggest adding from now to your favourite e-commerce shopping cart all the needed hardware, so that at the end you will be able to evaluate overall costs and decide if to continue with the project or remove them from the shopping cart. So, hardware will be only:
- Raspberry PI Computer Board (including proper power supply or using a smartphone micro USB charger with at least 3A)
- high speed micro SD card (at least 16 GB, at least class 10)
Of course, you need an Android smartphone where you want to free up storage space.
Step-by-Step Procedure
Step 1. Prepare the Operating System
The first step is to install the Raspberry PI OS Lite to get a fast and lightweight operating system (headless). If you need a desktop environment, you can also use the Raspberry PI OS Desktop, in which case you will work from its terminal app. Please find the differences between the 2 OS versions in my Raspberry PI OS Lite vs Desktop article.
Please make sure that your Operating System is up to date. From your terminal, use the following command:
sudo apt update -y && sudo apt full-upgrade -yStep 2. Installing ADB on the Raspberry Pi
Setting up ADB to communicate with my phone on the Raspberry Pi is very straightforward. First, update your package list and install the ADB package:
sudo apt update -y && sudo apt full-upgrade -y
sudo apt install adb
Now, you can connect your smartphone to the Raspberry PI via the USB cable.
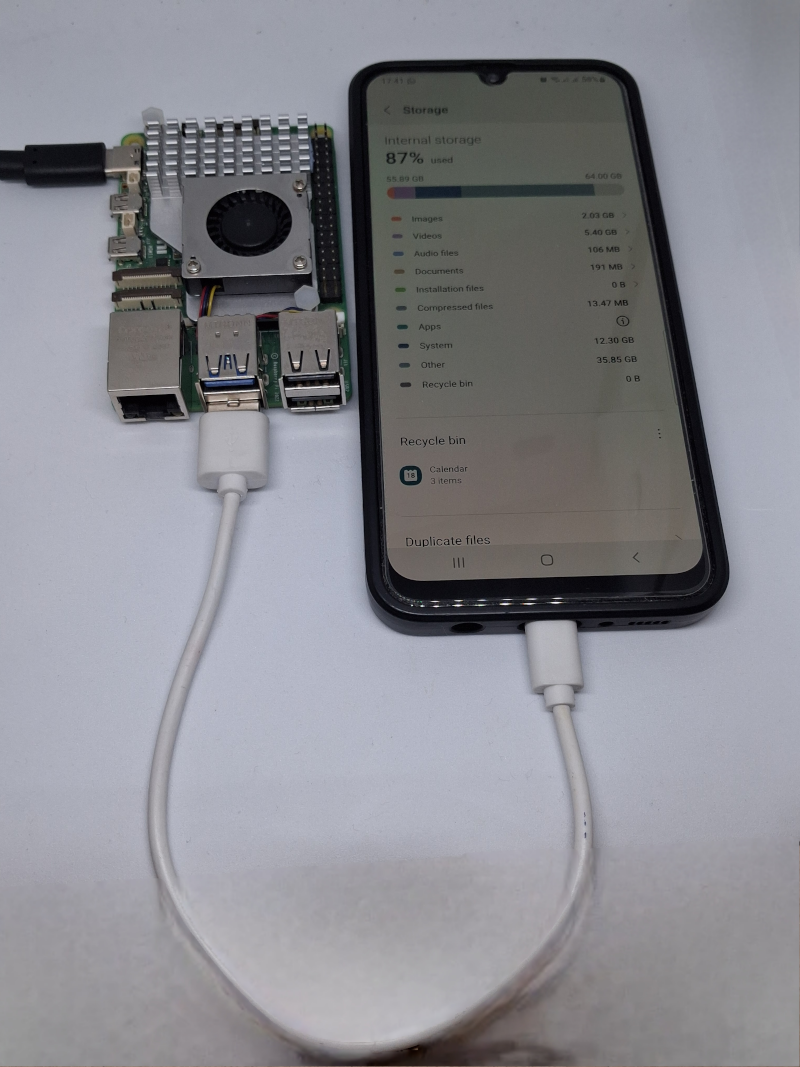
You can check if the smartphone is recognised by using the following terminal command:
adb devicesTroubleshooting: Why isn’t the Pi recognising my phone?
Before you can run any commands, you need to enable USB Debugging on your phone (go to Settings -> About Phone -> Software Information and tap Build Number 7 times, then go back to the new Developer Options menu and toggle USB Debugging on).
However, getting the Pi to actually “see” the phone is where most people get stuck. Here is how to fix the three most common roadblocks:
The “Empty List” Issue
You plug in the phone, run adb devices, and get nothing back.
- The Fix: Swipe down your phone’s notification shade. By default, Android might connect in “Charge Only” mode. Tap the USB settings notification and change it to “Transferring files” (MTP) or “MIDI”. Also, ensure you are using a high-quality data cable, not a cheap charging-only cable.
The “Unauthorised” Status (And the Ultimate Reboot Fix)
Your phone shows up, but it says unauthorized next to it. Normally, checking your phone’s screen and accepting the “Allow USB debugging?” pop-up fixes this. But sometimes, Android bugs out, and the pop-up simply refuses to appear.
- The True Fix: If the prompt doesn’t show up, you need to force a clean slate. Here is the exact procedure that worked for me:
- Unplug the USB cable from the phone.
- Go to your phone’s Developer Options and tap Revoke USB debugging authorisations (confirm if prompted).
- Reboot your phone.
- On your Raspberry Pi, restart the ADB server by typing:
adb kill-server - Once the phone has fully rebooted, plug the USB cable back in.
- Run
adb deviceson the Pi.
The pop-up prompt with the Pi’s RSA key fingerprint will now successfully appear on your phone screen. Check “Always allow from this computer” and tap Allow.
Step 3. Safety First – Backing Up and Restoring Packages
Since I use a Galaxy Gear S3 watch, I had to carefully avoid touching any wearable or accessory plugins. For the packages I did choose to target, safety was the absolute priority. Even if your personal data will not be deleted (if you uninstall apps that you don’t use), you can still perform a backup of it with Syncthing on Raspberry PI.
Before forcing the deletion of any system app, it is a smart practice to create a local backup of its installer file (.apk). If you accidentally break a system dependency or change your mind later, you won’t need to factory reset your phone—you can just restore the app instantly from your Raspberry Pi.
Here is how the workflow works, using the core targets as examples:
Understanding the Terminal Workflow
For each app, we run two commands in sequence:
- The Backup:
adb backup -f <filename>.adb -apk <package.name>
This tells ADB to extract the application package (-apk) directly from the phone and save it onto your Raspberry Pi as an encrypted Android backup file (.adb). When you run this, look at your phone’s screen—Android will ask you to confirm the backup. Just tap “Back up my data” (leave the password field blank). - The Removal:
adb shell pm uninstall -k --user 0 <package.name>
Once the backup file is safely stored on your Pi, this command forces the Package Manager (pm) to safely uninstall the app for the primary user (--user 0), while the-kflag instructs the system to keep the app’s cache/data directories just in case you want to restore it later.
The Safety Net: How to Restore an App
If you notice that a specific feature stopped working or you simply want an app back, reversing the process is incredibly simple. You don’t even need to search for the original APK online, because the system didn’t actually delete the app’s installer file from the deeper Android root partitions – it just uninstalled it for your primary user profile.
Depending on your preference, you have two different ways to bring an app back to life using your Raspberry Pi:
Method 1: Restoring from your Local Backup File
If you created a local backup file (.adb) using the workflow in Step 1, plug your phone back into the Pi, open your terminal in the folder where your backups are saved, and run:
adb restore <filename>.adbNote: Once you hit Enter, a prompt will appear on your phone screen. Leave the password field blank and tap “Restore my data”. The app will instantly reappear in your app drawer.
Method 2: Re-enabling the App via Package Manager (The Fastest Way)
If you didn’t create a backup file before running the uninstall command, don’t panic. Since the original package still exists in the phone’s system partition, you can tell Android to reinstall it for your user profile instantly with this command:
adb shell pm install-existing <package.name>Both methods are completely safe and will restore the application to its fully functional state in just a couple of seconds.
Step 4. Execution: The Hit List
Before firing commands blindly, you need to know exactly what is installed on your device. Every Android app has a unique identifier called a package name (for example, Samsung’s AR Zone is com.samsung.android.arzone). To explore the complete list of system applications currently running on your phone, you can query Android’s internal Package Manager (pm) directly from your Raspberry Pi terminal.
Connect your phone, ensure ADB debugging is authorised, and run the following command to print a clean list of every system package:
adb shell pm list packages -sFrom the resulting list, you can choose what to remove.
1. Carrier & Partner Advertising Stubs (Highly Recommended)
These hidden packages are used by carriers to silently install junk apps and games during system updates.
# Aura OOBE
adb backup -f backup_aura_oobe.adb -apk com.aura.oobe.samsung.gl
adb shell pm uninstall -k --user 0 com.aura.oobe.samsung.gl

# DTI Samsung
adb backup -f backup_dti_samsung.adb -apk com.dti.samsung
adb shell pm uninstall -k --user 0 com.dti.samsung
2. Heavy AR (Augmented Reality) & Emoji Modules
These background services consume heavy RAM and storage space if you don’t use Samsung’s 3D emojis.
# AR Zone & Drawing
adb backup -f backup_arzone.adb -apk com.samsung.android.arzone
adb shell pm uninstall -k --user 0 com.samsung.android.arzone

adb backup -f backup_ardrawing.adb -apk com.samsung.android.ardrawing
adb shell pm uninstall -k --user 0 com.samsung.android.ardrawing
Step 5. Purging Ghost Directories
Uninstalling a package via ADB removes the active application, but old cache and data folders can remain trapped in your user storage.
By running a directory search through the Pi, I found a legacy AR Zone folder that had been sitting in my /sdcard/Android/data/ directory since October 2020! I used the Pi to target and destroy these ghost folders:
adb shell rm -rf /sdcard/Android/data/com.samsung.android.arzoneStep 6. Wiping the System Cache and Logs
This is where the biggest part of the 10GB was hiding. Over time, especially after major Android updates, the system accumulates massive hidden log files and leftover installation fragments.
First, I cleared the system shell logs directly from the Raspberry Pi terminal:
adb shell pm clear com.android.shellNext came the final piece of deep maintenance: Wiping the Cache Partition. This process clears out old, temporary, and compressed update files from a dedicated hardware partition without touching any personal data (your photos, chats, and contacts remain 100% safe).
Since ADB cannot physically navigate the phone’s internal recovery menus for security reasons, I used the Pi to instantly boot the phone into its engineering mode:
adb reboot recoveryNote: Samsung devices require the USB cable to be physically connected to a PC or Raspberry Pi to successfully trigger Recovery mode, so keep it plugged in!
Once the phone rebooted into the black Recovery screen with blue/yellow text, I performed the final manual steps:
- Used the Volume Down button to highlight Wipe cache partition.
- Pressed the Power button to select it, and confirmed with Yes.
- Once the screen read “Cache wipe complete”, I selected Reboot system now.
The Takeaway
When the phone booted back up, I checked the storage settings. 10 Gigabytes. Gone.
That is the equivalent of roughly 3,000 high-res photos or hours of video recovered out of thin air. No personal files were lost, my smartwatch works flawlessly, and the phone feels remarkably snappier because the system partition is clean and the RAM isn’t choked by useless manufacturer background services anymore.
If you have a Raspberry Pi on your desk, you don’t need third-party optimisation software. The best maintenance tool you own is already running Linux right next to your keyboard.
Have you ever run into frustrating connection issues while setting up ADB? Did these troubleshooting tips help you get your Pi and phone talking to each other? Let me know in the comments below!
Next Steps
Interested in more projects with your Raspberry PI? Try to look at my Raspberry PI computer tutorial pages.
Enjoy!
Open source and Raspberry PI lover, writes tutorials for beginners since 2019. He's an ICT expert, with a strong experience in supporting medium to big companies and public administrations to manage their ICT infrastructures. He's supporting the Italian public administration in digital transformation projects.