
Last Updated on 8th December 2025 by peppe8o
In this tutorial, I’ll show you how to use Traefik on Raspberry PI to securely expose your Docker services and manage them with a reverse proxy. This tutorial aims to explain in a simpler way how to setup Traefik, as the official docs may appear a bit confusing for people at their first approach with this powerful tool.
It is important to note that if you want to use Traefik to expose your services to the internet, you must have a public IP (check your service provider for this) and a domain name (you can refer to my No-IP DUC in your Raspberry PI tutorial to use free domains from No-IP. Moreover, you must be able to set port forwarding rules from your home router, so that you can redirect external requests on specific ports to the same ports of your Raspberry PI’s IP address.
About Traefik
Taefik is an “all-in-one” reverse proxy. It works as a load balancer, acting as a unique front-end and distributing the incoming traffic to the proper services. It also allows you to add security to all of your connections, without the need to care for it service by service, and integrating natively Let’s Encrypt.
It was developed from the start with microservices in mind, so it perfectly integrates service deployments with Docker and Kubernetes. In these cases, Traefik can also discover the services running on your host.
What We Need
As usual, I suggest adding from now to your favourite e-commerce shopping cart all the needed hardware, so that at the end you will be able to evaluate overall costs and decide if to continue with the project or remove them from the shopping cart. So, hardware will be only:
- Raspberry PI Computer Board (including proper power supply or using a smartphone micro USB charger with at least 3A)
- high-speed micro SD card (at least 16 GB, at least class 10)

Step-by-Step Procedure
Preparing the Operating System
The first step is to install the Raspberry PI OS Lite to get a fast and lightweight operating system (headless). If you need a desktop environment, you can also use the Raspberry PI OS Desktop, in which case you will work from its terminal app. Please find the differences between the 2 OS versions in my Raspberry PI OS Lite vs Desktop article.
Once installed, please make sure that your OS is up to date. From your terminal, use the following command:
sudo apt update -y && sudo apt full-upgrade -yWe also need Docker. For this task, please refer to my Beginner’s Guide to Install and Use Docker with Raspberry PI tutorial.
We’ll perform our tests from a folder where we’ll create the Docker compose files. Let’s create and enter it:
mkdir traefik
cd traefik
Now, we’re ready to test Traefik on Raspberry PI.
Traefik Test 1: Dashboard
The first test will create a Traefik instance without any service, able to show the Traefik dashboard where you’ll be able to see current configuration in a web GUI.
For this test, please create a Docker Compose file:
nano docker-compose.ymlAnd fill it with the following content:
services:
  traefik:
    image: traefik:latest
    command:
      - '--api.insecure=true'
      - '--providers.docker=true'
      - '--entrypoints.web.address=:80'
    ports:
      - '80:80'
      - '8080:8080'
    volumes:
      - /var/run/docker.sock:/var/run/docker.sock:ro
Save the file and close it.
In this code, the command section includes the static configuration for Traefik. It allows you to setup the global environment settings. In our case, we allow insecure traffic and we define a web entrypoint label, listening at the default internet port (80).
The container will also expose the 8080 port (besides 80), where you’ll reach the Traefik dashboard.
The volume is mapped to the docker.sock file, which allows Traefik to discover if any services are running in your Docker environment.
Please run this test with the following terminal command:
docker compose up -dFrom your remote computer, please browse the URL composed by your Raspberry PI’s IP address and port 8080 to see the dashboard of your Traefik on Raspberry PI. For example, as my Raspberry PI’s IP is 192.168.1.218, my URL will be http://192.168.1.218:8080. You will see something like the following:
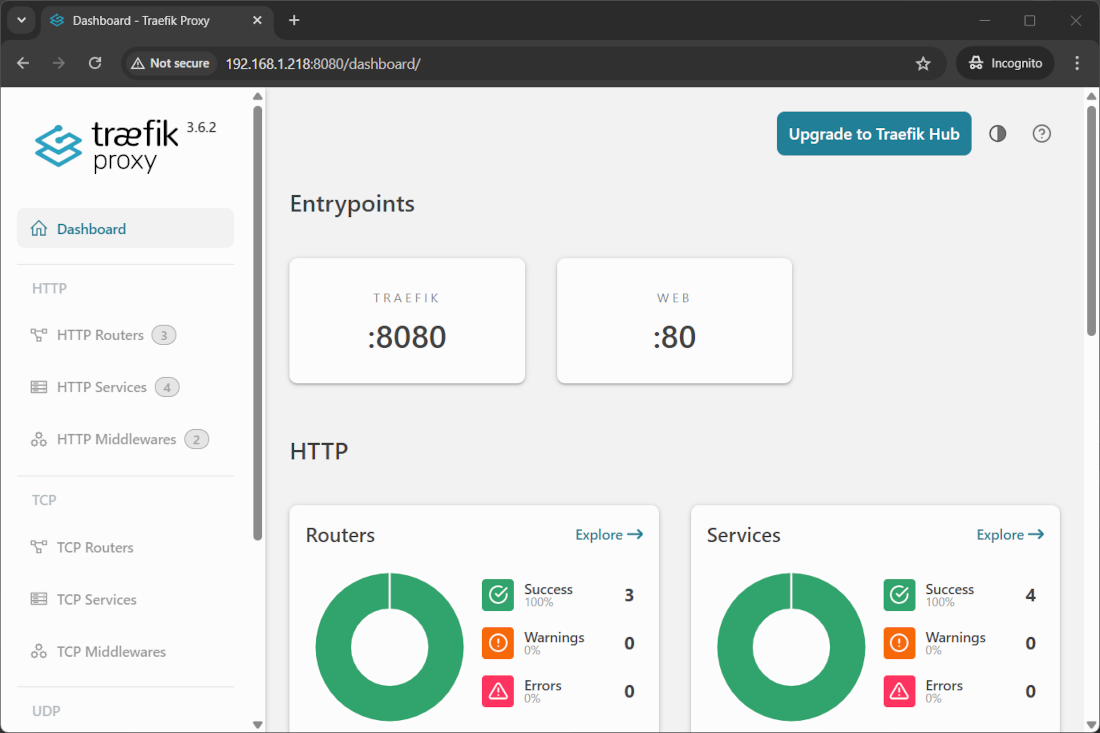
it is important to note that currently the port 80 is unused as we haven’t identified any service on this port.
After you finish any test, I suggest you deactivate the current infrastructure with the following Docker command before proceeding with the following test:
docker compose downTraefik Test 2: Expose a Service
In this test, we’ll expose a simple web service (httpd, which is a basic Apache web server) via Traefik.
For this purpose, please edit the Docker compose file according to the following:
services:
  traefik:
    image: traefik:latest
    command:
      - '--api.insecure=true'
      - '--providers.docker=true'
      - '--entrypoints.web.address=:80'
    ports:
      - '80:80'
      - '8080:8080'
    volumes:
      - /var/run/docker.sock:/var/run/docker.sock:ro
    restart: unless-stopped

  serv:
    image: httpd:latest
    container_name: web_httpd
    volumes:
      - ./www:/usr/local/apache2/htdocs/
    labels:
      - 'traefik.enable=true'
      # Router
      - 'traefik.http.routers.serv.entrypoints=web'
      - 'traefik.http.routers.serv.rule=PathPrefix("/")'
    restart: unless-stopped

networks:
  default:
    name: traefik-network
Save and close.
Here, there are a few additions, besides the restart: unless-stopped, which makes all the containers restart automatically even after the Raspberry PI’s reboots.
We added a new service: httpd, which is a simple Apache web service. It has its persistent volume: the www folder you’ll find created in the current folder will allow you to add any HTML file you want to expose.
The most important additions for our test are in the labels section of the service:
- The
traefik.enable=truewill allow Traefik to manage this service - The
traefik.http.routers.serv.entrypoints=webwill set the service to use the entrypoint named “web” in Traefik
This time, besides the Traefik Dashboard, you’ll see the default Apache page by browsing the URL composed only of the Raspberry PI’s IP (http://192.168.1.218 in my case):
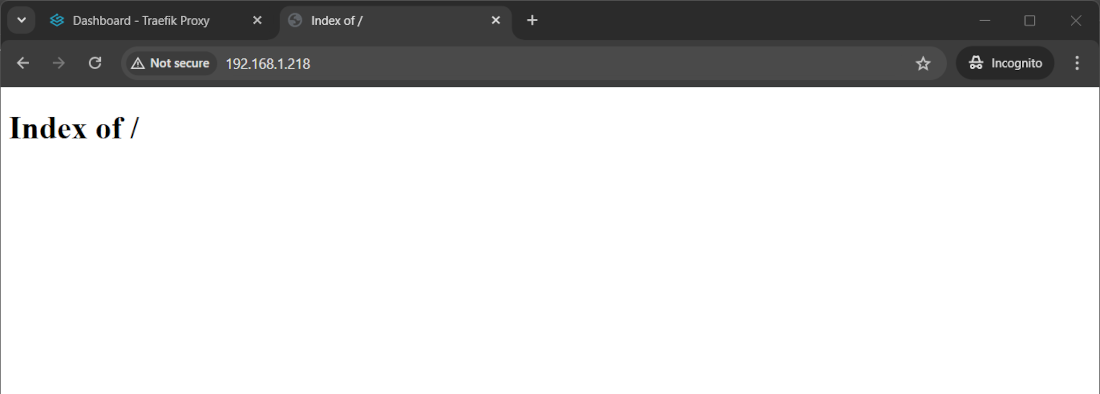
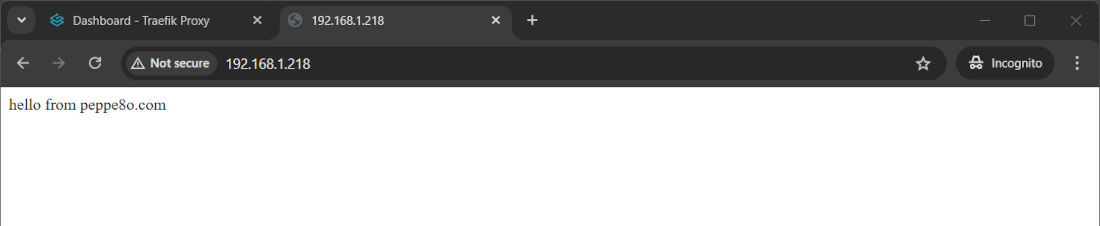
Our www folder doesn’t contain anything at the moment. For this reason, you’re not seeing anything from this page. You can create a very simple index.html file as follows to test it again:
echo "hello from peppe8o.com" | sudo tee www/index.htmlRefreshing the web page:
At the end of this test, you can remove the created infrastructure:
docker compose downTraefik Test 3: Expose the Service on the Internet with Let’s Encrypt
With this test, we’ll expose our service on the web. You must have a valid domain, a public IP, and set a port forward in your home router to forward requests from the web on ports 80 and 443 to the ports 80 and 443 of your Raspberry PI. Moreover, we’ll continue to show the Traefik dashboard only to the local network clients.
For this test, please change the Docker Compose file as follows, caring to change:
my.domain.comwith your public domainemail@example.comwith your personal email for Let’s Encrypt certificate issuing192.168.1.0/24with your local network broadcast address192.168.1.218with your Raspberry PI’s IP Address
services:
  traefik:
    image: traefik:latest
    container_name: traefik
    command:
      - '--api.dashboard=true'
      - '--providers.docker=true'
      - '--providers.docker.exposedbydefault=false'

      # Entrypoints
      - '--entrypoints.web.address=:80'
      - '--entrypoints.websecure.address=:443'
      - '--entrypoints.local.address=:8080'

      # Redirect HTTP → HTTPS
      - '--entrypoints.web.http.redirections.entrypoint.to=websecure'
      - '--entrypoints.web.http.redirections.entrypoint.scheme=https'

      # Let's Encrypt
      - '--certificatesresolvers.myresolver.acme.httpchallenge=true'
      - '--certificatesresolvers.myresolver.acme.httpchallenge.entrypoint=web'
      - '--certificatesresolvers.myresolver.acme.email=email@example.com'
      - '--certificatesresolvers.myresolver.acme.storage=/letsencrypt/acme.json'
    ports:
      - '80:80'
      - '443:443'
      - '8080:8080'
    volumes:
      - '/var/run/docker.sock:/var/run/docker.sock:ro'
      - './letsencrypt:/letsencrypt'
    restart: unless-stopped

    labels:
      - 'traefik.enable=true'

      # Dashboard router
      - 'traefik.http.routers.traefik.rule=Host("192.168.1.218")'
      - 'traefik.http.routers.traefik.entrypoints=local'
      - 'traefik.http.routers.traefik.service=api@internal'

      # Allow only LAN access
      - 'traefik.http.routers.traefik.middlewares=localonly'
      - 'traefik.http.middlewares.localonly.ipwhitelist.sourcerange=192.168.1.0/24'

  serv:
    image: httpd:latest
    container_name: web_httpd
    volumes:
      - ./www:/usr/local/apache2/htdocs/
    labels:
      - 'traefik.enable=true'
      # Router
      - 'traefik.http.routers.serv.rule=Host("my.domain.com")'
      - 'traefik.http.routers.serv.entrypoints=websecure'
      - 'traefik.http.routers.serv.tls.certresolver=myresolver'

    restart: unless-stopped
networks:
  default:
    name: traefik-network
Here, there are a few more additions to analyse.
We created a few more entry points: the websecure with port 443 and the local with 8080. The first will manage all the external requests with a TLS certificate issued by Let’s Encrypt. The second will manage only accesses from the “local” network to show the Traefik dashboard:
      # Entrypoints
      - '--entrypoints.web.address=:80'
      - '--entrypoints.websecure.address=:443'
      - '--entrypoints.local.address=:8080'
We added an automatic redirect from insecure HTTP requests to the secured HTTPS entrypoint:
      # Redirect HTTP → HTTPS
      - '--entrypoints.web.http.redirections.entrypoint.to=websecure'
      - '--entrypoints.web.http.redirections.entrypoint.scheme=https'
In the Let’s Encrypt section, we define a myresolver instance which uses Let’s Encrypt to issue and renew certificates. The certificate challenge file will be stored in the new “letsencrypt” volume stored in the current folder. You don’t need to care about it as it will be automatically managed by Traefik:
      # Let's Encrypt
      - '--certificatesresolvers.myresolver.acme.httpchallenge=true'
      - '--certificatesresolvers.myresolver.acme.httpchallenge.entrypoint=web'
      - '--certificatesresolvers.myresolver.acme.email=email@example.com'
      - '--certificatesresolvers.myresolver.acme.storage=/letsencrypt/acme.json'
In the labels section of Traefik, we also set the related dashboard to use the local entrypoint to show it. We also filter access permissions, limiting it to the local network:
      # Dashboard router
      - 'traefik.http.routers.traefik.rule=Host("192.168.1.218")'
      - 'traefik.http.routers.traefik.entrypoints=local'
      - 'traefik.http.routers.traefik.service=api@internal'

      # Allow only LAN access
      - 'traefik.http.routers.traefik.middlewares=localonly'
      - 'traefik.http.middlewares.localonly.ipwhitelist.sourcerange=192.168.1.0/24'
Moving to the web service, this now binds to the domain requests, using the websecure entrypoint and the Let’s Encrypt certificate:
      # Router
      - 'traefik.http.routers.serv.rule=Host("my.domain.com")'
      - 'traefik.http.routers.serv.entrypoints=websecure'
      - 'traefik.http.routers.serv.tls.certresolver=myresolver'
You can deploy this infrastructure with the classic command:
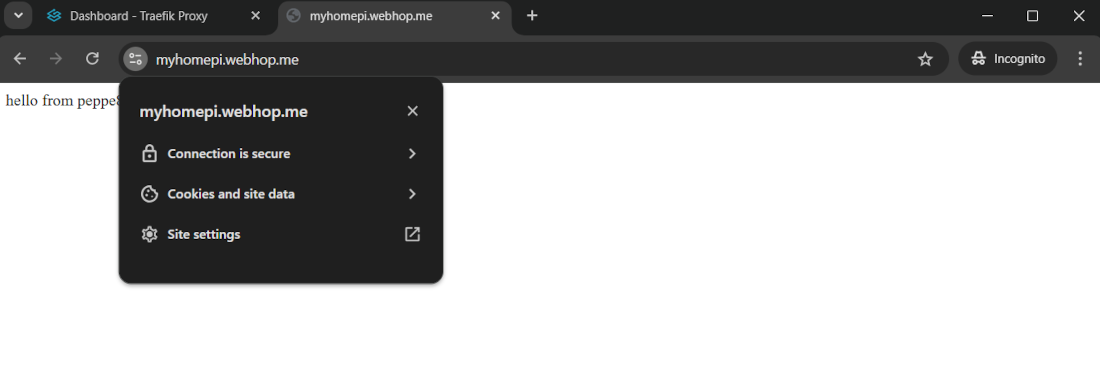
docker compose up -dYou can now browse your service from your domain with an HTTPS connection, in my case https://myhomepi.webhop.me with my free No-IP domain. IMPORTANT NOTE: Please note that you may need a few seconds before the Let’s Encrypt certificate is correctly issued. So, if you receive a certificate error, please try again after a bit of time.
You can now remove the current infrastructure before moving to the next test:
docker compose downTraefik Test 4: Expose Multiple Services
In this test, we’ll expose 2 different web services (both on an Apache web server) in different sub-folders. The first service will be available at https://my.domain.com/serv1 and the second at https://my.domain.com/serv2. Both will serve secure connections from the same Let’s Encrypt resolver.
The new Docker Compose file will appear as follows:
services:
  traefik:
    image: traefik:latest
    container_name: traefik
    command:
      - '--api.dashboard=true'
      - '--providers.docker=true'
      - '--providers.docker.exposedbydefault=false'

      # Entrypoints
      - '--entrypoints.web.address=:80'
      - '--entrypoints.websecure.address=:443'
      - '--entrypoints.local.address=:8080'

      # Redirect HTTP → HTTPS
      - '--entrypoints.web.http.redirections.entrypoint.to=websecure'
      - '--entrypoints.web.http.redirections.entrypoint.scheme=https'

      # Let's Encrypt
      - '--certificatesresolvers.myresolver.acme.httpchallenge=true'
      - '--certificatesresolvers.myresolver.acme.httpchallenge.entrypoint=web'
      - '--certificatesresolvers.myresolver.acme.email=email@example.com'
      - '--certificatesresolvers.myresolver.acme.storage=/letsencrypt/acme.json'

    ports:
      - '80:80'
      - '443:443'
      - '8080:8080'

    volumes:
      - '/var/run/docker.sock:/var/run/docker.sock:ro'
      - './letsencrypt:/letsencrypt'
    restart: unless-stopped
    labels:
      - 'traefik.enable=true'

      # Dashboard router
      - 'traefik.http.routers.traefik.rule=Host("192.168.1.218")'
      - 'traefik.http.routers.traefik.entrypoints=local'
      - 'traefik.http.routers.traefik.service=api@internal'

      # Allow only LAN access
      - 'traefik.http.routers.traefik.middlewares=localonly'
      - 'traefik.http.middlewares.localonly.ipwhitelist.sourcerange=192.168.1.0/24'

  web_1:
    image: httpd:latest
    volumes:
      - ./www_1:/usr/local/apache2/htdocs/

    labels:
      - 'traefik.enable=true'

      # Router
      - 'traefik.http.routers.web_1.rule=Host("my.domain.com") && PathPrefix("/serv1")'
      - 'traefik.http.routers.web_1.entrypoints=websecure'
      - 'traefik.http.routers.web_1.tls.certresolver=myresolver'

      # Strip /serv1 from the request before sending it to Apache
      - 'traefik.http.routers.web_1.middlewares=serv1-strip'
      - 'traefik.http.middlewares.serv1-strip.stripprefix.prefixes=/serv1'

      # Service (backend)
      - 'traefik.http.services.web_1.loadbalancer.server.port=80'

    restart: unless-stopped

  web_2:
    image: httpd:latest
    volumes:
      - ./www_2:/usr/local/apache2/htdocs/

    labels:
      - 'traefik.enable=true'

      # Router
      - 'traefik.http.routers.web_2.rule=Host("my.domain.com") && PathPrefix("/serv2")'
      - 'traefik.http.routers.web_2.entrypoints=websecure'
      - 'traefik.http.routers.web_2.tls.certresolver=myresolver'

      # Strip /serv2 from the request before sending it to Apache
      - 'traefik.http.routers.web_2.middlewares=serv2-strip'
      - 'traefik.http.middlewares.serv2-strip.stripprefix.prefixes=/serv2'

      # Service (backend)
      - 'traefik.http.services.web_2.loadbalancer.server.port=80'

    restart: unless-stopped

networks:
  default:
    name: traefik-network
Here’s what’s new in this Docker Compose file.
The Traefik service remains unchanged, while we use 2 instances of the httpd service (web_1 and web_2).
Please note that you will get 2 different folders in your storage: www_1 will mount the persistent data for the web_1 service, while www_2 will include the volume for web_2.
Each service will have its Labels section. Both are created with the same logic, so I’ll explain the logic, taking as an example the web_1 service.
Each service will be enabled to use Traefik:
   labels:
      - 'traefik.enable=true'
The router configuration uses the PathPrefix to define, together with the domain, the full path to bind for each service. Entrypoint and the certificate resolver remain unchanged. Please note that the routers take the name from the service (web_1):
      # Router
      - 'traefik.http.routers.web_1.rule=Host("my.domain.com") && PathPrefix("/serv1")'
      - 'traefik.http.routers.web_1.entrypoints=websecure'
      - 'traefik.http.routers.web_1.tls.certresolver=myresolver'
When a request reaches the my.domain.com/serv1 path, it must be routed to the related Apache service without the “/serv1” path, as the container will bind for the complete root path. For this reason, we must pass the required resource by removing it from the request. The following lines will do the trick:
      # Strip /serv1 from the request before sending it to Apache
      - 'traefik.http.routers.web_1.middlewares=serv1-strip'
      - 'traefik.http.middlewares.serv1-strip.stripprefix.prefixes=/serv1'
At the end, the load balancer identifies the server port:
      # Service (backend)
      - 'traefik.http.services.web_1.loadbalancer.server.port=80'
Again, please run the resulting infrastructure:
docker compose up -dWe can help to identify which service is responding by adding 2 different messages in the index.html files:
echo "hello from peppe8o.com from SERVICE 1" | sudo tee www_1/index.html
echo "hello from peppe8o.com from SERVICE 2" | sudo tee www_2/index.html
You can now browse the following paths to find the different answers from your different services:
https://my.domain.com/serv1https://my.domain.com/serv2
The Traefik dashboard will still be available from the local network, as in the previous tests.
Traefik Documentation
Please find the official documentation in the Traefik Docs pages.
Next Steps
Interested in more projects with your Raspberry PI? Take a look at peppe8o Raspberry PI computers tutorials pages.
Enjoy!

Open source and Raspberry PI lover, writes tutorials for beginners since 2019. He's an ICT expert, with a strong experience in supporting medium to big companies and public administrations to manage their ICT infrastructures. He's supporting the Italian public administration in digital transformation projects.
![]()
![]()
![]()
![]()
![]()
![]()
![]()


