
Last Updated on 16th February 2024 by peppe8o
Some advanced projects with Raspberry Pi can foresee also the use of voice controls. A very interesting project, in this sense, is the Google home assistant project. With these projects, the very first step always matches the need to give a microphone to your RPI.
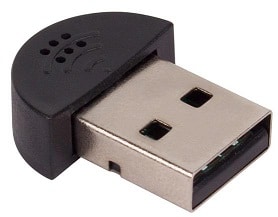
Remember that Raspberry Pi doesn’t come with a built-in audio device. A very cheap solution is the use of some USB microphones which can be found online, costing a few dollars.
Installing a USB microphone from a terminal is simple and is the only way if you don’t have a desktop environment installed.
In this tutorial, I’m going to show you how to setup a USB microphone with a Raspberry Pi computer board, with this procedure being the same for all recent Raspberry PI models.
What We Need
As usual, I suggest adding from now to your favourite e-commerce shopping cart all the needed hardware, so that at the end you will be able to evaluate overall costs and decide if to continue with the project or remove them from the shopping cart. So, hardware will be only:
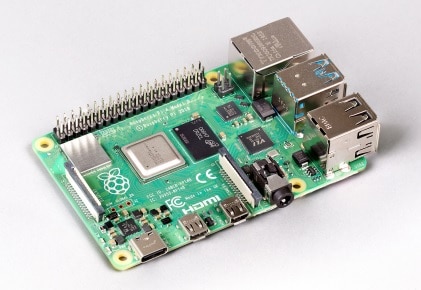
- Raspberry PI Computer Board (including proper power supply or using a smartphone micro USB charger with at least 3A)
- high speed micro SD card (at least 16 GB, at least class 10)
- USB microphone
As I’m going to show it with a headless setup, you will also need to install an SFTP file transfer application in your remote computer, like the free Filezilla.
Step-By-Step Procedure
Prepare the Operating System
We’ll start with a fresh operating system installation. So, start installing Raspberry PI OS Lite. You can also use this with Raspberry PI OS desktop, working from its internal terminal console.
Make the OS up to date. From the terminal:
sudo apt update -y && sudo apt upgrade -yIdentify the USB Microphone Hardware
We’ll use the Linux “lsusb” utility to check if the USB microphone is detected by our Raspberry PI. The “lsusb” is a utility for displaying information about USB buses in the system and the devices connected to them (ref. https://linux.die.net/man/8/lsusb).
Let’s check its output BEFORE plugging the USB microphone. From the terminal, you will have a result similar to the following:
pi@raspberrypi:~ $ lsusb
Bus 004 Device 001: ID 1d6b:0003 Linux Foundation 3.0 root hub
Bus 003 Device 001: ID 1d6b:0002 Linux Foundation 2.0 root hub
Bus 002 Device 001: ID 1d6b:0003 Linux Foundation 3.0 root hub
Bus 001 Device 001: ID 1d6b:0002 Linux Foundation 2.0 root hub
This result may change depending on the Raspberry PI computer board version and model you’re using (this output is from my Raspberry PI 5 Model B) and these entries are the USB ports.
Please plug in now the USB Microphone. Check again the USB list:
pi@raspberrypi:~ $ lsusb
Bus 004 Device 001: ID 1d6b:0003 Linux Foundation 3.0 root hub
Bus 003 Device 002: ID 8086:0808 Intel Corp. USB PnP Sound Device
Bus 003 Device 001: ID 1d6b:0002 Linux Foundation 2.0 root hub
Bus 002 Device 001: ID 1d6b:0003 Linux Foundation 3.0 root hub
Bus 001 Device 001: ID 1d6b:0002 Linux Foundation 2.0 root hub
In the previous output, I’ve highlighted the new line that appeared after plugging the USB microphone. This new line means that the external device has been detected from the OS and that Bus 003 Device 002 is my USB microphone.
Test the USB Microphone on Raspberry PI with Arecord
Arecord is a command-line sound recorder, already installed in our Raspberry PI OS Lite.
Let’s check the list of audio input devices and the card ID detected from it with the following terminal command:
pi@raspberrypi:~ $ arecord -l
**** List of CAPTURE Hardware Devices ****
card 2: Device [USB PnP Sound Device], device 0: USB Audio [USB Audio]
  Subdevices: 1/1
  Subdevice #0: subdevice #0
As highlighted in the previous output, my microphone matches the card 2 – device 0 sound device. In the next tests, this card identification will be mapped in the following arecord option: “plughw:2,0“.
Now, we can test a simple recording by typing:
arecord -D plughw:2,0 -d 3 test.wavThis command will perform a voice recording:
- using the card 2 – device 0 input equipment (the “-D plughw:2,0” option)
- with a duration of 3 seconds (the “-d 3” option)
- saving the recording to a file named “test.wav”
The following output will appear:
pi@raspberrypi:~ $ arecord -D plughw:2,0 -d 3 test.wav
Warning: Some sources (like microphones) may produce inaudible results
         with 8-bit sampling. Use '-f' argument to increase resolution
         e.g. '-f S16_LE'.
Recording WAVE 'test.wav' : Unsigned 8 bit, Rate 8000 Hz, Mono
Now you can simply check the recorded file by connecting and downloading it with your favourite SFTP software (for example Filezilla) to your Raspberry PI, by setting an SFTP connection (using your RPI user and password).
Remove Arecord Noise
When listening to the recorded file, you will probably listen at a very high noise and a very low voice volume. Let’s face the noise first.
By default, arecord uses an 8000Hz sampling. This will probably include a lot of noise in your recording, making it quite useless. We can fix this problem by changing the sampling format the the “-f” option.
You can test different sampling formats coming from the arecord man page. I get a very good output with the “-f dat” option, which produces a 16-bit, 48000Hz recording.
You can test this setting with the following command (please remember to set your card/device ID instead of mine):
arecord -f dat -D plughw:2,0 -d 3 test2.wavThis is still a 3-second recording with the new format. In my case, it completely fixed the noise problem.
Regulating the USB Microphone Volume
The recording volume can be really low in some cases. Alsamixer helps us with a simple interface to manage the volume of our Raspberry PI audio devices. You can reach the Alsamixer interface with the following terminal command:
alsamixerYou’ll see the default console:
At the top-right side of this screen, you can find the selected audio device you’re going to control (in my case, the “USB PnP Sound Device”). If you have any doubts, you can use the F6 key to show a list of the available devices:
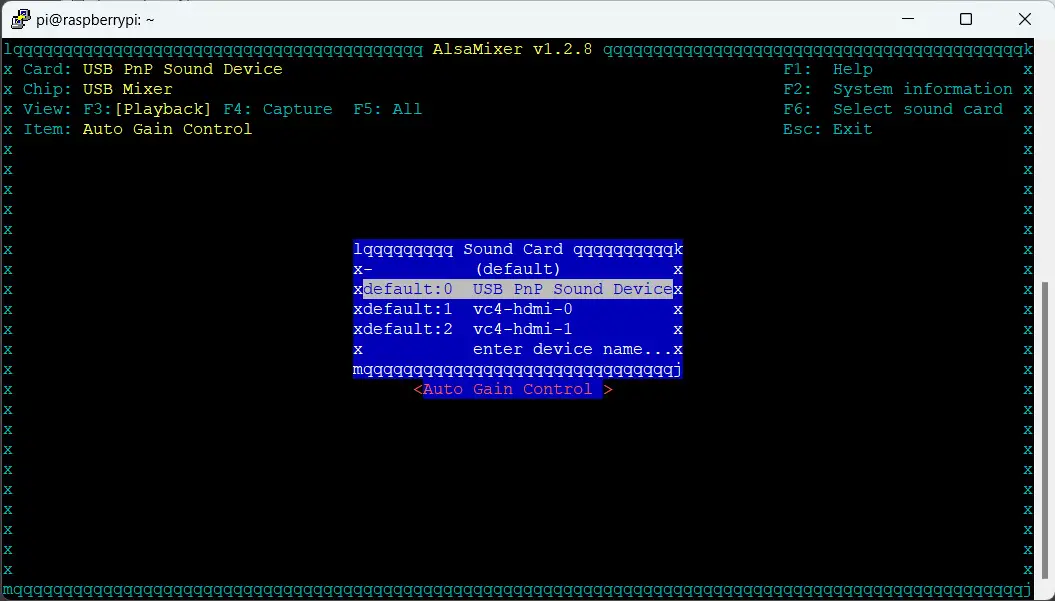
If required, select your one with the up/down arrow keys and press “ENTER”.
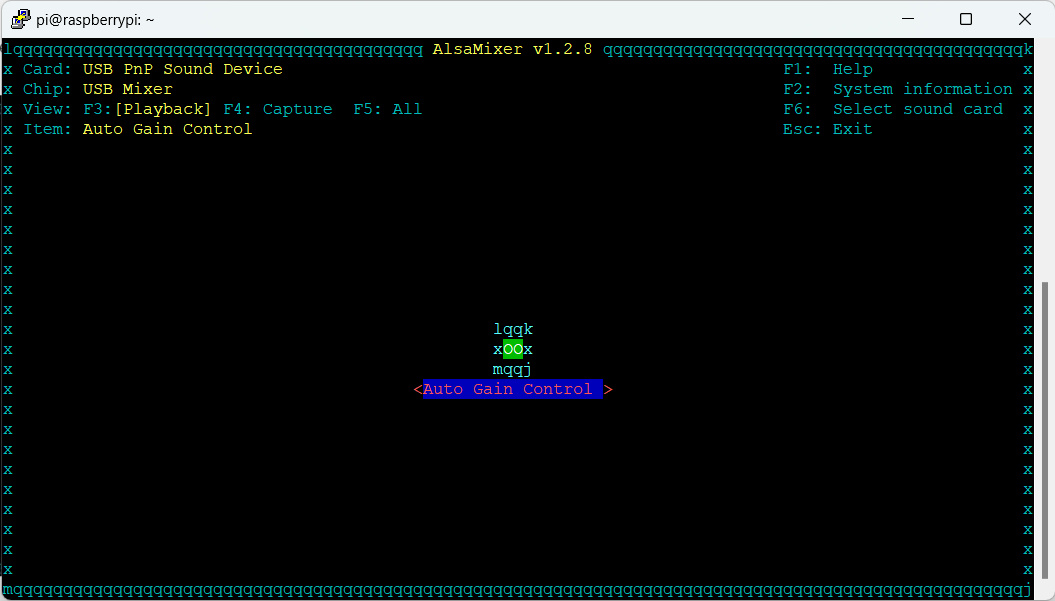
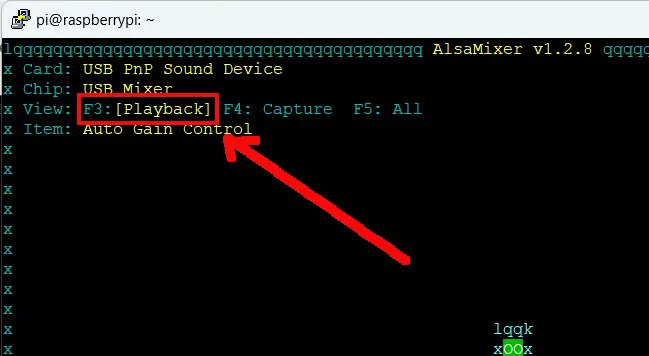
Still, by default, alsamixer shows you the Playback settings, as highlighted in the following picture:
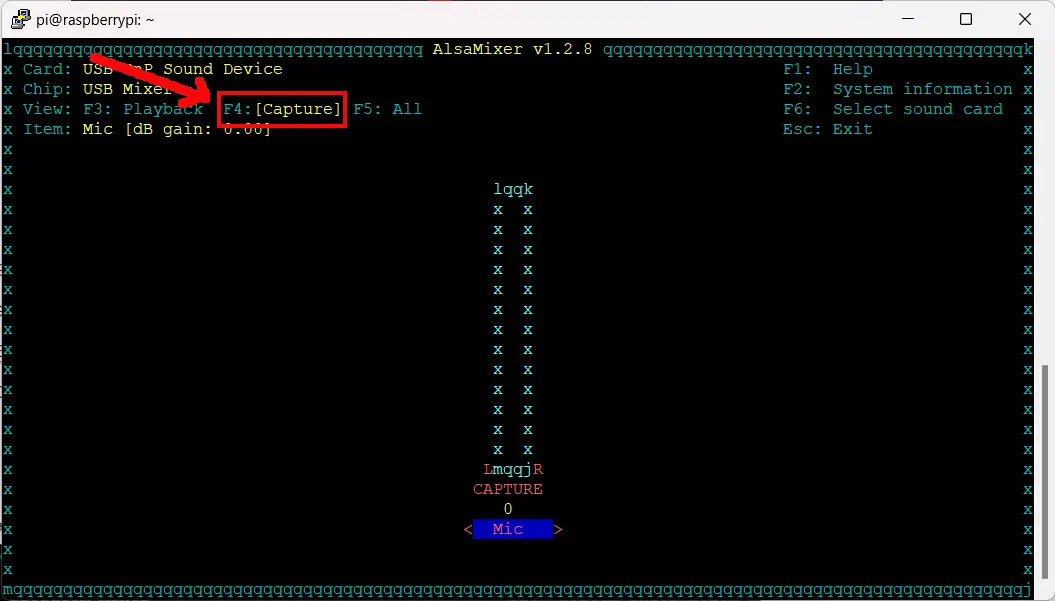
If you’re using the Raspberry PI terminal from its desktop environment, you should be able to change the view settings by pressing F3, F4, and F5. From remote SSH sessions, this may not work correctly, closing the alsamixer screen. In this case, you can switch between the different views by pressing the “TAB” key from your keyboard. Please move to the “Capture” screen:
Now, the console shows a vertical bar representing (with the terminal characters) the current Microphone gain. Please use the up/down keys from your keyboard to set a higher gain. With low-cost USB Microphone, probably you can test it at the maximum value:
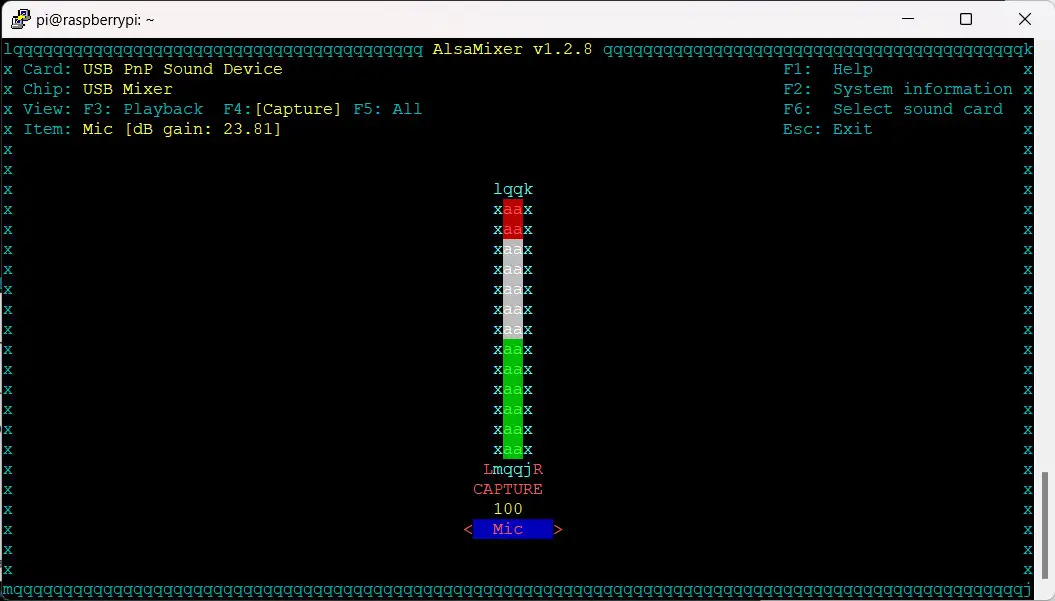
Press ESC to save and exit and test it again:
arecord -f dat -D plughw:2,0 -d 3 test2.wavDepending on your USB microphone quality, you may need or not to make it near your sound source, but you should hear your voice at a good level if you bring the microphone near your mouth.
Assign Static ID to your USB Microphone
After a reboot, your Raspberry PI may assign a different card ID to your USB Microphone, resulting in the following error:
pi@raspberrypi:~ $ arecord -f dat -D plughw:2,0 -d 3 test2.wav
arecord: main:831: audio open error: No such file or directory
To avoid this error, we can create an “alsa-base.conf” file as follows:
sudo nano /etc/modprobe.d/alsa-base.confAnd paste the following line:
options snd-usb-audio index=2
I used the “index=2” as I’m setting the card ID to the value “2”, but you can use your preferred ID number.
Close and save the file. After this, your USB Microphone on Raspberry PI will always get the same card ID.
What’s Next
Interested in more cool ways to use your Raspberry PI computer board? Take a look at peppe8o Raspberry PI computer tutorials!
Enjoy!

Open source and Raspberry PI lover, writes tutorials for beginners since 2019. He's an ICT expert, with a strong experience in supporting medium to big companies and public administrations to manage their ICT infrastructures. He's supporting the Italian public administration in digital transformation projects.
![]()
![]()
![]()
![]()
![]()
![]()
![]()


