
Last Updated on 18th August 2026 by peppe8o
In this tutorial, I’m going to show you how to install Home Assistant Container on your Raspberry Pi computer board, using the Docker installation method. Here, I’m also going to show you how to use a separate MariaDB container for the Recorder database, instead of the classic SQLite database.
This approach keeps the Raspberry Pi OS as the host operating system, allowing you to manage Home Assistant together with other Docker services. This post doesn’t install Home Assistant OS (with Supervisor and the Add-on store), as it would make it harder for you to use your Raspberry PI with other local services that it can easily run.
Quick Answer
- Create a Docker Compose file containing the Home Assistant and MariaDB setup
- Start it with
docker compose up -d - Open Home Assistant from a browser on port
8123 - After onboarding, configure the Recorder integration with this database URL:
recorder:
  db_url: mysql://homeassistant:changeme_ha@mariadb/homeassistant?charset=utf8mb4
The official Home Assistant image comes from the Home Assistant Core project, but this installation method is called Home Assistant Container. It is not the same as installing Home Assistant Core directly in Python.
Test results
The following values have been collected from my Raspberry PI after onboarding, after enabling MariaDB as the Recorder database, and while the installation was idle without manually adding any device/add-on/plugin/custom integration.
| Component | CPU | RAM | Application storage |
|---|---|---|---|
| Home Assistant | 0.03% | 297.9 MiB | 476K configuration directory |
| MariaDB | 0.01% | 102 MiB | 163M data directory |
The Docker image sizes were approximately 3.4 GB for Home Assistant and 500MB for MariaDB. These measurements come from a clean installation.
Home Assistant installation methods
This tutorial installs Home Assistant Container. It includes the Home Assistant application, dashboards, automations, integrations, scripts, scenes, and Recorder, but not Supervisor or the Add-on store.
| Method | Description | Supervisor | Add-on store |
|---|---|---|---|
| Home Assistant Container | Home Assistant application running in Docker | No | No |
| Home Assistant OS | Dedicated operating system for Home Assistant | Yes | Yes |
| Home Assistant Core | Home Assistant installed directly in a Python environment | No | No |
| Home Assistant Supervised | Home Assistant with Supervisor on a supported host system | Yes | Yes |
What We Need
As usual, I suggest adding from now to your favourite e-commerce shopping cart all the needed hardware, so that at the end you will be able to evaluate overall costs and decide if to continue with the project or remove them from the shopping cart. So, hardware will be only:
- Raspberry PI Computer Board (including a proper power supply or using a smartphone micro USB charger with at least 3A)
- high-speed micro SD card (at least 16 GB, at least Class 10)
Step-by-Step Procedure
Step 1. Prepare the Operating System
The first step is to install the Raspberry PI OS Lite to get a fast and lightweight operating system (headless). If you need a desktop environment, you can also use the Raspberry PI OS Desktop, in which case you will work from its terminal app. Please find the differences between the 2 OS versions in my Raspberry PI OS Lite vs Desktop article.
Please make sure that your Operating System is up to date. From your terminal, use the following command:
sudo apt update -y && sudo apt full-upgrade -yWe also need to install Docker on Raspberry PI (please use the linked tutorial).
For this project, I will use the following folder tree (considering my “pi” default user).
/home/pi/ha-stack/
├── .env
├── docker-compose.yml
├── homeassistant/
└── mariadb/
Please use the following terminal command to arrange it:
mkdir -p ~/ha-stack/homeassistant ~/ha-stack/mariadb
cd ~/ha-stack
Step 2. Create the environment file
Please create a .env file, which will include all the variables used in the next steps:
nano .envFill it with the following content and change the bolded parts with strong, unique passwords:
MYSQL_ROOT_PASSWORD=changeme_root
MYSQL_DATABASE=homeassistant
MYSQL_USER=homeassistant
MYSQL_PASSWORD=changeme_ha
Save and close the file.
Step 3. Create the Docker Compose File
Now, let’s create the main configuration file for this Docker Compose project:
nano docker-compose.ymland fill it with the following content. Please change the timezone (bolded) with your one.
services:
  mariadb:
    image: mariadb:latest
    container_name: mariadb
    restart: unless-stopped
    environment:
      MYSQL_ROOT_PASSWORD: ${MYSQL_ROOT_PASSWORD}
      MYSQL_DATABASE: ${MYSQL_DATABASE}
      MYSQL_USER: ${MYSQL_USER}
      MYSQL_PASSWORD: ${MYSQL_PASSWORD}
    volumes:
      - ./mariadb:/var/lib/mysql
    healthcheck:
      test: ["CMD", "healthcheck.sh", "--connect", "--innodb_initialized"]
      interval: 10s
      timeout: 5s
      retries: 5

  homeassistant:
    image: ghcr.io/home-assistant/home-assistant:stable
    container_name: homeassistant
    restart: unless-stopped
    privileged: true
    ports:
      - "8123:8123"
    environment:
      TZ: Europe/Rome
    volumes:
      - ./homeassistant:/config
      - /run/dbus:/run/dbus:ro
    logging:
      options:
        max-size: "10m"
        max-file: "3"
    depends_on:
      mariadb:
        condition: service_healthy
Save and close.
As you can see from this file, both the local volumes for Home Assistant and MariaDB are stored in the local folder. This will make it easier for you to backup these files for persistence.
Moreover, Docker Compose automatically creates a network for this project. Home Assistant will reach MariaDB through the service name mariadb.
Step 4. Start the Containers
From the terminal on Raspberry Pi, you can perform all the download and installation works with this simple command:
docker compose up -dIt will take a few minutes to complete these operations.
In my Raspberry PI 4, with a 150Mbps internet connection, it took around 3 minutes to download all the images, create the network, and create / start the containers. The compressed size (to download) for Home Assistant image was ~600MB, for MariaDB it was ~100MB.
After the prompt comes back to you, please check that MariaDB has started correctly. The following command:
docker compose logs -f mariadbWait for it to return you something like the following:
(...)
mariadb  | 2026-08-11 10:55:54 0 [Note] InnoDB: Buffer pool(s) load completed at 260811 10:55:54
mariadb  | 2026-08-11 10:56:01 0 [Note] Server socket created on IP: '0.0.0.0', port: '3306'.
mariadb  | 2026-08-11 10:56:01 0 [Note] Server socket created on IP: '::', port: '3306'.
mariadb  | 2026-08-11 10:56:01 0 [Note] mariadbd: Event Scheduler: Loaded 0 events
mariadb  | 2026-08-11 10:56:01 0 [Note] mariadbd: ready for connections.
mariadb  | Version: '12.3.2-MariaDB-ubu2404'  socket: '/run/mysqld/mysqld.sock'  port: 3306  mariadb.org binary distribution
Moreover, the following terminal command:
docker compose psshould show healthy status for both the containers.
Step 5. Start onboarding
At this point, you should be able to reach the running Home Assistant on Raspberry Pi from any remote computer with a browser, by using the URL composed by your Raspberry PI’s IP address and the port 8123. In my case, as my IP address is 192.168.7.110, the complete URL will be http://192.168.7.110:8123. Some browsers may warn you that the connection is insecure because no certificates has been installed. As your Home Assistant installation runs only in your local home area, it will be enought secure to accept.
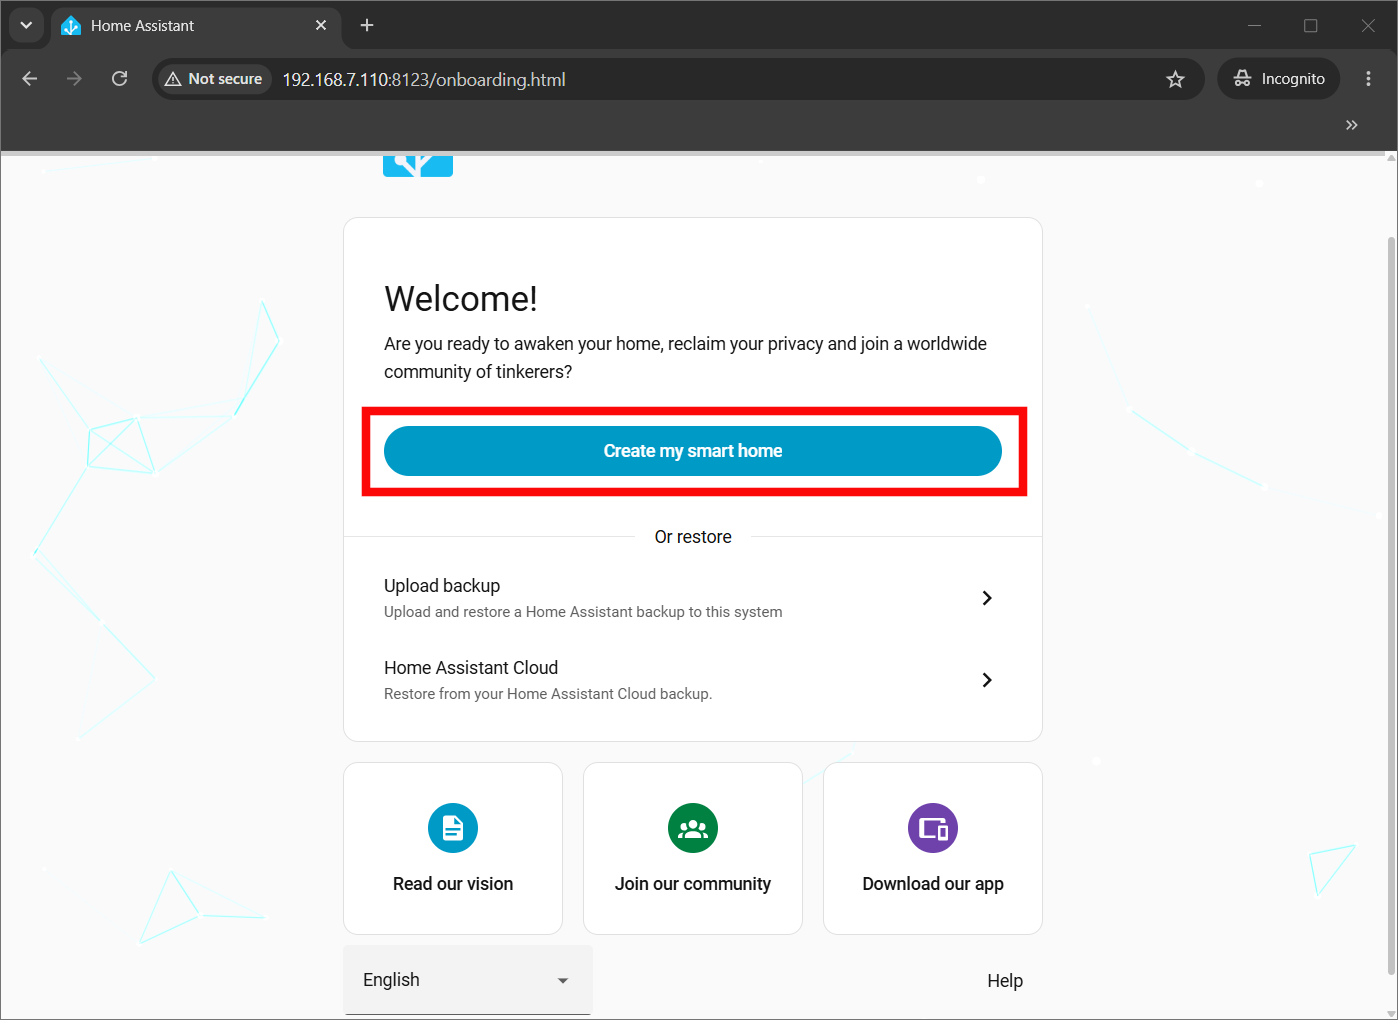
You will find the Home Assistant welcome page. As we’re installing a new instance from scretch, please click the “Create my smart home” button highlighted in the following screenshot.
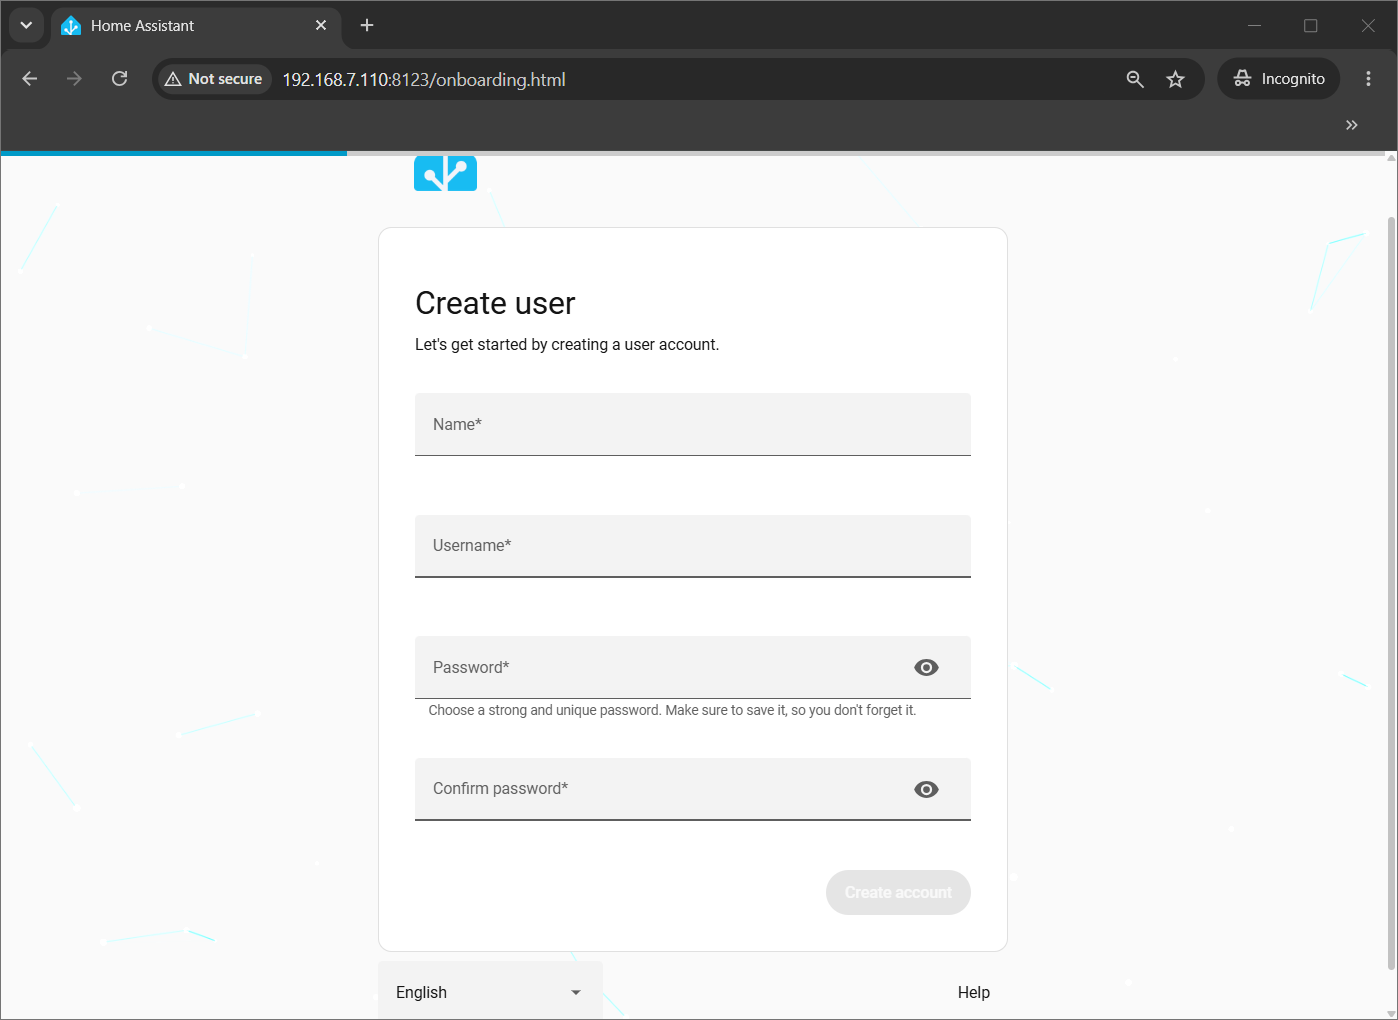
In the following page, we’ll create the administrator account. Enter your name, username, and a strong password. This will be the initial administrator account:
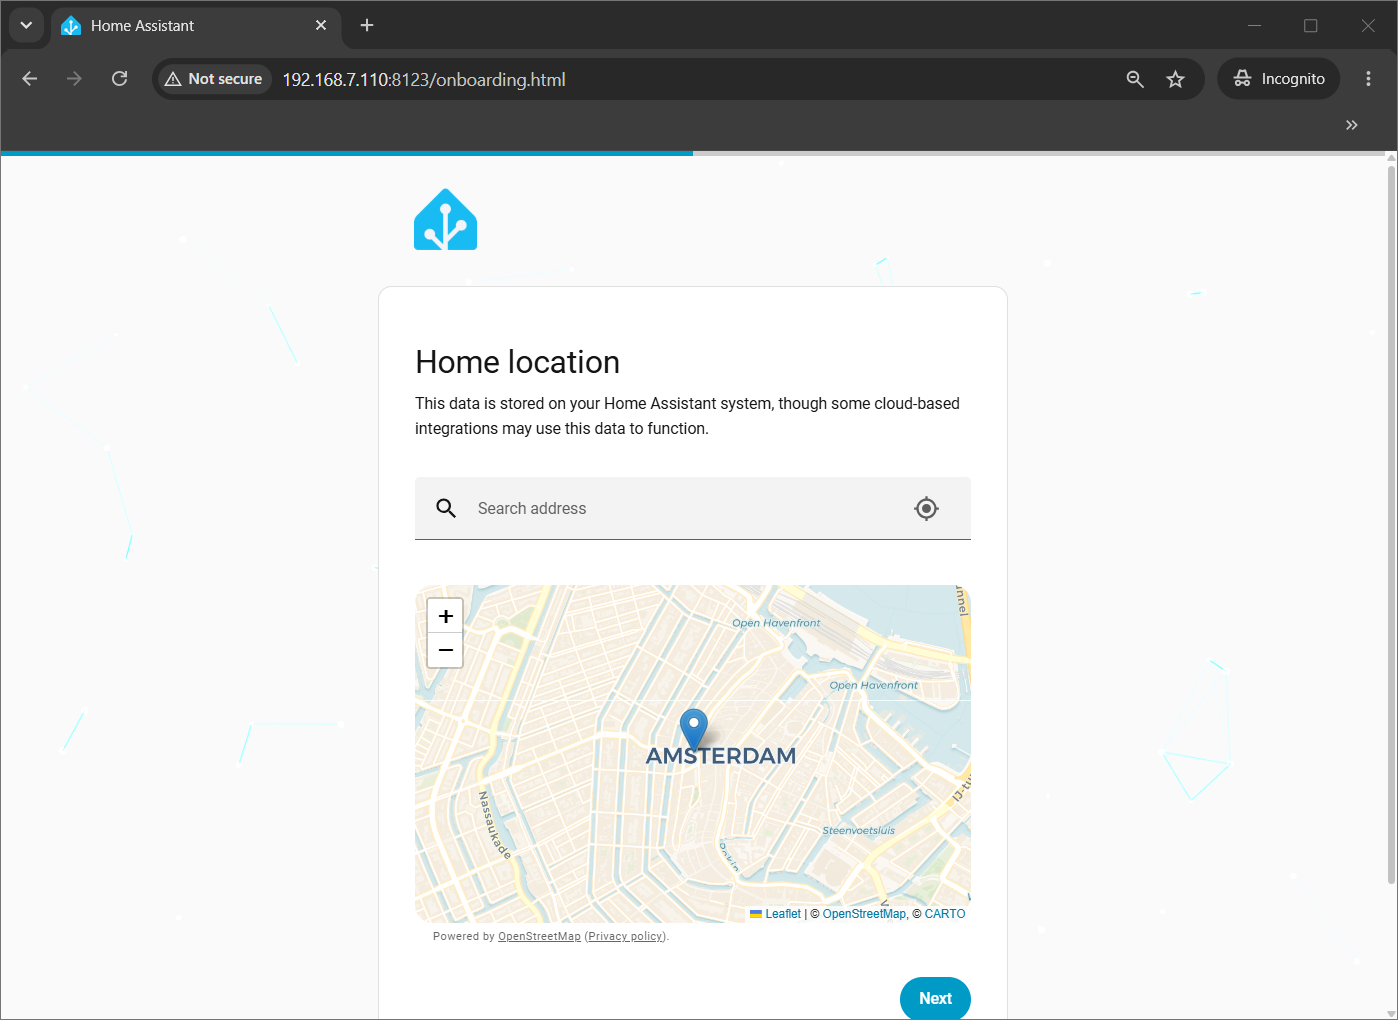
The following page will allow you to set the home location. Search for your address or city, verify the map position, and click Next:
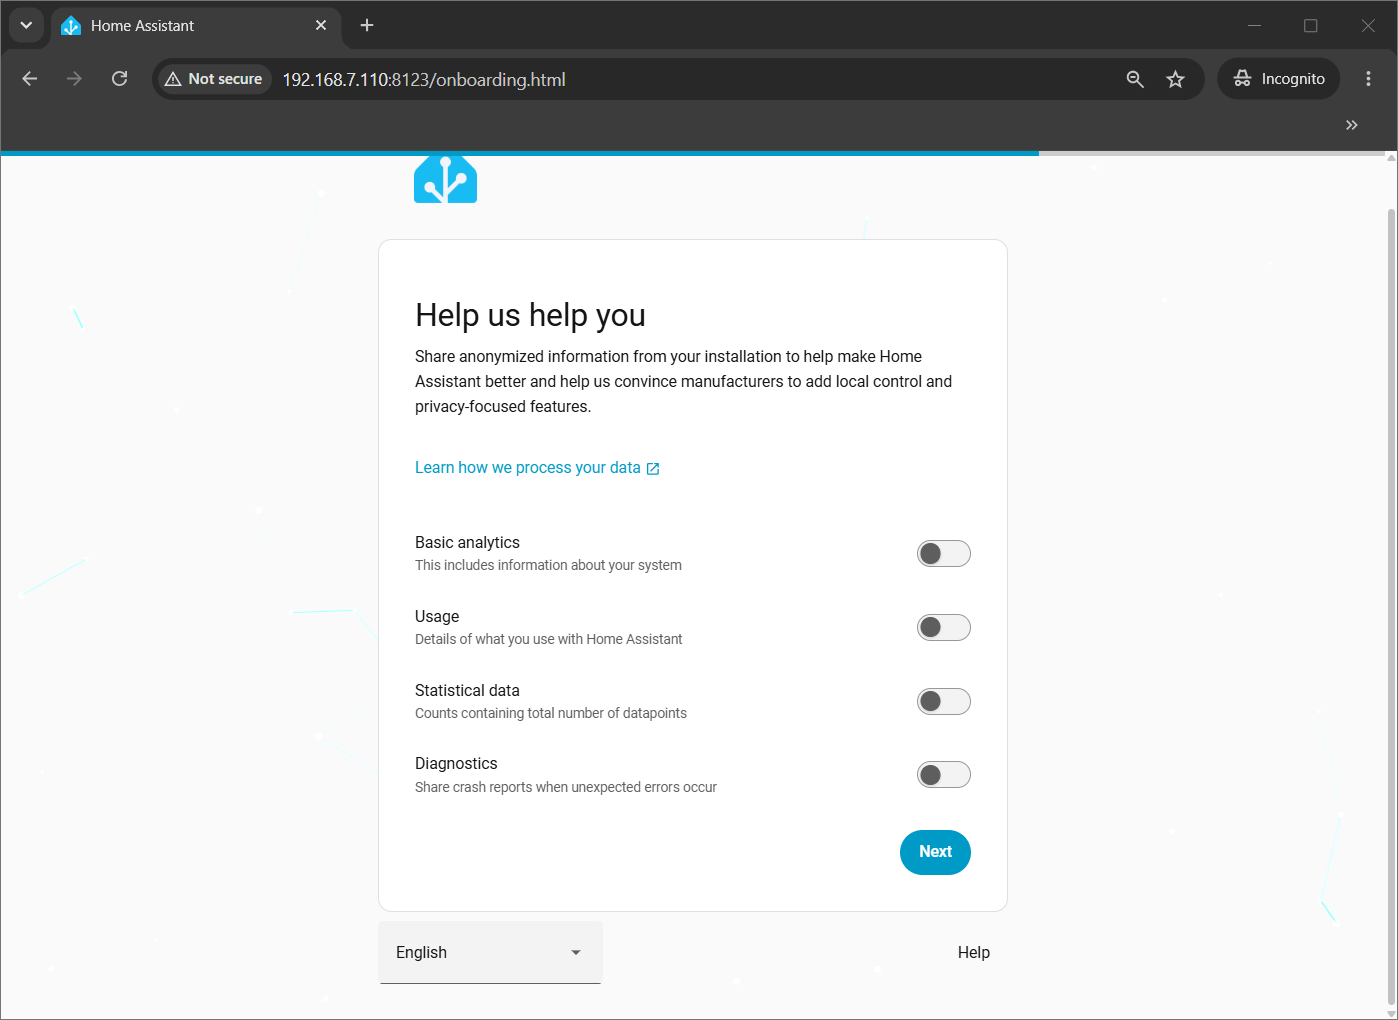
In the following page you can review the data-sharing options and choose the settings that match your privacy preferences. For a minimal-data test, you cana leave optional sharing disabled:
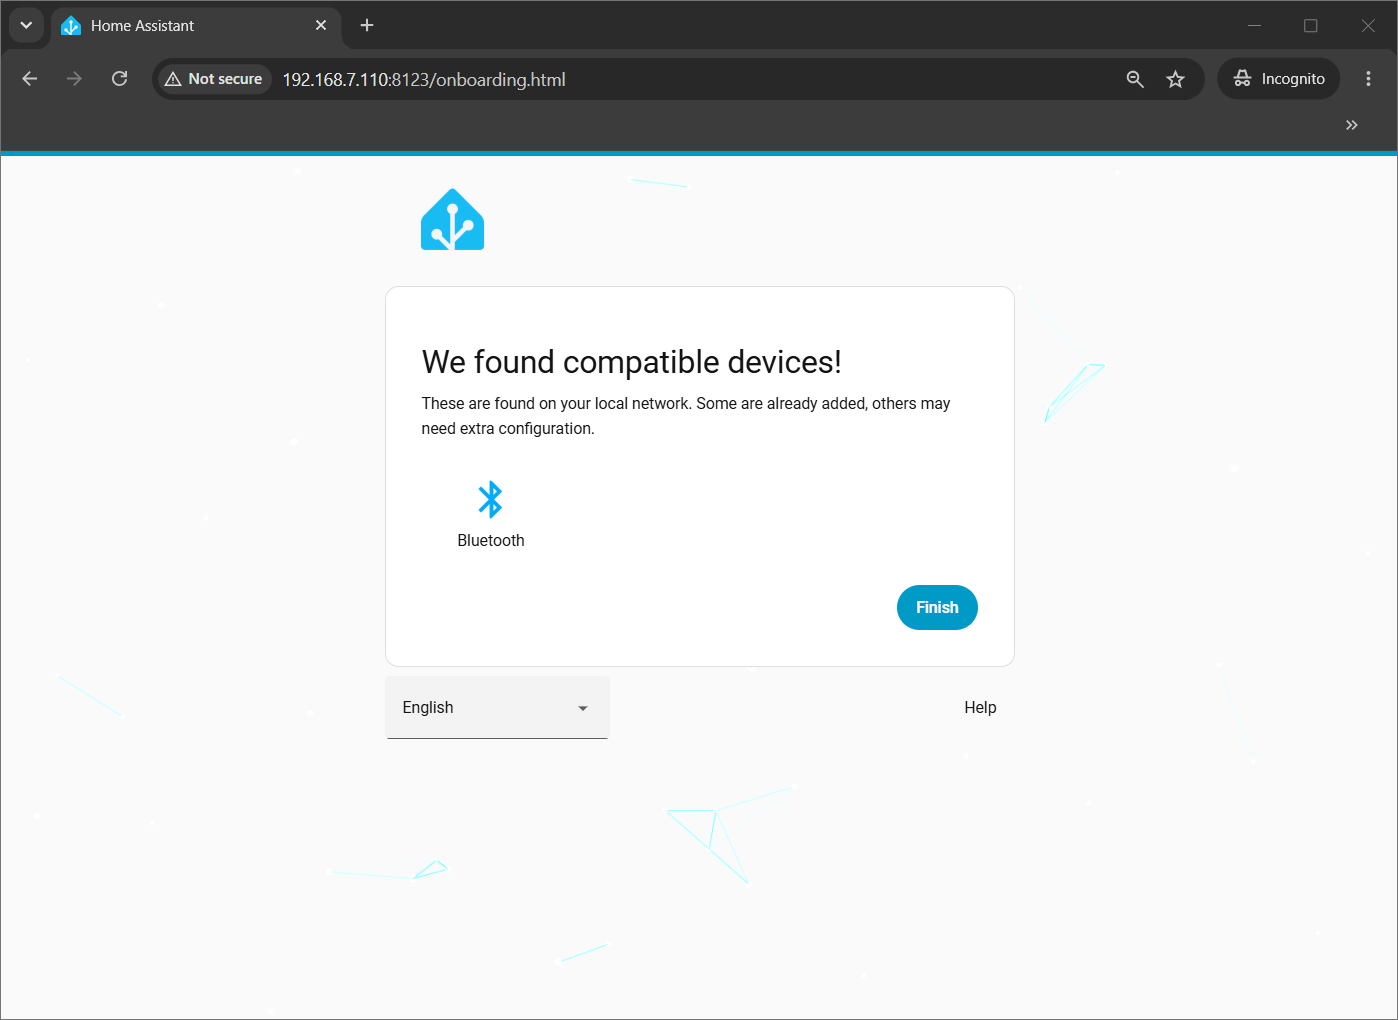
In the last configuration page, Home Assistant will show you the devices authomatically discovered on the local network. Click Finish:
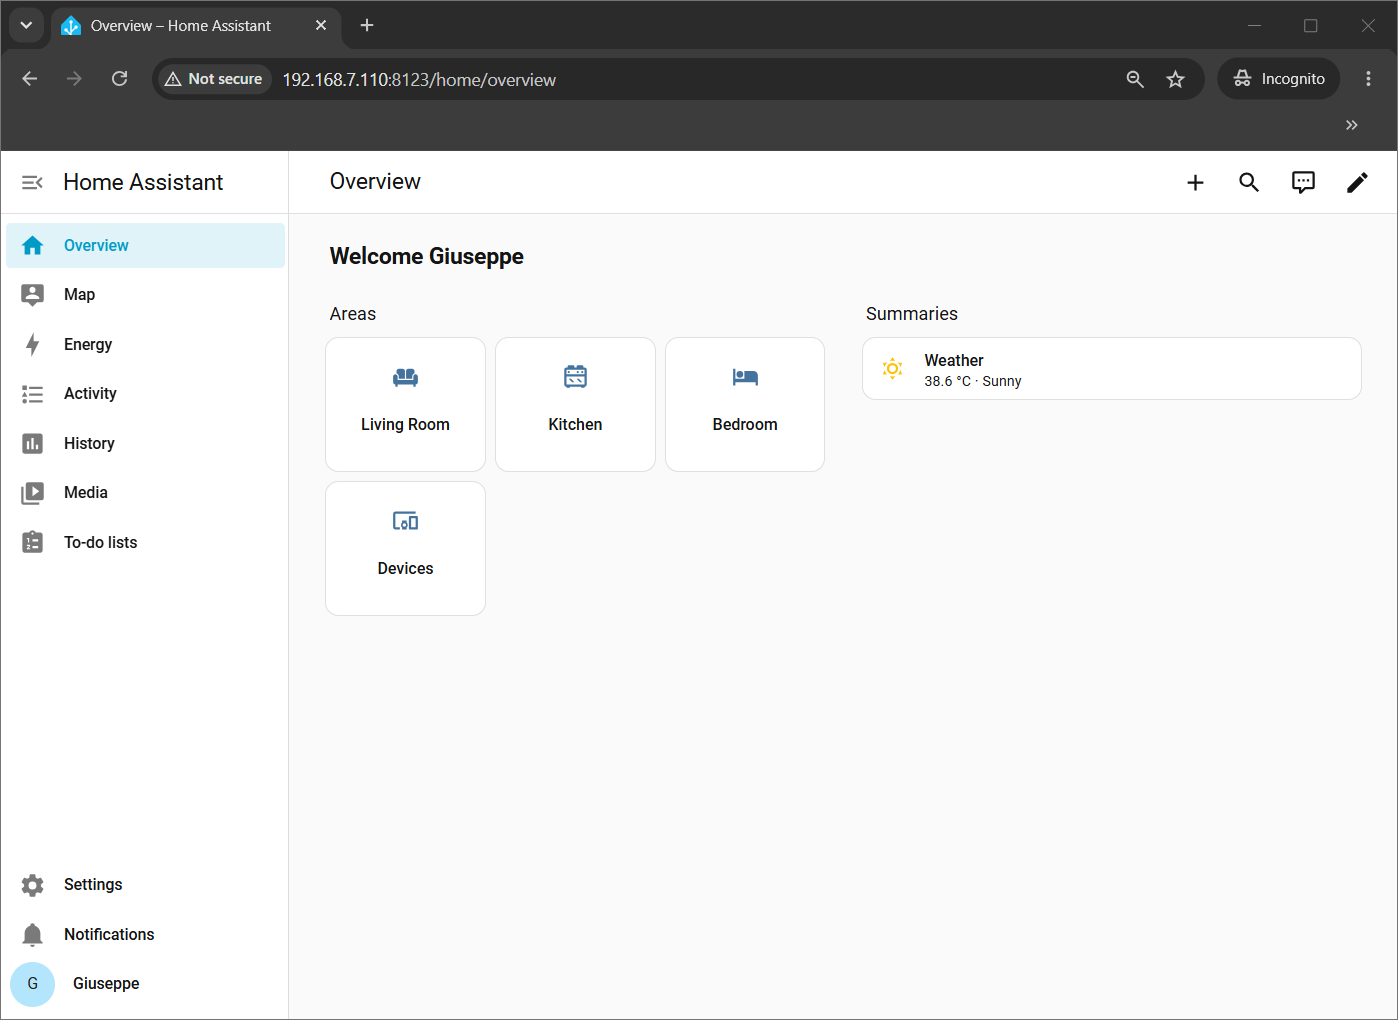
Finally, the dashboard will confirm that the Home Assistant web interface is working. The content can vary depending on automatically discovered services.
Configure MariaDB for Recorder
By default, Home Assistant uses SQLite to store item events and state changes. As described at the beginning of this article, we’ll move it to a more performing MariaDB database. We’ll get this by editing the Home Assistant configuration file.
Before performing this operation, please create a backup of the configuration file, with the following terminal command:
sudo cp ~/ha-stack/homeassistant/configuration.yaml ~/ha-stack/homeassistant/configuration.yaml.before-mariadbOpen it:
sudo nano ~/ha-stack/homeassistant/configuration.yamlAppend the following lines at the end of the file:
recorder:
  db_url: mysql://homeassistant:changeme_ha@mariadb/homeassistant?charset=utf8mb4
The hostname must be mariadb, as set in the Docker Compose file for the service name. Do not use 127.0.0.1, which refers to the Home Assistant container itself!
Save and close.
Restart Home Assistant:
docker compose restart homeassistantVerify the Recorder
After the Home Assistant restart, you can verify that it is running correctly by checking the tables (user and password must be set accroding to what you set in the .env file):
docker exec mariadb mariadb \
-u homeassistant -pchangeme_ha homeassistant \
-e "SHOW TABLES;"
This returned to me the following output (your one should be similar):
Tables_in_homeassistant
event_data
event_types
events
migration_changes
recorder_runs
schema_changes
state_attributes
states
states_meta
statistics
statistics_meta
statistics_runs
statistics_short_term
Then check that events and states have been written:
docker exec mariadb mariadb \
  -u homeassistant -pchangeme_ha homeassistant \
  -e "SELECT e.event_id, FROM_UNIXTIME(e.time_fired_ts) AS fired_at, et.event_type FROM events e LEFT JOIN event_types et ON e.event_type_id = et.event_type_id ORDER BY e.event_id DESC LIMIT 10;"
In this test, my result was:
event_id  fired_at                  event_type
341       2026-08-11 15:10:10.472627  recorder_5min_statistics_generated
340       2026-08-11 15:08:06.590278  homeassistant_started
339       2026-08-11 15:08:06.590098  core_config_updated
338       2026-08-11 15:08:06.587183  homeassistant_start
337       2026-08-11 15:08:06.586929  core_config_updated
336       2026-08-11 15:08:06.586153  component_loaded
335       2026-08-11 15:08:06.335822  component_loaded
334       2026-08-11 15:08:06.313374  component_loaded
333       2026-08-11 15:08:06.291188  service_registered
332       2026-08-11 15:08:06.286679  component_loaded
Backup the installation
A raw copy of the mariadb directory taken while the container is running is not reliable. MariaDB constantly writes to its data files in the background, even without active queries, to flush memory pages and maintain its internal structures. Copying those files with the container still running can capture some files while a write operation is running. This will produce a backup that looks complete but which is internally inconsistent and may fail to restore later.
The simplest and safest method for a beginner is a cold backup: stop the containers, copy the folders while nothing is writing to them, then start the containers again. This is the same principle used for database backups in general, where a database is considered safe to copy only once it is fully stopped.
Stop the stack:
cd ~/ha-stack
docker compose down
Copy the whole project folder to a backup location, for example a USB drive or another machine:
sudo cp -a ~/ha-stack /path/to/backup/ha-stack-$(date +%Y%m%d)Start the stack again:
docker compose up -d
docker compose ps
This single copy includes everything needed to restore the installation:
ha-stack/
├── .env
├── docker-compose.yml
├── homeassistant/   (configuration, dashboards, automations)
└── mariadb/          (Recorder database, safe to copy because MariaDB was stopped)
Store the backup on another device. A backup kept only on the same SD card does not protect against card failure.
This method requires a short downtime while the containers are stopped, which is a reasonable trade-off for a home installation.
If you need to back up MariaDB without stopping Home Assistant, look into mariadb-dump or mariadb-backup, which are designed to produce a consistent copy of a running database.
Update Home Assistant
Before updating, back up the installation using the above described method. Moreover, record the image versions (both Home Assistant and MariaDB) before and after updates:
echo "Home Assistant digest:" && docker image inspect ghcr.io/home-assistant/home-assistant:stable --format '{{index .RepoDigests 0}}'
echo "Home Assistant version:" && docker exec homeassistant cat /config/.HA_VERSION
echo "MariaDB digest:" && docker image inspect mariadb:latest --format '{{index .RepoDigests 0}}'
echo "MariaDB version:" && docker exec mariadb mariadb -u homeassistant -pchangeme_ha -e "SELECT VERSION();"
This will allow you to rollback and recreate the running service even on update problems, allowing you to get more time to throubleshoot what not worked.
Then pull and recreate the Home Assistant container:
cd ~/ha-stack
docker compose pull homeassistant
docker compose up -d homeassistant
docker compose ps
docker compose logs --tail 50 homeassistant
The stable tag follows the current stable image.
Troubleshooting
Home Assistant is not reachable
docker compose ps
docker ps
The expected port mapping is 0.0.0.0:8123->8123/tcp.
MariaDB is not healthy
docker compose logs mariadbRecorder cannot connect
Check the hostname mariadb, credentials, database name, and the recorder.db_url entry.
Permission denied when measuring MariaDB
sudo du -sh ~/ha-stack/mariadb
docker exec mariadb du -sh /var/lib/mysql
Final Thoughts about Home Assistant Container on Raspberry PI
Running Home Assistant Container with MariaDB on a Raspberry Pi provides a flexible Docker-based installation while preserving Raspberry Pi OS as the host operating system. This means that you will be able to use your Raspberry Pi for other private projects and services by using the tutorials available for this versatile computer board.
In my home test on a Raspberry Pi 4 Model B with 4GB RAM, Home Assistant used approximately 298 MiB of RAM at idle and MariaDB used approximately 102 MiB. The Home Assistant configuration directory occupied less than 1MB, while the MariaDB data directory occupied approximately 163MB after initialization.
The Docker images used approximately 3.392GB for Home Assistant and 488.8MB for MariaDB. These figures provide a useful baseline to properly select your storage size before adding integrations, devices, automations, and long-term Recorder history.
What’s Next
Interested in more projects for your Raspberry Pi computer board? Take a look at peppe8o Raspberry PI tutorials!
Enjoy!
Home Assistant Container runs the Home Assistant application in Docker and does not include Supervisor or the Add-on store. Home Assistant Core is a direct Python installation without Supervisor. Home Assistant OS is a dedicated operating system that includes Supervisor and supports add-ons. Supervised combines Home Assistant with Supervisor on a supported host system. This tutorial uses Home Assistant Container.
Yes. SQLite is the default Recorder database and is suitable for a small or lightly used installation. This guide uses MariaDB as a separate container to keep Recorder data outside the Home Assistant configuration directory and to provide a server database for larger histories and concurrent access. Switching databases does not automatically migrate existing history, so create a backup before changing the db_url value.
Home Assistant Container does not include Supervisor or the Add-on store. You can run equivalent services as separate Docker containers. HACS is not a Supervisor add-on: it is a custom integration and can be installed in Home Assistant Container, but it requires additional manual steps and should be treated as an optional advanced topic.
Open source and Raspberry PI lover, writes tutorials for beginners since 2019. He's an ICT expert, with a strong experience in supporting medium to big companies and public administrations to manage their ICT infrastructures. He's supporting the Italian public administration in digital transformation projects.






This is one of the great tutorial. I did every thing as per your instructions and all is well.
Is there anyway to install add on on home assistant. I cannot find usual hass.io in web ui
Many thanks
Thanking to your comment, I’ve discovered that docker installation for home-assistant (beside on which platform is installed) is a core installation. Supervisor tab is available only on complete and manual installation (https://www.home-assistant.io/docs/installation/raspberry-pi/). Updated post title according.
Thank you
Dear Peppe8o
wish you a merry Christmas
Thanks for your prompt response. i think even without supervisor tab i manage to get some add-ons with HA core version. i wanted to integrate MQTT broker and i did after referring few online tutorials. but none of them are clear as your instructions.
i’m trying to find where home assistant configuration.yaml located. i can find find file with same name at homeAssProd directory. but it doesn’t look like usual yaml file.
i want to get duckDNS and integrate with home assistant. i couldn’t find any tutorial on this written for home assistant core version.
it’s appreciated if you can find sometime to work on this. many thanks again and keep up your good job
Hi,
Thanks for a great simple tutorial. It was realy simple to install Home Assistant with this tutorial.
I have a question:
If I follow this tutorial where can i find the directory custom_components? I can’t find them when I’m using docker but I can find it when I’m using another (more difficult) tutorial.
Hi Kenneth,
I’m not a specialist in Home Assistant, but first of all please consider (as referred in my tutorial) that this is to install Home Assistant CORE. That said, when you use docker, containers create internal folder structure which is not directly visible from shell. To see what you have inside the container folders you have 2 options:
docker exec -it homeAssProd bash): this allows you to have an interactive shell inside the containerIf the custom_components is a default folder, you will find it inside the container.
If it is required for your customizations, you should map it into a dedicated volume (as done in my tutorial for config folder with the “
-v /home/pi/homeAssProd:/config“option).Probably, if you need to create it you have to check that your configuration.yaml file is configured properly. Anyway, I suggest to ask support from Home Assistant forums, which are more specialized in Home Assistant internal stuff.