
Last Updated on 2nd September 2023 by peppe8o
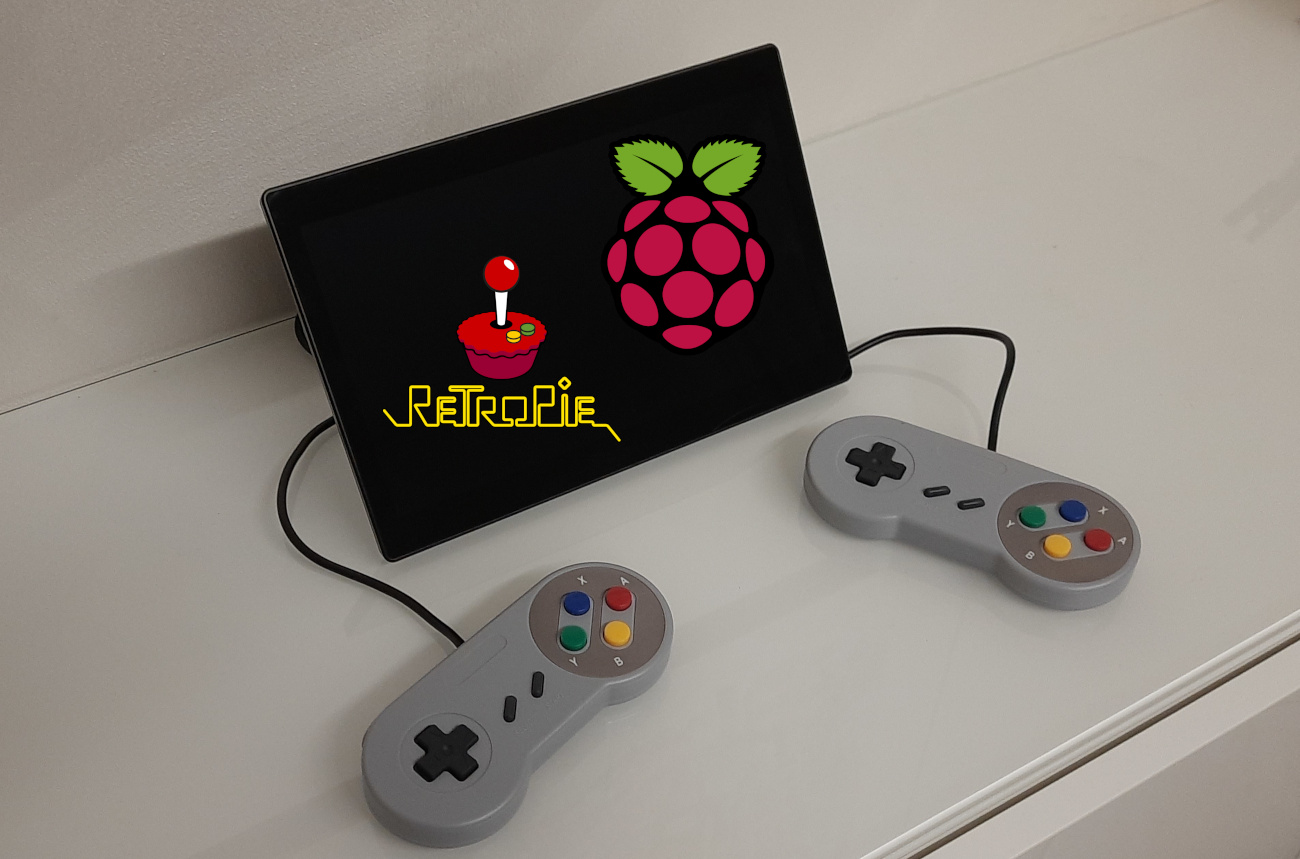
This tutorial will show you how to install and setup RetroPie on Raspberry PI to get your personal retro gaming console.
The retro gaming console is one of the most famous applications for Raspberry PI computer boards. Some users built arcade cabinets around the software powering this project, so getting a complete 80s taste. RetroPie and Raspberry PI allow a straight way to get everything working with a few steps
About RetroPie
Retropie is a software released under the GPL (GNU General Public License). It allows you to turn your Raspberry Pi computer board into a retro-gaming machine, able to emulate a lot of Arcade, home console and classic PC games with a minimum setup. For this purpose, it uses EmulationStation.
In addition to this, RetroPie also provides a number of configuration tools allowing deeper system customization.
You can install RetroPie on top of a full Operating System, but Raspberry PI users can get things simplified by using pre-build images that bring your Raspberry PI computer board ready to upload your games and play them.
For this tutorial, I’m going to use a Raspberry PI 3 Model B+, but you can use this with quite all Raspberry PI computer boards
What We Need
As usual, I suggest adding from now to your favourite e-commerce shopping cart all the needed hardware, so that at the end you will be able to evaluate overall costs and decide if to continue with the project or remove them from the shopping cart. So, hardware will be only:
- a Raspberry PI Computer Board (including proper power supply or using a smartphone micro USB charger with at least 3A)
- high-speed micro SD card (at least 16 GB, at least class 10)
- one or more Gamepad
- an HDMI display (for my project I used the Uperfect touchscreen, which has a specific slot for Raspberry PI computer boards)
- (optional) a USB/wireless keyboard
Check hardware prices with the following links:


Step-by-Step Procedure
Install the Operating Sistem
In order to prepare our micro SD card for RetroPie, we can enjoy the easy use of Raspberry PI Imager tool. It enables you to easily select your desired software and flash it on your micro SD card with a few clicks. A short guide for this software is available at my Raspberry PI Imager tutorial.
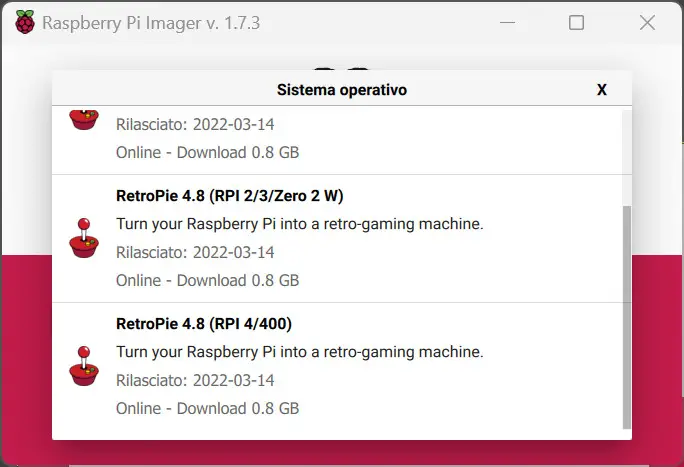
Once plugged the Micro SD card in your PC with the Imager tool installed, please select the RetroPie Operative System with the following clicks:
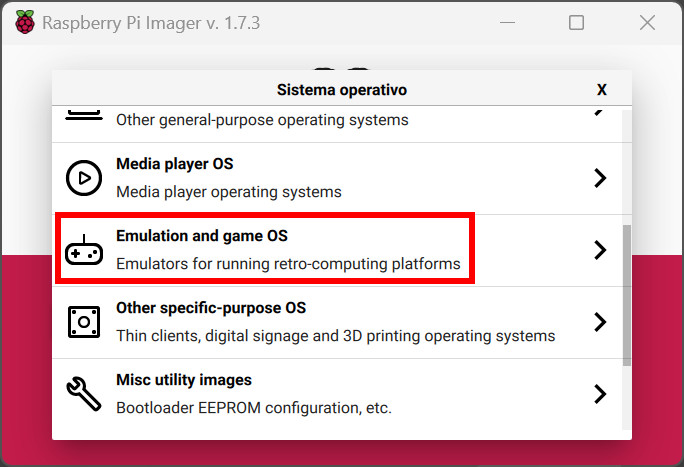
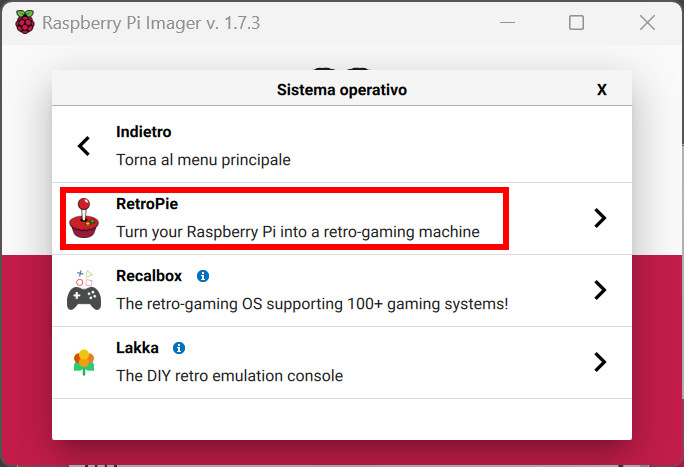
The last click changes depending on your Raspberry PI model:
Then select the Storage matching your micro SD card and click the “WRITE” button. At the end of the process, you should have a Successfull message (otherwise, please try again by running the imager with administrative permissions). You can then eject your storage and plug it in your Raspberry PI.
Boot the Raspberry PI with RetroPie
Before booting, I suggest you to connect the gamepad. This is useful if you have only the gamepad (no Keyboard), as it will allow you to configure it at the very start of first boot, as shown in the following picture:
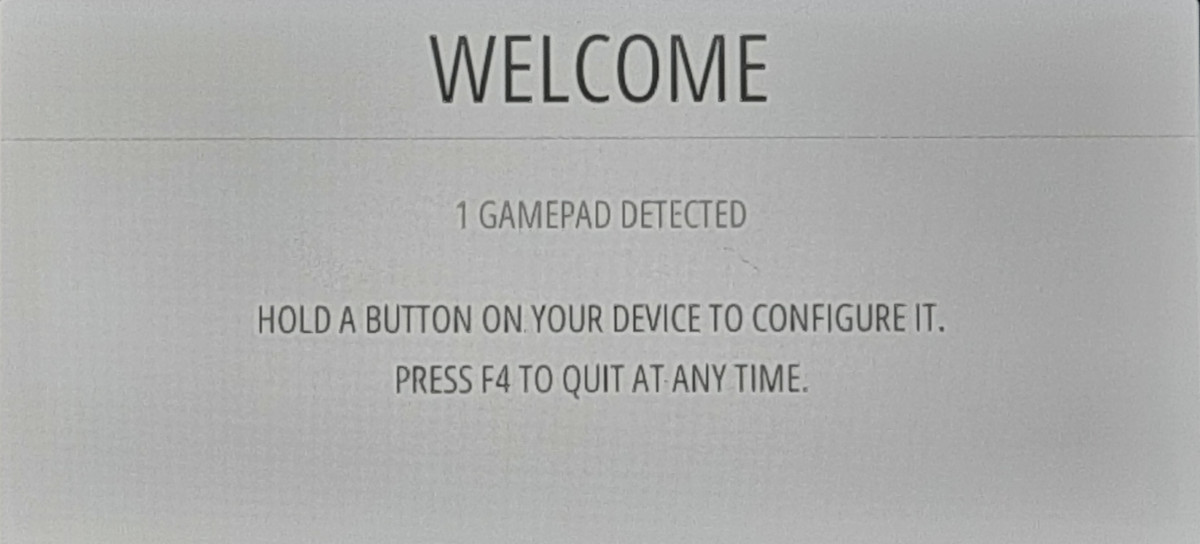
Keep pressing one button (whatever) from your gamepad to start configuring it.
RetroPie configures the gamepads by allowing you to map all the main actions (on left side for each row) to the key that you will press.
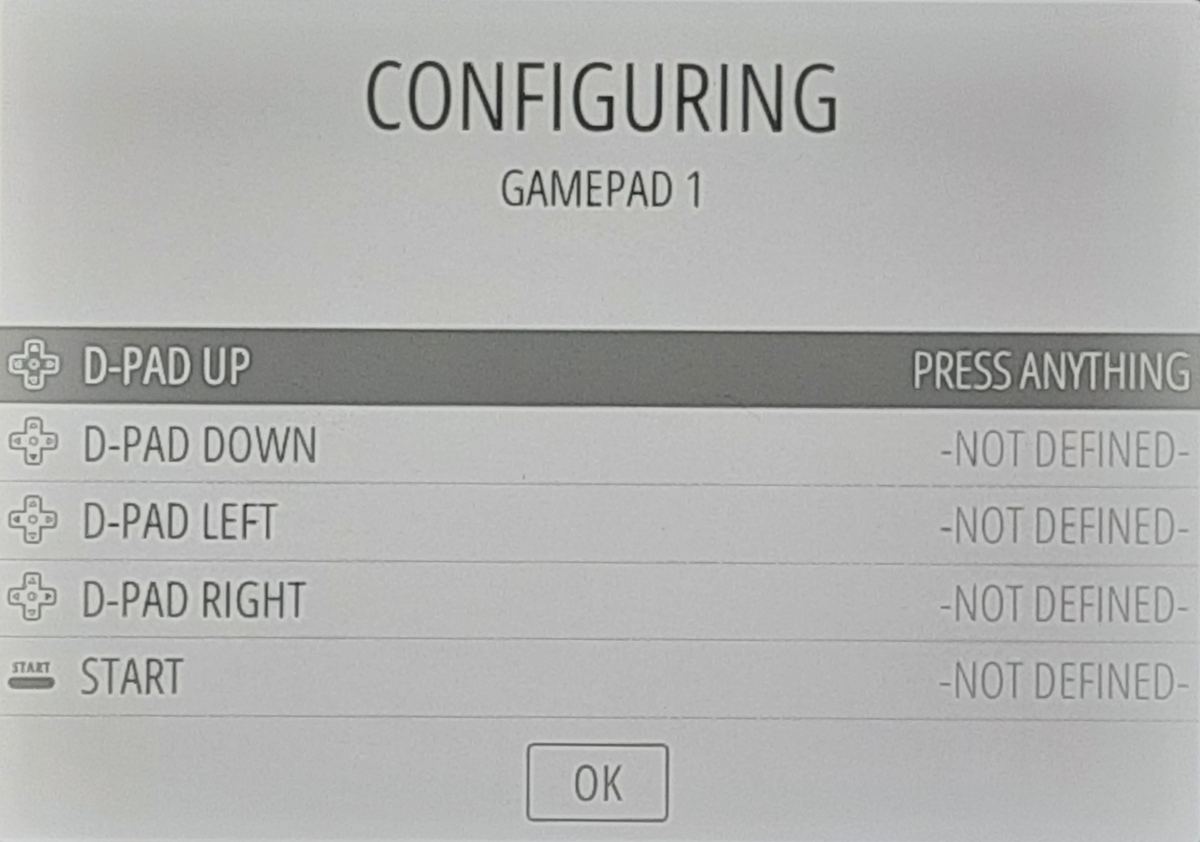
For example, for the D-PAD UP (first row), when this is selected you can press the related button from your gamepad (the UP button from your direction buttons) in order to get this associated. At the gamepad input the configuration will move to the next row:
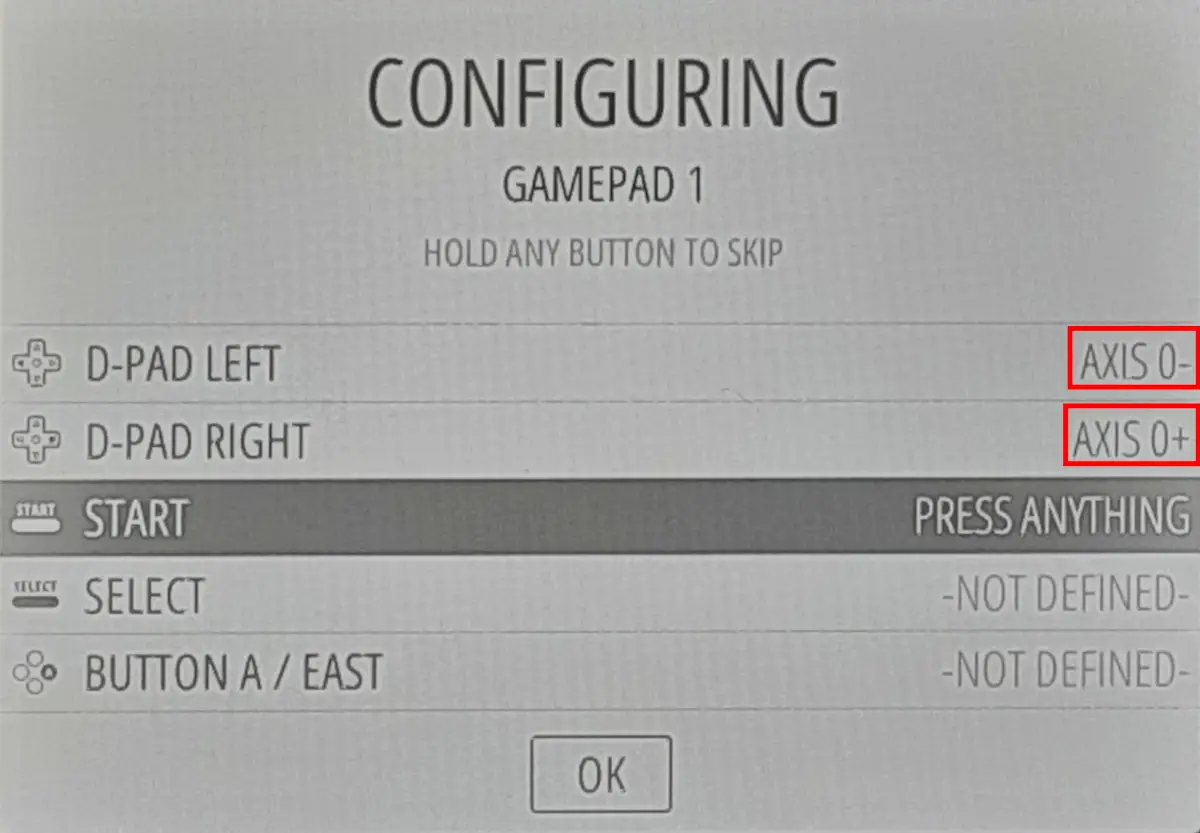
RetroPie may provide more buttons compared to your gamepad availability. In this case you can skip specific rows by keeping pressed any button of your gamepad to move to the following row, till the end.
The final (Hotkey Enable) can be assigned to any of your existing buttons even if already assigned. I strongly suggest to associate it to one of your buttons (for example the Select) as it will allow you to exit from games without shutting down the Raspberry PI.
At the end, with the OK button you will reach the home configuration:
With your gamepad configured, you can use it to navigate and configure every Retropie setting. Your gamepad UP/DOWN will allow moving within the menu, the “A” button to select a menu item and the “B” button to go back.
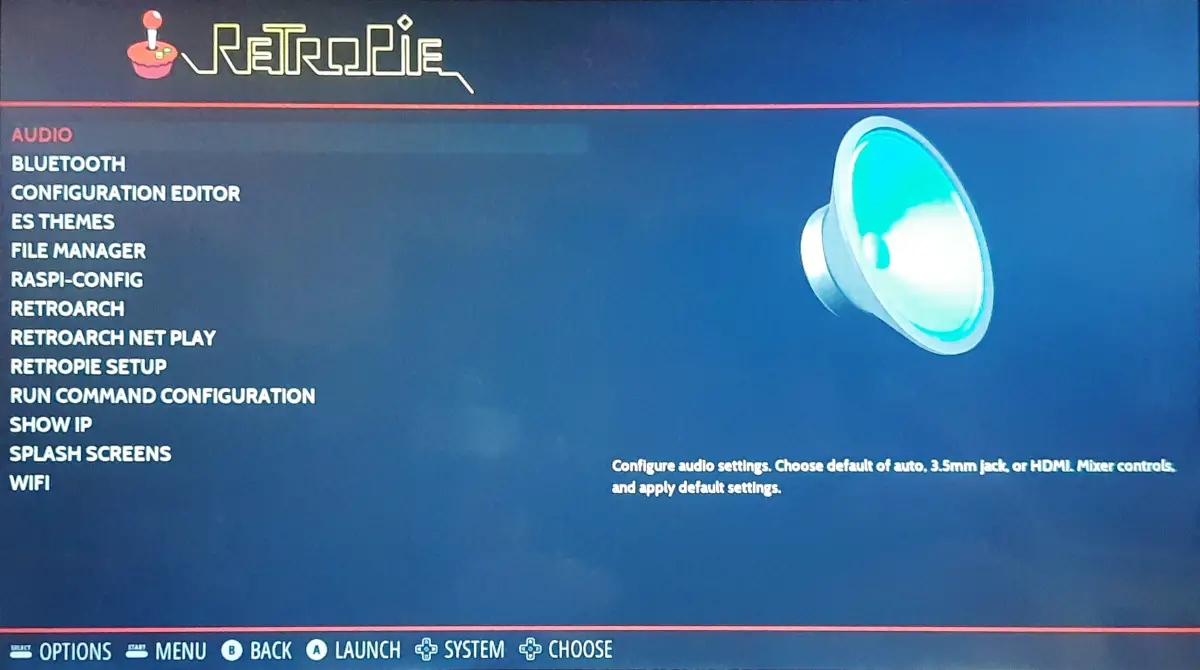
Using the Raspi-Config
The raspi-config is a really important tool for RetroPie on Raspberry PI, as it allows to set important parameters like, for example, the WiFi country ID (to connect your WiFi network).
In order to use it, please select the RASPI-CONFIG menù:
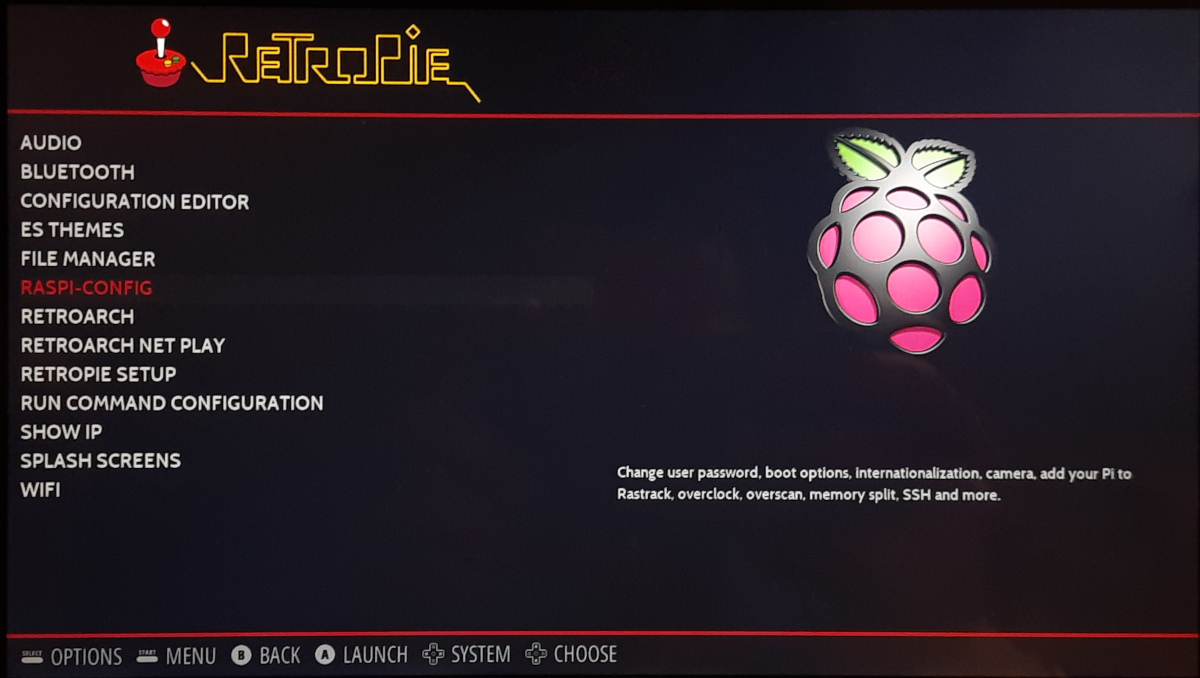
Press the “A” button from your gamepad and this will allow you to reach the well-known raspi-config interface:
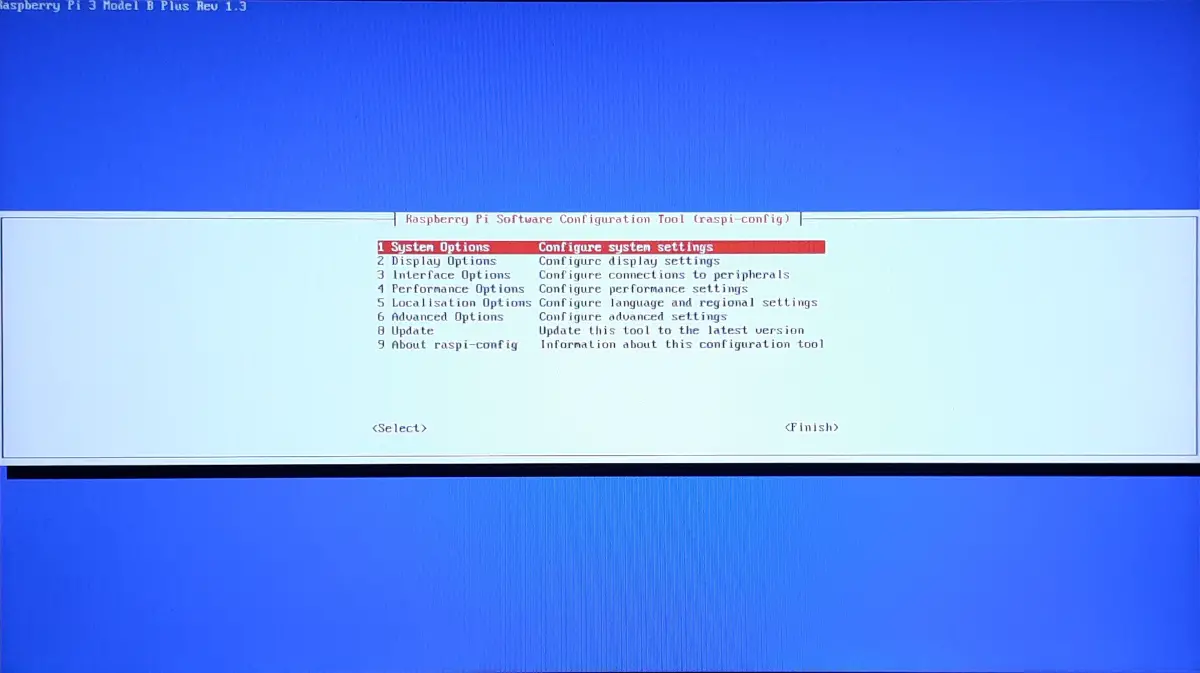
To use it with a gamepad, please remember the following actions:
- up/down to move between menu items
- once you are on the wished item, use the right arrow from your gamepad to pass into the Select/Finish at the end of the screen
- press the “B” button from your gamepad to confirm the “Select” (so entering the sub-menu) or the “Finish”
- the “X” button from gamepad allows exiting from the raspi-config without saving the changes
The following will give you two configuration suggestions from me.
Entering the “Localisation Options” will allow you to reach the “WLAN Country“, where you can set your country ID, required if you want to connect the Retropie to a WiFi network.
In my opinion, one more important feature to enable is the SSH interface. You can enable it from raspi-config by using the “Interface Options” menù, then the “SSH” menù. I suggest enabling it as it allows uploading the ROMs via an SFTP client (as, for example, the free Filezilla) from a remote PC. This will make it possible to upload the ROMs without having a keyboard plugged into your Retropie device.
Connecting the WiFi
Once you have set the WLAN Country, you can use the WiFi menu from Retropie main configuration page in order to get your device connected to your local network and internet.
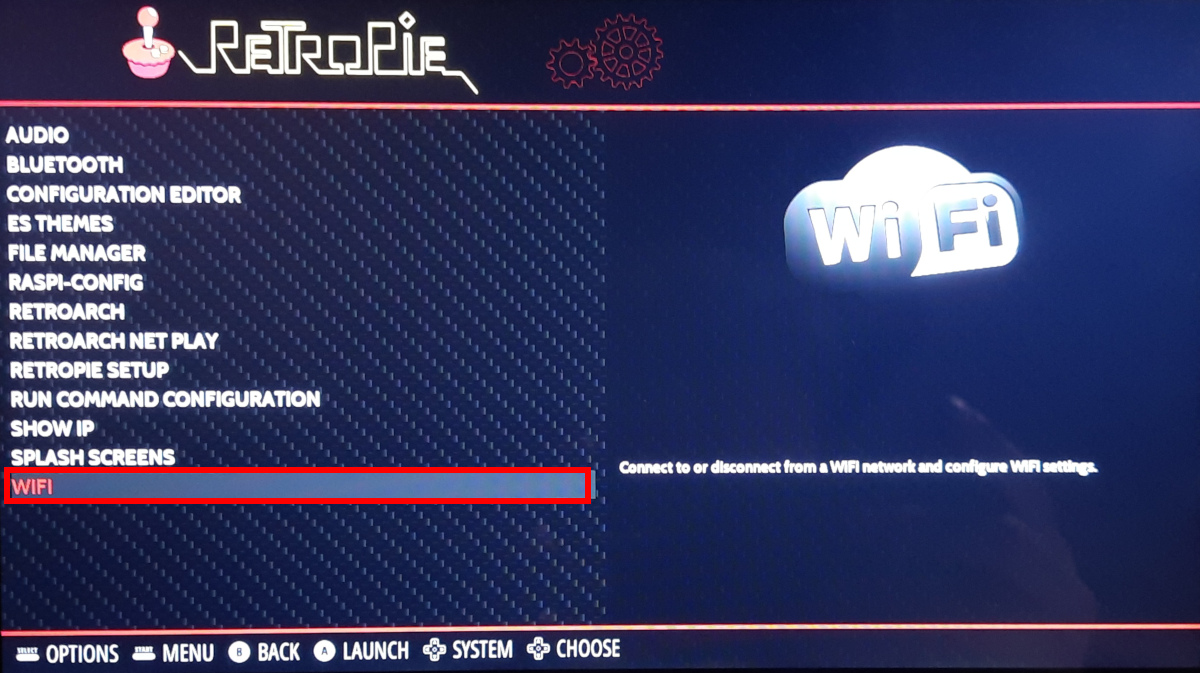
From the following interface, you can scan the WiFi networks detected from the Raspberry PI and connect your WiFi.
Retropie ROMs
Retropie is an empty box without games. A ROM (Read Only Memory), in the Retropie context, is a software package that allows the emulation of a specific game. The ROM filename usually refers to the emulated game and its file extension (the chars after the last dot in the name) typically refers to the emulated platform required to play the game. Some of the most common extensions (platforms) are:
- .zip / .smc / .sfc / .fig / .swc -> Super Nintendo
- .crt / .d64 / .g64 / .t64 / .tap / .x64 -> Commodore 64
- .gb -> Game Boy
- .z64 / .n64 / .v64 -> Nintendo 64
A more complete list of file extensions and their platform can be found at https://retropie.org.uk/about/systems/.
The ROMs can be found on a lot of websites on the web, but you have to care about the copyright issues as every country can have different laws applied to this subject and it is important to check what your Country allows. Two of the most famous websites offering free ROMs are:
Also, many popular p2p networks allow downloading many ROMs packages (usually distributed in compressed files), but please mind always to respect your country’s laws regarding copyrights.
One more source for ROMs is Amazon (you can use this amazon search link).
Retropie has a defined space where to store the ROMs. By default, it is available at “/home/pi/RetroPie/roms” and it includes the following sub-folders:
- amstradcpc
- arcade
- atari2600
- atari5200
- atari7800
- atari800
- atarilynx
- channelf
- coleco
- fba
- fds
- gamegear
- gb
- gba
- gbc
- genesis (it is a link to the megadrive folder)
- mame-libretro
- mastersystem
- megadrive
- msx
- n64
- neogeo
- nes
- ngp
- ngpc
- pcengine
- psx
- sega32x
- segacd
- sg-1000
- snes
- vectrex
- zxspectrum
In order to work correctly, every ROM must be stored in the folder related to its platform. For example, the “.smc” files, that are related to Super Nintendo, must be stored in the “snes” folder.
Adding ROMs to Retropie on Raspberry PI
Before going onward, please note that if you have your ROMs in compressed files (like “.zip”, “.rar”, “.7z” or similar), you need to extract them into one (or more) folders. A good option is getting files organized into folders based on their extension.
There are several ways to add games to your Retropie box. I’ll show you 2 of them. Please note that if you have only a gamepad attached to your Retropie on Raspberry PI, then you can go straight to the SFTP strategy.
If you have a keyboard attached to your Retropie, you can add ROMs from a directly attached USB storage. In this case, your USB storage must be formatted with a FAT32 file system. In this case, connect the USB storage in your Raspberry PI running RetroPie (powered on). From the RetroPie configuration page, you can use the File Manager:
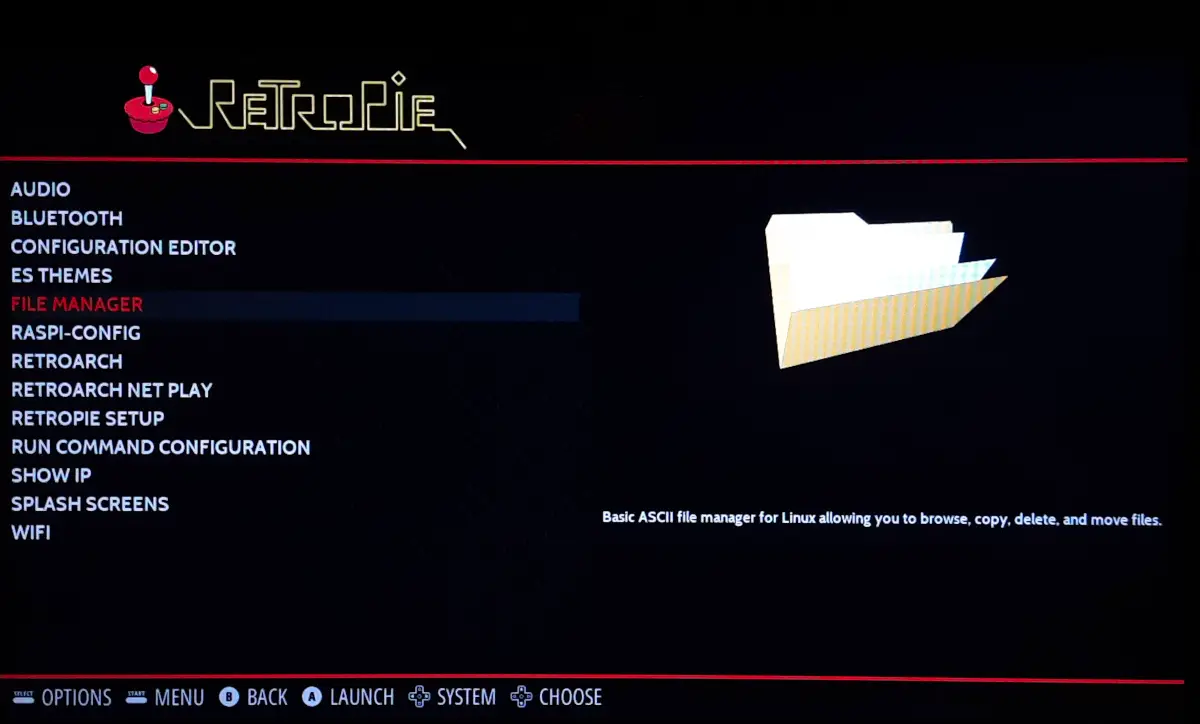
The RetroPie File Manager will show the following interface:
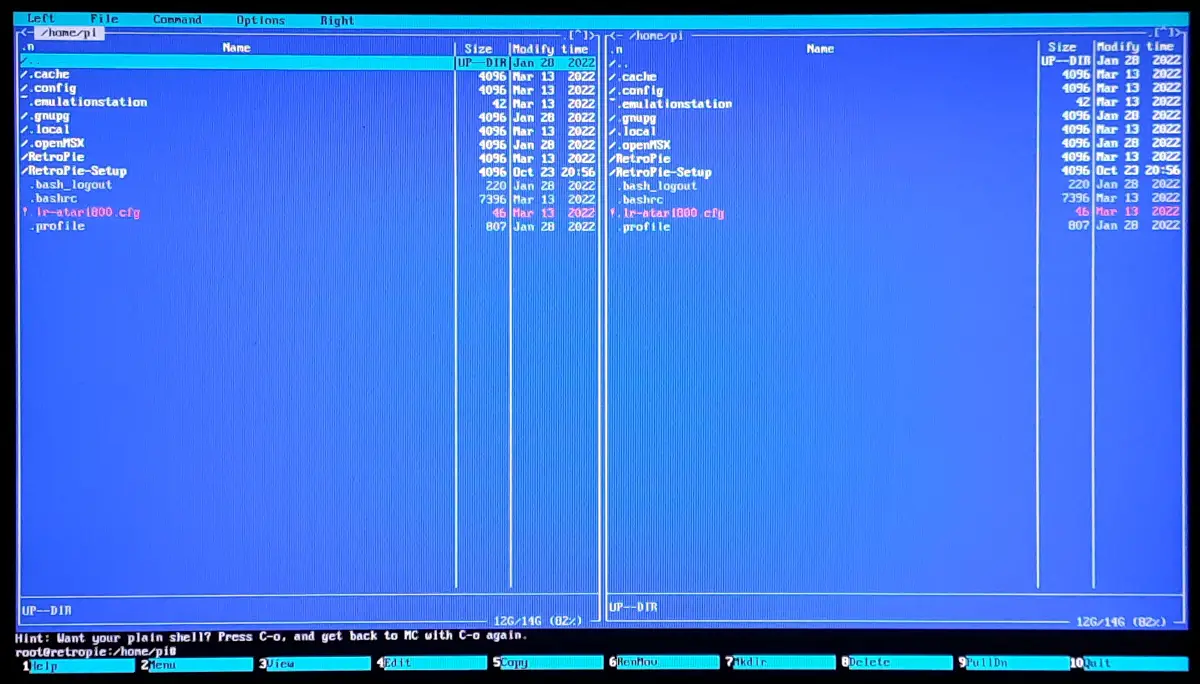
The two sides of the File manager will allow you to copy your ROMs from the USB storage (usually available at the “/media/USB” path) to your Retropie storage into the related platform folder.
But this ROMs upload strategy is really hard to perform from a gamepad, as it has been hard (at least to me) to understand how a simple gamepad can access the menu on top of the file manager. This may be an improvement for the following releases…
So, the most convenient way to upload ROMs, in my opinion, is using an SFTP client software like Filezilla. Once installed in your remote PC (FileZilla is compatible with a lot of OSes), as we already enabled the SSH on Retropie via the raspi-config, we have already all the needed to connect our Retropie on Raspberry PI, that will act as the SFTP server. On the remote computer side (where the Filezilla client is installed), you will use the Raspberry PI IP address, also available from the “SHOW IP” menu on Retropie. The port must be “22”, while the default credentials are:
- username: pi
- password: raspberry
Here is a screenshot of my Filezilla config, where my Retropie has 192.168.1.238 IP address:
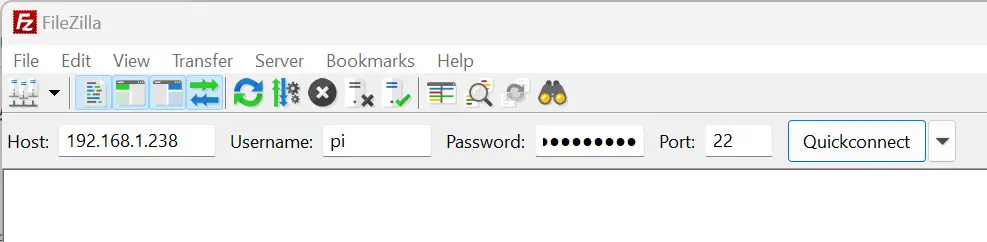
With this, you can access the Retropie folders from a remote PC and upload the ROMs into the proper folders.
Activating the ROMs
Once you have uploaded the ROMs, a restart is required to make them enabled. From a gamepad, you can restart the RetroPie by pressing the ‘Start’ button and then selecting “Quit” and then “Restart System”.
After this reboot, you will note that the platform (where your ROMs are saved) appears listed in the menu, at the side of the RetroPie configuration menu:
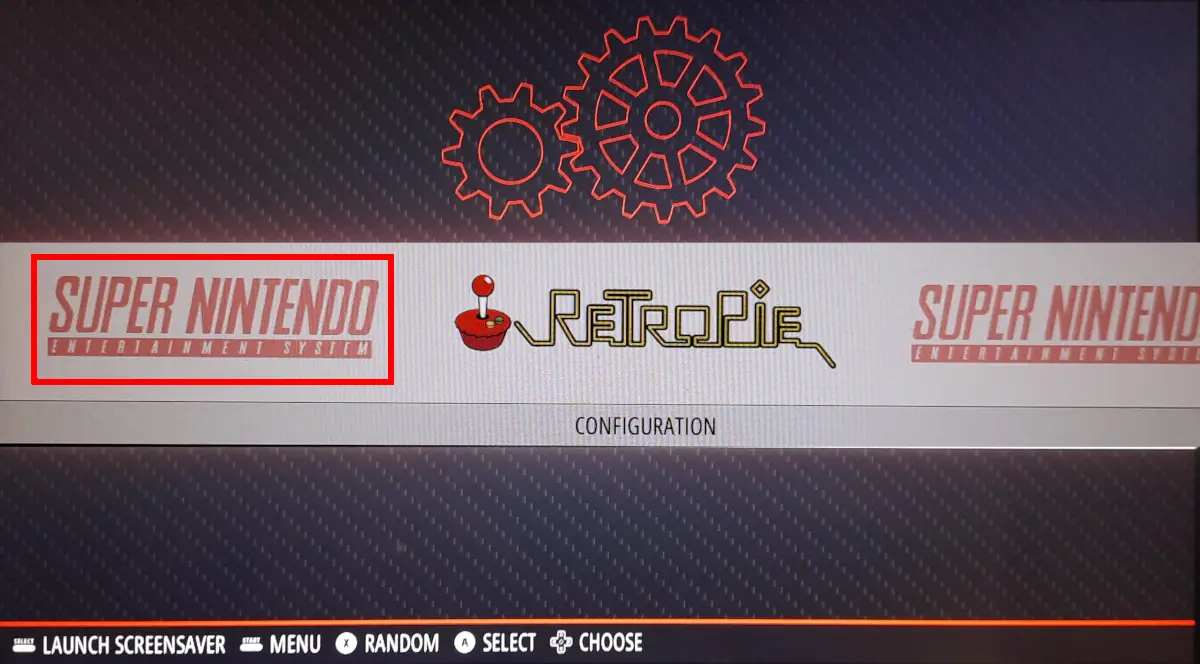
From your gamepad, use the right-left arrows to select it and the “A” button to open the emulator. The games list will appear and you will be able to run each of them with the “A” button.
At any time, you can exit from any game by pressing “SELECT” + “START” from your gamepad.
RetroPie Docs
More configuration guides can be found in the official Retropie docs.
What’s Next?
Looking for more cool projects with your RPI? Take a look at peppe8o Raspberry PI computers tutorials.
Enjoy!

Open source and Raspberry PI lover, writes tutorials for beginners since 2019. He's an ICT expert, with a strong experience in supporting medium to big companies and public administrations to manage their ICT infrastructures. He's supporting the Italian public administration in digital transformation projects.
![]()
![]()
![]()
![]()
![]()
![]()
![]()


