
Last Updated on 2nd September 2023 by peppe8o
Securing an existing website with Let’s Encrypt and Certbot is one of most common internet actions, as prodives free certification for your https pages and a fully automated renewal process working with Raspberry PI
In this post, I will show you how to install and configure Certbot on Raspberry PI with Apache to get your Let’s Encrypt free certificates working and renewed without manual intervention. This can be useful to enhance security for your self hosted websites, like WordPress hosting on RPI, phpBB hosting on RPI or a simple LAMP server on RPI. Please remember that webpage published on the internet need a public IP address (check my introduction to No-IP DUC installation).
Let’s Encrypt and Certbot are 2 different pieces on securing your website. While Let’s Encrypt works as Certification Authority. certbot works to issue and renew certificates automatically before their expiration. More details on how a certification process works can be found in my introduction to Self Signed Certificate tutorial.
What is Let’s Encrypt
Let’s Encrypt is a free Certification Authority provided by the Internet Security Research Group (ISRG). It aims to give common people a free way to get and maintain certificates in order to enable HTTPS (SSL/TLS) for their websites. Anyone who owns a domain name (even free, second-level domains) can use Let’s Encrypt to obtain a trusted certificate at zero cost. Let’s Encrypt also allows users to automate their service for most common web technologies, making painlessly all the process from obtaining a certificate, configuring it and renewing.
You can inspect issued/revoked certificates publicly, making this extremely transparent.
What is Certbot
Certbot is an open-source tool that automates certificate administering using Let’s Encrypt. The Electronic Frontier Foundation (EFF) manages its source code. Certbot requires that your website is already up and running, with port 80 open and SSH access with sudo privileges (which are assured with a Raspberry PI self-hosting installation).
This command line tool takes care to require a new certificate, install it and configure your most common web servers (like apache or nginx) to secure your communication through http-to-https redirection.
In this tutorial, I’ll use a Raspberry PI Zero W with Apache. The following steps also work with newer Raspberry PI computer boards.
What We Need
As usual, I suggest adding from now to your favourite e-commerce shopping cart all the needed hardware, so that at the end you will be able to evaluate overall costs and decide if to continue with the project or remove them from the shopping cart. So, hardware will be only:
- Raspberry PI Zero W (including proper power supply or using a smartphone micro usb charger with at least 3A) or newer Raspberry PI Board
- high speed micro SD card (at least 16 GB, at least class 10)
Check hardware prices with following links:


Step-by-Step Procedure
Web Server and Domain Preparation
As said, we need a running web page. For this purpose, I will use a standard LAMP installation on Raspberry PI.
We also need that our server can be reached on port 80 (with proper router port forwarding). You also need to open/port forward port 443, as https protocol will use this port to work. Finally, we need a DNS domain name: using No-IP tutorial steps, I will use my free “myhomepi.webhop.me” as a test domain, where I will expose the Apache default index page.
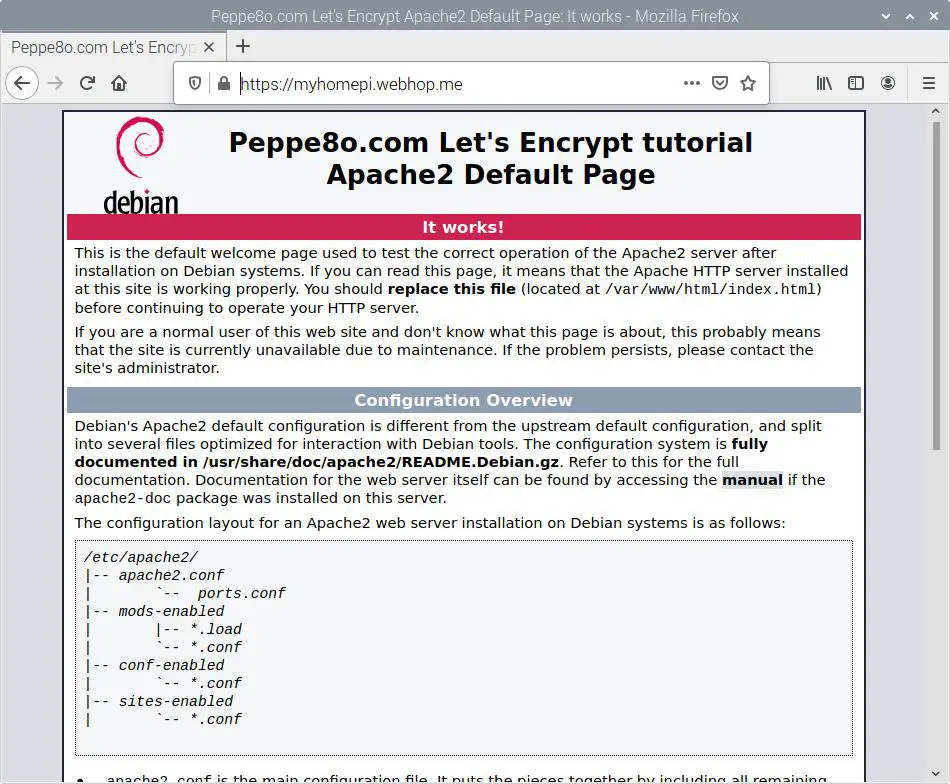
Not required, but I also changed my apache default index.html to get a more personalized index.html, with nano:
sudo nano /var/www/html/index.htmlfind this HTML part:
<span class="floating_element">
   Apache2 Default Page
</span>
and edit to:
<span class="floating_element">
   Peppe8o.com Let's Encrypt tutorial<br>
   Apache2 Default Page
</span>
Finally, I assume that you updated the OS. Otherwise, please use the following command from the terminal:
sudo apt update -y && sudo apt upgrade -yOnce done, these preparation steps, you should have your webpage published on the internet:

Please note the icon near the URL, which indicates a not secure (https) web page:
Installing Certbot and Let’s Encrypt Certificate
We can install certbot in 2 independent and different ways: with snap and directly from apt. The official one is with snapd.
Installing Certbot with Snap (not for Raspbery PI Zero)
As certbot is installed via Snap Core and this one is available from armhf upward, this installation procedure can’t apply to Raspberry pi Zero W, but can be used with newer Raspberry PI computer boards (like RPI3 and RPI4).
Install snapd:
sudo apt install snapdWe need to reboot our RPI:
sudo rebootInstall snap core and update it:
sudo snap install core; sudo snap refresh coreIf you have already installed certbot via apt, you need to remove it:
sudo apt remove certbot python3-cert*
sudo apt autoremove
Install Certbot:
sudo snap install --classic certbotMake your certbot command line tool available from terminal, by linking its binary file from /usr/bin/:
sudo ln -s /snap/bin/certbot /usr/bin/certbotFomr here you can setup certbot for taking care of the whole certificate issuing and renewal process:
sudo certbot --apacheor you can use certbot only to generate a new certificate for your website (in /etc/letsencrypt folder):
sudo certbot certonly --apacheYou will be asked to specify your domain. Besides browsing your web page with https, you can verify your certificate process with the following terminal command:
sudo certbot renew --dry-runGetting an answer similar to the following one:
pi@raspberrypi:~ $ sudo certbot renew --dry-run
Saving debug log to /var/log/letsencrypt/letsencrypt.log

- - - - - - - - - - - - - - - - - - - - - - - - - - - - - - - - - - - - - - - -
Processing /etc/letsencrypt/renewal/myhomepi.webhop.me.conf
- - - - - - - - - - - - - - - - - - - - - - - - - - - - - - - - - - - - - - - -
Account registered.
Simulating renewal of an existing certificate for myhomepi.webhop.me

- - - - - - - - - - - - - - - - - - - - - - - - - - - - - - - - - - - - - - - -
Congratulations, all simulated renewals succeeded:
  /etc/letsencrypt/live/myhomepi.webhop.me/fullchain.pem (success)
- - - - - - - - - - - - - - - - - - - - - - - - - - - - - - - - - - - - - - - -
Installing Certbot with Apt
For Raspberry PI Zero W users, snap core is unavailable. So we need to go with apt installation.
Besides certbot package, it is strongly suggested to install also python3-certbot-apache package, as it automates certificate management:
sudo apt install certbot python3-certbot-apacheIf you use a webserver different from apache, you can find a specific python3-certbot for your server with the following terminal command:
apt search 'python3-certbot*'From here, you can start your certbot setup with the following terminal command:
sudo certbot --apacheAt setup rpocess, you will be asked of your email address:
pi@raspberrypi:~ $ sudo certbot --apache
Saving debug log to /var/log/letsencrypt/letsencrypt.log
Plugins selected: Authenticator apache, Installer apache
Enter email address (used for urgent renewal and security notices) (Enter 'c' to
cancel):
Enter your own email and press enter.
Then you must agree to Let’s Encrypt Terms of Service.
- - - - - - - - - - - - - - - - - - - - - - - - - - - - - - - - - - - - - - - -
Please read the Terms of Service at
https://letsencrypt.org/documents/LE-SA-v1.2-November-15-2017.pdf. You must
agree in order to register with the ACME server at
https://acme-v02.api.letsencrypt.org/directory
- - - - - - - - - - - - - - - - - - - - - - - - - - - - - - - - - - - - - - - -
(Y)es/(N)o:
After reading these terms, if you accept then type “Y” letter and press enter.
The next question asks if you want to receive emails from EFF about their work:
- - - - - - - - - - - - - - - - - - - - - - - - - - - - - - - - - - - - - - - -
Would you be willing, once your first certificate is successfully issued, to
share your email address with the Electronic Frontier Foundation, a founding
partner of the Let's Encrypt project and the non-profit organization that
develops Certbot? We'd like to send you email about our work encrypting the web,
EFF news, campaigns, and ways to support digital freedom.
- - - - - - - - - - - - - - - - - - - - - - - - - - - - - - - - - - - - - - - -
(Y)es/(N)o:
Feel free to answer Y/N and press enter.
At this point, if no domain is still explicit in your apache sites configuration files, certbot procedure will ask you what domain name you want to use:
No names were found in your configuration files. Please enter in your domain
name(s) (comma and/or space separated)  (Enter 'c' to cancel): myhomepi.webhop.me
As you can see, you will use there the domain registered with No-IP (or your registrar) without http/https. In my case, I’m going to use my free “myhomepi.webhop.me”. The setup process will then get a certificate and configure apache for you, also redirecting http traffic to https. A final confirmation that everything worked is printed:
Requesting a certificate for myhomepi.webhop.me
Performing the following challenges:
http-01 challenge for myhomepi.webhop.me
Enabled Apache rewrite module
Waiting for verification...
Cleaning up challenges
Created an SSL vhost at /etc/apache2/sites-available/000-default-le-ssl.conf
Enabled Apache socache_shmcb module
Enabled Apache ssl module
Deploying Certificate to VirtualHost /etc/apache2/sites-available/000-default-le-ssl.conf
Enabling available site: /etc/apache2/sites-available/000-default-le-ssl.conf
Enabled Apache rewrite module
Redirecting vhost in /etc/apache2/sites-enabled/000-default.conf to ssl vhost in /etc/apache2/sites-available/000-default-le-ssl.conf

- - - - - - - - - - - - - - - - - - - - - - - - - - - - - - - - - - - - - - - -
Congratulations! You have successfully enabled https://myhomepi.webhop.me
- - - - - - - - - - - - - - - - - - - - - - - - - - - - - - - - - - - - - - - -
Subscribe to the EFF mailing list (email: giuseppe@peppe8o.com).

IMPORTANT NOTES:
 - Congratulations! Your certificate and chain have been saved at:
   /etc/letsencrypt/live/myhomepi.webhop.me/fullchain.pem
   Your key file has been saved at:
   /etc/letsencrypt/live/myhomepi.webhop.me/privkey.pem
   Your certificate will expire on 2022-04-30. To obtain a new or
   tweaked version of this certificate in the future, simply run
   certbot again with the "certonly" option. To non-interactively
   renew *all* of your certificates, run "certbot renew"
 - If you like Certbot, please consider supporting our work by:

   Donating to ISRG / Let's Encrypt:   https://letsencrypt.org/donate
   Donating to EFF:                    https://eff.org/donate-le
Back to your browser, a simple refresh will redirect your page to https:
Please note your padlock icon near the URL field, which changed:
What’s Next
Interested in more Raspberry PI projects? Please check peppe8o Raspberry PI tutorials to discover more ways to use your computer board.
Enjoy!

Open source and Raspberry PI lover, writes tutorials for beginners since 2019. He's an ICT expert, with a strong experience in supporting medium to big companies and public administrations to manage their ICT infrastructures. He's supporting the Italian public administration in digital transformation projects.
![]()
![]()
![]()
![]()
![]()
![]()
![]()


Thanks for this!
note, I had to install python-certbot-apache as “python*3*-certbot”, since it looks like python-certbox-apache was removed
`sudo apt install certbot python-certbot-apache`
Thank you, Ben. I will update the tutorial as soon as possible as with the new debian release some packages could have changed
Hi Ben,
finally I was able to update this tutorial. From recent Bullseye release, the python-certbot package has effectively removed and all has been moved to python3.
Thank you very much!