

Last Updated on 13th April 2024 by peppe8o
In this tutorial, I’m going to show you how to install phpBB and configure your very first topic on a cheap Raspberry PI Zero W.
King of self-hosted forum platforms, phpBB has a strong story and is spreadly used. As its name suggests, it is based on PHP and is so light that you can run your self-hosted forum with phpBB on Raspberry PI.
About phpBB
phpBB is an open-source (Licensed under the GPLv2) forum software, built with a bulletin board logic, that can link a group of people or can power an entire website. Its features can be extended using extensions that can be installed and configured with a few clicks.
PhpBB includes a customizable registration process for your users, allowing administrators to manage permissions up to a fine level.
The primary purpose of phpBB is to facilitate post exchange between users. It uses a flat topic and post structure: this means that each new post reply is appended at the end and nidification is avoided. phpBB allows multiple attachments to share media/files with other users. The types and sizes of these files allowed can be configured in its administrative panel (ACP). It also supports emoticons, leaving the option of customizing smiles.
phpBB also offers a polling feature to let users call to vote for topics. Multiple polling options, as well as time limits, can be set. Users can be allowed or disallowed to change their vote at a later time.
Individual forums are organized inside categories, which are something like containers including logical topics organization.
Please refer phpBB features page to get more info about it.
As said, I’ll use a Raspberry PI Zero W, but this process applies to all Raspberry PI computer boards.
What We Need
As usual, I suggest adding from now to your favourite e-commerce shopping cart all the needed hardware, so that at the end you will be able to evaluate overall costs and decide if to continue with the project or remove them from the shopping cart. So, hardware will be only:
- Raspberry PI Zero W (including proper power supply or using a smartphone micro USB charger with at least 3A) or newer Raspberry PI Board
- high speed micro SD card (at least 16 GB, at least class 10)
Check hardware prices with the following links:

Step-by-Step Procedure
Before starting with the installation steps, let’s check what are the phpBB software requirements:
- A webserver or web hosting account running on any major Operating System with support for PHP
- A SQL database system, one of:
- MySQL
- MariaDB (we’ll use this option)
- MS SQL Server
- Oracle
- PostgreSQL
- SQLite
- PHP with support for the database you intend to use.
- getimagesize() function enabled (included in default php installation)
- The following PHP modules are required:
- json (included in default php installation)
- mbstring
- XML support
- Corresponding PHP module for the database system you intend to use
- The following PHP modules are optional but will provide access to additional features.
- zlib Compression support (included in default php installation)
- Remote FTP support (included in default php installation)
- GD support
Prepare Operating System
Start installing OS. You should opt for installing Raspberry PI OS Lite (for a fast, headless operating system) or you can also use Raspberry PI OS Desktop (in this case working from its internal terminal). If you opt for the Desktop version, you could need a more performing computer board than Zero W.
Make your OS up to date:
sudo apt update -y && sudo apt upgrade -yInstall Required Packages
Install Apache, PHP and MariaDB database with LAMP setup tutorial (phpmyadmin is optional). After this step, install additional required packages to run phpBB on Raspberry PI:
sudo apt install php-mbstring php-xml php-gd -yRestart Apache service to get new packages active:
sudo systemctl restart apache2.serviceCreate your database space and credential to let phpBB connect your DB. If you still didn’t change the root password, after the first command, it will be empty. I anyway strongly suggest changing the root password. Also use your favourite database name, user and password instead of tutorial “phpBBDB”, “phpBBUser” and “phpBBPassword”. From terminal:
sudo mysql -uroot -p
create database phpBBDB;
create user phpBBUser@'%' identified by 'phpBBPassword';
grant all privileges on phpBBDB.* to phpBBUser@'%';
flush privileges;
quit
Get phpBB installation package. You should get the latest version link from phpBB download page and use that link with wget terminal command. At the time of this article, the latest version is 3.3.7:
wget https://download.phpbb.com/pub/release/3.3/3.3.7/phpBB-3.3.7.zipUnzip the downloaded package directly in Apache web root:
sudo unzip phpBB-3.3.7.zip -d /var/www/html/You also need to change web permissions, so that the Apache user (“www-data”) can manage files:
cd /var/www/html/
sudo chown -R www-data:www-data ./
Extracted data will be uncompressed with their main folder. We probably want to execute phpBB at the root path in our Apache server. The following commands will move all phpBB files to the Apache root directory:
sudo rm index.html # remove old index.html apache template
sudo mv phpBB3/* ./
sudo mv phpBB3/.[!.]* ./ # required to move also hidden files
sudo rmdir phpBB3/
Install phpBB
From here, the next tasks will use your favourite browser. In this paragraph I will use my Raspberry PI local IP address (192.168.1.77), please use your IP instead. If you want to use a free domain, you could be interested in my No-IP setup tutorial.
Browse http://192.168.1.77/ URL:
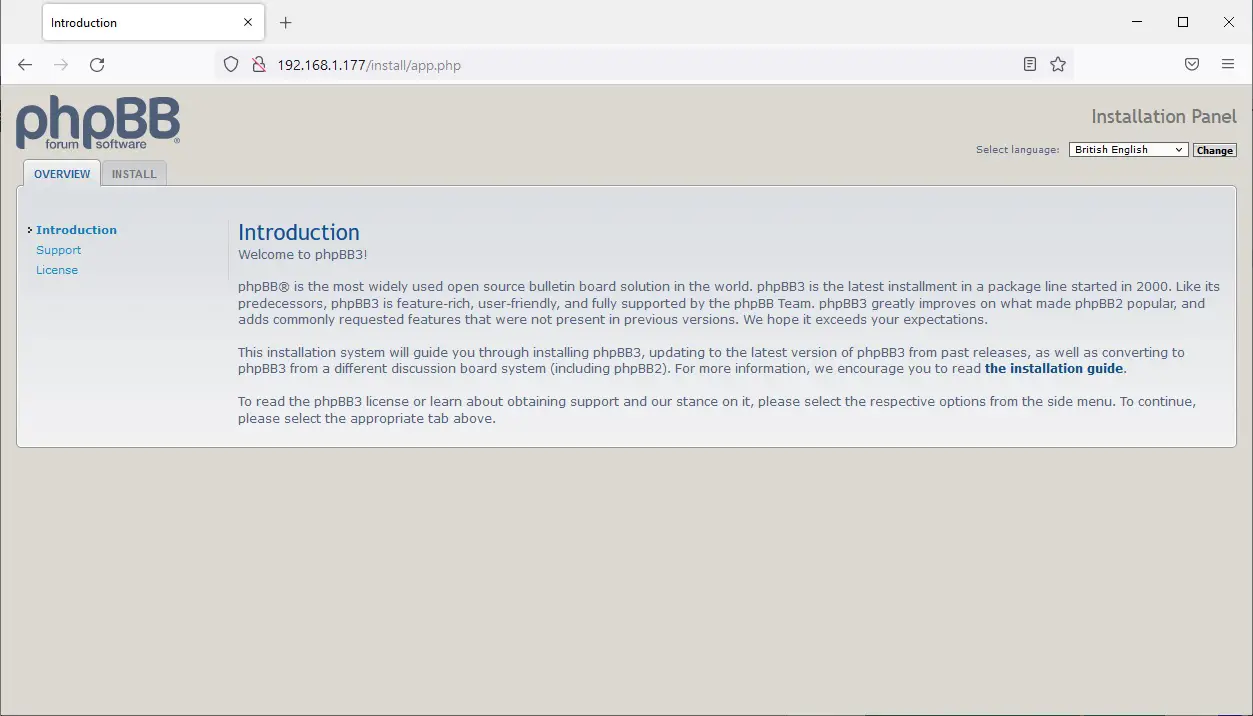
Here you can choose your favourite language by using the “Select Language” switch on the top-right side of the page and clicking the “Change” button. Then move to the install tab as in the following picture:
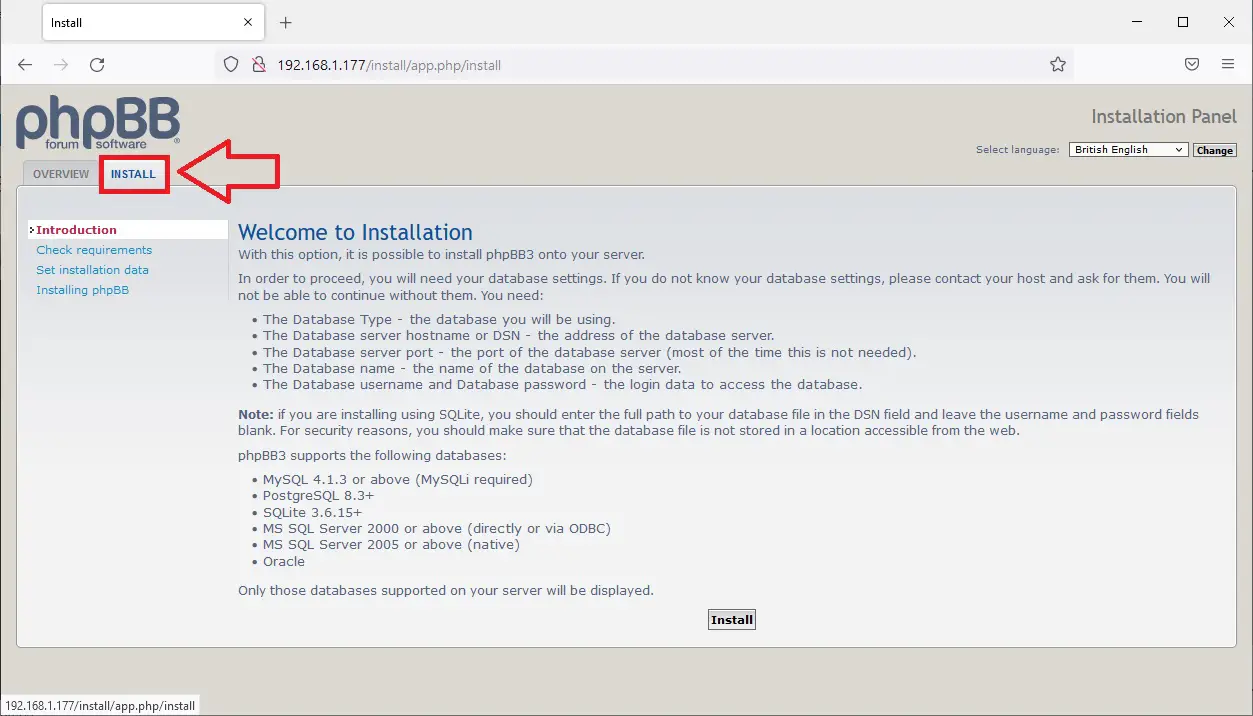
Scroll down this page and click the Install button at the bottom.
All requirements checks should be ok, so the next screen should directly redirect to the Administration configuration. Fill next form with your favourite credentials, which you will use to login in phpBB administration dashboard:
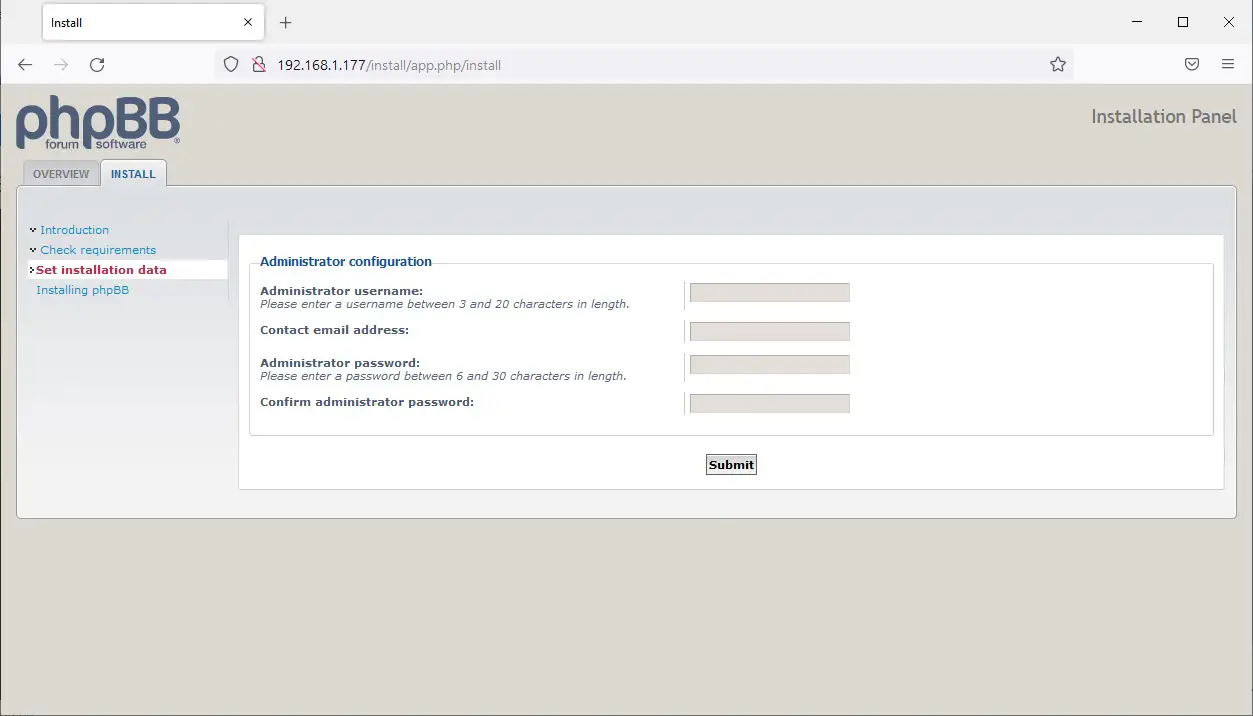
Click submit. The next screen will require info to connect MariaDB internal database. Fill similarly to the following picture, using your database credential set before, instead of tutorial ones:
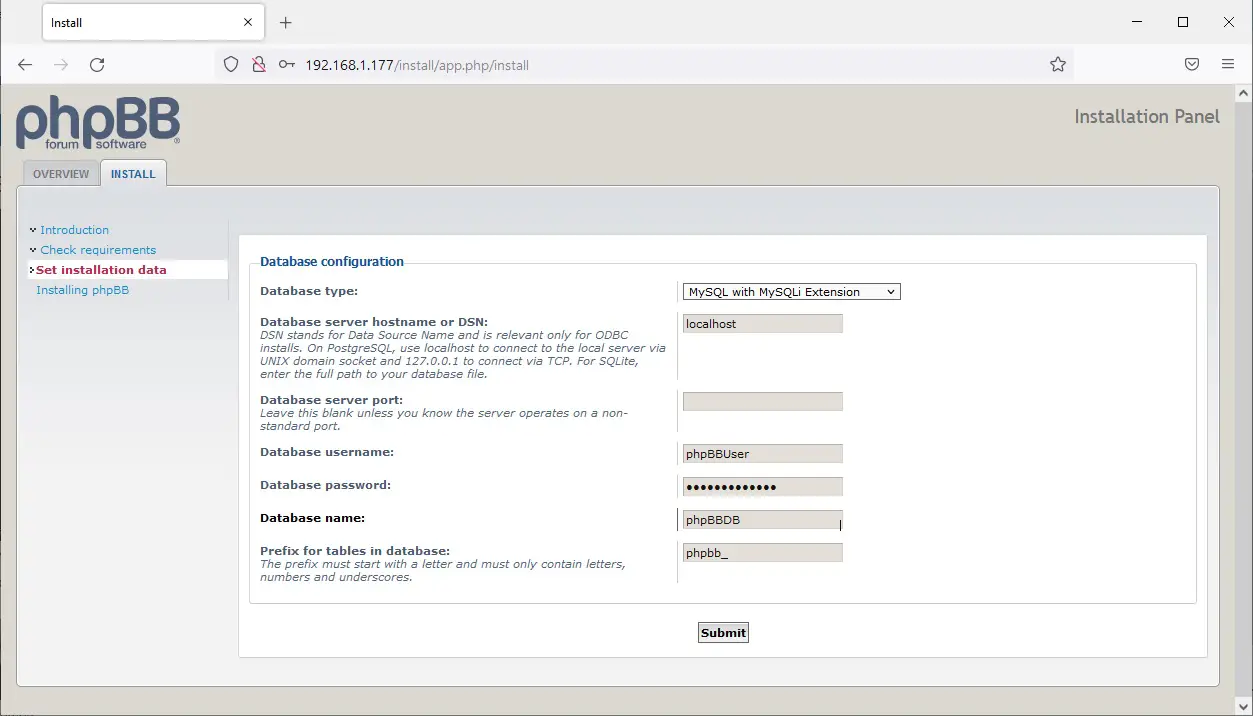
Click Submit button. The next screen will allow if needed, additional server configurations:
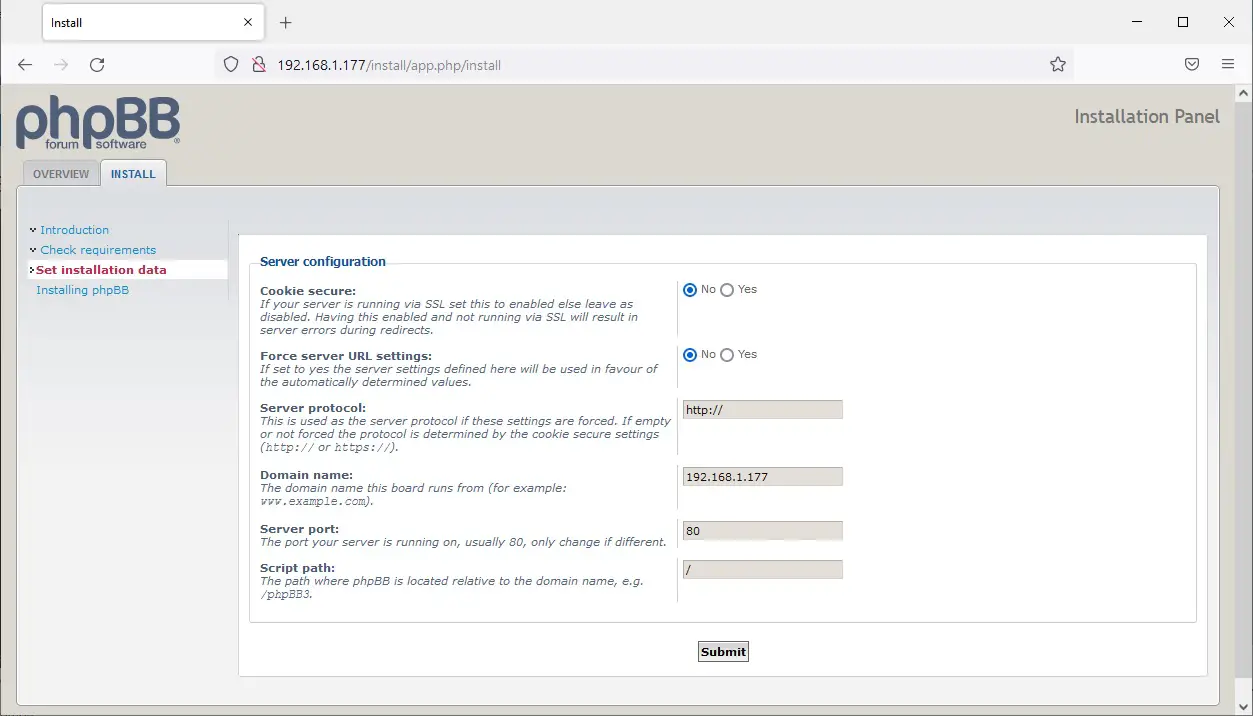
You can edit according to your needs or leave the default ones and click Submit button.
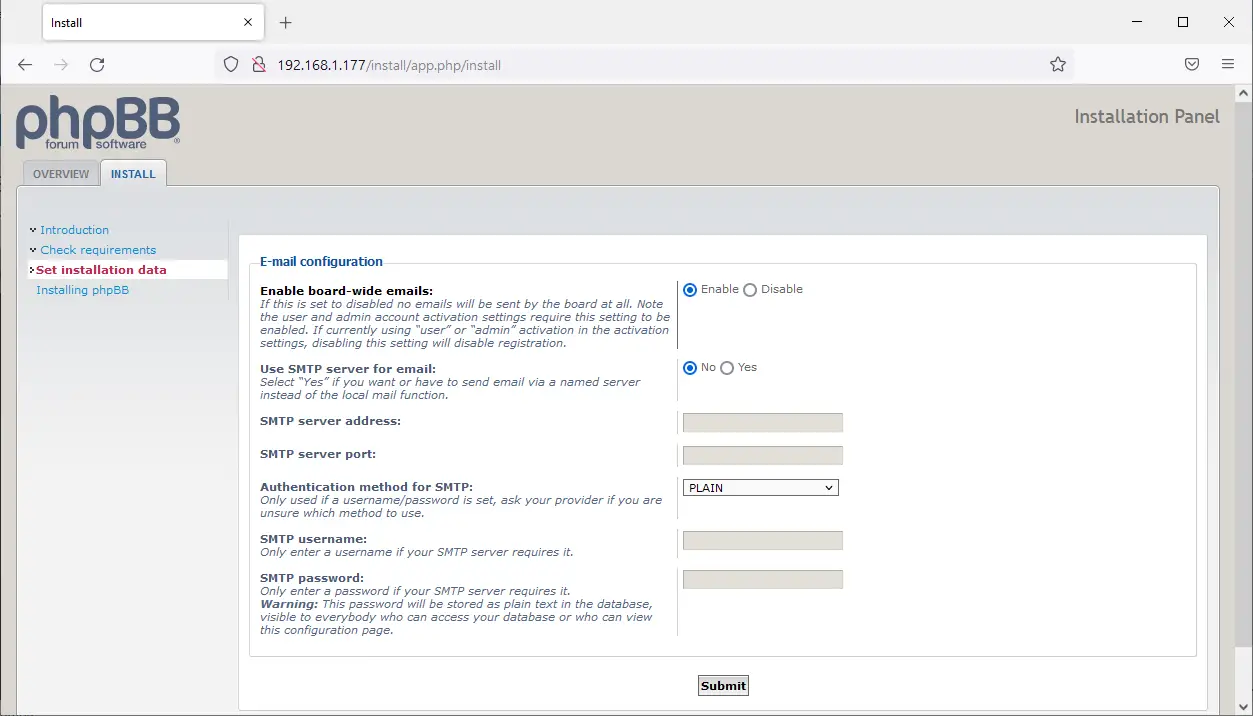
The next screen will allow you to configure email settings to get your server able to send emails. You can use your favourite email provider or leave it empty and configure it later:
Then, click Submit. The final installation screen will allow you to configure your forum appearance, by changing the title and description according to your preferences:

Click submit and wait for the installation to be completed:
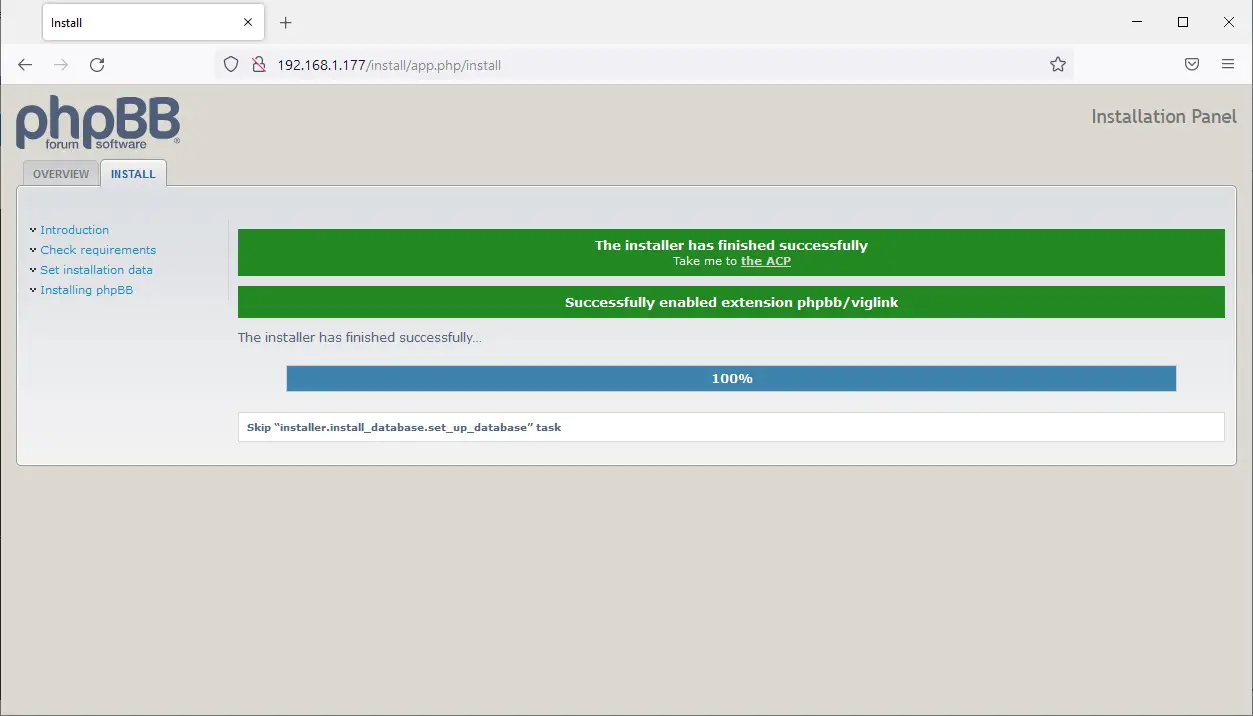
Before moving to the admin dashboard, we need to remove the install folder from our apache server. You can both remove this folder or rename it. The last case will be done with the following terminal command from our Raspberry PI:
sudo mv install/ install_old/Finally, back to the browser go to the home page http://192.168.1.78:
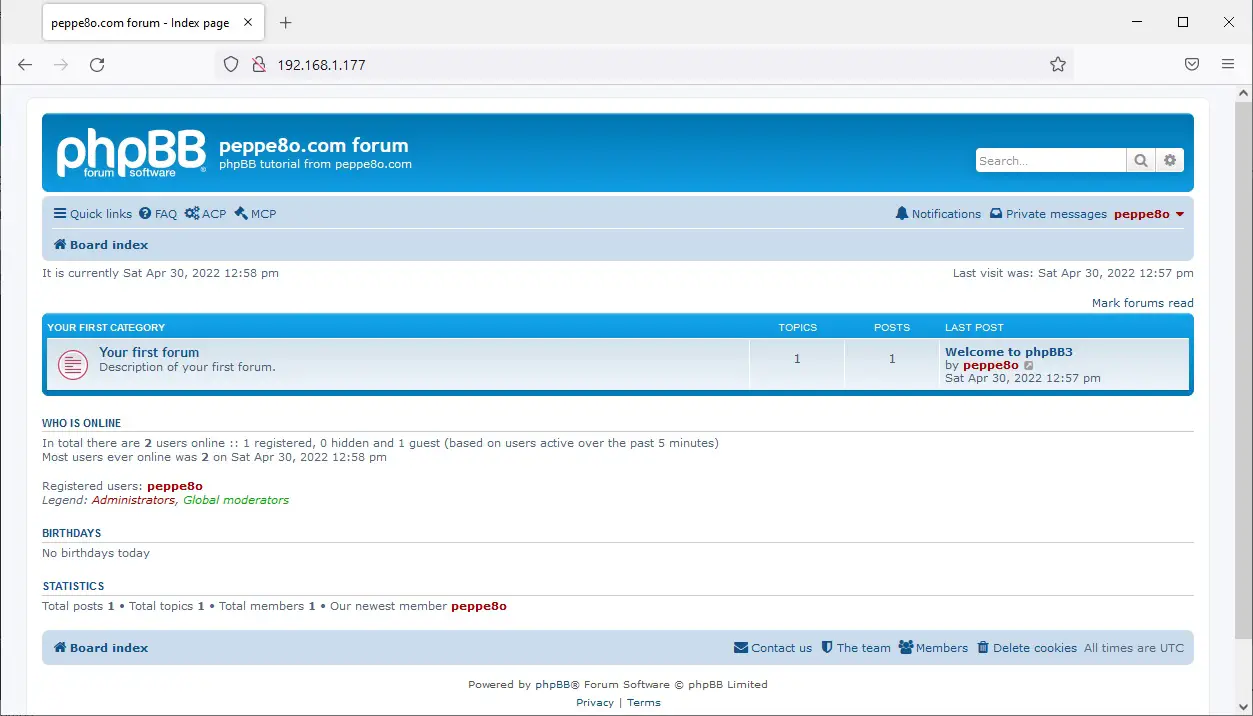
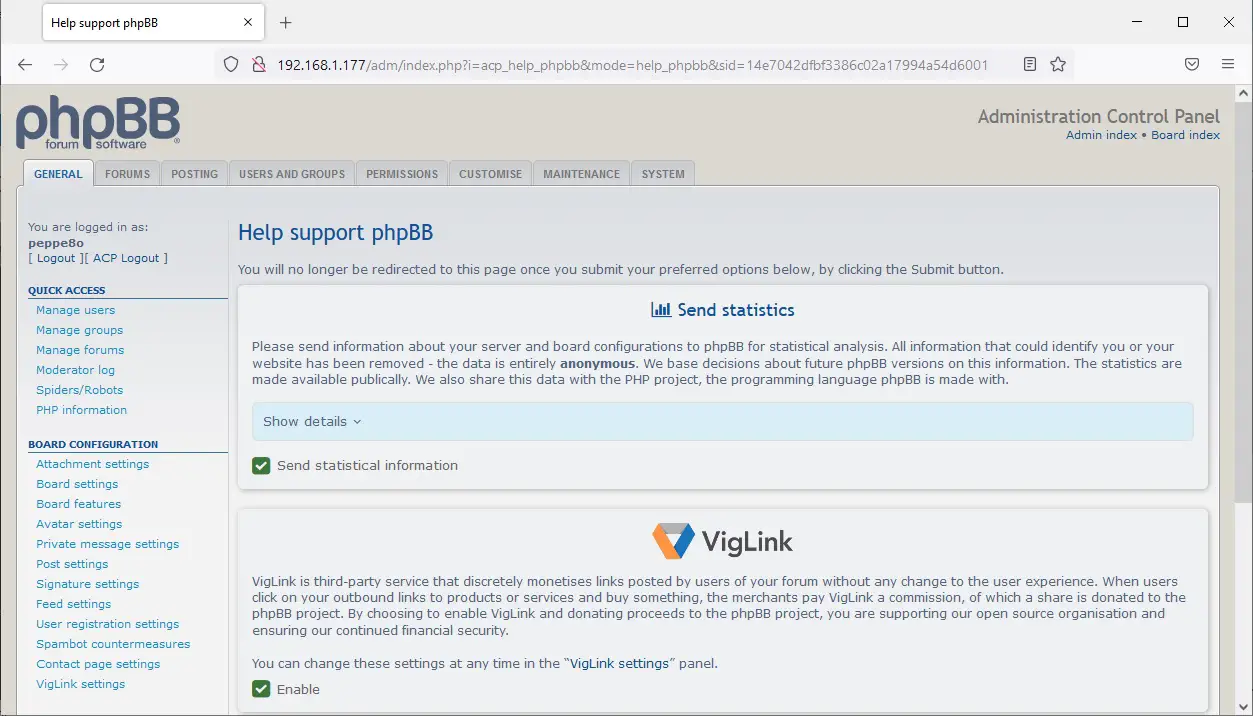
Your phpBB forum on Raspberry PI is ready and live!
Create Your Very First Category
A small note useful for people approaching for the first time to phpBB forums. From a logical point of view, you can imagine your site organized into Categories, which contains Forums, which contain Topics.
To create and view categories, you will need to create at least one forum inside the new category and set the correct permissions. Deeper info is available from the official phpBB user guide (you can download it from phpBB documentation page). In this paragraph, I will shortly show you how to create a generic category.
Identify in your home ACP link to go on the administrative dashboard:
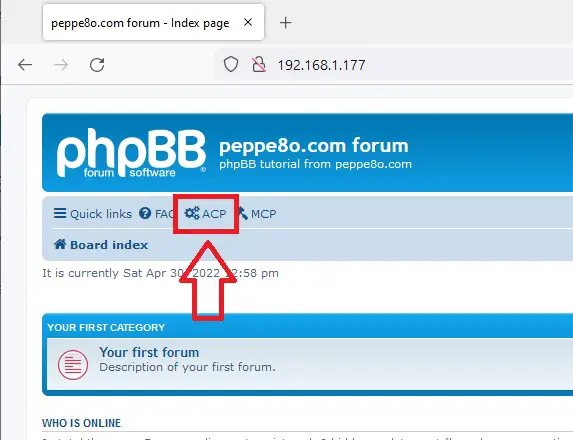
Use that link to reach the administrative panel:
Move to the “FORUMS” tab:
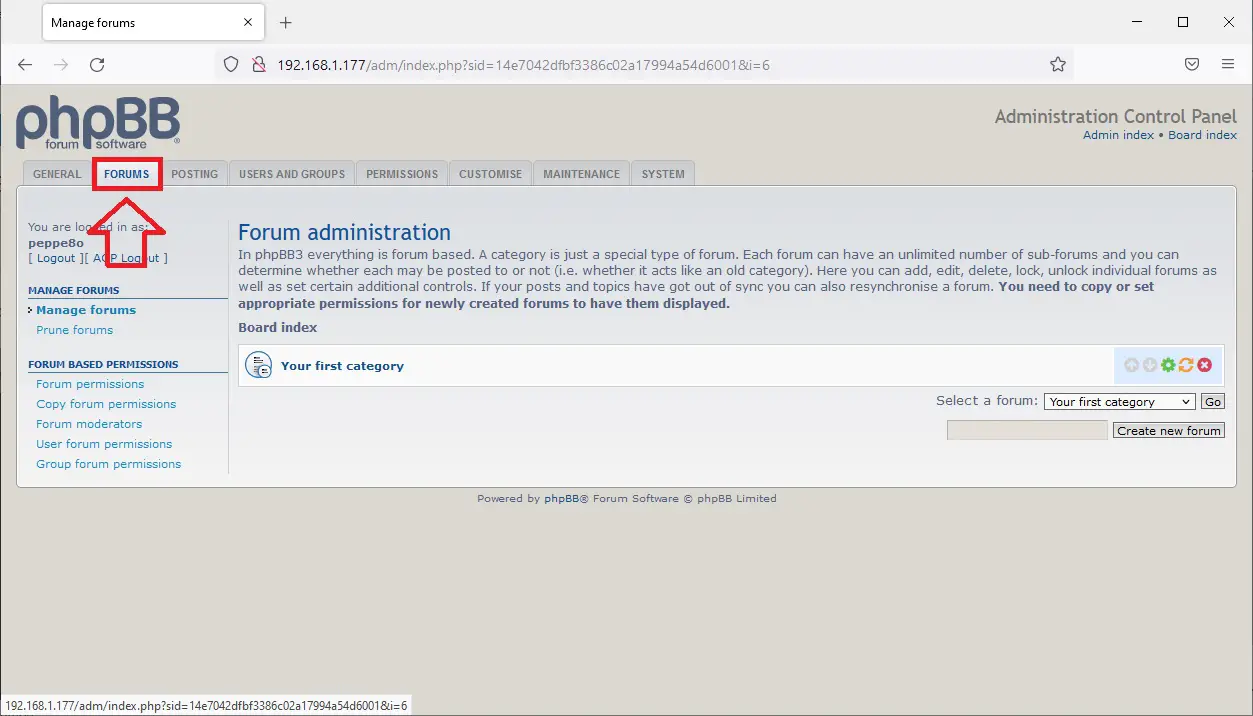
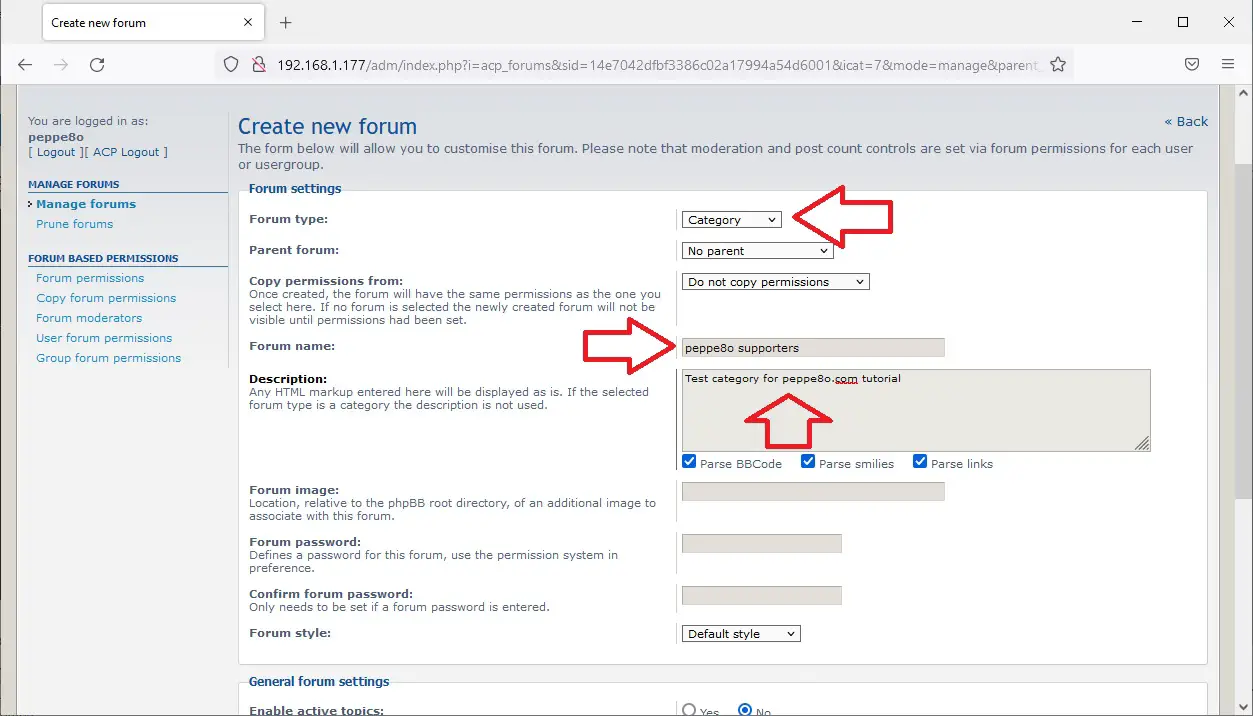
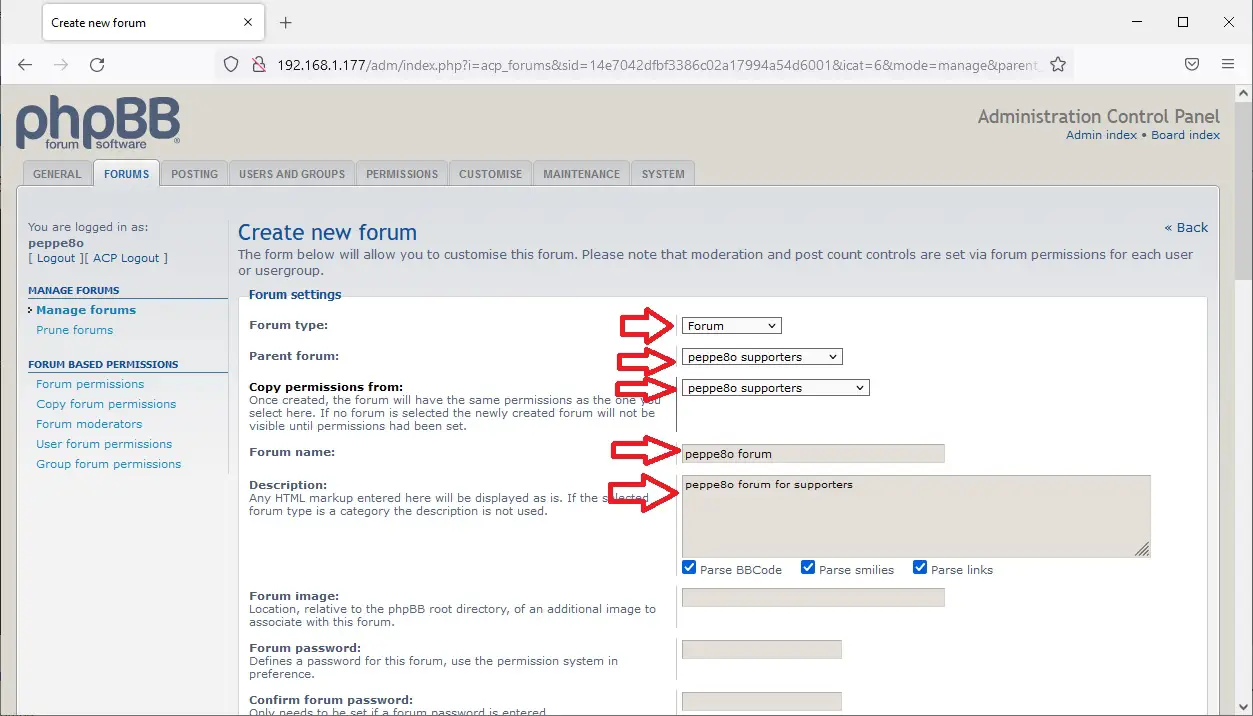
Click the “Create new forum” button at the bottom right. On the next screen, I changed the “Forum type” option from default “Forum” to “Category”. I also added example values in the Forum name and Description. The “Copy permission from” field also allows copying permissions from an existing forum. I left to default (“Do not copy permissions”) to set my very first category permissions manually:
Click submit. The next screen will redirect to permission settings. For the moment I will manage permissions for administrators, registered users and newly registered users. You can select multiple groups in the right bottom area with the CTRL keyboard key:

Then click the “Add permissions” button under the selected area.
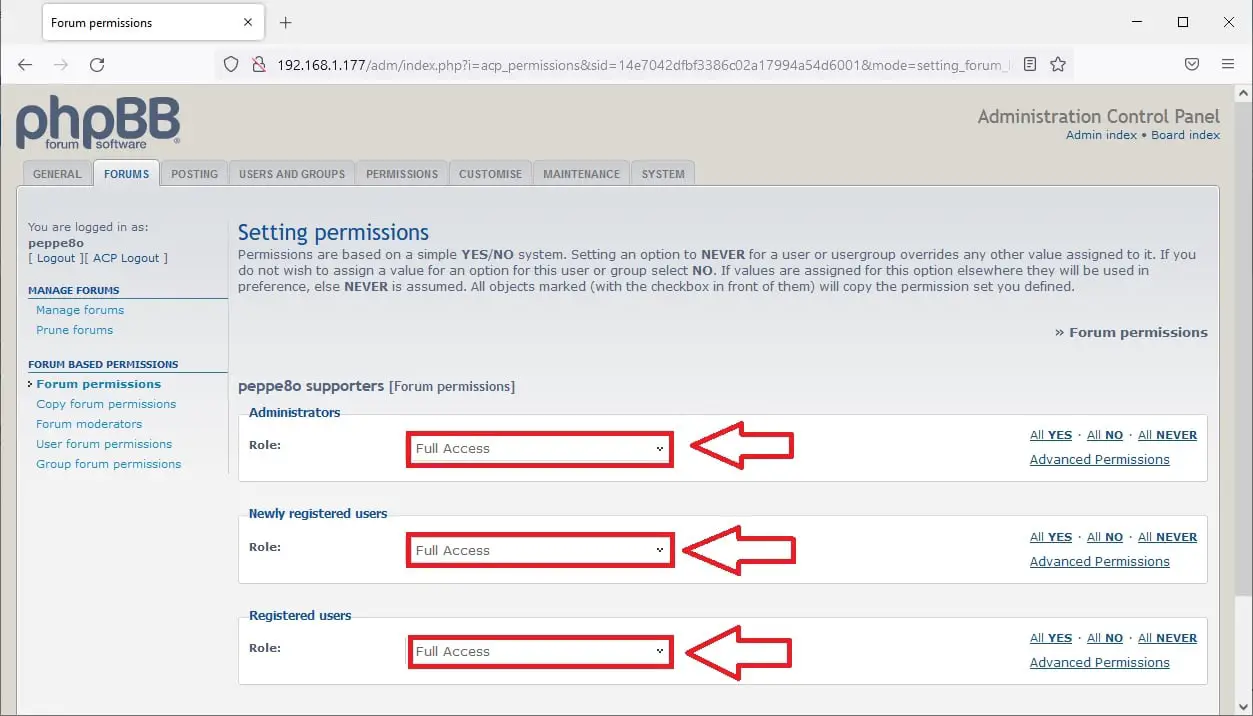
In the next window, you can set what each group can do or not in this category. For tutorial purposes, I’m going to give full access to selected groups:
Click the “Apply all permissions” button. Grants will be updated and you will be redirected to the previous permissions page.
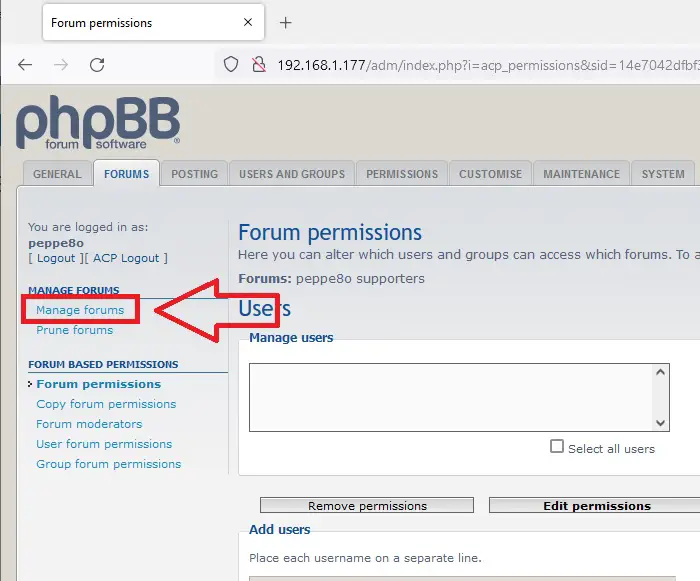
At this point, phpBB has created our category, but it is still not visible because it is empty. We need to create at least one forum inside this category to get it available on the mainboard. Identify from the left bar the Manage forums link to go back to the Forums administration board:
and repeat the same steps, caring to create a forum instead of a category and placing it inside the category created before. This time, I will reuse parent category permissions. Please remember also to set the forum name:
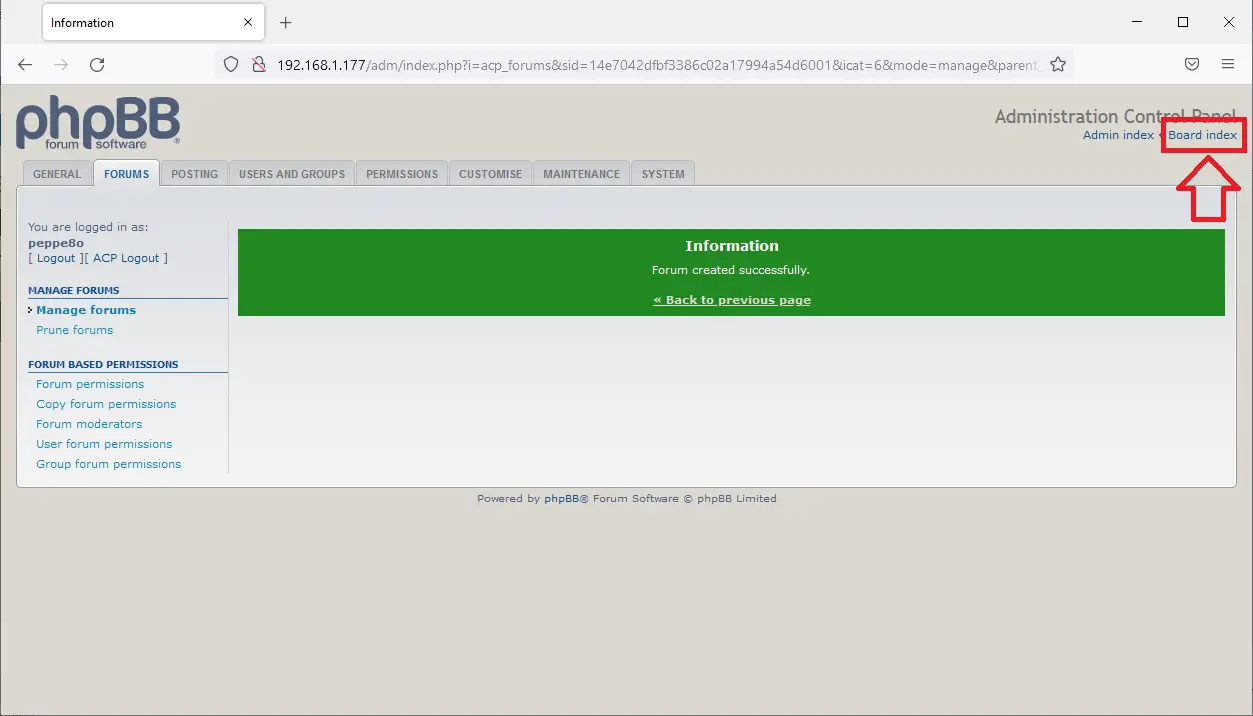
Scroll down and click the “Submit” button.
In the top part of the Administration panel you will ever have a link to go back to the phpBB home page:
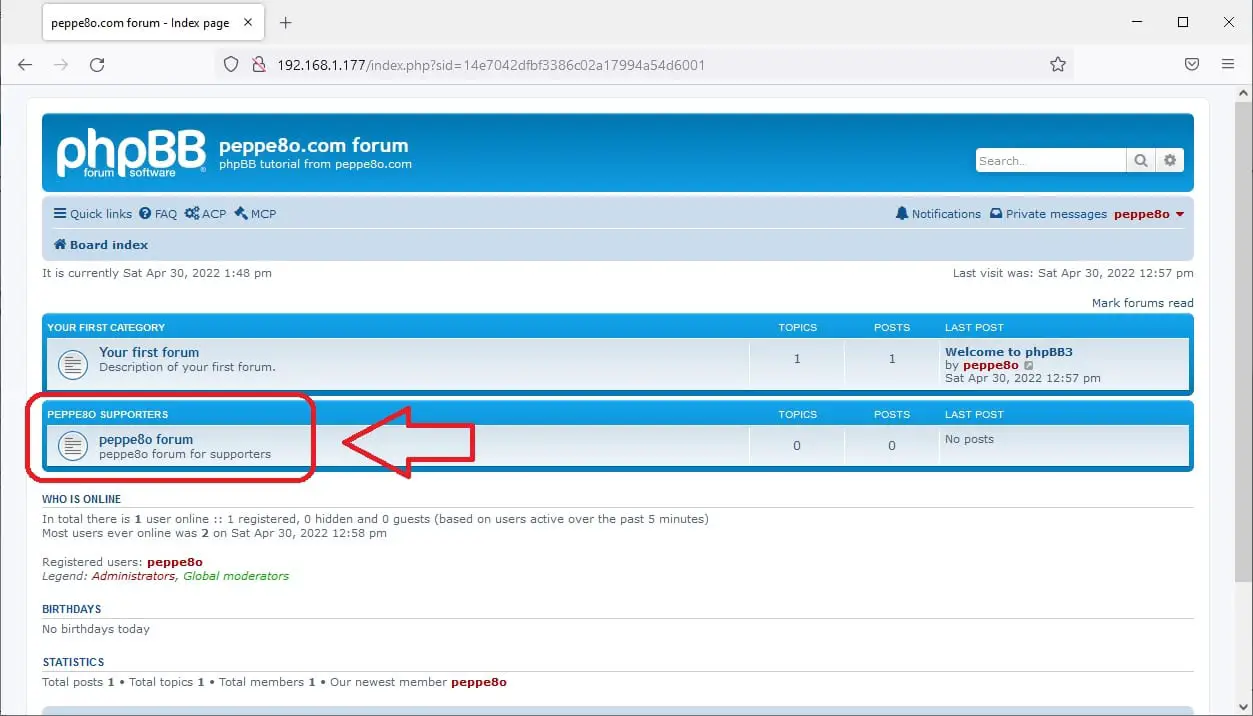
Use this link to go back to your forum home page. The new category is now live, including our new forum:
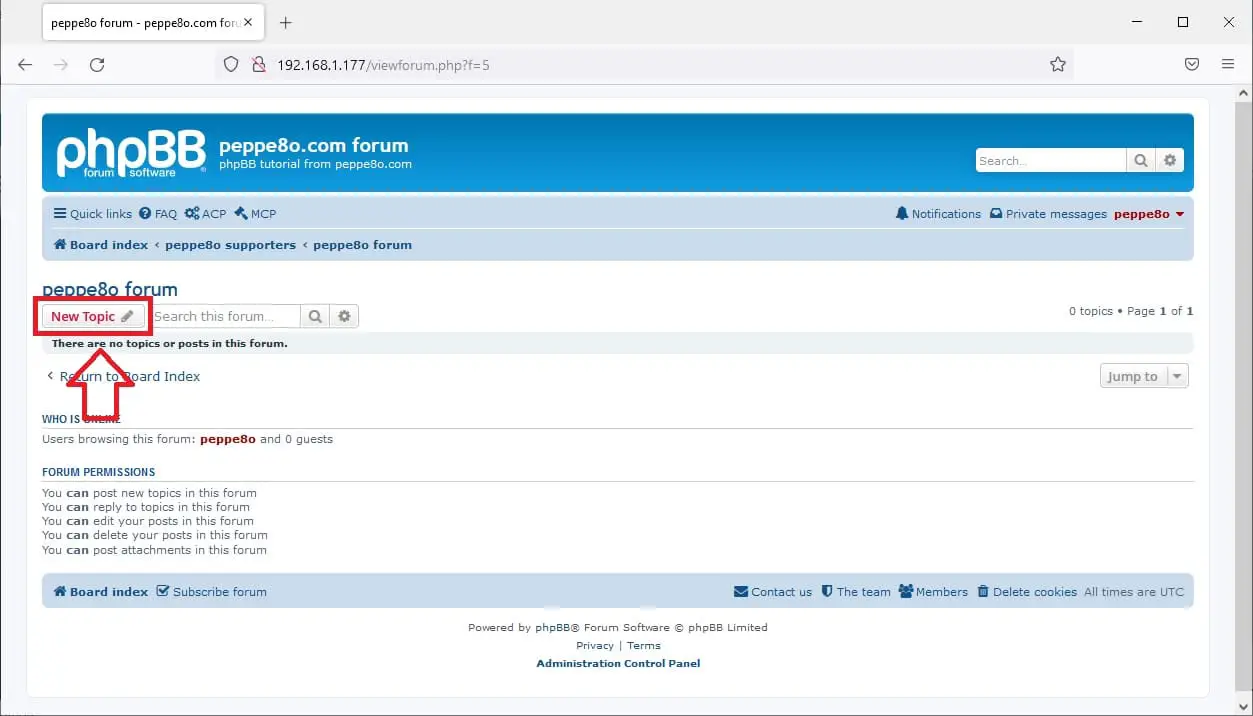
Entering the forum, it will be ready to get your new topics, as the “new topic” button is enabled:
What’s Next
If you want to discover many other projects for your Raspberry PI, you can take a look at peppe8o Raspberry PI tutorials.
Enjoy your phpBB forum on Raspberry PI!

Open source and Raspberry PI lover, writes tutorials for beginners since 2019. He's an ICT expert, with a strong experience in supporting medium to big companies and public administrations to manage their ICT infrastructures. He's supporting the Italian public administration in digital transformation projects.
![]()
![]()
![]()
![]()
![]()
![]()
![]()


Outdated step:
sudo apt install php7.3-mbstring php7.3-xml php7.3-gd -y
They’re on 7.4 now
Yes, Dan. I’m going to update all those project with php…
Tutorial updated with both new php and phpBB versions.
Cheers
This is an awesome resource! I had been running a self-hosted WordPress for years. I nuked it in favor of hosting a phpBB site; clean install. This, along with the LAMP walk-through got me up and running. The only difficult part was getting an FTP, for uploading custom styles, going (did it from a different tutorial) and getting SSL certificates working without end-user exceptions required (through Let’s Encrypt free). There was an error on the LAMP walk through, a MariaDB command changed, but I posted it in the comments section on the LAMP tutorial for a fix.
My phpBB is up and running just fine on a Raspberry Pi 3B+. Thank you so much!