
Last Updated on 22nd March 2024 by peppe8o
In this tutorial, I’m going to show you how to setup and use oilpainting effect from Raspberry PI with OpenCV and Python.
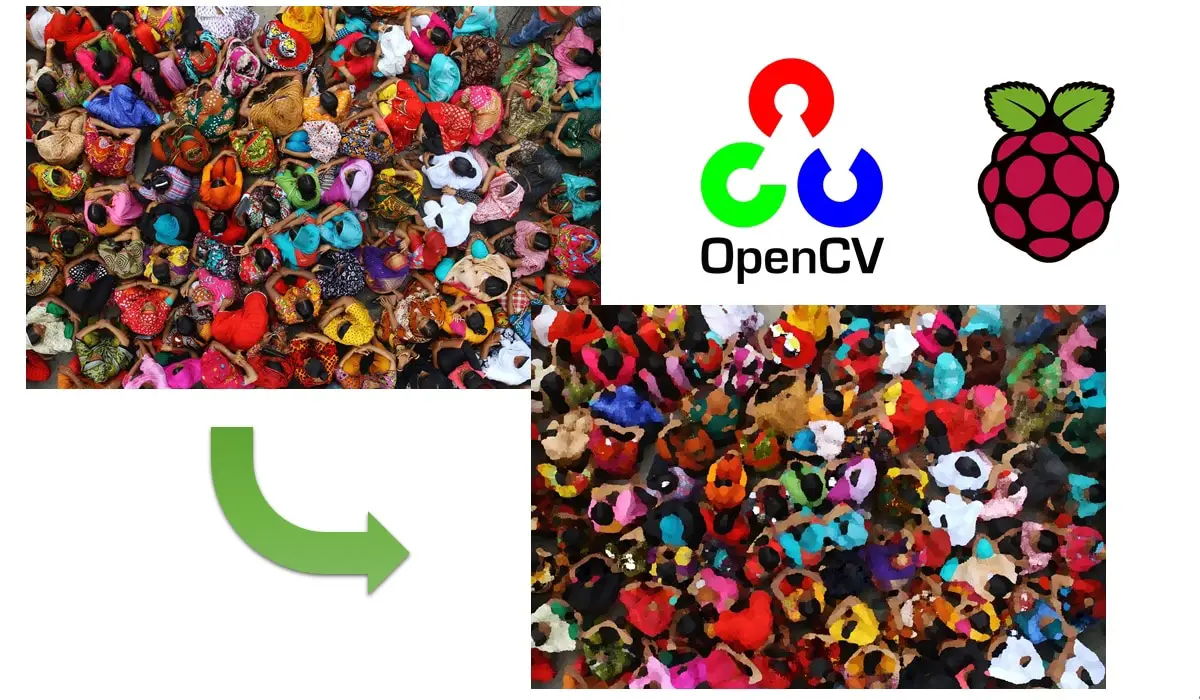
Beside being a fantastic tool for Artificial Intelligence computing, OpenCV also makes available a number of options to create cool effects applied to pictures. One of these is Oilpainting, which creates an oil paint from your image, able to run in a Raspberry PI
OpenCV isn’t new in my posts, as I already used it to cartoonize images with Raspberry PI. Tosay’s effect is similar, but getting a more artistic result.
The biggest problem is that OpenCV xphoto module isn’t available in default python3-opencv package, but requires opencv-contrib-python (available from pip package manager). I tried installing latest version, but I had same problem as many users: it takes a veeeery long time to compile. Some heroes measured that in their Raspberry PI 3 model B this installation required up to 8 hours!
Solution is using secon-last version, according to opencv-contrib-python releases page. This makes compiling faster. At the time of this article, latest version is 4.5.1.48, so I’ll use 4.4.0.46.
For this project I’m going to use a Raspberry PI 3 model B+, but this will also work with newer Raspberry PI computer boards.
What We Need
As usual, I suggest adding from now to your favourite e-commerce shopping cart all the needed hardware, so that at the end you will be able to evaluate overall costs and decide if to continue with the project or remove them from the shopping cart. So, hardware will be only:
- Raspberry PI (including proper power supply or using a smartphone micro usb charger with at least 3A)
- high speed micro SD card (at least 16 GB, at least class 10)
Check hardware prices with following links:


Prepare Operating System
Start preparing your Raspberry PI OS, with install Raspberry PI OS Lite guide (to have a fast, headless OS) or install Raspberry PI OS Desktop (getting a Desktop environment, so working with its internal terminal). I will use Lite distribution and I will move files by sftp session (with filezilla).
Make your OS up to date. From terminal:
sudo apt update -y && sudo apt upgrade -yInstall required packages. Beside pip3, opencv has a long listo of dependencies non resolved automatically… Moreover, as opencv-contrib-python requires pip version >= 19.3 (check with “pip -V” command), we also need to upgrade pip:
sudo apt install python3-pip libatlas-base-dev python3-h5py libharfbuzz0b libwebp-dev libtiff5 libjasper-dev libilmbase23 libopenexr-dev libavcodec-dev libavformat-dev libswscale-dev libv4l-dev libqtgui4 libqt4-test libgstreamer1.0-0 libgtk-3-dev
pip3 install --upgrade pip
python3 -m pip install opencv-contrib-python==4.4.0.46
OpenCV Oil Painting Image Script
You can get a copy of this script directly in your Raspberry PI with following terminal command:
wget https://peppe8o.com/download/python/opencv_oilpainting.pyYou can also explore script content with cat or nano commands. This script can be used with following terminal command, caring that image filename shouldn’t include a dot (excluding the one before file extension):
python3 opencv_oilpainting.py your_image.jpegPlease find below script description. As oilpainting is a direct OpenCV, we need only to open image file, apply transformation and save new file.
opencv_oilpainting script starts importing required libraries:
import cv2
import sys
After this, filename variable gets image file name from our command, by splitting name from extension using “.” as delimeter:
filename = sys.argv[1].split(".")Image is then read to “img” variable. Oilpainting module applies desired effect, saving results to “oil” variable:
img = cv2.imread(sys.argv[1])
oil = cv2.xphoto.oilPainting(img, 10, 1)
Oilpainting function requires following variables:
- src: Input three-channel or one channel image
- size: neighbouring size is 2-size+1
- dynRatio: image is divided by dynRatio before histogram processing
- [, dst] (optional): Output image of the same size and type as src.
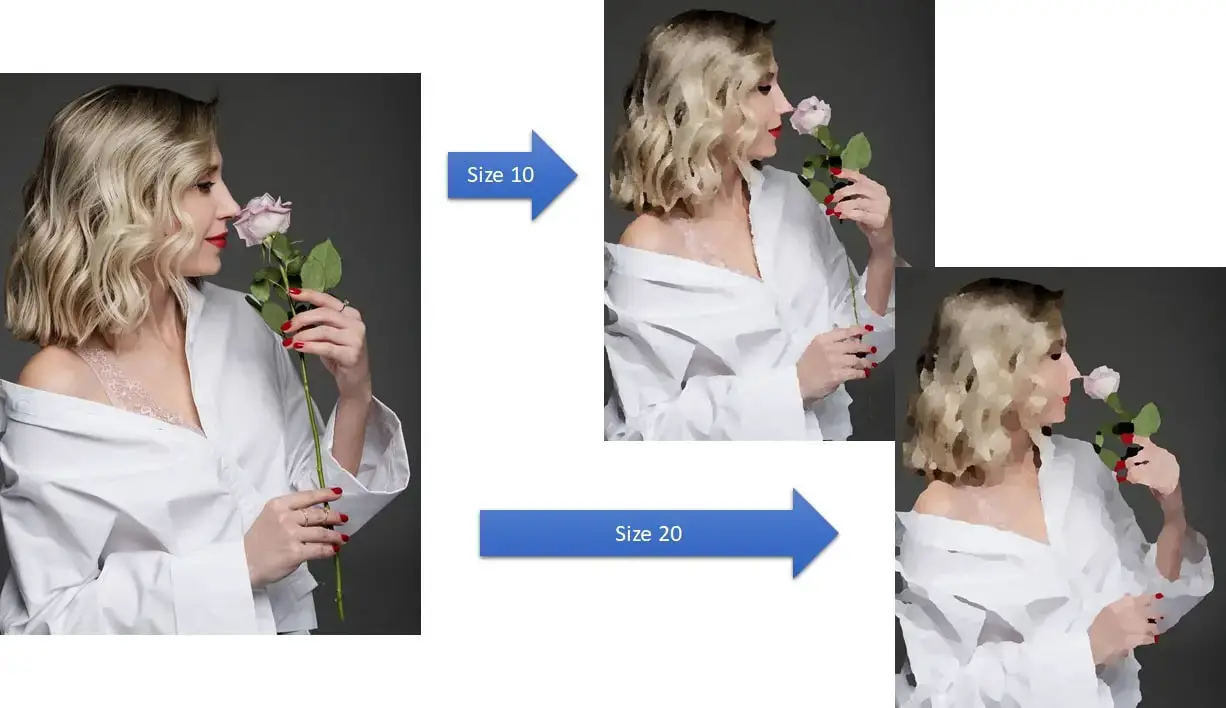
So, changing “size” parameter you can get different results on image processing.
Finally, oilpaint-ed image is saved with a different name to avoid overwriting:
cv2.imwrite(filename[0]+"_oil."+filename[1], oil)OpenCV Oilpainting Examples
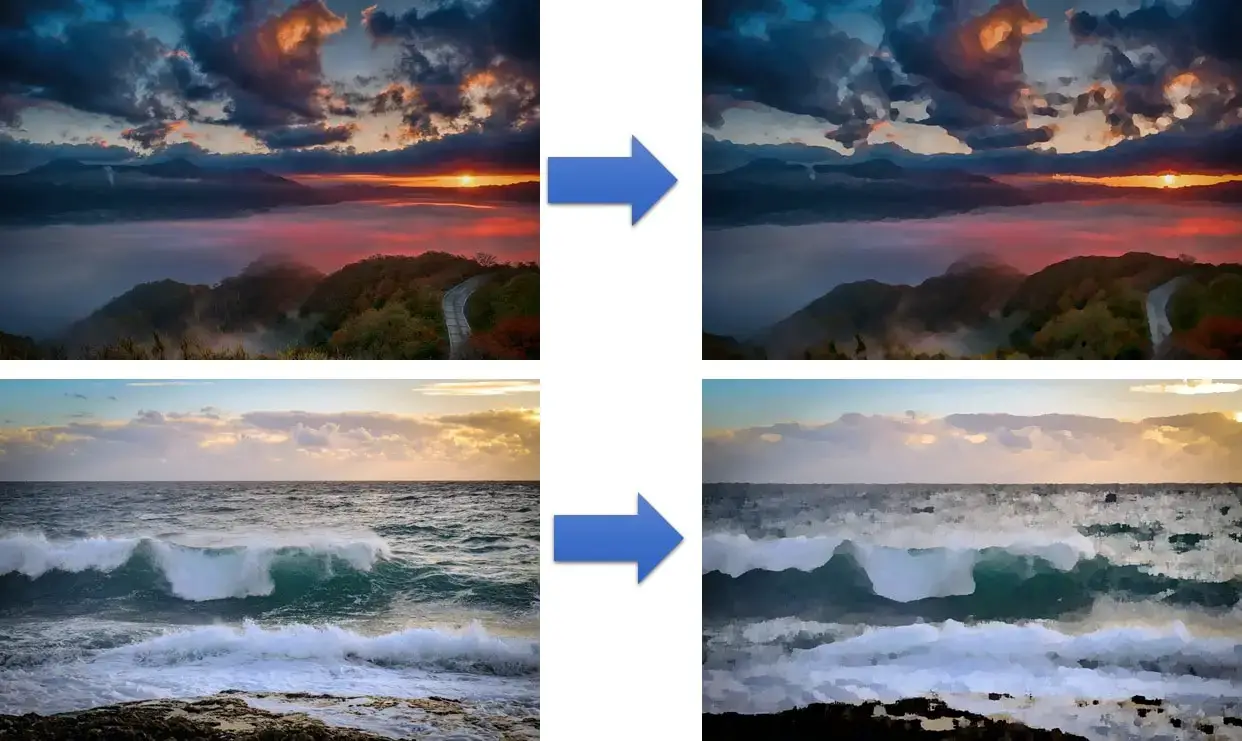
I’ll use some example pictures from free Pixabay service to show some results.
Following picture, on the other side, compares different setting for size parameter, which enables different resolution used for transforming original image:
Enjoy!

Open source and Raspberry PI lover, writes tutorials for beginners since 2019. He's an ICT expert, with a strong experience in supporting medium to big companies and public administrations to manage their ICT infrastructures. He's supporting the Italian public administration in digital transformation projects.
![]()
![]()
![]()
![]()
![]()
![]()
![]()


