

Last Updated on 4th June 2024 by peppe8o
This tutorial will show you how to use WiFi with Raspberry PI Pico.
The Raspberry PI Pico W added a WiFi connection to the microcontroller from the Raspberry PI Foundation, enabling our projects to connect to the Internet world
With the release of Raspberry PI Pico W, adding the Infineon CYW4343 module to the RP2040-based microcontroller enabled us to get connected to 2.4GHz WiFi networks. It has been a big step, as before this evolution only a few microcontrollers were able to get connected with a WiFi connection and this makes the Pico usable in smart things projects.
What We Need
As usual, I suggest adding from now to your favourite e-commerce shopping cart all the needed hardware, so that at the end you will be able to evaluate overall costs and decide if to continue with the project or remove them from the shopping cart. So, hardware will be only:
- A common computer (maybe with Windows, Linux or Mac). It can also be a Raspberry PI Computer board
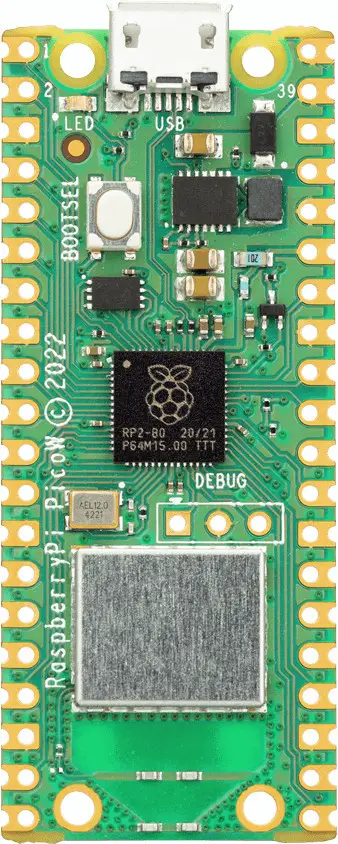
- Raspberry PI Pico W microcontroller (with a common micro USB cable)
Check hardware prices with the following links:


Step-by-Step Procedure
Install MicroPython Firmware
Before starting with examples, install the MicroPython firmware in your Raspberry PI Pico W.
Here’s the first warning note: at the time of this post (July 2022), Raspberry PI Foundation had to publish a specific firmware to get the WiFi working on Raspberry PI Pico W. They promised that the firmware capabilities would be joined to official MicroPython firmware soon. But, for the moment, running the networking code with official MicroPython firmware will result in the following error when trying to import the network library:
Traceback (most recent call last):
  File "<stdin>", line 1, in <module>
ImportError: no module named 'network'
Anyway, you can also refer to my First steps with Raspberry PI Pico for Beginners tutorial, as it also shows how to use Thonny (the same IDE I will use for this tutorial). This will allow you to test the official MicroPython firmware before switching to the RPI Foundation fork.
So, if you tested that the official firmware gets the above error, please install the firmware provided by Raspberry PI Foundation from their documentation page (please pay attention to selecting the firmware for the Pico W) or you can get a copy from my download page:
micropython-firmware-pico-w-290622.uf2
Briefly, you can install it by:
- pressing the BOOTSEL button on RPI Pico W
- then plug the USB cable into your PC
- releasing the BOOTSEL button
- copying the downloaded firmware (“.uf2” file) in the storage appearing on your computer (usually labelled as “RPI-RPI2”)
- once the copy is finished, the RPI Pico will automatically reboot and get ready with the new firmware
WiFi Scan
The first operation is checking that your WiFI network has enough signal to connect. Please remember that Raspberry PI Pico W can use only 2.4 GHz networks.
The code to perform this operation is simple and short, so I’ve added in-code comments that explain the row task:
import network #import required module
wlan = network.WLAN(network.STA_IF) #initialize the wlan object
wlan.active(True) #activates the wlan interface
accessPoints = wlan.scan() #perform a WiFi Access Points scan
for ap in accessPoints: #this loop prints each AP found in a single row on shell
    print(ap)
The result will be similar to the following (where I’ve used the “*” chars to hide my personal network for privacy):
>>> %Run -c $EDITOR_CONTENT
(b'****er-1', b'\xac\x9e\x17k\xd6@', 2, -47, 5, 5)
(b'*********G3P4', b'\xc8Z\x9f\xdc\xa47', 11, -81, 5, 3)
(b'*********TWEB', b'\xcaZ\x9f\xdc\xa47', 11, -80, 5, 2)
For each discovered access point, the following info SHOULD be reported:
- The access point name (SSID)
- The basic service set identifier (BSSID)
- The channel that the access point is using
- the Received Signal Strength Indicator (RSSI): a measurement of how well your device can hear a signal from an access point or router (signals from “-70” are usable with common WiFi)
- The security protocol : 0 –> open; 1 –> WEP; 2 –> WPA-PSK; 3 –> WPA2-PSK; 4 –> WPA/WPA2-PSK)
- The info if the Access Point is hidden; 0 –> visible; 1 –> hidden
I typed “SHOULD” as the last 2 values resulting from my local scan don’t seem to be compliant with the official MicroPython WLAN docs… I don’t know if it is an implementation bug or if I’m reading these values in the wrong way, but the Access Point name and signal strength are the most important and their values seem to be reliable.
Connect to WiFi
Once scanned the WiFi networks and found that the signal is enough for reliable communication, we can now start to get connected to our home router.
The code is the following (you will have to change the red parts):
import network, rp2, time

# set your WiFi Country
rp2.country('IT')

wlan = network.WLAN(network.STA_IF)
wlan.active(True)

# set power mode to get WiFi power-saving off (if needed)
wlan.config(pm = 0xa11140)

wlan.connect('YourHomeSSID', 'YourSSIDPassword')

while not wlan.isconnected() and wlan.status() >= 0:
 print("Waiting to connect:")
 time.sleep(1)

print(wlan.ifconfig())
In the MicroPython code, the “rp2.country(‘IT’)” sets the WiFi country code (mine one is IT as I’m in Italy). Change it to your 2-letter country code in order to have your WiFi using the channels allowed in your country.
The “wlan.config(pm = 0xa11140)” sets the WiFi power mode for your Raspberry PI Pico W. By default, the Pico W puts the WiFi into an energy-saving mode that makes it less responsive after a while that the connection is not used. If you need a prompt response even after time, use this to keep the WiFi power always on.
The wlan.connect() is where your WiFi credentials are saved. To say the truth, if you are going to use a Raspberry PI Pico W in a public space it’s not secure having the WiFi password exposed in plain code and you will need more advanced connection protection (like, for example, a specific network protected from the router side). For home projects, usually, it’s not a big problem. Moreover, the wlan.connect() initializes the WiFi connection.
The while loop waits for the connection to be completed. The check is also made by verifying the wlan.status() codes, that can be interpreted with the following schema:
- -3 -> CYW43_LINK_BADAUTH
- -2 -> CYW43_LINK_NONET
- -1 -> CYW43_LINK_FAIL
- 0 -> CYW43_LINK_DOWN
- 1 -> CYW43_LINK_JOIN
- 2 -> CYW43_LINK_NOIP
- 3 -> CYW43_LINK_UP
Finally, we print the IP configuration get from the router (below I show mine, but your ones should be similar):
>>> %Run -c $EDITOR_CONTENT
Waiting to connect:
Waiting to connect:
Waiting to connect:
Waiting to connect:
('192.168.1.43', '255.255.255.0', '192.168.1.1', '8.8.8.8')
The result shows:
- ‘192.168.1.43’ -> the IP address get from Raspberry PI Pico W. This is the address that you will use to reach your Raspberry PI Pico W
- ‘255.255.255.0’, -> the subnet mask
- ‘192.168.1.1’, -> the default gateway (usually your home router IP)
- ‘8.8.8.8’ -> the DNS address
Our Raspberry PI Pico W is not connected to the WiFi network and it can interact with the world.
Getting Internet pages/content with Urequests
The first example is getting info from internet pages or services. There are different ways to achieve this goal, but the simpler one is using the “urequests” library.
This example shows how to download a generic file, but you can use the results in your MicroPython code to manage the text/json files received in order to filter and adapt whatever input.
The code is the following:
import network
import urequests

# set your WiFi Country
rp2.country('IT')
wlan = network.WLAN(network.STA_IF)
wlan.active(True)
# set power mode to get WiFi power-saving off (if needed)
wlan.config(pm = 0xa11140)
wlan.connect('YourHomeSSID', 'YourSSIDPassword')

# Make GET request
r = urequests.get("https://google.com")
print(r.content)
r.close()
Please note that you can’t download pages too big in size as to the limit of Raspberry PI Pico W memory (256KB of RAM and 2MB of Flash Memory). When this limit is exceeded, you will get an error similar to the following:
Traceback (most recent call last):
  File "<stdin>", line 18, in <module>
  File "urequests.py", line 20, in content
MemoryError: memory allocation failed, allocating 116480 bytes
The above script will return the HTML code for the linked page.
Exposing HTML pages
This example shows the opposite case compared to the previous one: our Raspberry PI Pico W will publish a simple HTML page. Moreover, from this HTML page, we’ll be able to control the board LED. In this case, we’ll use the socket library, that is included in the RPI Foundation firmware too.
Please start downloading the following files and moving them to your Raspberry PI Pico W storage:
The netman.py code includes a very simple library to manage the WiFi connection for your Raspberry PI Pico W. It includes a connectWiFi() function that requires as inputs your home SSID, your WiFi password and your 2-letter country code. It returns the connection status: this is an array having at its first element the IP Address get from your home Router. Moreover, it adds better connection management with error handling, as suggested in Raspberry PI Foundation documentation.
Using such a custom function, linked from an external file, makes your code far cleaner and easier to understand.
The webled.py code is the MicroPython script to run in your Raspberry PI Pico W. Of course the print() statements will show in your Thonny shell what is happening and can be removed or commented on once you don’t need them.
At the start, the required modules are imported:
import netman
import socket
from machine import Pin
The network and rp2 modules are not required as they are imported by the “netman” module.
After creating the LED object, that will drive the Raspberry PI Pico W board LED:
led = Pin("LED", Pin.OUT)we set the WiFi connection credentials and country. We use variables in order to have a single place where to change them:
country = 'IT'
ssid = 'YourHomeSSID'
password = 'YourSSIDPassword'
We now use the netman module to initialize WiFi connection and we’ll store the connection status in a “wifi_connection” variable:
wifi_connection = netman.connectWiFi(ssid,password,country)The next part stores the HTML code for our page to show on remote computers. You can note that we’re using the “%s” marker to make it possible to add later the LED status. Moreover, we’re also using the “wifi_connection[0]” value (that is the IP address got from Wlan connection) to create an internal link to the same page:
html = """<!DOCTYPE html>
<html>
<head> <title>Pico W</title> </head>
<body> <h1>Pico W</h1>
<p>Current status: %s</p>
<p><a href="http://"""+wifi_connection[0]+"""/light/on">Turn ON</a></p>
<p><a href="http://"""+wifi_connection[0]+"""/light/off">Turn OFF</a></p>
<p>by <a href="https://peppe8o.com">peppe8o.com</a></p>
</body>
</html>
"""
The socket is initialized and configured to bind at “0.0.0.0”: this means that our web server will answer any request from external computers. Moreover, the “s.setsockopt(socket.SOL_SOCKET, socket.SO_REUSEADDR, 1)” option will avoid to you from getting the error about the address already in use when restarting the program:
addr = socket.getaddrinfo('0.0.0.0', 80)[0][-1]
s = socket.socket()
s.bind(addr)
s.listen(1)
print('listening on', addr)
At very the first page load, the LED status may be inconsistent. So initializing it to a default value is a good way to have a controlled initial configuration:
led.value(0)
stateis = "LED is OFF"
The main loop will wait for external connections. Once a generic connection comes from a computer, the shell will print the request (also useful for troubleshooting):
while True:
  try:
    cl, addr = s.accept()
    print('client connected from', addr)
    request = cl.recv(1024)
    print(request)
This webserver can answer to serve 3 different pages (URLs). The URLs will start always with “http://YourRpiPicoAddress” (where “YourRpiPicoAddress” is your Pico W IP address, mine one for this example will be 192.168.1.43). The root URL will show the LED status, while the URLs including “/light/on” or “/light/off” will control the LED, besides showing the same page output and the current LED status. Making it simpler, with my IP address:
- http://192.168.1.43 -> this will show the LED status, without changing it
- http://192.168.1.43/light/on -> this will power on the LED and show the LED status
- http://192.168.1.43/light/off -> this will power off the LED and show the LED status
We’ll find the URL that the computer is asking for by reading the requested content and looking for the related strings. Please note that the request string has been cut for the first 50 chars as moving from the LED ON page and LED OFF page will track the previous page with the “Referer” query and may lead to an incorrect status:
    request = str(request)[0:50] # The [0:50] avoids getting the url directory from referer
    led_status = request.find('GET / HTTP')
    led_on = request.find('/light/on')
    led_off = request.find('/light/off')
    print( 'led on = ' + str(led_on))
    print( 'led off = ' + str(led_off))
If the find function doesn’t find the required string, it will return a “-1” value. If this finds the string, it will return the related position as an integer. With this in mind, the following if statements will set the LED on/off and the related state message string:
    if led_status >0:
      print("LED status request") # No LED action

    if led_on >0:
      print("led on")
      led.value(1)
      stateis = "LED is ON"

    if led_off >0:
      print("led off")
      led.value(0)
      stateis = "LED is OFF"
Finally, the web page is server and we also close the socket session:
    response = html % stateis

    cl.send('HTTP/1.0 200 OK\r\nContent-type: text/html\r\n\r\n')
    cl.send(response)
    cl.close()
Moreover, in line with the “try:” statement, the final “exception” will handle errors:
  except OSError as e:
    cl.close()
    s.close()
    print('connection closed')
The resulting page will be the following (please, remember to use your Raspberry PI Pico W address instead of mine). And yes, you can configure the HTML code as you prefer, like I added the peppe8o.com link. This will require a bit of HTML knowledge.

Official Docs
The official documentation to get your Raspberry PI Pico W connected is available from the Raspberry PI Foundation website at https://datasheets.raspberrypi.com/picow/connecting-to-the-internet-with-pico-w.pdf. From this documentation, I’ve freely changed some code parts and I hope you will enjoy the changes.
What’s Next
Interested to do more with your Raspberry PI Pico? Try to look at my Raspberry PI Pico tutorials for useful and funny projects!
Enjoy!

Open source and Raspberry PI lover, writes tutorials for beginners since 2019. He's an ICT expert, with a strong experience in supporting medium to big companies and public administrations to manage their ICT infrastructures. He's supporting the Italian public administration in digital transformation projects.
![]()
![]()
![]()
![]()
![]()
![]()
![]()


Is it possible to connect two pico w’s together so that one may read and input and have the 2nd pico display the result in as close to real time as possible?
I want to make a gear shift light that mounts onto a riders helmet and using the bikes onboard shift light as the trigger.
Hi Daniel,
Sorry for the late answer. I suppose that you already considered using only one Pico both to collecting data and show them and it is not viable. So, you should be able to connect the two Pico both via SPI or direct communication between GPs. You can also use a WiFi connection to communicate, but this means that you will also need a WiFi hotspot where your project runs and WiFi communication will surely be less performing compared to direct communication. I still haven’t tested direct communication between 2 Pico via SPI or GP, so for the moment I can’t redirect to one of my tutorials. Sorry
Thanks peppe8o – very useful indeed.
One thing I hope you can help me with – is it possible to have the published webpage to include a download link to download a log file from the Pico W?
I am using mine to sample a bunch of temperature probe data, activate relays as a result and log a bunch of data, and woudl love to be able to have it publish a very simple web page where i could access that data as a .log file dowload or the equivalent.
Any thoughts appreciated.
Hi Alasdair,
your one is a good suggestion for a new post… I hope to be able to arrange it in next days. Anyway, the simpler way you should be able, on client request, to open the file, read and print it on HTML. From the client side, using a wget and redirecting the output to a text file should give a first, basic solution
Great tutorial! I have one issue. When I visit
http://10.0.0.8/light/onit works fine, but I’ve noticed, that this code executes twice. Maybe this is the chrome issue (something like background preloading)? To summarize – every time I click on a link the code runs twice, not once, like it is supposed to. I get two lines:“client connected from (‘10.0.0.8’, XXXXX)”
“client connected from (‘10.0.0.8’, XXXXX+1)”
Any idea how to fix this?
Hi Peter. Just tested. On each conection, the second request is for the favicon: the icon that the browser shows in your tabs near the page title. That’s just the browser requesting for the favicon, but it shouldn’t affect the result.
Thanks! That makes sense. Also noticed, that while I’m on my iPhone, I only get one request (iPhone13 PRO/Safari).
Is there a way we can get rid of this favicon connection? Or filter this connection in any way?
It should be a default request from the browser, it doesn’t start from the Pico. I don’t think that we can do more… Nevertheless, as said it shouldn’t affect your code.
Hi peppe8o,
Great tutorial, very analytical thank you.
I have a problem though, I can’t connect to my wifi ap.I get an error :
“RuntimeError: network connection failed”.
So I see that wlan.status() != 3 to bring this problem. How do I go about troubleshooting this issue? Thank you!
Mike
Hi Mike,
the code exception is the one you correctly identified. I would double check SSID and password: for example, characters link the “-” (minus) or brakets can bring errors if copied from some advanced text editors like MS Word or similar.
If these parameters are ok, you should add a print(str(wlan.status())) line in the code just before the identified code lines and see the resulting error code. Then, you can check what the error code means at the Raspberry PI Pico W datasheet https://datasheets.raspberrypi.com/picow/connecting-to-the-internet-with-pico-w.pdf in the “3.6.1. Connection status codes” section
You state “signals from “-70” are usable with common WiFi)”, “from” is ambigous, what does “from -70” actually mean, is it “-70 to 0” or “-70 to -9999”?
Hi Jim,
-70 is measured in dBm, a common measurement unit for radio waves in terms of power loss from the radio source. The best is 0 dBm, even quite never rechable as radio transmission involves a not null power reduction