
Last Updated on 13th June 2024 by peppe8o
In this tutorial, I’m going to show you how to use a photoresistor with Raspberry Pi Pico. If you have instead a Foundation computer board, you can also use my tutorial to use Photoresistors with Raspberry PI computer board.
Projects running different actions in function of sun exposure usually need acquiring information on the light level as a trigger to execute specified tasks. Photoresistors with Raspberry PI Pico can provide light info by acquiring analog levels from its input pins.
With the new Pico microcontroller availability, as it includes also analog ports we have access to a number of projects using analog sensors. A useful case is with photoresistors.
The Photoresistor
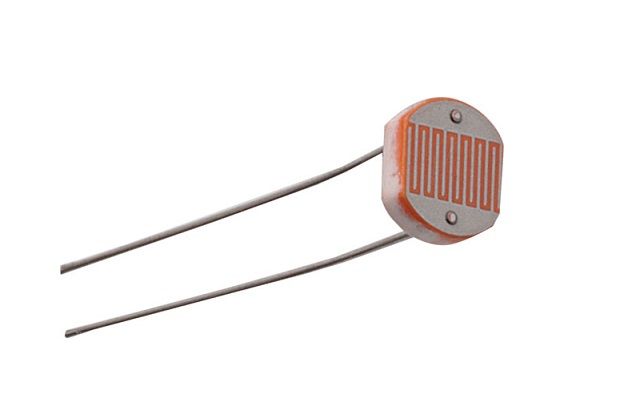
A photoresistor (also known as photocell) is a Light Dependent Resistor (LDR). As the name suggests, these components act just like a resistor, changing their resistance in response to how much light is falling on it. Usually, photoresistors have a very high resistance in near darkness and very low resistance in bright light.
As this sensor works as a simple resistor, you will not get absolute light values (for example, in lumens). Compared to a reference voltage level (that is the 3.3 V provided by Raspberry PI Pico) you will read a value minor or equal to Vref, reduced proportionally to the light exposed to the photoresistor. With ADC module from MicroPython, this value will range between 0 and 65535 (16-bit max value) and we’ll transform it into a percentage (between 0% and 100%).
What We Need
As usual, I suggest adding from now to your favourite e-commerce shopping cart all the needed hardware, so that at the end you will be able to evaluate overall costs and decide if to continue with the project or remove them from the shopping cart. So, hardware will be only:
- A common computer (maybe with Windows, Linux or Mac). It can also be a Raspberry PI Computer board
- Raspberry PI Pico microcontroller (with a common micro USB cable)
- photoresistor
- resistors (1x 10kOhm used)
- breadboard
- dupont wirings
Check hardware prices with following links:


Wiring Diagram
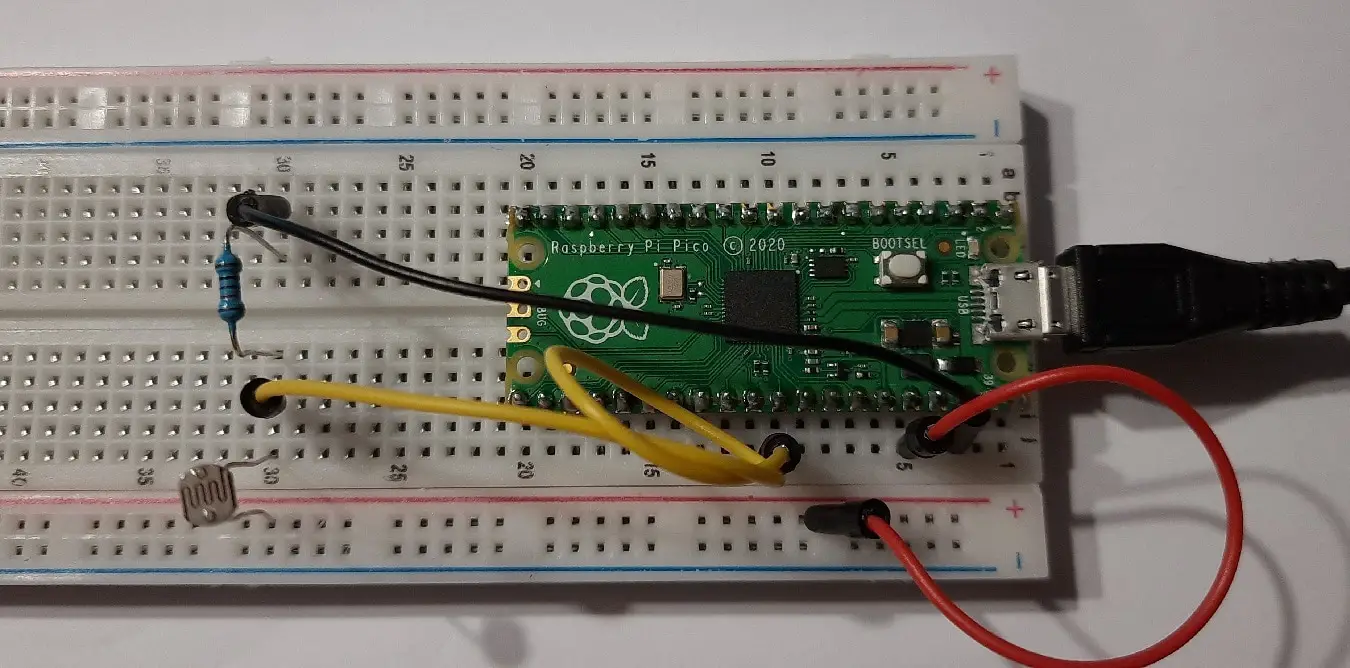
Please find below the used wiring diagram:

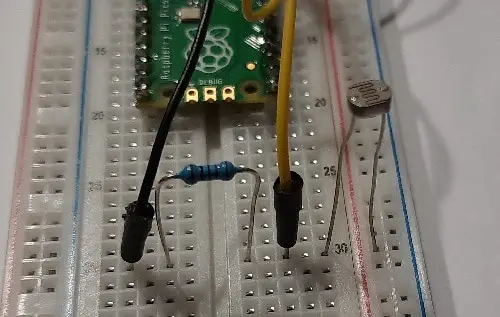
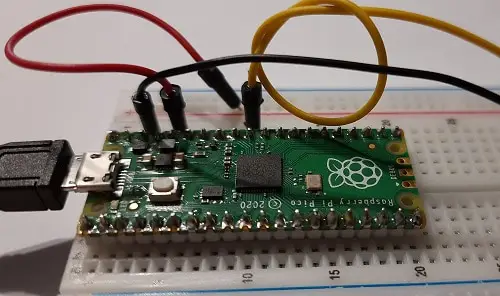
Following picture show some cabling details:

Step-by-Step Procedure
Prepare cabling according to the previous paragraph. Connect RPI Pico to Thonny (you can refer to my tutorial about First steps with Raspberry PI Pico). Download my picoPhotoresistor.py script on your computer and open it with Thonny.
Following paragraphs will describe my code line by line.
Required modules are imported first:
from machine import ADC, Pin
from time import sleep
Then, PIN number connected to photoresistor is associated to a variable. In this way our code improves both in readability and management:
photoPIN = 26A function will handle all the (few) operations required to read light intensity and convert it into a percentage. This function requires only the PIN number connected to the photoresistor. This number is used at function start to initialize the micropython ADC object:
def readLight(photoGP):
    photoRes = ADC(Pin(26))
The current light value is read with classic micropython 16-bit reading function:
light = photoRes.read_u16()As 16-bit resulting reading will range between 0 and 65,535, the light value will be transformed in a percentage and finally returned as function result:
    light = round(light/65535*100,2)
    return light
Following rows are the main loop. In this infinite loop, we get light value with “readLight(photoPIN)” call. As it returns a numeric value and as print function requires a string, the str() method converts the number object in a string, so that it can be printed on shell. Final sleep keeps readings not too fast:
while True:
    print("light: " + str(readLight(photoPIN)) +"%")
    sleep(1) # set a delay between readings
Running the picoPhotoresistor.py Script
Run this script in your Thonny IDE (F5) and you will start seeing your readings printed on Thonny shell, as in the following:
>>> %Run -c $EDITOR_CONTENT
light: 10.67%
light: 21.49%
light: 21.37%
light: 29.06%
light: 33.55%
light: 33.6%
What’s Next
Interested to do more with your Raspberry PI Pico? Try to look at my Raspberry PI Pico tutorials for useful and funny projects!
Enjoy!

Open source and Raspberry PI lover, writes tutorials for beginners since 2019. He's an ICT expert, with a strong experience in supporting medium to big companies and public administrations to manage their ICT infrastructures. He's supporting the Italian public administration in digital transformation projects.
![]()
![]()
![]()
![]()
![]()
![]()
![]()


Why We Are Using 10K Ohm Resistor.
As We Are Passing 3.3v to the adc pin.
Which Is Also Looking For The Voltage Between 0 to 3.3v
Usually, high resistors can be used to avoid a direct spike of current coming to your GPIO port. In this case, photoresistor is itself a resistor, but when it has low resistance it can let pass quite all the current (it isn’t a voltage risk, but a current risk)
So if there is higher current then the gpio accept range. the current would try to escape from the easiest path which is through the resistor to the ground. am i right?
Is there any reason to choose GND pin 38, and not any of the others ? 28 or 23 (or the other side ? 3,8,13,18)
No, they are all the same. You can choose the one more convenient for your cabling
hi,
usually, LDR have a high resistance in dark and low when full light.
May not it be better to connect the LDR to the GND instead of the VCC,
and in the program, just print 100-round(light/65535*100) to cope with the expected behavior?
The 10k resistor would always protect the GPIO.
btw, this is how i see it mounted everywhere.
thanks for your articles, it helps a lot.