
Last Updated on 14th June 2025 by peppe8o
In this tutorial, I’m going to show you how to install and configure Seafile on a Raspberry Pi using Docker, which makes the installation procedure far simpler.
As files on your devices increase, a common limitation is having a cloud storage with limited space to get your files securely stored and available for your access and collaboration. Common storage services (like Google Drive or OneDrive) give you few space compared with modern needs and require a fee for bigger GigaBytes. Seafile with Raspberry PI can give a cheap solution with cross-device clients.
What is Seafile
Seafile is an open-source file sync & share solution composed of server and client software. The server part makes your Seafile web page available for access. In this tutorial, our Raspberry PI will run the server software. The client one lets you use Seafile from any external device. From clients, you can also use a simple web browser to explore your files and collaborate on them.
Seafile also adds a security layer to files stored on the server: they can be encrypted by a password chosen by you, so that even in case of external server hosting, the system admin can’t view the files.
For this tutorial, I’m going to use a Raspberry PI 5 Model B computer board, but you can also use these steps with Raspberry PI computer boards supporting the 64-bit OS.
If you need to access Seafile from the internet and you have a public IP to do this, you can use a No-IP free domain with my How to configure No-IP DUC service in your Raspberry PI, taking care to arrange the port forward in your home router for ports 80/443.
What We Need
As usual, I suggest adding from now to your favourite e-commerce shopping cart all the needed hardware, so that at the end you will be able to evaluate overall costs and decide if to continue with the project or remove them from the shopping cart. So, hardware will be only:
- Raspberry PI Computer Board (including proper power supply or using a smartphone micro USB charger with at least 3A)
- high-speed micro SD card (at least 16 GB, at least class 10)

Step-by-Step Procedure
Prepare the Operating System
Start preparing your OS. Please note that we must use a 64-bit OS to get the MariaDB container directly available from Docker. Otherwise, we’ll need to modify our docker-compose file according to my Create a Custom MariaDB Container with Raspberry PI and Docker tutorial.
You can install Raspberry PI OS Lite (to get a faster, headless OS) or you can install Raspberry PI OS Desktop, in this case working from its internal terminal. Please find the differences between the 2 OS versions in my Raspberry PI OS Lite vs Desktop article.
For low RAM Raspberry PI computer models, the Lite OS is strongly suggested.
A few more optimisations can be performed, especially for installations on Raspberry PI boards with RAM lower than 1GB:
- Reduce the GPU to 16MB (only for computer boards up to Raspberry PI 4) -> Manage Raspberry PI GPU Memory Split
- Change Swap File to 1000MB -> Set Raspberry PI Swap Memory
Make sure that your OS is updated. From the terminal:
sudo apt update -y && sudo apt full-upgrade -yFinally, install Docker with the following tutorial: Beginner’s Guide to Install and Use Docker with Raspberry PI. The Portainer installation is not strictly required, but it is a good tool to try to manage your Docker environment.
Install Seafile on Raspberry PI with Docker
With Docker available on your Raspberry PI, the Seafile installation becomes super simple.
Please create a new folder on your Raspberry PI storage, which will include the docker-compose file. You can use whatever name you prefer for this folder:
mkdir Seafile
cd Seafile
You can both get my docker-compose.yml template for Seafile with the following terminal command:
wget https://peppe8o.com/download/docker/seafile/docker-compose.ymlOr you can create it manually:
nano docker-compose.ymlby pasting the following content inside it:
services:
  db:
    image: mariadb:latest
    container_name: seafile-mysql
    environment:
      - MYSQL_ROOT_PASSWORD=db_pwd
      - MYSQL_LOG_CONSOLE=true
    volumes:
      - /opt/seafile-mysql/db:/var/lib/mysql
    networks:
      - seafile-net
  memcached:
    image: memcached:latest
    container_name: seafile-memcached
    entrypoint: memcached -m 256
    networks:
      - seafile-net
  seafile:
    image: seafileltd/seafile-mc:latest
    container_name: seafile
    ports:
      - "80:80"
#      - "443:443"  # If https is enabled, cancel the comment.
    volumes:
      - /opt/seafile-data:/shared
    environment:
      - DB_HOST=db
      - DB_ROOT_PASSWD=db_pwd
      - TIME_ZONE=Europe/Rome
      - SEAFILE_ADMIN_EMAIL=my_email@example.com
      - SEAFILE_ADMIN_PASSWORD=my_pwd
      - SEAFILE_SERVER_LETSENCRYPT=false
      - SEAFILE_SERVER_HOSTNAME=192.168.1.218
    depends_on:
      - db
      - memcached
    networks:
      - seafile-net

networks:
  seafile-net:
Before saving and closing, please edit at least the parts highlighted in bold according to your preferences:
- db_pwd: This sets the MariaDB database password for root access (first occurrence) and the password that the Seafile container will use to access the DB (second occurrence). Both occurrences must have the same value
- TIME_ZONE=Europe/Rome: This sets the timezone for Seafile. You can get a list of timezones with correct strings with the following Wikipedia link: https://en.wikipedia.org/wiki/List_of_tz_database_time_zones
- my_email@example.com / my_pwd: these strings set the administrator account username and password to access the Seafile console. With these credentials, you can create new users and modify the Seafile server settings
- SEAFILE_SERVER_LETSENCRYPT=false: This disables or enables the HTTPS secure protocol. With a “false” value, you can access Seafile by using “http”. With “true”, you can use “https” access, but you need to have a public IP address and a domain to do it.
- SEAFILE_SERVER_HOSTNAME=192.168.1.218: This sets the Seafile access IP or domain. If you have a domain, use it instead of an IP address. If you don’t have a domain, you can use your Raspberry PI’s IP address. The 192.168.1.218 is my Raspberry PI’s IP in my local network, so change this with your one.
Also note that this docker-compose configuration maps persistent volumes to your Raspberry PI storage to keep them saved even when containers are removed. These volumes will be available in your /opt/ folder and will include the Seafile files (/opt/seafile-data/) and database files (/opt/seafile-mysql/). You can map these volumes to external storage to get more space, keeping in mind to always mount the external volume with the same path over reboots. You can refer to my Automount USB storage with Raspberry PI OS Lite tutorial for this task.
Once set and customised, save and close the docker-compose.yml file, and Seafile can be completely installed with the following terminal command (run inside the “Seafile” folder):
docker compose up -dPlease wait for your Raspberry PI to download all the required Docker images. It can take minutes, depending on your internet speed. When the terminal prompt comes back to you, you can check that all the containers are running correctly with the docker ps -a command:
pi@raspberrypi:~/Seafile $ docker ps -a
CONTAINER ID   IMAGE                          COMMAND                  CREATED         STATUS         PORTS                                 NAMES
fe29eaffdb0d   seafileltd/seafile-mc:latest   "/sbin/my_init -- /s…"   3 minutes ago   Up 3 minutes   0.0.0.0:80->80/tcp, [::]:80->80/tcp   seafile-web
d90e74aaaeb1   mariadb:latest                 "docker-entrypoint.s…"   3 minutes ago   Up 3 minutes   3306/tcp                              seafile-mysql
291d187075d3   memcached:latest               "memcached -m 256"       3 minutes ago   Up 3 minutes   11211/tcp                             seafile-memcached
With low-grade Raspberry PI computers, the Seafile initialisation can take a few more seconds. You can check if Seafile is ready and running by periodically issuing the docker command to inspect containers’ logs:
docker logs seafile-webThe following result will tell you that Seafile is ready:
...
...
Seafile server started
Done.
Starting seahub at port 8000 ...

----------------------------------------
Successfully created seafile admin
----------------------------------------

Seahub is started
Done.
Access Seafile
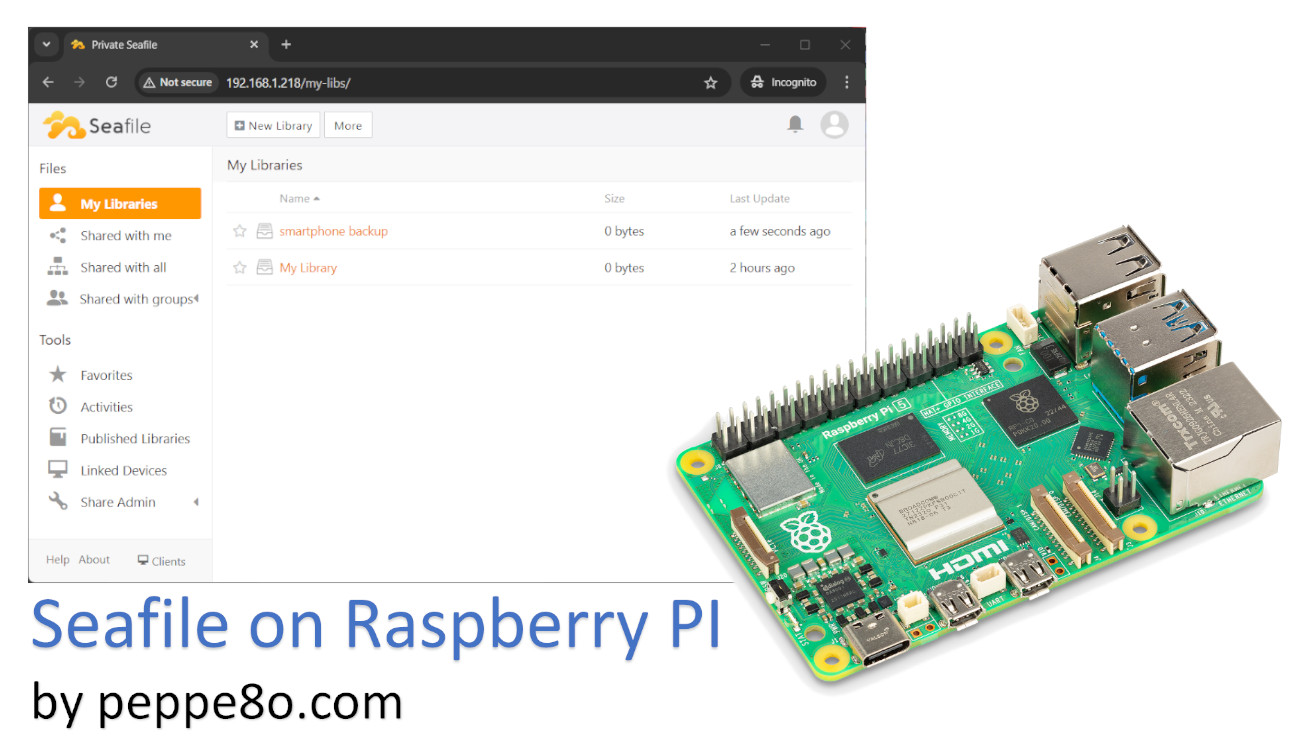
From your local computer, use your favourite browser to access Seafile by using your domain or Raspberry PI’s IP:

Please use the credentials set in your docker-compose.yml to access:

As you can see, a default library is already available for the very first tests. From the user menu, you can both access the user Settings and the server administration page (System Admin):

By selecting the System Admin menu, you will be able to manage and manually add users:

But you can also allow users to self-register in your Seafile installation. To do this, please select “Settings” in the left sidebar menu (still in “System Admin”) and scroll down to activate the “allow new registration” option. A good way to manage users’ activation is by sending them the “activation email”. You can also activate this option, but the email configuration is not yet ready (I’ll show you in the next step how to configure it):

Please note that the “allow new registrations” will enable a Signup link in the Seafile login page:

Configure Seafile Email Sending with Gmail
Sending email from Seafile requires an existing email account from an internet provider. As one of the most common is Google with its Gmail services, in this step, we’ll use an existing Gmail account.
Because of Google security restrictions, you can’t use directly your Gmail address and password. So, before taking the next actions, do the following:
- Go to your Google account (https://myaccount.google.com/)
- Select the “Security” option in your left-side menu
- Search the “App Passwords” widget (you can also search it in the search box from this page)
- At the bottom, choose Select app and choose Email and then select “Other” as device. Give a mnemonic name for this password app (for example, “Seafile”) and then press Generate
- The password we’ll get is the 16-character code in the yellow bar. Please take note of it
- Click Done
With the app password generated, edit the Seahub settings file:
sudo nano /opt/seafile-data/seafile/conf/seahub_settings.pyAppend the following content at the end by editing only the values highlighted in red:
EMAIL_USE_TLS = True
EMAIL_HOST = 'smtp.gmail.com'
EMAIL_HOST_USER = 'my_email@gmail.com'
EMAIL_HOST_PASSWORD = 'my_google_app_password'
EMAIL_PORT = 587
DEFAULT_FROM_EMAIL = EMAIL_HOST_USER
SERVER_EMAIL = EMAIL_HOST_USER
Save and close. With the terminal still in your Seafile folder from Raspberry PI, please issue the following command:
docker compose restartThis will restart your Seafile installation, also keeping the new configuration but maintaining the old files as they are stored in the (persistent) volumes created with the docker-compose file. The same command can be used for whatever change you need to make in your Seafile settings.
The docker logs seafile-web command will allow you to check that everything went successfully and that you can test it.
For our test, you can go to your Seafile home page and enter (click) on the default library (My Library). From here, please press the share button appearing on the top side of the page:

In the next window, please click the “Generate link” button:

Now, you can choose (optionally) to add a password or define an expiration time for the link. Then, please click the “Generate” button:

The following window will give you the link you can copy and share via your email. But it also offers you the “Send” button to automatically send it via Seafile. Please click this:

Fill in the recipient(s) email address and the message fields. Optionally, you can also write a message in the related box. Finally, please click the “Send” button:

The recipient will receive an email like the following one. They may need to check the spam folder in their email box.

Backup Device Folders on Seafile
Seafile offers client software for many devices. You can download the clients from the links available on the Seafile download page. For example, I will show you how to sync and backup folders from an Android smartphone.
After installing the app from the Play Store and launching it, you will get a button to add an account to your Seafile app:

In the following page, please select the “Other Seafile Server” option:

Then, please fill in the form with the Raspberry PI’s IP address and your credentials as set in the docker-compose file:

Android may require authorisation to access your local files. You need to give this permission to enable Seafile to backup your local files:

Now, you can access the remote files on your home page:

Now, you can create new libraries from your Android device. Moreover, by clicking the “Settings” tab (at the bottom of the following screen), you can enable and setup the Folder backup, which will enable you to automatically get your device’s folders in your Seafile on Raspberry PI:

Seafile Manual Pages
More customisation settings can be found on the official Seafile server manual page.
What’s Next
Interested in more projects for your RPI? Take a look at peppe8o Raspberry PI computers tutorial!
Enjoy!

Open source and Raspberry PI lover, writes tutorials for beginners since 2019. He's an ICT expert, with a strong experience in supporting medium to big companies and public administrations to manage their ICT infrastructures. He's supporting the Italian public administration in digital transformation projects.
![]()
![]()
![]()
![]()
![]()
![]()
![]()
I’m stuck at a certain step. I was about to deploy Seafile, but when I enter “docker-compose up -d” I get an error: no matching manifest for linux/arm/v7 in the manifest list entries.