
Last Updated on 2nd September 2023 by peppe8o
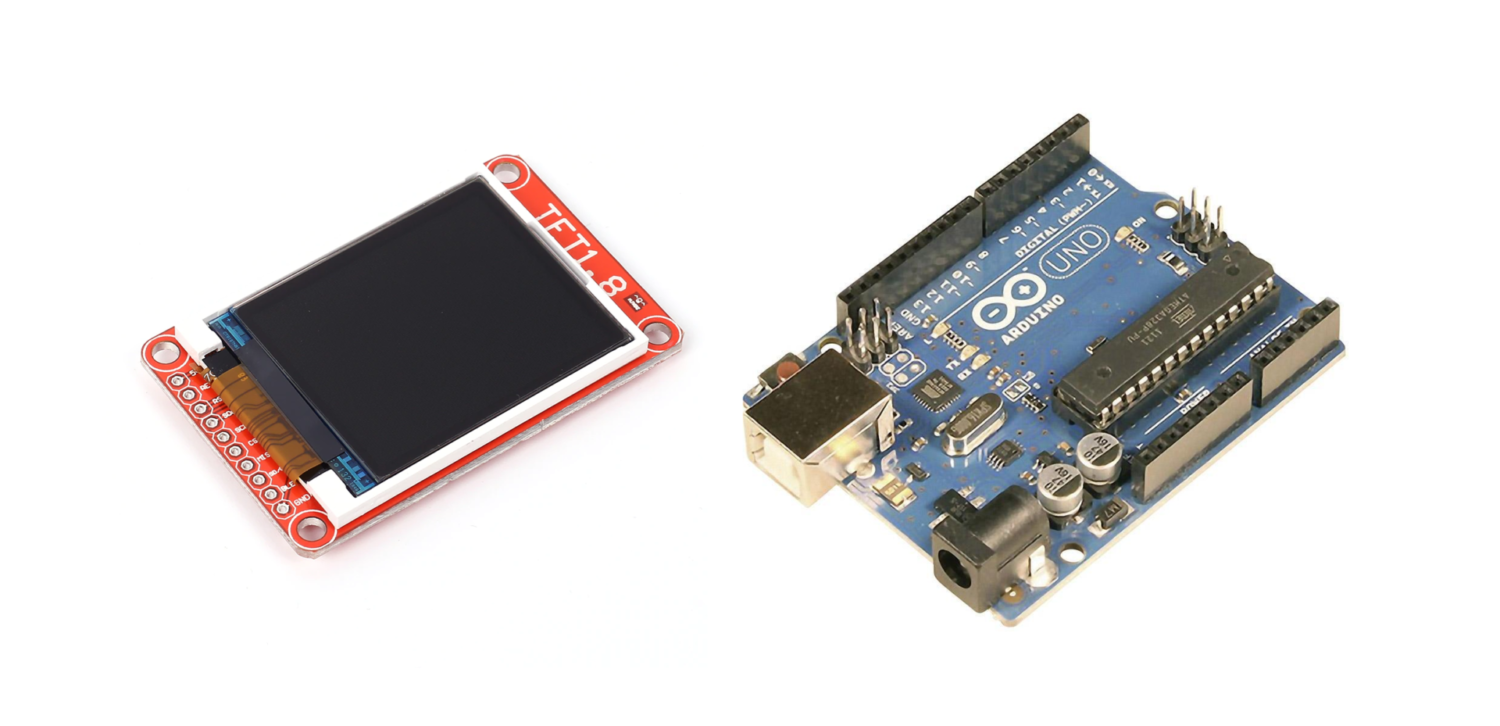
In this tutorial, we’ll interface the 1.8 TFT LCD display with Arduino Uno. You’ll learn how to interface the TFT LCD with Arduino to write text on this LCD. This tutorial presents the coding, wiring diagram and components list required for the LCD display.
To interface TFT LCD Display with Arduino, for designing custom HMI TFT LCD Display provide rich colours, detailed images, and bright graphics with their full-colour RGB mode it comes in different pixels 128 x 160 pixels, 320×240 pixels and many more.
TFT LCD Introduction
Creating an interface between the user and the system is very important. This interface can be created by displaying useful data, and menus. There are several components to achieving this. LEDs, 7-segments, OLEDs, and full-color TFT LCDs. The right component for your projects depends on the amount of data to be displayed, and the type of user interaction.
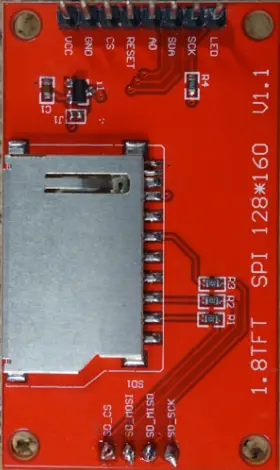
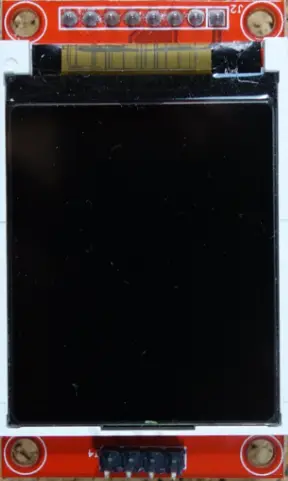
TFT LCD is a variant of a liquid-crystal display (LCD) that uses thin-film-transistor (TFT) technology to improve image qualities such as addressability and contrast. In the case of Arduino, the processor frequency is low. So it is not possible to display complex and high-speed motions. Therefore, full-colour TFT LCDs can only be used to display simple data and commands. This TFT has 128 x 160 pixels. 1.8 TFT display can load images from an SD card. It has an SD card slot at the back. You can see the front and back views of the TFT LCD in the figures below.
Working Phenomena of TFT LCD
TFT is an abbreviation of “Thin Film Transistor”. It has transistors made up of thin films of Amorphous silicon. It serves as a control valve to provide an appropriate voltage onto liquid crystals for individual sub-pixels. The working principle is very simple the TFT LCD composes of many pixels that can emit light of any colour. The desired image achieves by controlling each pixel to display the corresponding colour. In TFT LCD, the backlight technology is generally used. In order to accurately control the colour and brightness of each pixel, it is necessary to install a shutter-like switch after each pixel. When the “blinds” are opened, light can pass through them. When the shutters are closed, light cannot pass through them.
What We Need

As usual, I suggest adding from now to your favourite e-commerce shopping cart all the needed hardware, so that at the end you will be able to evaluate overall costs and decide if to continue with the project or remove them from the shopping cart. So, hardware will be only:
Check hardware prices with the following links:


Step-by-Step Procedure
Wiring Diagram of 1.8 TFT LCD with Arduino
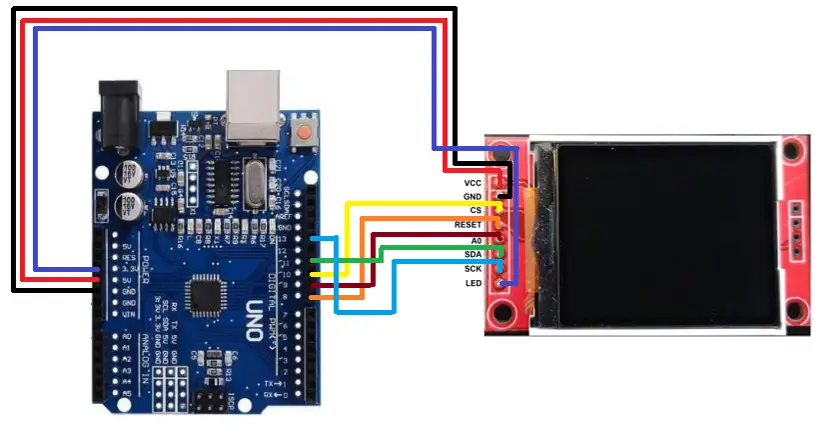
The TFT display communicates with the Arduino via SPI communication. To connect the 1.8 TFT LCD with Arduino we need to:
- Connect Ground to Ground
- Connect the VCC pin to the Arduino 5v pin
- Connect SCK pin to Arduino pin 13
- Connect the SDA pin to Arduino pin 11.
- Connect RESET pin to Arduino pin 8
- Connect A0/DC pin to Arduino pin 9
- Connect CS pin to Arduino pin 10
- Connect LED pin to Arduino 3.3V
Get the code and TFT Library
Connect your PC to Arduino and open Arduino IDE. For the very first steps, you can refer to Connecting Windows PC with Arduino tutorial. You can get the .ino code and libraries from my download area with the following link:
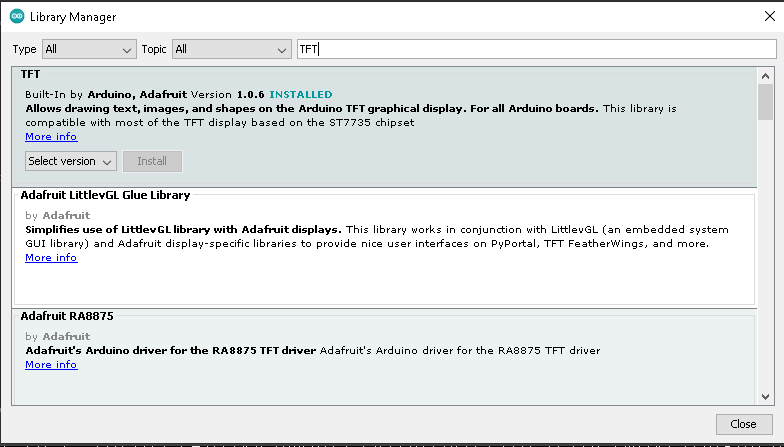
You also need to install the following libraries, according to my Install Arduino Libraries: methods to add libraries with Arduino IDE tutorial.
tft_code.ino Explanation
Section 1:
This is the section before setup which uses for globe variables defining and libraries additions. TFT.h is the library for TFT LCD Display and uses for writing and drawing on the display. The TFT display communicates with the Arduino via SPI communication, so you need to include the SPI library.
#include <TFT.h>
#include <SPI.h>
#define cs   10
#define dc   9
#define rst  8
TFT TFTscreen = TFT(cs, dc, rst);
Section 2:
This is the setup section in which Serial.begin(9600) initialize. TFTscreen.begin() is use to initialize the library. TFTscreen.background(0, 0, 0) is use to customize the screen background color here TFTscreen.background(0, 0, 0) means the background colour is black. TFTscreen.setTextSize(2) is use to set the font size.
void setup()
{
  Serial.begin(9600);
  TFTscreen.begin();
  TFTscreen.background(0, 0, 0);
  TFTscreen.setTextSize(2);
}
Section 3;
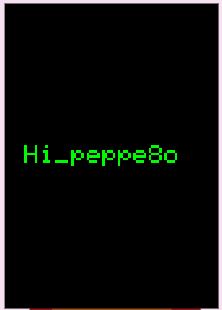
In the loop section first, we will print the “Hi_peppe8o!” in the centre of the LCD and this will be in three different colours (Red, Green, Blue) you can choose any colour using the different colour codes. After 300 milliseconds a straight line will be displayed, after 300 milliseconds a square will be displayed, after 300 milliseconds a circle will be displayed, and after 300 milliseconds screen will be black/ erase and these all shapes and the text will be repeated in the void loop.
void loop()
{
  int redRandom = random(0, 255);
  int greenRandom = random (0, 255);
  int blueRandom = random (0, 255);

  TFTscreen.stroke(redRandom, greenRandom, blueRandom);
  TFTscreen.text("Hi_peppe8o!", 6, 57);
  delay(300);

  //erase all
  TFTscreen.background(0,0,0);
  delay(300);
}
Results
The LCD displays the text of “Hi_peppe80” and after that displays the line, square, and circle and then erases everything after completing this sequence. The command used for clearing all the data is TFTscreen.background(0,0,0):
What’s Next
Please find more tutorials on Arduino in peppe8o Arduino archives.
Enjoy!
Umar Jamil
For any queries and help for work, please contact me at:
Whatsapp: +92-346-661-7017/ Link
Email: umarjamil0007@gmail.com

I'm an Electronic Engineer, well-skilled to solve the issues of hardware and software. I do have laboratory which contains unlimited sensors and modules for testing the working. Also, I am experienced in Arduino programming, Android mobile application, microcontroller programming, IOTs and embedded projects. I provide services to control, realize the sensor data in the Mobile Application. For any queries and help for work Contact: Whatsapp:+92-346-661-7017 Email: umarjamil0007@gmail.com
![]()


