
Last Updated on 23rd January 2025 by peppe8o
This tutorial will show you how to connect and use an IR Reflective Sensor with Raspberry PI Pico, also explaining the related MicroPython code.
Infra-Red reflective sensors usually give robotic projects the ability to detect if an obstacle is near your robot and help avoid collision damages or to walk along a line with different reflective properties compared to the border. IR reflective sensors and Raspberry PI Pico work together with MicroPython with a very few code line
How IR Reflective Sensors work
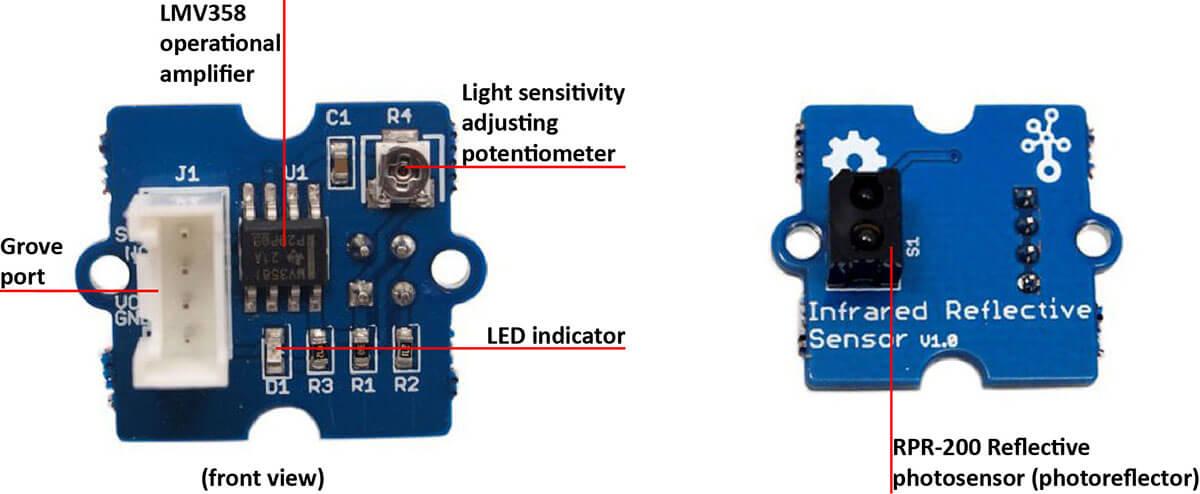
The IR reflective sensor works on transmitting infrared light and continuously measuring the light returned back, in order to be aware if there is a reflective material near the sensor. So, it is composed mainly of an IR emitter and a receiver. It may include an on-board led, visually showing a proximity warning, and a light sensitivity potentiometer:
It usually can work with a 5V and 3.3V power supply from the connected microcontroller. In my installation, I use the 3.3 output PIN from my Rasberry PI Pico, which grants that the returning signal can’t be higher that this voltage. If you are going to use a 5V power supply, then you should protect your Raspberry PI Pico input PIN with a voltage divider, to make the returning signal to Raspberry PI Pico compatible with its max input.
What is the IR sensor used for?
Even if it has a very short detection range (the mine one, based on the RPR-220 sensor, works on a 4-16mm range), it has more applications than you can imagine. It can be used with robotics for obstacle presence detection, as well as with line-following robots, optical encoders, object counting devices, and so on.
Compared to ultrasonic sensors, the IR reflective sensor can assure a lower distance, but it has a theoretically faster response, better precision (as the IR works on a really narrow angle), and fewer problems with sound-absorbing materials.
IR Reflective Sensor Pinout
It usually has 3 main PINs:
| PIN | Description |
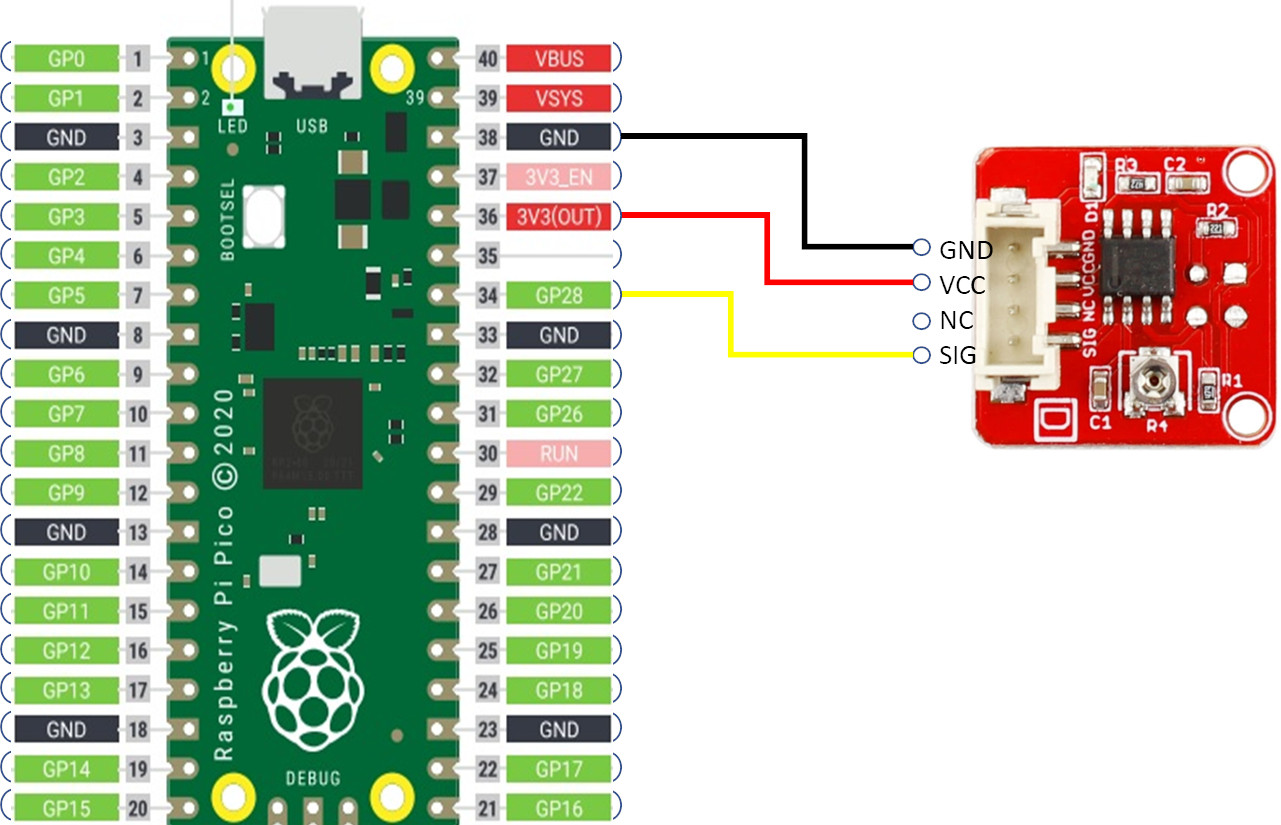
| GND | takes the ground reference |
| VCC | Used to give the power supply to the sensor |
| NC | Not used (if present) |
| SIG | Returning the detection result (0-> detected, 1-> not detected) |
Please note that the IR reflective sensor works with an inverse logic: getting a 0 (low) from the SIG PIN means that the sensor detected something, while the 1 (high) means that nothing has been detected.
What We Need
As usual, I suggest adding from now to your favourite e-commerce shopping cart all the needed hardware, so that at the end you will be able to evaluate overall costs and decide if to continue with the project or remove them from the shopping cart. So, hardware will be only:
- A common computer (maybe with Windows, Linux or Mac). It can also be a Raspberry PI Computer board
- Raspberry PI Pico microcontroller (with a common micro USB cable)
- IR reflective sensor (mine one is from crowtail)
- resistors
- breadboard
- dupont wirings
I’ve got my IR reflective sensor in my CrowPI2 bundle.
Check hardware prices with the following links:


Step-by-Step Procedure
Prepare the IR Reflective Sensor and Raspberry PI Pico Wiring
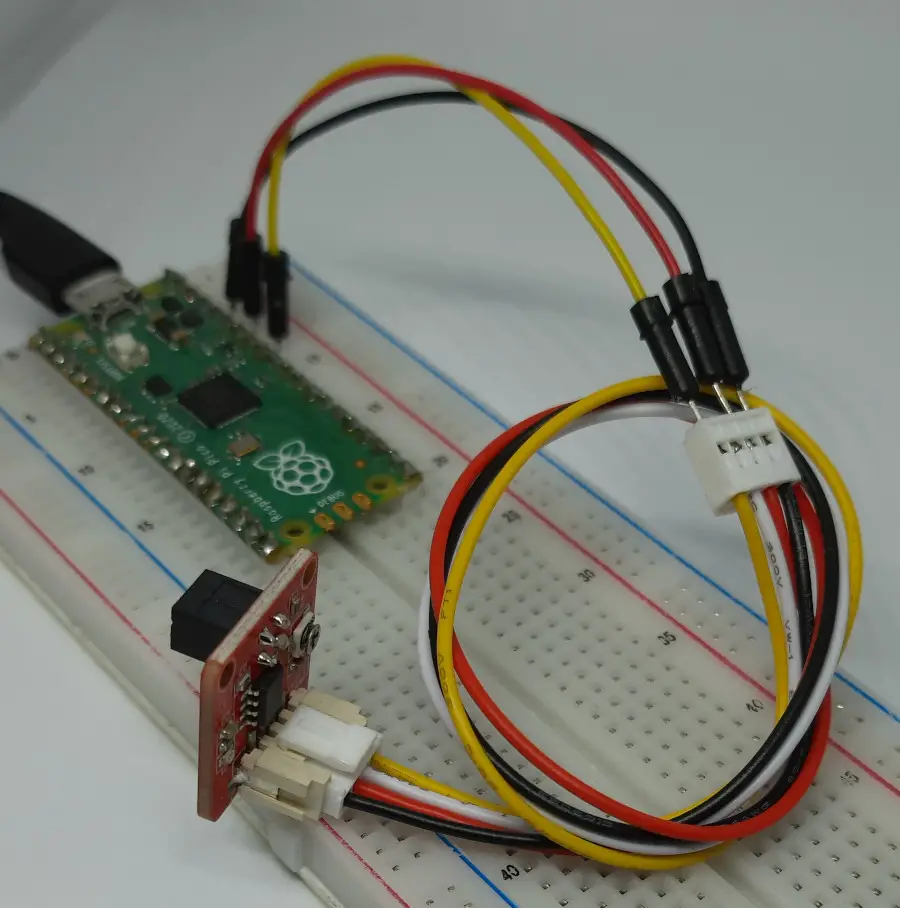
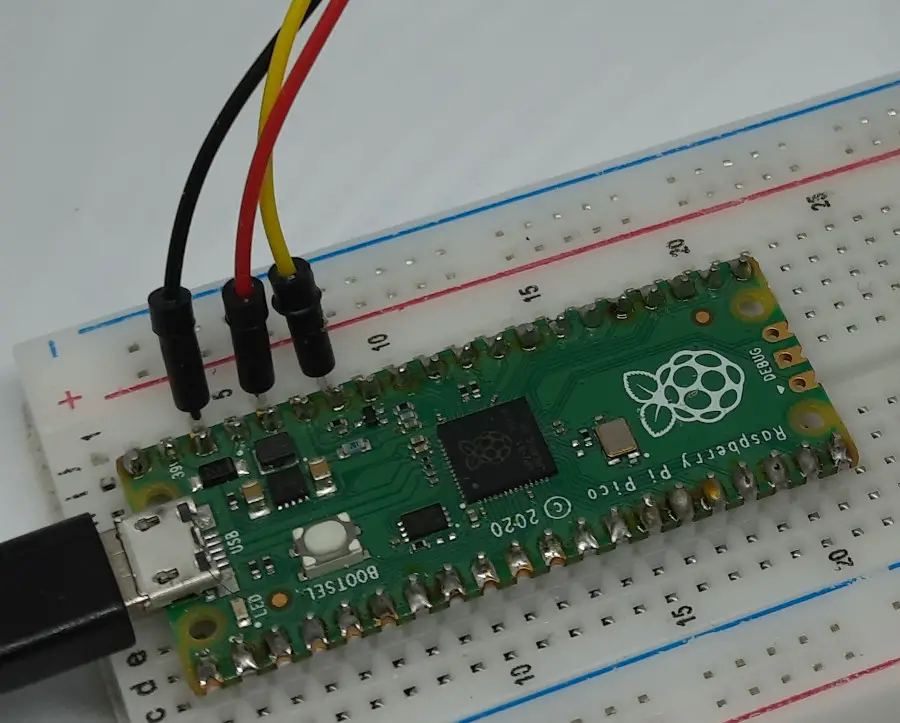
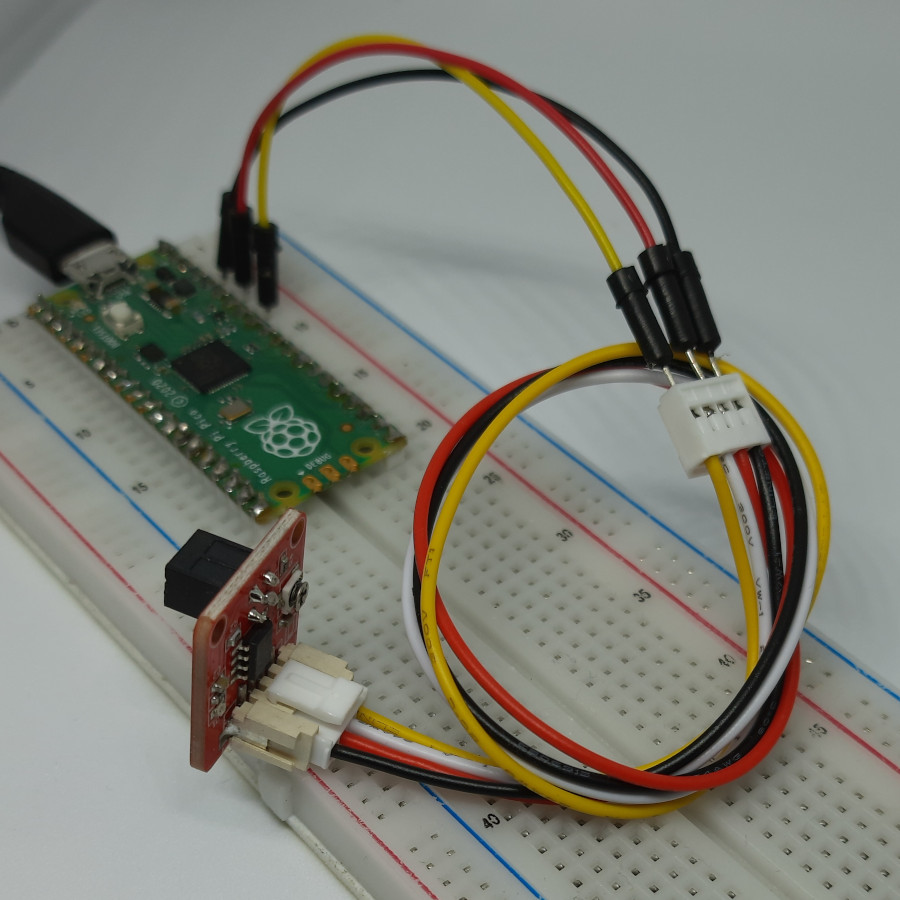
Please arrange the wiring as in the following picture, according to Raspberry PI Pico pinout:
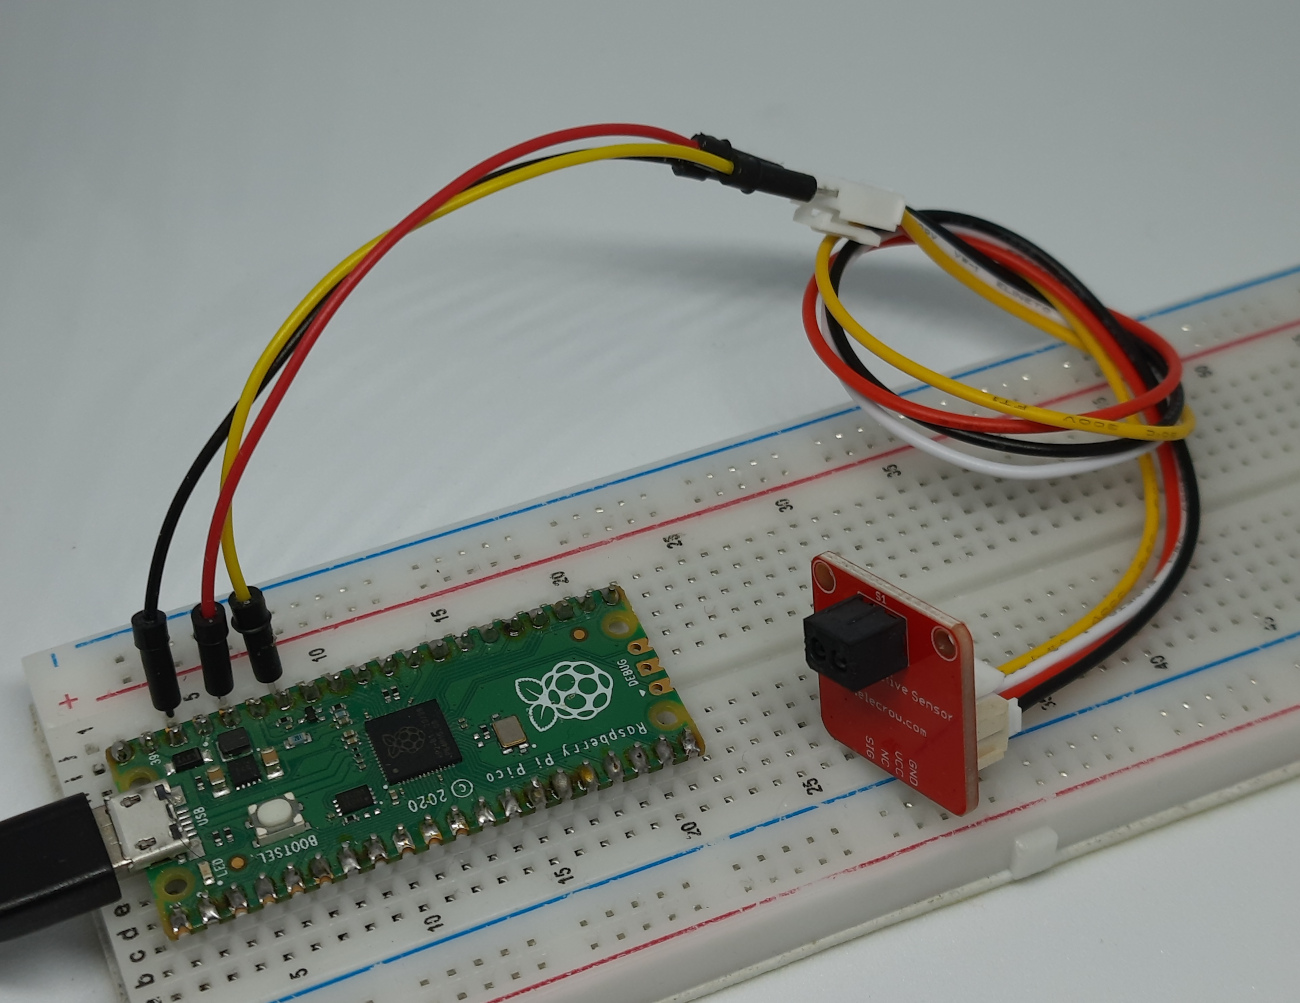
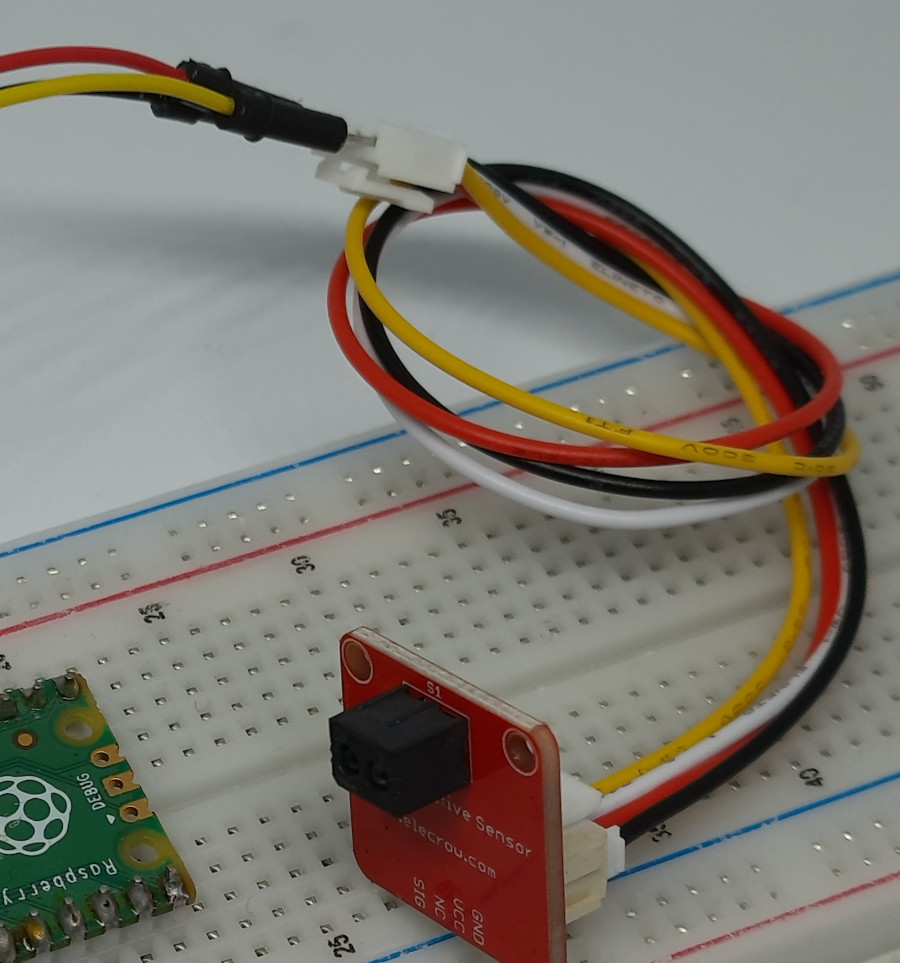
Please find below some pictures from my lab. Consider that I’m using a shielded sensor, that brings its own connector, but the wiring should be the same as your one, putting attention to PINs labels:
Get the rpr220-pico.py MicroPython Code
Connect RPI Pico to Thonny (you can refer to my tutorial about the First steps with Raspberry PI Pico).
Please download the code from the following link and save it to your Raspberry PI Pico storage:
The following lines will explain the code, that’s really simple as the IR Reflective Sensor has all the logic to return a 0 or 1, based on IR reflection detection.
At the start we import the required modules:
from machine import Pin
from utime import sleep
The following line initializes the Raspberry PI Pico Pin connected to SIG in order to read at the measured values:
ir=Pin(28,Pin.IN)Then, the main loop begins. Please remember that the IR Reflective Sensor returns a “0” (low) if an obstacle is detected. The “not()” function allow us to invert the logic so that this case will give an “obstacle=1” when something is detected. The opposite case happens when nothing is detected (sensor returning “1” -> obstacle = 0).
while True:
    try:
        obstacle=not(ir.value())
The following “IF” statement just checks the returned value from the obstacle variable and prints “Obstacle detected!” if the IR sensor detects an IR reflection, while prints “Nothing present” on the other case. Of course, you can change the print() statements with your action to take on IR reflection detection.
        if obstacle:
            print("Obstacle detected!")
        else:
            print("Nothing present")
A sleep() line of 0,5 seconds will keep the program waiting half a second between two different readings so that you can read the result from your MicroPython shell:
sleep(0.5)The final except statement will handle program errors by simply restarting the Raspberry PI Pico:
    except OSError as e:
        machine.reset()
Test the Raspberry PI Pico with IR Reflective Sensor
Now, you can run the script. From your Thonny, please execute it by pressing the F5 key (or the Run button). Move the IR Reflective sensor near and away from an obstacle and the shell will print if a reflection is detected. Please consider, as said at the beginning, that te IR Reflective sensor works and very low distances (mine one between 4 and 16 millimeters):
MicroPython v1.17-145-g86125de2e-dirty on 2021-12-20; Raspberry Pi Pico with RP2040

Type "help()" for more information.
>>> %Run -c $EDITOR_CONTENT
Nothing present
Nothing present
Nothing present
Nothing present
Nothing present
Obstacle detected!
Obstacle detected!
Obstacle detected!
What’s Next
Interested to do more with your Raspberry PI Pico? Try to look at my Raspberry PI Pico tutorials for useful and funny projects!
Enjoy!

Open source and Raspberry PI lover, writes tutorials for beginners since 2019. He's an ICT expert, with a strong experience in supporting medium to big companies and public administrations to manage their ICT infrastructures. He's supporting the Italian public administration in digital transformation projects.
![]()
![]()
![]()
![]()
![]()
![]()
![]()


