
Last Updated on 17th September 2023 by peppe8o
This tutorial will show you how to install and use Hashcat with Raspberry PI computer boards.
Keeping our data safe with passwords sometimes makes us pretty sure that no one will access our data. But there are passwords and passwords. In the sense that some “commonly used” passwords with a limited combination and length can be cracked within a very short time, while adding a few random chars can make your data a bit safer.
How Password Protection Works
All the main services use passwords to make user data secure. They usually don’t store the password with plain text for security reasons, but they create an encrypted string of your password by hashing it with specified encryption algorithms. For example, if you use a password like “123456” and store it with a SHA-512 algorithm, you will get something like the following result:
ba3253876aed6bc22d4a6ff53d8406c6ad864195ed144ab5c87621b6c233b548baeae6956df346ec8c17f5ea10f35ee3cbc514797ed7ddd3145464e2a0bab413So, the services will store this string, which appears random, instead of your “123456” password.
When you login into the service, you will prompt your “123456” password and they will check if the hashing of your input matches the saved string. If so, they will grant access to your data.
The problem is that if a malicious hacker wants to grab your encrypted password or perform an attack to the service, your data will be as safe as the more complex the password is.
What is Hashcat
Hashcat is an advanced password recovery tool, running from a command line.
With Hashcat, you can check if your password is enough secure to reject the most common password attacks, so that you can give more time to the service owners to detect the attack and put in place the related security actions that could save your data.
Another use case of Hashcat is to recover passwords. Sometimes, especially in self-hosted services, you may forget your own password and not have a recovery tool. If you have the password hash, you can use Hashcat to recover it.
It can perform very fast tests on a given encrypted password, giving back the original string in plain text. In this case, you can check if your password is enough safe.
Hashcat on Raspberry PI will make extensive usage of resources, so I suggest using it with a cooling system or checking the Raspberry PI CPU temperature, while Hashcat runs, with a second terminal session and the command:
watch cat /sys/class/thermal/thermal_zone0/tempHow We’ll Perform the Hashcat Tests with Raspberry PI
Raspberry PI computer boards already include, in their Raspberry PI OS packages, OpenSSL. We’ll use it to simulate a (SHA-512) password encryption and we’ll look at the required time to decrypt it.
Hashcat supports a large list of encryption modes, you can find the complete list at https://hashcat.net/wiki/doku.php?id=example_hashes.
What We’ll Need
As usual, I suggest adding from now to your favourite e-commerce shopping cart all the needed hardware, so that at the end you will be able to evaluate overall costs and decide if to continue with the project or remove them from the shopping cart. So, hardware will be only:
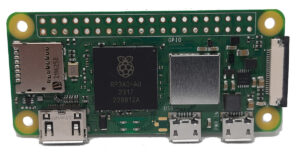
- Raspberry PI Zero 2 W (including proper power supply or using a smartphone micro USB charger with at least 3A) or newer Raspberry PI Computer Board
- high speed micro SD card (at least 16 GB, at least class 10)
For this tutorial, I’m going to use a Raspberry PI Zero 2 W, which has really limited computing capabilities. This will show you how can be easy to crack some passwords even with a 20$ computer board.
Step-by-Step Procedure
Prepare the Raspberry PI Operating System
Please start installing the Raspberry PI OS. Here, you can opt for one of the 2 main options (with the links for installation instructions):
- Raspberry PI OS Lite: This is a lightweight OS for Raspberry PI computer boards, without a Desktop environment (headless)
- Raspberry PI OS Desktop: This is a less-performing OS (compared to the lite version), but it runs really well on Raspberry PI computer boards
You can check the difference between the 2 operating systems with my Raspberry PI OS Lite vs Desktop: comparison between the 2 distributions article.
After installing the OS, please make it up-to-date. From the Raspberry PI SSH session (or terminal):
sudo apt update -y && sudo apt upgrade -yInstall Hashcat on Raspberry PI
With the Aptitude package manager, it’s really simple to install Hashcat in our computer board, even if the apt doesn’t have the very latest version. You can perform it with the following terminal command:
sudo apt install hashcat -yImproving Hashcat Performances: get a WordList
Hashcat is capable of simulating direct attacks to the encrypted string even starting from nothing. But you can help its job by using a dictionary of common passwords used on the web. So, Hashcat will test this dictionary on your encrypted password instead of wasting time and resources with every possible character and password length.
A great (free) resource to get the most common passwords is “Weakpass“. On this website, everyone (even those with malicious intents) can get dictionaries starting from thousands of words up to bigger dictionaries of billions of keywords. The more complex the dictionary, the more space it will be required in your Raspberry PI to store it and the more time your Raspberry PI with Hashcat will take to try all the words.
For our tests, I will use the “ignis-10M” dictionary, which includes 10 million words to test. It has a manageable size (32MB compressed, 90 MB uncompressed). Once identified the word package on the Weakpass page, you can copy the download link with a right click of your mouse:
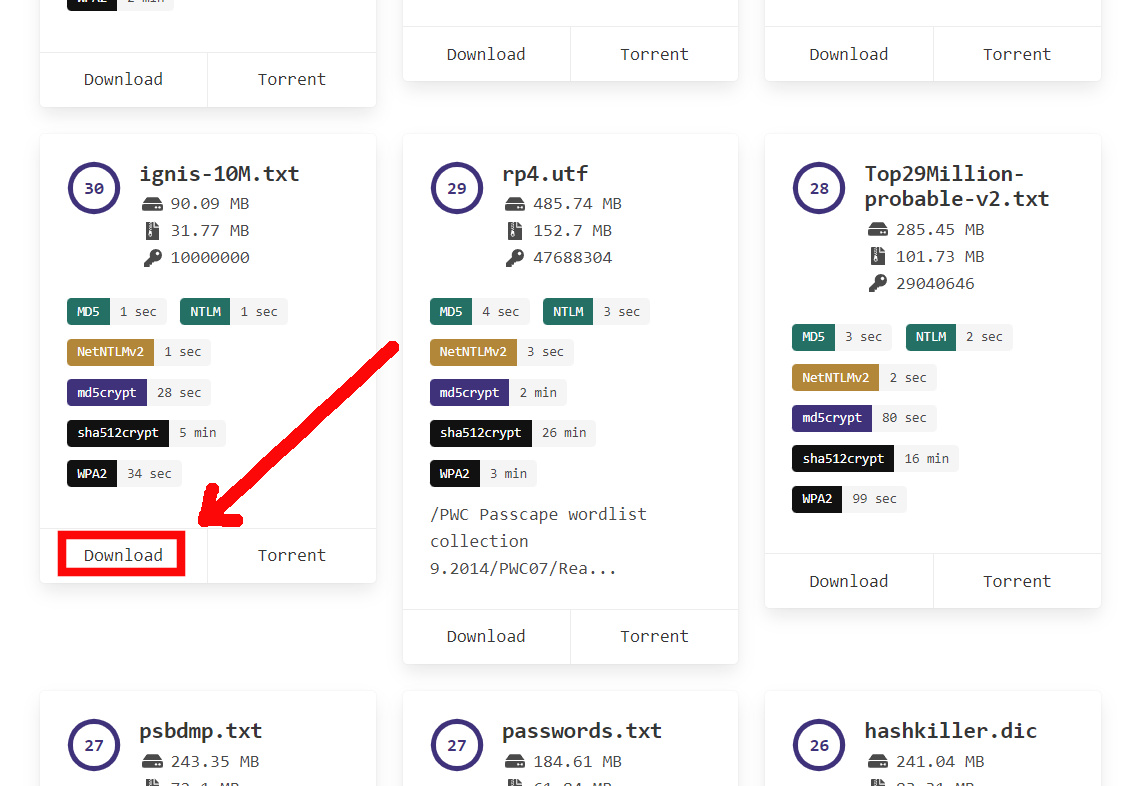
And paste the copied link directly inside your Raspberry PI terminal with the wget command:
wget https://download.weakpass.com/wordlists/1935/ignis-10M.txt.7zIt will download a compressed (7z) file in your Raspberry PI storage, but you can un-compress it with the following command:
7z x ignis-10M.txt.7zCreate your Hashed Password
We can simulate the encrypted string creation (with “SHA512” encryption mode) by providing our test password (“123456” for this test) to the following terminal command:
echo -n "123456" | openssl dgst -sha512 | awk '{print $2}' > hashed.txtIt will create (if doesn’t exist) a text file named “hashed.txt”, including the hashing of our test password. You can see the result with the following cat command (and the result):
pi@raspberrypi:~ $ cat hashed.txt
ba3253876aed6bc22d4a6ff53d8406c6ad864195ed144ab5c87621b6c233b548baeae6956df346ec8c17f5ea10f35ee3cbc514797ed7ddd3145464e2a0bab413
Running the Hashcat “attack”
In order to run the Hashcat tool on this encrypted password, we’ll use some specific options:
- -m 1700: this identifies the hash mode. According to https://hashcat.net/wiki/doku.php?id=example_hashes, 1700 means a SHA2-512 mode
- -a 0: this identifies the attack mode. 0 (zero) means a dictionary attack, so Hashcat will expect a wordlist file at the end of the command (the “ignis-10M.txt”)
- -r /usr/share/hashcat/rules/combinator.rule: it creates new additional variants to our dictionary, by using (for example) upper case instead of lower case, appending numbers, and so on
So, our Hashcat command will be like the following:
hashcat -m 1700 -a 0 -r /usr/share/hashcat/rules/combinator.rule hashed.txt ignis-10M.txtHashcat will initialize its modules and will start trying to identify the password. If found, it will return the hashed string near the plain password, as you can see from the following output of my terminal.
If your Raspberry PI becomes really hot, you can also append to the Hashcat command the cpu-affinity option, in order to limit the workload to the specified Cores. For example, to limit the Hashcat execution to the Cores 0 and 1, you can use the following command:
hashcat -m 1700 -a 0 -r /usr/share/hashcat/rules/combinator.rule hashed.txt ignis-10M.txt --cpu-affinity=1,2The process will take more time, but your CPU will be less hot, as you can monitor in a second terminal session with the command:
watch cat /sys/class/thermal/thermal_zone0/tempHashcat will give you the result of the attack (“Cracked” in this case) and the time of the start and end, besides other info.
ba3253876aed6bc22d4a6ff53d8406c6ad864195ed144ab5c87621b6c233b548baeae6956df346ec8c17f5ea10f35ee3cbc514797ed7ddd3145464e2a0bab413:123456

Session..........: hashcat
Status...........: Cracked
Hash.Name........: SHA2-512
Hash.Target......: ba3253876aed6bc22d4a6ff53d8406c6ad864195ed144ab5c87...bab413
Time.Started.....: Sat Sep 16 12:05:24 2023 (2 secs)
Time.Estimated...: Sat Sep 16 12:05:26 2023 (0 secs)
Guess.Base.......: File (ignis-10M.txt)
Guess.Mod........: Rules (/usr/share/hashcat/rules/combinator.rule)
Guess.Queue......: 1/1 (100.00%)
Speed.#1.........:   618.9 kH/s (10.57ms) @ Accel:128 Loops:40 Thr:1 Vec:2
Recovered........: 1/1 (100.00%) Digests
Progress.........: 20480/400000000 (0.01%)
Rejected.........: 0/20480 (0.00%)
Restore.Point....: 0/10000000 (0.00%)
Restore.Sub.#1...: Salt:0 Amplifier:0-40 Iteration:0-40
Candidates.#1....: 123456 -> murphy

Started: Fri Sep 15 17:15:55 2023
Stopped: Fri Sep 15 17:16:16 2023
Moreover, you can also pass multiple lines in your hashed.txt file in order to perform a single test with several passwords. In this case, you can perform the simulation by appending the password generation to the hashed.txt file with the double “greater sign” (“>>”) as highlighted in the following:
echo -n "password_1" | openssl dgst -sha512 | awk '{print $2}' > hashed.txt
echo -n "password_2" | openssl dgst -sha512 | awk '{print $2}' >> hashed.txt
echo -n "password_3" | openssl dgst -sha512 | awk '{print $2}' >> hashed.txt
In this case, you can’t get statistics about the password strength from the End-Start Time, as these count the overall attack process times.
Testing Password Strenght
Finally, let’s look at how much time it requires to crack some common passwords. You can perform these tests in your Raspberry PI in order to see how much time it takes with different passwords.
Remember that I’m performing the following tests with a Raspberry PI Zero 2 W, which is a really “poor” board. I bet that the results will surprise you.
Please note that once a password has been recovered, Hashcat saves it to the “.hashcat/hashcat.potfile” and reuses it for future tests.
The “123456” Password
One of the oldest passwords. Let’s look at how much time it can resist.
We have already generated the hashed.txt file with the command:
echo -n "123456" | openssl dgst -sha512 | awk '{print $2}' > hashed.txtSo, let’s run the Hashcat attack:
hashcat -m 1700 -a 0 -r /usr/share/hashcat/rules/combinator.rule hashed.txt ignis-10M.txtWhen the password has been cracked, it will show it in plain text near the hashed string:
...
ba3253876aed6bc22d4a6ff53d8406c6ad864195ed144ab5c87621b6c233b548baeae6956df346ec8c17f5ea10f35ee3cbc514797ed7ddd3145464e2a0bab413:123456


Session..........: hashcat
Status...........: Cracked
...
It will return the start time as well as the end time:
Started: Fri Sep 15 17:15:55 2023
Stopped: Fri Sep 15 17:16:16 2023
It’s just 20 seconds to crack the “123456” password! And with a Raspberry PI! Crazy.
The Hashcat historical results can be also found in its potfile, available with the cat command:
pi@raspberrypi:~ $ cat .hashcat/hashcat.potfile
ba3253876aed6bc22d4a6ff53d8406c6ad864195ed144ab5c87621b6c233b548baeae6956df346ec8c17f5ea10f35ee3cbc514797ed7ddd3145464e2a0bab413:123456
Let’s continue with more tests.
The “password” Password
It’s crazy, but you can’t imagine how many people are still using “password” as a password. Let’s look at how it performs. We can create the new encrypted string:
echo -n "password" | openssl dgst -sha512 | awk '{print $2}' > hashed.txtAnd use the same Hashcat command:
hashcat -m 1700 -a 0 -r /usr/share/hashcat/rules/combinator.rule hashed.txt ignis-10M.txtGuess the result…
Started: Fri Sep 15 17:23:21 2023
Stopped: Fri Sep 15 17:23:36 2023
15 seconds. It takes more for Hashcat to initialize than Cracking this password…
The “Password123” password (combining upper case and numbers)
Let’s try combining upper case and numbers within an unsecured password word:
echo -n "Password123" | openssl dgst -sha512 | awk '{print $2}' > hashed.txtRun the Hashcat:
hashcat -m 1700 -a 0 -r /usr/share/hashcat/rules/combinator.rule hashed.txt ignis-10M.txtYou will soon realize that having an insecure base doesn’t save your data:
Started: Fri Sep 15 17:35:15 2023
Stopped: Fri Sep 15 17:35:38 2023
Cracked in 13 seconds.
The “P455w0rd” password (changing letters with numbers)
A common myth is that changing letters with numbers having a similar “shape” would make our password more safe. So, people try changing the “A” letters with the number 4, “S” letters with the number 5, “O” letters with the number 0 (zero), and so on. It’s time to test this myth:
echo -n "P455w0rd" | openssl dgst -sha512 | awk '{print $2}' > hashed.txtRun the Hashcat attack:
hashcat -m 1700 -a 0 -r /usr/share/hashcat/rules/combinator.rule hashed.txt ignis-10M.txtAnd this myth is soon debunked:
Started: Fri Sep 15 17:38:15 2023
Stopped: Fri Sep 15 17:38:29 2023
Cracked in 14 seconds.
Random Password
Using Random passwords is always the better choice, and this test will show it. Linux terminal can generate random strings with your preferred length with the following command, where the “fold -w 12” sets the length to 12 characters:
cat /dev/urandom | tr -dc 'a-zA-Z0-9' | fold -w 12 | head -n 1The following is the result:
pi@raspberrypi:~ $ cat /dev/urandom | tr -dc 'a-zA-Z0-9' | fold -w 12 | head -n 1
PFLgYeYHrEXH
Let’s encrypt it:
echo -n "PFLgYeYHrEXH" | openssl dgst -sha512 | awk '{print $2}' > hashed.txtAnd test this password with the Hashcat command already shown. The result will show you that the selected password has resisted the attack with our (limited) wordlist:
...
Guess.Queue......: 1/1 (100.00%)
Speed.#1.........:  1685.4 kH/s (10.48ms) @ Accel:128 Loops:40 Thr:1 Vec:2
Recovered........: 0/1 (0.00%) Digests
Progress.........: 400000000/400000000 (100.00%)
Rejected.........: 0/400000000 (0.00%)
...
Not cracked (with this dictionary).
While the potfile doesn’t include the last test:
pi@raspberrypi:~ $ cat .hashcat/hashcat.potfile

ba3253876aed6bc22d4a6ff53d8406c6ad864195ed144ab5c87621b6c233b548baeae6956df346ec8c17f5ea10f35ee3cbc514797ed7ddd3145464e2a0bab413:123456
b109f3bbbc244eb82441917ed06d618b9008dd09b3befd1b5e07394c706a8bb980b1d7785e5976ec049b46df5f1326af5a2ea6d103fd07c95385ffab0cacbc86:password
804f50ddbaab7f28c933a95c162d019acbf96afde56dba10e4c7dfcfe453dec4bacf5e78b1ddbdc1695a793bcb5d7d409425db4cc3370e71c4965e4ef992e8c4:Password123
0a9b3f20d3d588b98616f5792d957709f62a5ddd2662436e46c752a5000db6877c8c58997bd0cadc3c8f14827510cab5df92170a8ceda6ecb8275fa6b5d8f375:P455w0rd
Please consider, in this case, that using a more complex dictionary could discover other common words.
Hashcat Docs
You can find more info about Hashcat options and advanced usage in its Hashcat wiki.
Next Steps
Interested in more projects with your RPI? Try to look at my Raspberry PI computer tutorial pages.
Enjoy!

Open source and Raspberry PI lover, writes tutorials for beginners since 2019. He's an ICT expert, with a strong experience in supporting medium to big companies and public administrations to manage their ICT infrastructures. He's supporting the Italian public administration in digital transformation projects.
![]()
![]()
![]()
![]()
![]()
![]()
![]()


