Last Updated on 28th August 2025 by peppe8o
In this tutorial, I will show you how to install Raspberry PI OS Lite edition, the official Raspberry PI Foundation free Operating System without a graphical user interface.
What is Raspberry PI OS Lite
Raspberry Pi OS Lite is a lightweight operating system designed for use on the Raspberry Pi single-board computer. It is a minimalist version of the full Raspberry Pi OS, optimized for users who want an operating system that doesn’t come pre-installed with a lot of unnecessary software.
It is ideal for projects that require a low-overhead operating system that can be customized to suit the user’s needs. With Raspberry Pi OS Lite, users have full control over their system and can add only the software packages they need, making it a popular choice for hobbyists, makers, and developers.
The OS is based on the Debian operating system and includes a range of powerful tools and utilities that make it easy to configure and manage the Raspberry Pi device.
Overall, Raspberry Pi OS Lite is a versatile, flexible, and lightweight operating system that provides a solid foundation for a wide range of Raspberry Pi projects.
More about Raspberry PI OS
The Raspberry PI Foundation released 3 different OS versions (you can also compare them in Raspberry PI OS Desktop vs Lite article). All of them are based on the same Linux distribution (Debian).
Sometimes, Raspberry PI kits come with NOOBS pre-installed inside an SD card, but you can also choose to install directly a minimal core and use it from your external PC by SSH with only a command line.
In February 2022, Raspberry PI Foundation finally released its official 64-bit OS release. So, from this date, you can choose between the common 32-bit distribution and the new 64-bit one. Please note that you are forced to use a 32-bit image if you have Raspberry PI 1, Raspberry PI 2 and Raspberry PI Zero computer boards. This is because their CPU relies on armhf architecture and it doesn’t support the 64-bit instruction set. Newer Raspberry PI computer boards (including Raspberry PI Zero 2) can use both the 32 and 64 bit images.
With Raspberry PI Imager software, you don’t need to download the OS image to your PC. But if you need to download the image, you can get the 2 distributions with the following links:
Once get the distribution, the installation procedure will be the same in both cases.
If you are interested in Raspberry PI OS Desktop, please refer to install Raspberry PI OS Desktop guide, which will guide you to install a complete desktop computer.
What do you need
As usual, I suggest adding from now to your favourite e-commerce shopping cart all the needed hardware, so that at the end you will be able to evaluate overall costs and decide if to continue with the project or remove them from the shopping cart. So, hardware will be only:
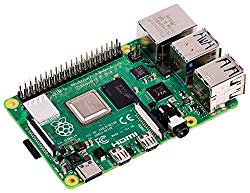
- a Raspberry PI computer board (no Raspberry PI Pico) including proper power supply or using a smartphone micro USB charger with at least 3A) or newer Raspberry PI Board
- high speed micro SD card (at least 16 GB, at least class 10)
I strongly suggest evaluating buying a case with cooling system (fan) if you are thinking of using your Raspberry PI for resource-intensive applications.
You also need a PC (notebook or desktop) with an SD card reader.
Step-by-step guide
There are two main methods for installing Raspberry PI OS Lite. The first one is with the official Raspberry PI Imager tool, and the second one is with USB flashing software.
Please note that, when preparing the USB from a MS Windows PC, I suggest running the installation software with administrative permissions in both cases.
Method 1: Install Raspberry PI OS Lite with Raspberry PI Imager
Take the RPI Imager installation software from the Raspberry Pi download page, install it according to your OS and run it. You will get the RPI Imager open:
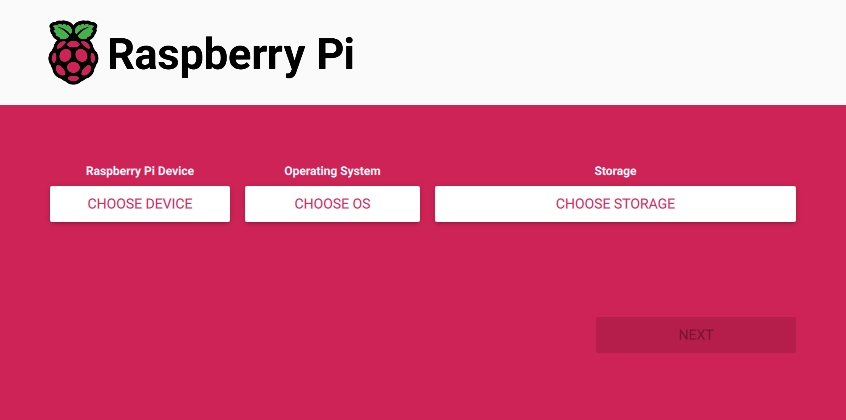
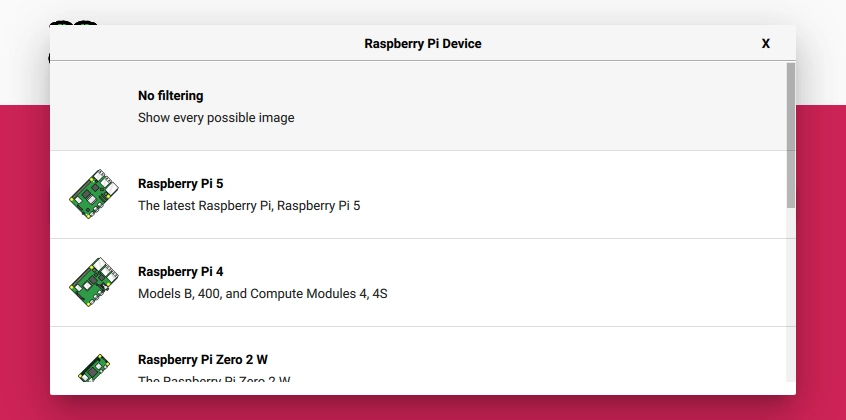
With the “Choose Device” button, you can choose to filter the OS list (from the following steps) depending on your Raspberry PI model. So, you can cheese here your device or leave with “No filtering” to try even different OS chooses:
With the “Choose OS” button, please enter the sub-menu “Raspberry PI OS (other)“:
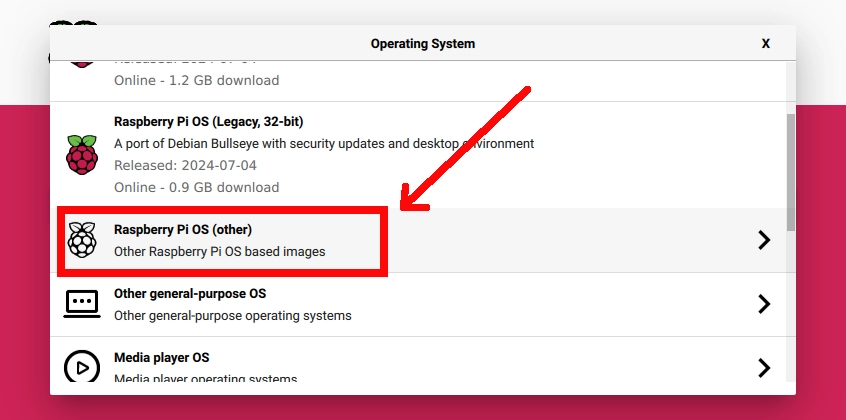
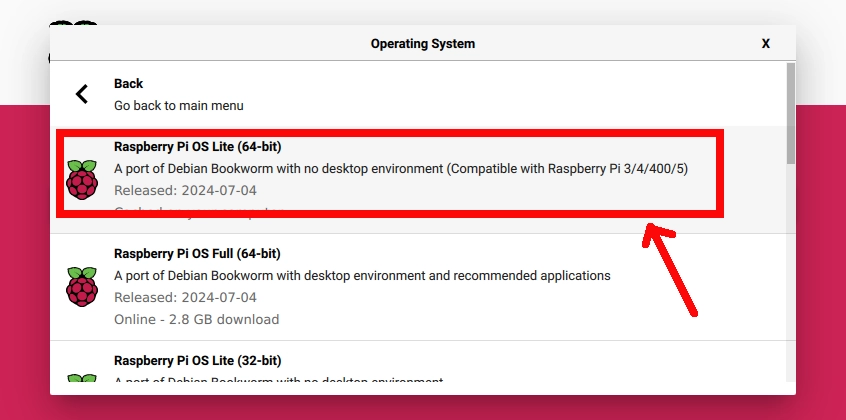
Then select “Raspberry PI OS Lite (64-bit)” (or “Raspberry PI OS Lite (32-bit)” if your model doesn’t support a 64-bit OS):
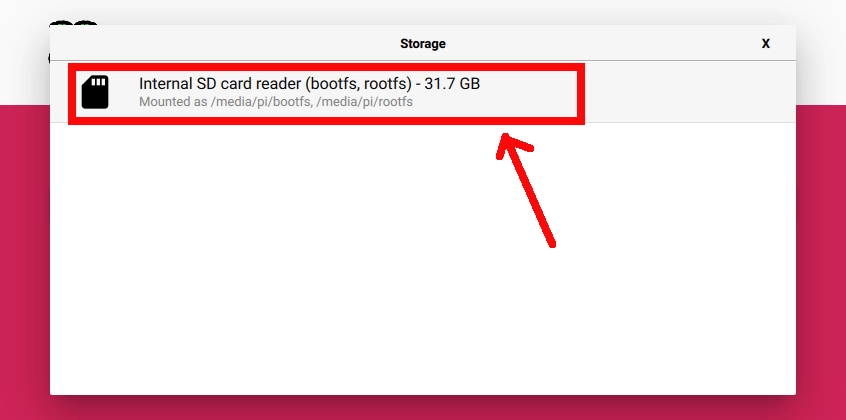
With the Micro SD storage plugged into the PC running the RPI Imager, you can now select your Micro SD from the “Choose Storage” options:
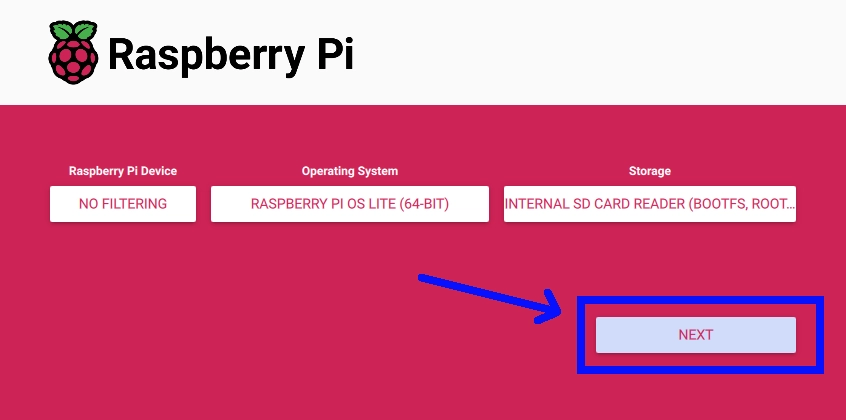
Please press the NEXT button from your Raspberry PI Imager.
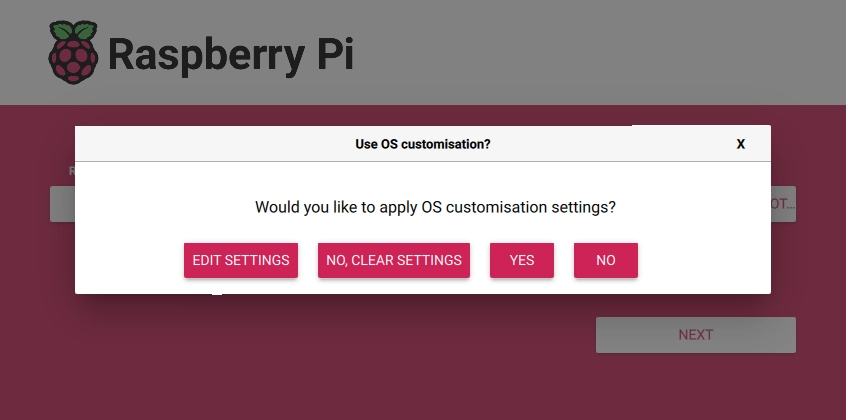
From Raspberry PI Imager 1.7.1, the Foundation added to its official flashing software the ability to pre-configure some settings to be ready from the very first boot. After pressing the NEXT button, you will be asked if you want to change the settings or, if this isn’t the first time you use the imager, if you want to clear them:
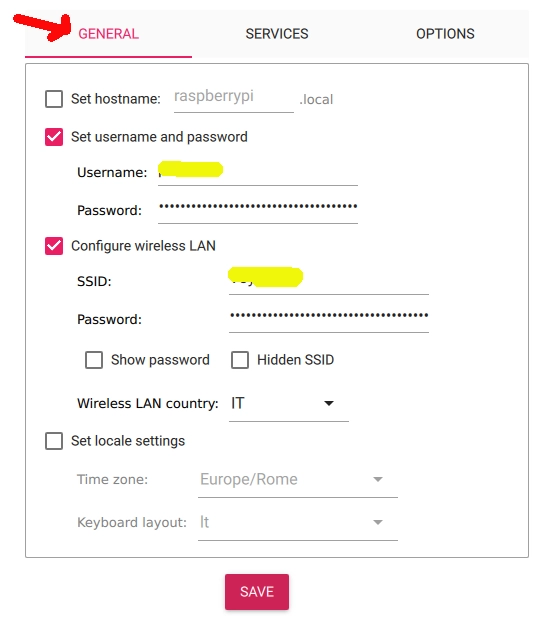
If you select “EDIT SETTINGS”, you will get the related menu in the “General” tab (see in the top part of the window for the tabs). Here you can change, for example, your default user and the WiFi settings:
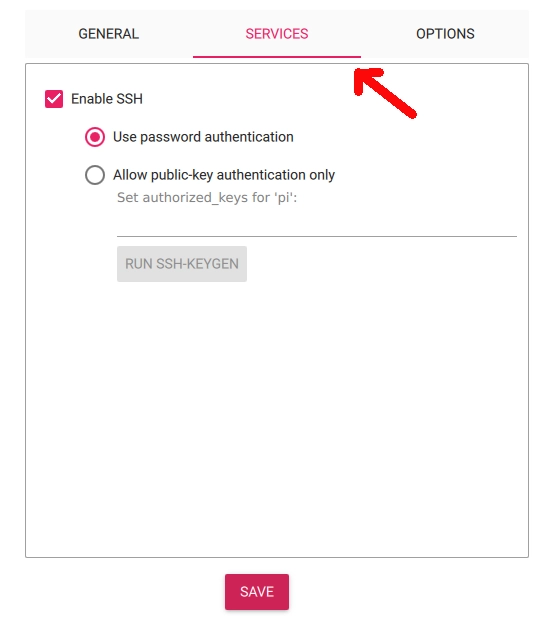
In the SERVICES tab you can enable the SSH service, so that you can connect your Raspberry PI from a remote SSh connection event at the first boot:
And, finally, you can also set a few more options:
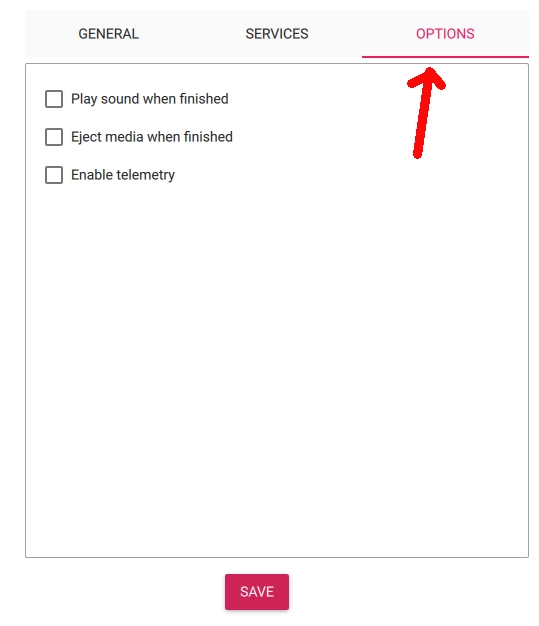
Set according to your preference and click Save.
You can start then start the image writing with the “YES” button. A popup will also warn you that writing the image will result in erasing all the data in your Micro SD. Once write (and verification) operations are completed, it will show a notification.
If you find any errors here, please try again to write the image and/or try changing the Micro SD storage.
Now you can unmount and extract the storage from your PC, then insert it in your Raspberry PI and power on it. From here you can go to the “Final Operations” chapter of this tutorial.
Method 2: Install Raspberry PI OS Lite with other Flashing Software
Download and install the flashing software on your PC. Moreover, please download the Raspberry PI OS Lite disk image (ZIP version) in a local folder. As mentioned above, you can get both the 64-bit and the 32-bit versions from the following links:
Insert your SD card into your PC/SD card reader and flash the image according to the software.
If you want to run a headless setup, you will probably wish to get the WiFi and SSH connection ready at the first boot. So, before using the OS and after having flashed the micro SD, let’s configure Wi-Fi and SSH connection directly modifying files inside the SD card.
Extract the SD card and re-insert it into your PC. From your file explorer you’ll see at least a new “boot” partition. We will create a connection configuration file inside this partition.
Open your notepad and paste the following lines:
ctrl_interface=DIR=/var/run/wpa_supplicant GROUP=netdev
update_config=1
country=«your_ISO-3166-1_two-letter_country_code»

network={
        scan_ssid=1
        ssid="«your_SSID»"
        psk="«your_PSK»"
        proto=RSN
        key_mgmt=WPA-PSK
        pairwise=CCMP
        auth_alg=OPEN
}
Replace «your_ISO-3166-1_two-letter_country_code» with your ISO Country Code (such as US for the United States), «your_SSID» with your wireless access point name and «your_PSK» with your Wi-Fi password.
Save this file under the boot partition, naming it “wpa_supplicant.conf”.
In addition, you can create a new file named “ssh” (without extension) under the boot partition also to enable SSH in our Raspberry. It is not important what is contained in this file: when the PI boots, it looks for the “ssh” file and, if this is found, SSH will be enabled and then the file will be deleted.
So, let’s open a new, empty Notepad window (in my case the notepad comes from Windows):

Go to: File -> Save as
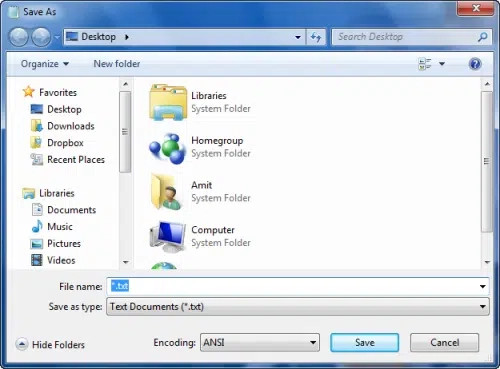
Select the boot partition from the SD card. Insert in “File name” field value “ssh” and click “Save”.
Be aware that Notepad sometimes saves files by adding “.txt” extension. So, control the saved file and be sure that its extension is NOT included.
In 2022, the Raspberry PI Foundation also removed the default “pi” user with the default password “raspberry”, because of security problems with having this user created by default. Instead of this, you can create your very first user by generating an encrypted password from an OpenSSL terminal command:
openssl passwd -6This command will ask you for the desired password and for confirmation. It will produce as output a character string that is your encrypted password. Put it in a file named “userconf.txt”, containing only the username you choose (plain text) and the encrypted password, divided by column:
my_user:my_enctypted_passwordClose and save the file in the boot partition of your Raspberry PI micro SD card.
So, in the end, the files that you must save in the boot partition to get your Raspberry PI OS Lite working with a headless (without monitor/keyboard) setup will be:
wpa_supplicant.conf
ssh
userconf.txt
Extract the SD card from your SD reader and insert it into your Raspberry PI.
Updating Raspberry PI OS Lite
Power the Raspberry PI on and wait a few minutes for the first boot. The boot operations can take some minutes if you use a large micro SD card. This is because one of the first actions it makes is expanding the filesystem to the whole storage.
Check the Raspberry PI’s IP address in your router or as described in my How to find Raspberry PI’s IP tutorial. Then, connect to it from Putty (or whatever connection program you are using for SSH). Please remember, if required, that the default SSH port is 22.
Use your Username / Password to login.
At the first boot is always important to update the OS to get all the latest packages. From the command line, please use the following command:
sudo apt update -y && sudo apt upgrade -yThe “&&” symbol links two different commands in one line so that the upgrade operations will automatically follow the update ones.
Change Timezone in Raspberry PI OS Lite
After installing your Raspberry PI OS, one of the main actions is configuring the timezone to show the correct time in your system. This chapter applies to both Raspberry PI OS Lite and Raspberry PI OS Desktop.
Raspberry PI OS, like Debian, includes timezone files in the /usr/share/zoneinfo directory tree, which is provided by the tzdata package.
Looking at this directory you will find all of them:
pi@raspberrypi:~ $ ls -la /usr/share/zoneinfo
total 304
drwxr-xr-x  20 root root   4096 Jul  4 02:04 .
drwxr-xr-x 106 root root   4096 Oct 20 15:01 ..
drwxr-xr-x   2 root root   4096 Jul  4 02:04 Africa
drwxr-xr-x   6 root root   4096 Jul  4 02:04 America
drwxr-xr-x   2 root root   4096 Jul  4 02:04 Antarctica
drwxr-xr-x   2 root root   4096 Jul  4 02:04 Arctic
drwxr-xr-x   2 root root   4096 Jul  4 02:04 Asia
drwxr-xr-x   2 root root   4096 Jul  4 02:04 Atlantic
drwxr-xr-x   2 root root   4096 Jul  4 02:04 Australia
drwxr-xr-x   2 root root   4096 Jul  4 02:04 Brazil
drwxr-xr-x   2 root root   4096 Jul  4 02:04 Canada
-rw-r--r--   1 root root   2094 Feb  3  2024 CET
drwxr-xr-x   2 root root   4096 Jul  4 02:04 Chile
-rw-r--r--   1 root root   2310 Feb  3  2024 CST6CDT
lrwxrwxrwx   1 root root     14 Feb  3  2024 Cuba -> America/Havana
-rw-r--r--   1 root root   1908 Feb  3  2024 EET
lrwxrwxrwx   1 root root     12 Feb  3  2024 Egypt -> Africa/Cairo
lrwxrwxrwx   1 root root     13 Feb  3  2024 Eire -> Europe/Dublin
-rw-r--r--   1 root root    114 Feb  3  2024 EST
-rw-r--r--   1 root root   2310 Feb  3  2024 EST5EDT
drwxr-xr-x   2 root root   4096 Jul  4 02:04 Etc
drwxr-xr-x   2 root root   4096 Jul  4 02:04 Europe
...
To check current local time, please you can verify what timezone file is pointed by /etc/localtime link:
pi@raspberrypi:~ $ ls -l /etc/localtime
lrwxrwxrwx 1 root root 33 Oct 20 14:12 /etc/localtime -> /usr/share/zoneinfo/Europe/London
To change local time, you can use the convenient tzdata. From the terminal, type command:
sudo dpkg-reconfigure tzdataThis command will enable the tzdata configuration wizard. On the first screen, you can choose the geographic area:
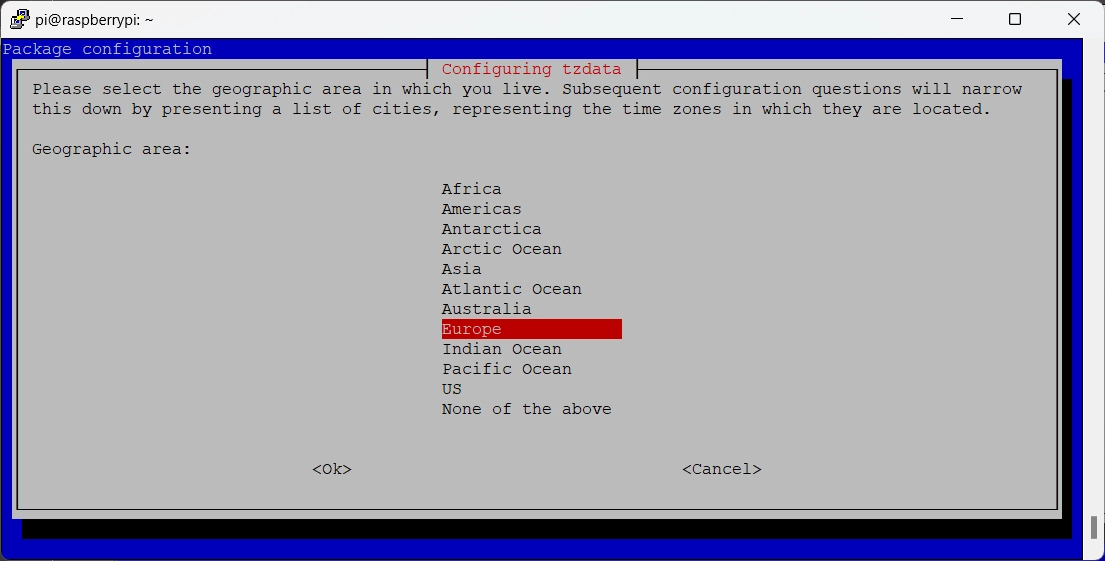
After selecting the region, and pressing ENTER, you will get the list of the supported zones, associated with the cities:
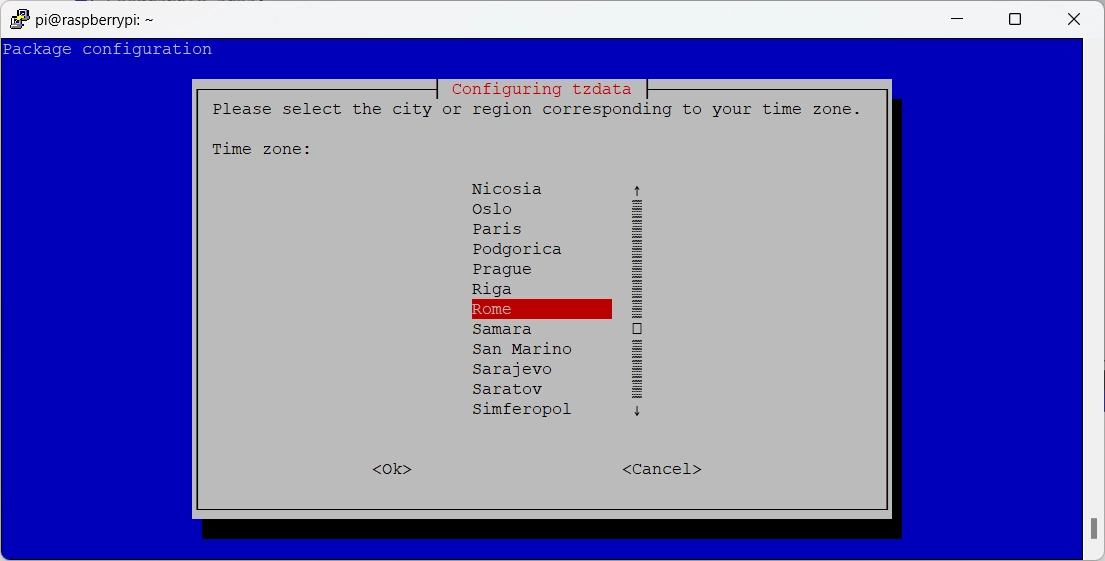
Please select your time zone (Rome in my case) and press ENTER. Wizard will exit and your new config will be confirmed in the following terminal message:
Current default time zone: 'Europe/Rome'
Local time is now:      Sun Oct 20 15:15:35 CEST 2024.
Universal Time is now:  Sun Oct 20 13:15:35 UTC 2024.
The new configuration will be also confirmed from /etc/localtime link:
pi@raspberrypi:~ $ ls -l /etc/localtime
lrwxrwxrwx 1 root root 31 Oct 20 15:15 /etc/localtime -> /usr/share/zoneinfo/Europe/Rome
The same wizard can also be found with raspi-config (run with sudo) -> Localisation Options -> L2 Timezone.
Assign Static IP and Manage Networking
Many projects involving desktop-less installations require making it available always with the same IP address. This condition can be achieved by managing networking in Raspberry PI OS Lite settings from the terminal console.
Default Behavior
Raspberry PI uses the dhcpcd daemon to configure TCP/IP across all of its network interfaces. This includes assigning each interface an IP address, setting netmasks, and configuring DNS resolution nameservers.
By default, Raspberry Pi OS attempts to automatically configure all network interfaces by DHCP, falling back to automatic private addresses in the range 169.254.0.0/16 if DHCP fails.
Previous versions of Raspberry Pi OS used the file /etc/network/interfaces for network interface configuration. If an interface is listed in this file, any settings there will take precedence over what is in /etc/dhcpcd.conf.
On Raspberry Pi OS versions with desktop environment installed, a GUI tool called “lxplug-network” is used to allow the user to make changes to the configuration of dhcpcd.
Raspberry PI OS usually lists 2 interfaces (for models WITHOUT ethernet physical interface) or 3 interfaces (all other models):
- wlan0: for WiFi network connection
- eth0: for Ethernet cabled networking connection
- lo: loopback interface used by OS to identify itself (with ip address 127.0.0.1)
You can list all these interfaces and their status with the following terminal command:
ifconfigor with the command:
ip linkFinally, another option to list all the networking interfaces is the following command:
ls /sys/class/netCorrectly Managing Networking Configurations
The correct way to manage networking config is by editing the interfaces file:
sudo nano /etc/network/interfacesThe default configuration (with no interface settings) uses DHCP to configure both eth0 and wlan0 interfaces.
To make your ethernet interface IP address static, please append these lines to the end of the file, changing the IP addresses for the interface, default gateway (routers), and DNS (domain_name_servers) with your ones.
iface wlan0 inet static
 address 192.168.1.218/24
 gateway 192.168.1.1
If you also need to use IPV6 addresses, you can add the static IP with the following format:
iface wlan0 inet6 static
 address 2001:db8::c0ca:1eaf/64
 gateway 2001:db8::1ead:ed:beef
To set static configuration for the ethernet interface, please use the same configuration changing “wlan0” to “eth0”.
To make the new configuration running, you can use the ifdown and ifup commands as shown in the following command line:
sudo ifdown wlan0 && sudo ifup wlan0If you need to apply the new settings for a different interface, please use the interface name instead of “wlan0”.
Change the DNS (Domain Name Server)
Domain Name Servers are special servers taking the job of converting mnemonic URL to IP addresses. They are worldwide synchronized. In this way, every domain will result in the same IP address both if you look for it in your country or in a different one.
You can have one or more DNS configured for a single computer. Moreover, modern routers offer an internal DNS service so that they will resolve the URL for you and you can just use the same IP address as gateway and nameserver.
In Raspberry PI OS, the DNS settings are managed by the resolv.conf file. To change your nameservers, please open the file for editing:
sudo nano /etc/resolv.confYou will find just one entry here (the line with trailing “#” are just comments and programs just skip them):
# Generated by NetworkManager
nameserver 8.8.8.8
The 8.8.8.8 is the classic DNS from Google. You can add a new line or change it according to your needs. For example, if you want also to use your router as DNS you probably will add something like the following:
# Generated by NetworkManager
nameserver 8.8.8.8
nameserver 192.168.1.1
Next Steps: Advanced Configurations
After finishing the Raspberry PI OS Lite installation, you may need advanced configurations available from the following links:
- Fix slow SSH session from remote terminal
- Add 2 factor authentication
- Use USB Microphone
- Migrate to larger SD Card
- free Raspberry PI remote access and management tools
- Set Raspberry PI Swap Memory
- Manage Raspberry PI GPU Memory Split
- Automount USB storage in Raspberry PI OS Lite
What’s Next
If you are interested in more Raspberry PI projects, look at my Raspberry PI tutorials.
Enjoy your Raspberry PI OS Lite!

Open source and Raspberry PI lover, writes tutorials for beginners since 2019. He's an ICT expert, with a strong experience in supporting medium to big companies and public administrations to manage their ICT infrastructures. He's supporting the Italian public administration in digital transformation projects.

Same as all the articles I can find on Raspberry Pi OS Lite. Unfortunately for me while I can get the SSH prompt to come up it does not like these credentials. Not sure why. Any help would be greatly appreciated.
Hi Jeremy. With latest RPI OS releases, you are forced to set the user and password (the default pi user is no more available). Try flashing with RPI Imager and setting the user/pwd before writing the image or try connecting the RPI with a monitor to check if it is asking to set the user for first boot
Thanks for your help. I was running into the following issue when trying to flash either 32-bit or 64-bit Raspberry Pi OS Lite using Raspberry Pi Imager: “[FAILED] Failed to start Command from Kernel Command Line”. Flashing with Balena Etcher instead and configuring WiFi and SSH using your methods stated above worked perfectly for me.
Hi Eoin,
I’ve never experiences this issue, but found that some users in the Web get your same problem. For example, there’s a GitHub issue here:https://github.com/raspberrypi/linux/issues/4458, but it was closed without a solving answer. The only interesting thing here is that the user wrote that flashing the image without Advanced settings allows to avoid the error. Another post pointing to the same workaround is the following, even if related to flashing an ubuntu image: https://github.com/raspberrypi/rpi-imager/issues/213.
The only suggestion I can give you is trying to run the RPI imager with admin permission (sudo) or changing the rpi imager version
“IMPORTANT NOTE: with my Windows 11 I had a lot of issues getting these advanced options working for the first boot in headless mode….
“The fix that worked for me was disabling the “Eject media when finished” option from advanced settings and, after writing the card, checking that the new “bootfs” partition, visible from your Windows PC, includes the “firstrun.sh” file into the root folder.
Otherwise, please wait for it to appear before ejecting the card at the end of the flashing operations!”
This suggests that your stupid Windows 11 software stack is lying to you about write operations being complete. Which is THE most basic function of an OS. See where the problem is? Using Windows, sold by liars, used by liars (“hey, privacy doesn’t matter” is a lie people tell themselves, due to conditioning and brainwashing, so they tolerate spyware like Android, Facebook, Windows et al).
Check Write Caching settings for your drive(s), however that slows-down performance.
That said, when you first use a newly-purchased flash media (sd card, USB flash drive, or even ssd or external HDD) here is a tip to prove integrity as a basic baseline for any future troubleshooting:
Use f3 in Linux (I think a Windows version exists). Fight Flash Fraud is what it stands for.
It is a simple utility that writes to the whole disk, filling it to capacity. It then reads back the files and checksums them to prove their integrity.
Whilst you wait. It also gives you an idea of the speed of your card under true load. Better to know up-front, rather than lose half your holiday photos as happened to a family member!
In Linux, you can run the ‘sync’ command to flush the file system cache to disk. That way you know the write has finished.
If Windows 11 is really that pathetic at performing properly, I would be running some utility to monitor filesystem I/O. iotop is useful on Linux, which tells you what processes are doing disk I/O and at what rate. Useful for diagnosing disk transfer issues in a basic way from the command line.
But this fake progress bar crap is what Microsoft are notorious for.
Only because idiots keep feeding that beast, does the beast not learn to behave.
Hi Langleyhooer,
thank you for your feedback. As additional notes, from my experience I had better chances to get the image working by cancelling the whole SD card from the Raspberry PI Imager before writing the new one.
Moreover, I should admit that the newest Raspberry PI Imager versions have less errors in providing a working image (the firstrun.sh file is correctly completed before closing the card).
Many thanks again