Last Updated on 13th April 2024 by peppe8o
In this tutorial, I’ll show you how to interface an MQ-2 Smoke sensor with Arduino Uno. Results of the smoke sensor are displayed over the serial monitor.
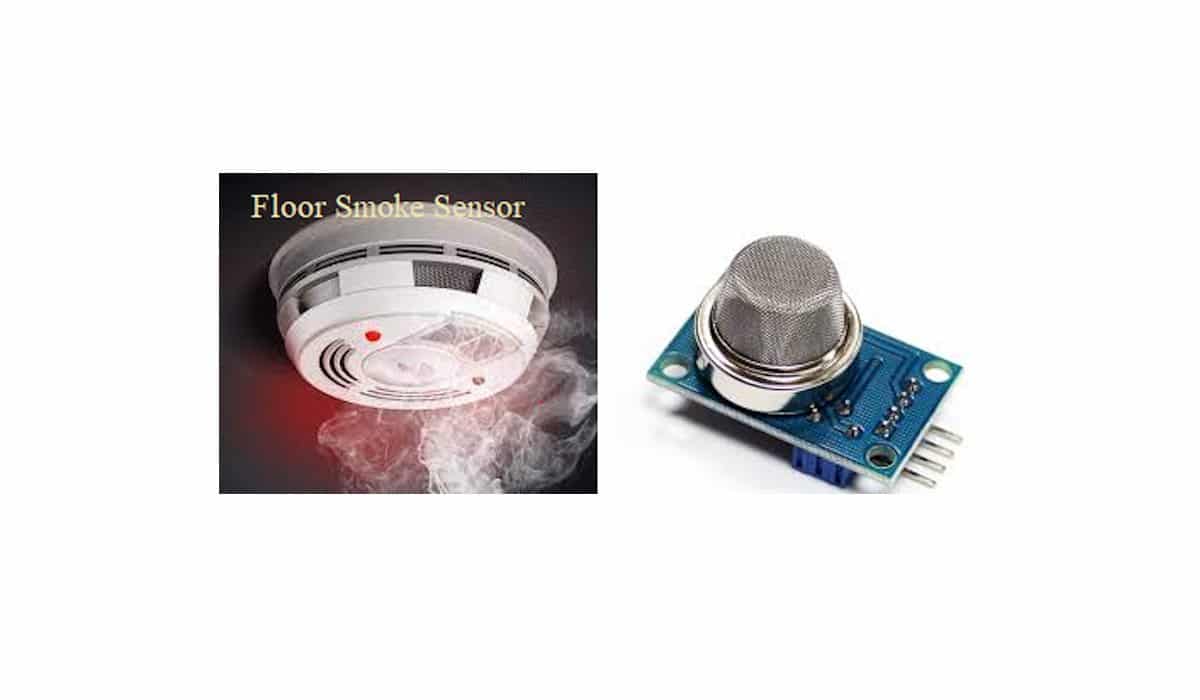
When you need to monitor a fire initialization, Smoke Sensor is the best way to detect the percentage of carbon monoxide (CO) in parts per million (PPM). The smoke sensor gives an analog voltage which can be monitored by Analog Pin of Arduino Uno
Smoke Sensor Features
Smoke sensor MQ-2 measures the gas available in the air and gives us the results. This sensor works on 5V DC voltage. It can detect gases in the concentration of range 200 to 10000ppm, even if data received from Arduino are into the range of 0-1023 common to board analog ports.
It uses SnO2 as sensitive material, which has lower conductivity in clean air. When the monitored gas arrives with air on MQ-2, the sensor’s conductivity is more higher along with the gas concentration rising, thus giving higher current values from its analog out PIN.
MQ-2 gas sensor has high sensitivity with LPG, Propane and Hydrogen, also could be used to Methane
and other combustible steam. Having low market costs, it fits well for different application fields, the most common being:
- Domestic gas leakage detector
- Industrial Combustible gas detector
- Portable gas detector
Here are important features of MQ-2:
- Detection of Smoke
- Easy to interface with Arduino uno, mega or any analog reading microcontroller
- Easy Wirings
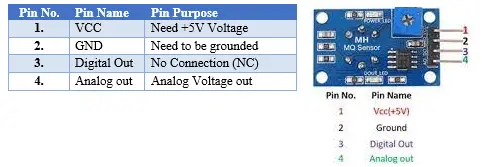
MQ-2 Smoke Sensor Pinout
MQ-2 Smoke sensor has 4 pins, which are described as under, the image shown is the backside of the smoke sensor. Starting from the right side is the first pin of the sensor. Digital out can be used at the digital pin, for that have to adjust the potentiometer (a rectangular shape with + sign), Basically, this potentiometer set the threshold when the voltage across the threshold the digital Out pin will become HIGH logic.
What We Need
As usual, I suggest adding from now to your favourite e-commerce shopping cart all the needed hardware, so that at the end you will be able to evaluate overall costs and decide if to continue with the project or remove them from the shopping cart. So, hardware will be only:
Check hardware prices with the following links:


Step-by-Step Procedure
Wiring Diagram
Please prepare wiring according to the following picture:
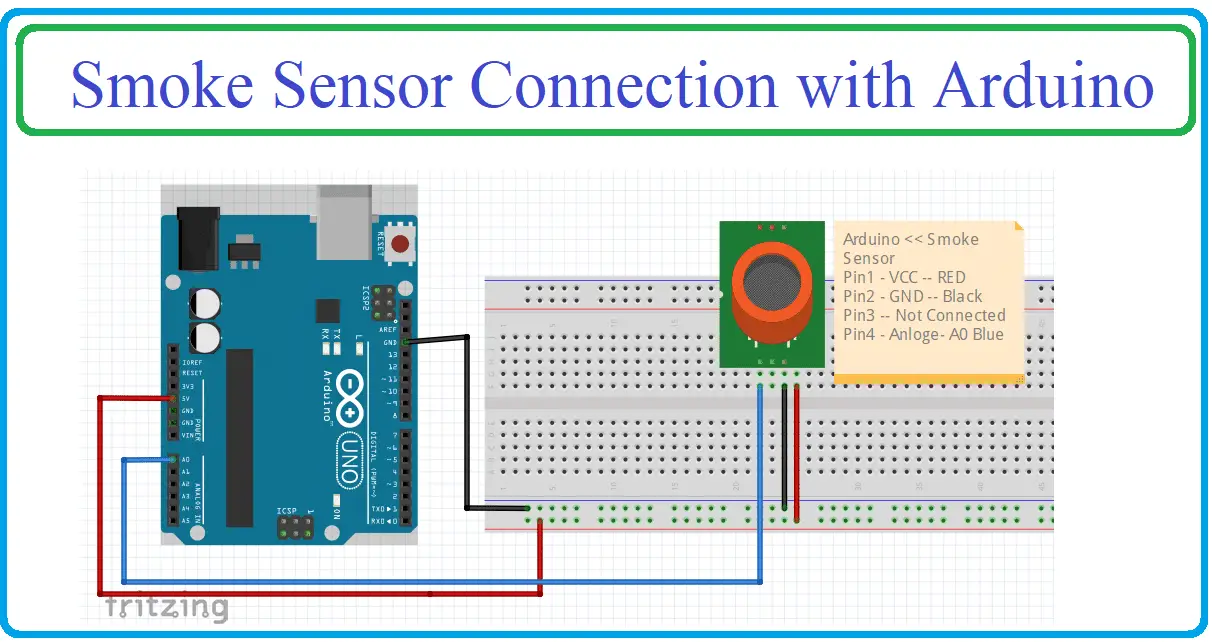
There are four pins of Smoke Sensor which need to connect, Pin 1 = VCC needs to be connected with 5V. PIn 2= GND needs to be connected with the ground, Pin 3 – Digital Pin No connection, and Pin 4 needs to be connected with A0 analog Pin.
Get my Smoke Sensor Code
Connect your PC to Arduino and open Arduino IDE. For the very first steps, you can refer to Connecting Windows PC with Arduino tutorial. Please download my smoke sensor code, by using the following link:
Extract the folder content in your PC and open this file with your Arduino IDE.
Code Explanation
Connection of Smoke sensor to Arduino. Prints output in serial console.
There are two sections of the code explanation in section 1 we have covered the total setup. Float sensor value variable is declared which is basically used to measure the voltage. Then setup is started in which serial monitor is initialized at a baud rate of 9600.
float sensorValue; // Smoke value store
void setup()
{
  Serial.begin(9600); // Serial Monitor initilized at 9600 baud rate
}
In the loop section, the sensor value is the rate at pin A0. The value of the sensor is mapped from 0 to 100 depending on the analog voltage. After which the sensor, values are displayed on the serial monitor. There is a delay of one second to measure the voltage and display.
void loop()
{
  sensorValue = analogRead(A0); // read the sensor value
  sensorValue = map(sensorValue, 0, 1023, 0, 100); // convert the sensor value with in 100 range
  Serial.print("SensorValue= "); // Print values
  Serial.print(sensorValue);
  Serial.println("%");
  delay(1000); // Delay for 1 second
}
Results and Discussion
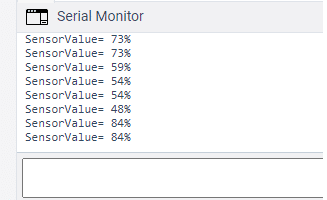
In the result and discussion session, this tutorial represents the screenshot of the smoke sensor. Results are being displayed on the serial monitor. As we can see that percentage is being displayed for the sensor value which is basically 0-100. This means that there is 84% carbon monoxide in the air for the last value.
Enjoy!
Umar Jamil
For any queries and help for work, please contact me at:
Whatsapp:+92-346-661-7017
Email: umarjamil0007@gmail.com

I'm an Electronic Engineer, well-skilled to solve the issues of hardware and software. I do have laboratory which contains unlimited sensors and modules for testing the working. Also, I am experienced in Arduino programming, Android mobile application, microcontroller programming, IOTs and embedded projects. I provide services to control, realize the sensor data in the Mobile Application. For any queries and help for work Contact: Whatsapp:+92-346-661-7017 Email: umarjamil0007@gmail.com
![]()