
Last Updated on 1st November 2023 by peppe8o
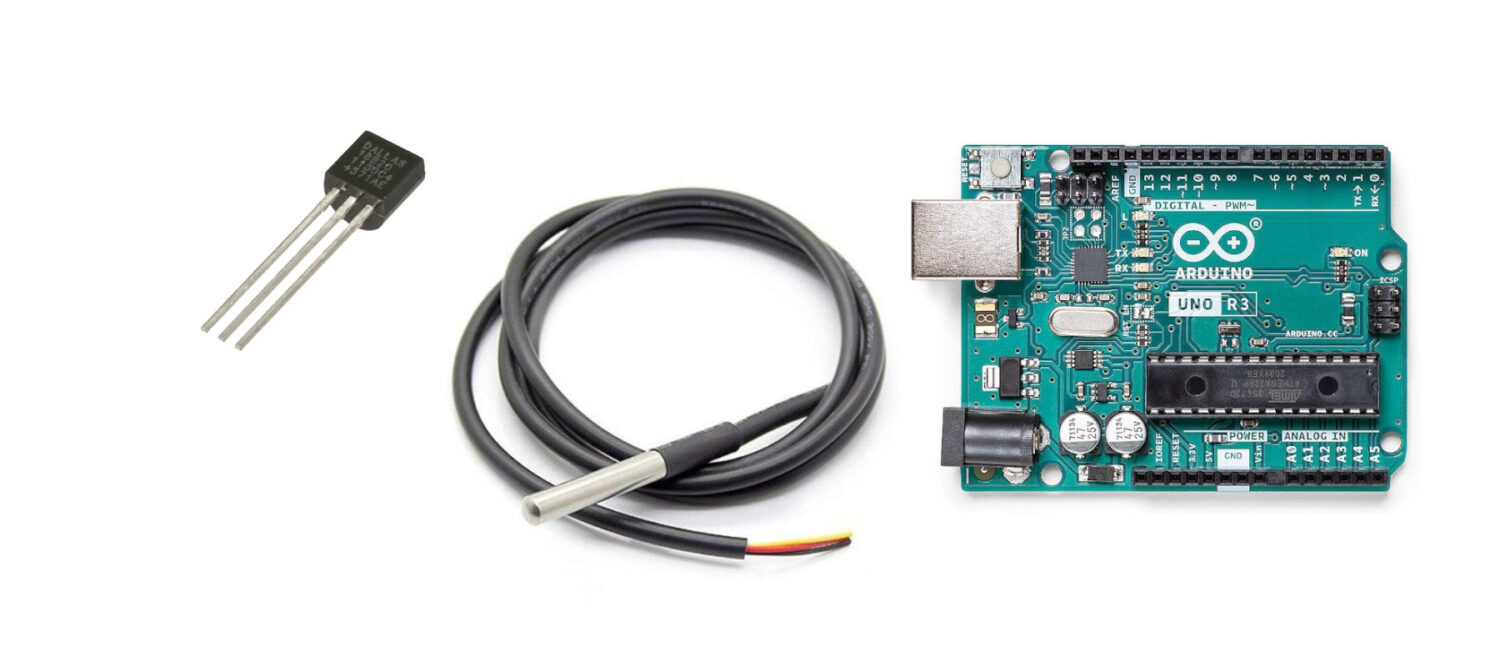
In this tutorial, we will use a DS18B20 to display water temperature with Arduino Uno on a serial monitor and control LED brightness based on the temperature. This DS18B20 has wide applications in temperature control settings. It is mostly used in thermometers and wearable devices to keep the temperature updated.
DS18B20 Description
The DS18B20 is an analogue component or subsystem used by various devices to keep track of the temperature.
It consists of an analogous circuit that differentiates with respect to the temperature and provides voltage as a result. It communicates on one wire means that it sends and receives data from the same wire, it happens by allocating time to sending and receiving data.
The importance of this sensor in the electronic field is because of its waterproof assembly, it normally comes with a long wire and waterproof sensing top.
Working principle of DS18B20
The circuitry of the DS18B20 temperature sensor converts the analogue temperature to the digital voltage.
The communication works on a bit level, in which the controller along with its interface reads and writes separate bits on the one wire. It has a unique 64-bit address which enables it to use multiple sensors on one wire.
When the sensor receives the temperature command it converts the internal temperature to 12 bits digital value based on the resolution set for the sensor.
This temperature sensor can read from -55°C to +125°C.
The DS18B20 comes in 2 different formats, both working in the same way: chip format and water-proof wire. the water-proof wire allows you to measure water temperature as you can immerse the sensor in water.
What We Need

As usual, I suggest adding from now to your favourite e-commerce shopping cart all the needed hardware, so that in the end you will be able to evaluate overall costs and decide if continue with the project or remove them from the shopping cart. So, hardware will be only:
Step-by-Step Procedure
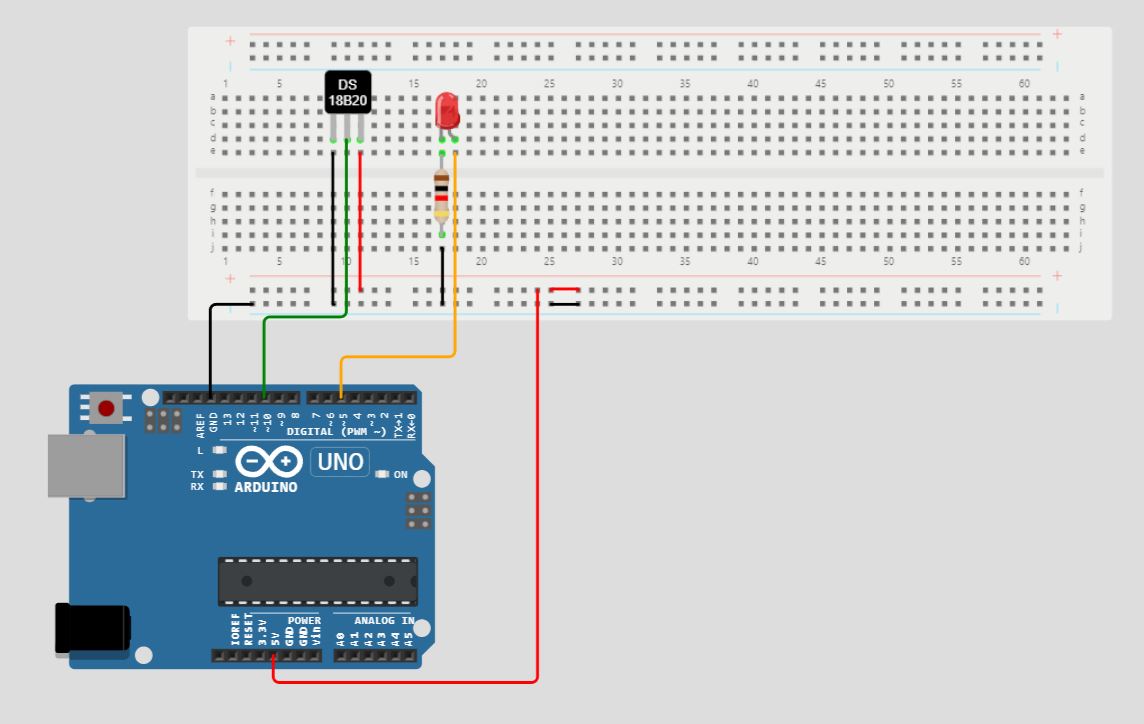
Wiring Diagram of Water Temperature System with Arduino Uno and DS18B20
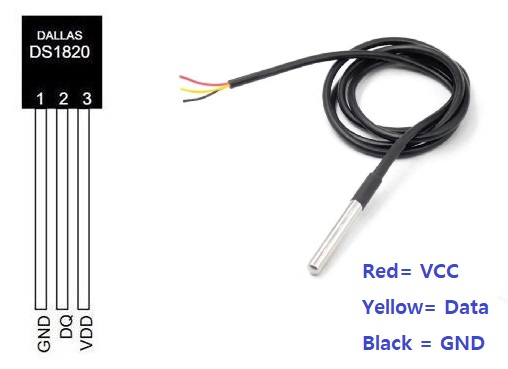
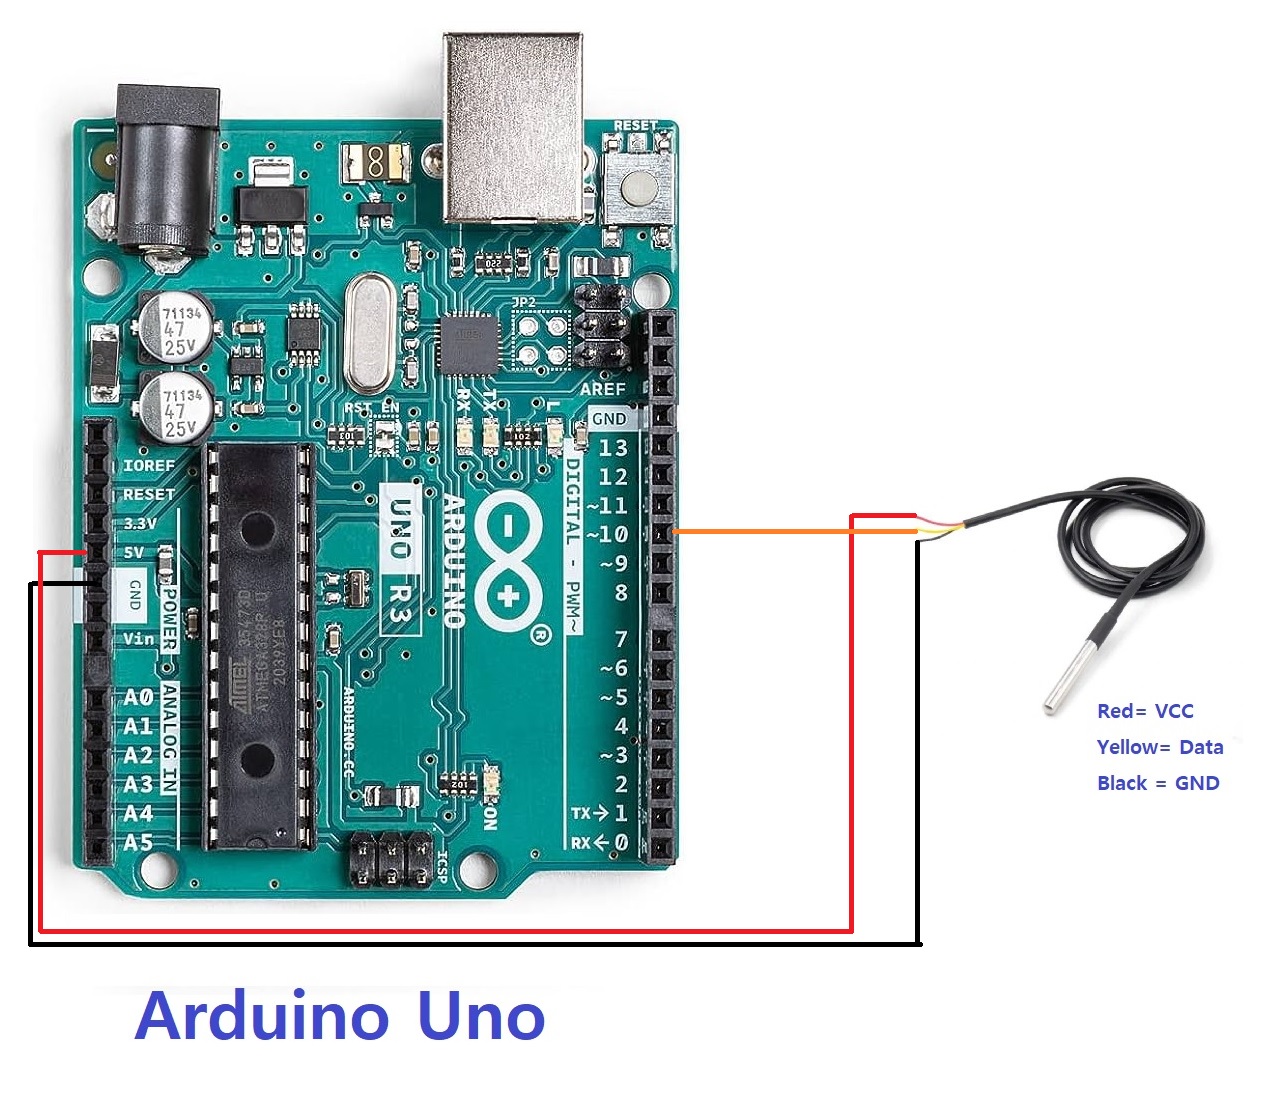
The DS18B20 requires three pins to connect with the microcontroller, according to the Arduino UNO Pinout.
On the temperature sensor, there are 3 PINs: GND, Data, and VCC.
The GND and VCC pins on the sensor should be connected to the GND and 5V of Arduino Uno respectively. The data PIN connects with pin 10 of Arduino Uno.
The additional LED gives information on the temperature. The anode connects with pin 5 of Arduino, while the cathode connects with GND with the resistor.
| DS18B20 sensor | Arduino | LED |
|---|---|---|
| Pin 1 (right side) | GND | Pin 1 (with resistor) |
| pin 10 | ||
| 5 V | ||
| pin 5 | Pin 2 | |
| 3 |
Please find below a picture showing the temperature sensor, LED, and Arduino Uno wiring diagram:
Get the code for the DS18B20 temperature sensor with Arduino
Connect your PC to Arduino and open Arduino IDE. For the very first steps, you can refer to Connecting Windows PC with Arduino tutorial. You can get the .ino code from my download area with the following link:
You also need to install the following libraries, according to my Install Arduino Libraries: methods to add libraries with Arduino IDE tutorial.
Code Explanation
Section 1: Before setup
In this section, we attach the OneWire library, as this temperature sensor works on one wire, while the DallasTemperature library supports the commands of the sensor.
The temperature sensor is set to work on pin 10 so its instance creates to interface.
The LED is set at analogue pin 5 to give analogue values for brightness control later on.
#include <OneWire.h>
#include <DallasTemperature.h>
// Create a OneWire instance to communicate with the DS18B20 temperature sensor
OneWire oneWire(10);
// Create a DallasTemperature instance to interface with the OneWire bus
DallasTemperature sensor(&oneWire);
// Define the pin connected to the LED
int LED = 5;
Section 2: In the setup
In the setup, we set the baud rate of the serial monitor to 9600.
Then, we initialize the sensor as its instances already created before setup. We also set the LED as output by pinMode.
void setup(void) {
  // Start serial communication with a baud rate of 9600
  Serial.begin(9600);
  delay(2);
  // Initialize the DallasTemperature sensor library
  sensor.begin();
  delay(20);
  // Set the LED pin as an output pin
  pinMode(LED, OUTPUT);
}
Section 3: Loop section
This is the section for the main loop.
It starts requesting the temperature reading, given by the sensor. After the temperature sensor returns the value, which we read by the gettempCbyIndex(0) commands. which means that temperature in degree centigrade with zero decimal points, if a more accurate temperature is required than zero can be changed.
void loop(void) {
  // Request temperature readings from the DS18B20 sensor
  sensor.requestTemperatures();
  // Print the temperature in Celsius to the serial monitor
  Serial.print("Temperature is: ");
  delay(10);
  // Read the temperature value in Celsius from the sensor
  int value = sensor.getTempCByIndex(0);
The temperature value is printed on serial.println (value), the value of the temperature sensor is mapped from 0 to 255 to give it to the LED brightness.
  // Print the temperature value to the serial monitor
  Serial.println(value);
  // Map the temperature value to LED brightness range (from -127°C to 125°C to 0-255 brightness)
  int ledbrightness = map (value, -55 125, 0, 255);
  // Print the mapped LED brightness value to the serial monitor
  Serial.println(ledbrightness);
The analogWrite(LED, ledbrightness) gives 0 to 255 PWM to the LED.
  // Set the LED brightness based on the mapped temperature value
  analogWrite(LED, ledbrightness);

  // Delay for 1 second before taking the next temperature reading
  delay(1000);
}
Results Measuring Water Temperature with Arduino Uno
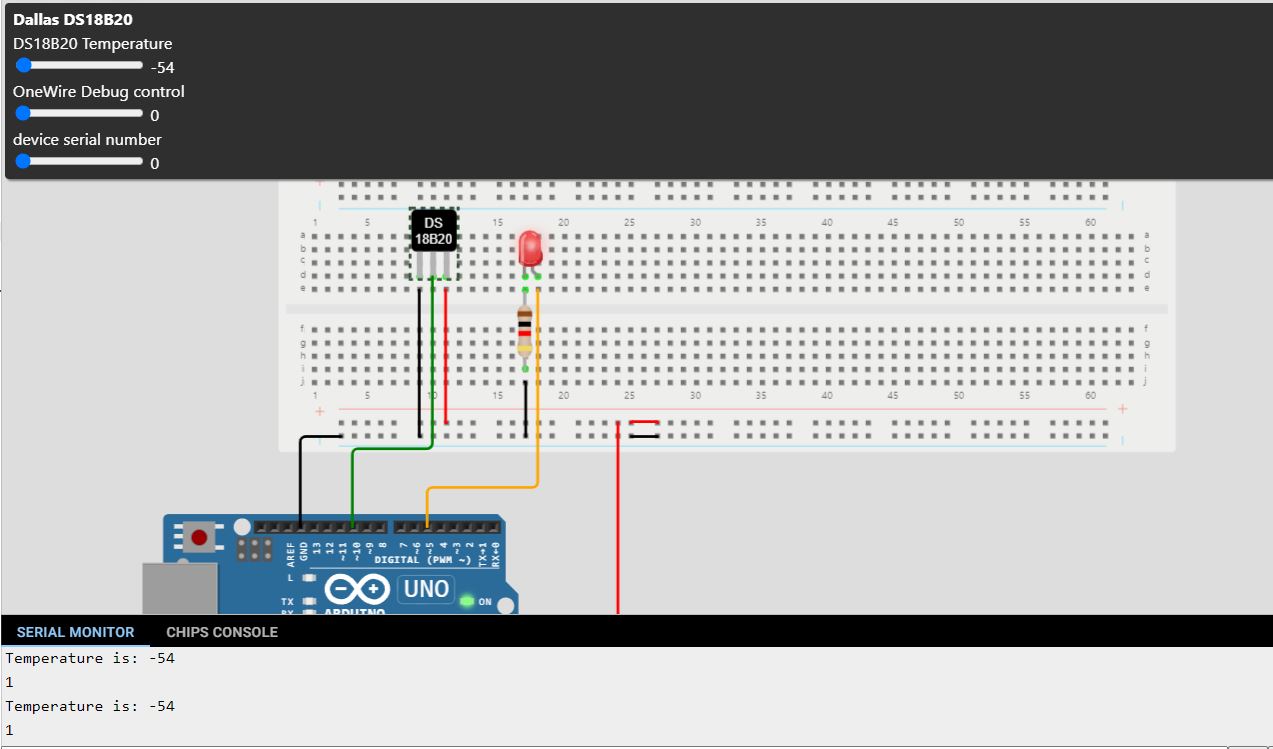
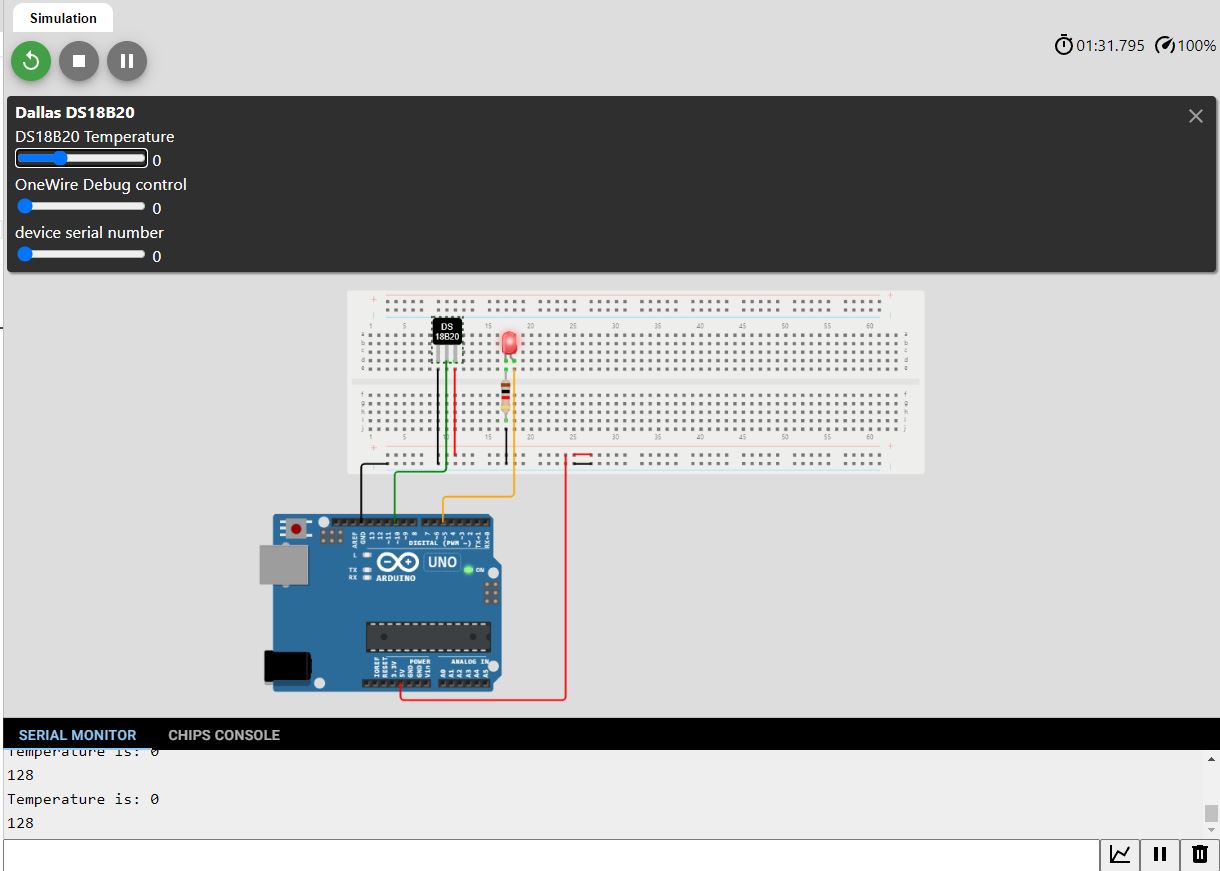
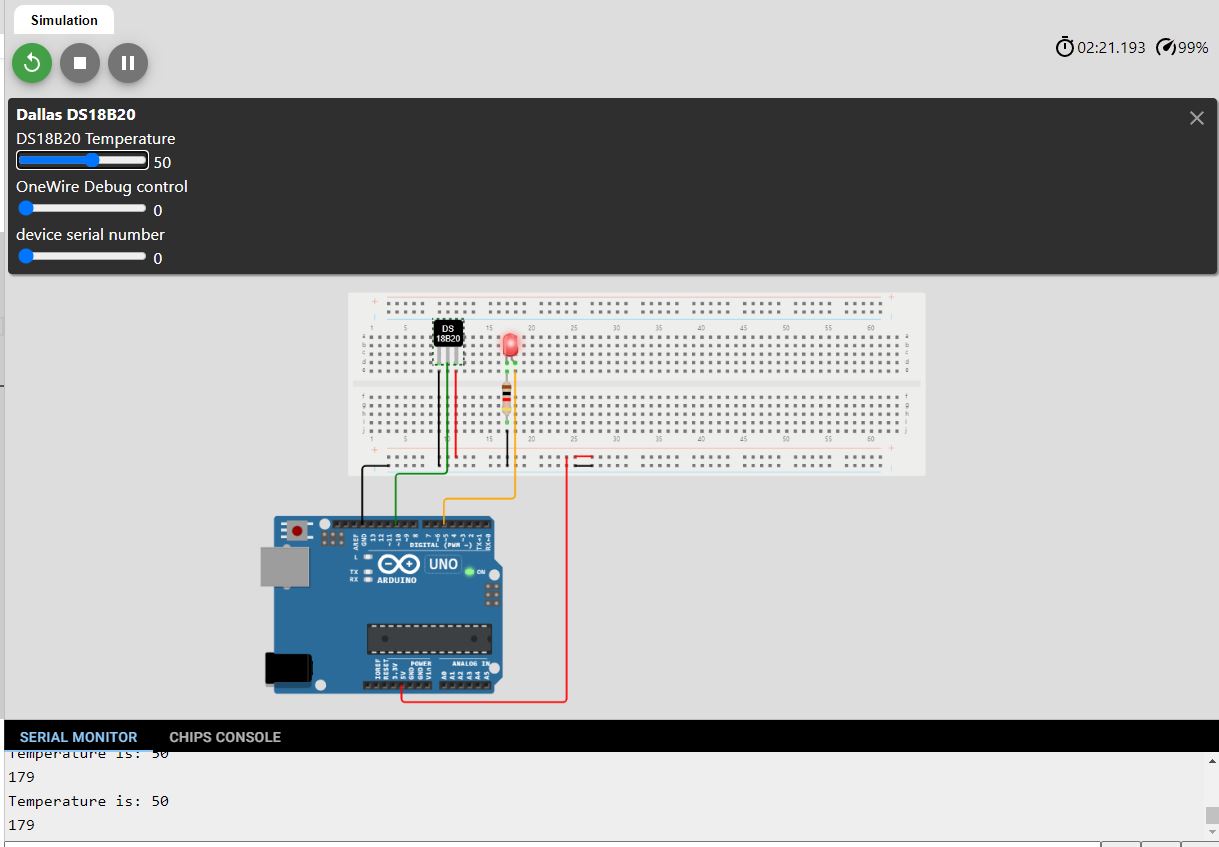
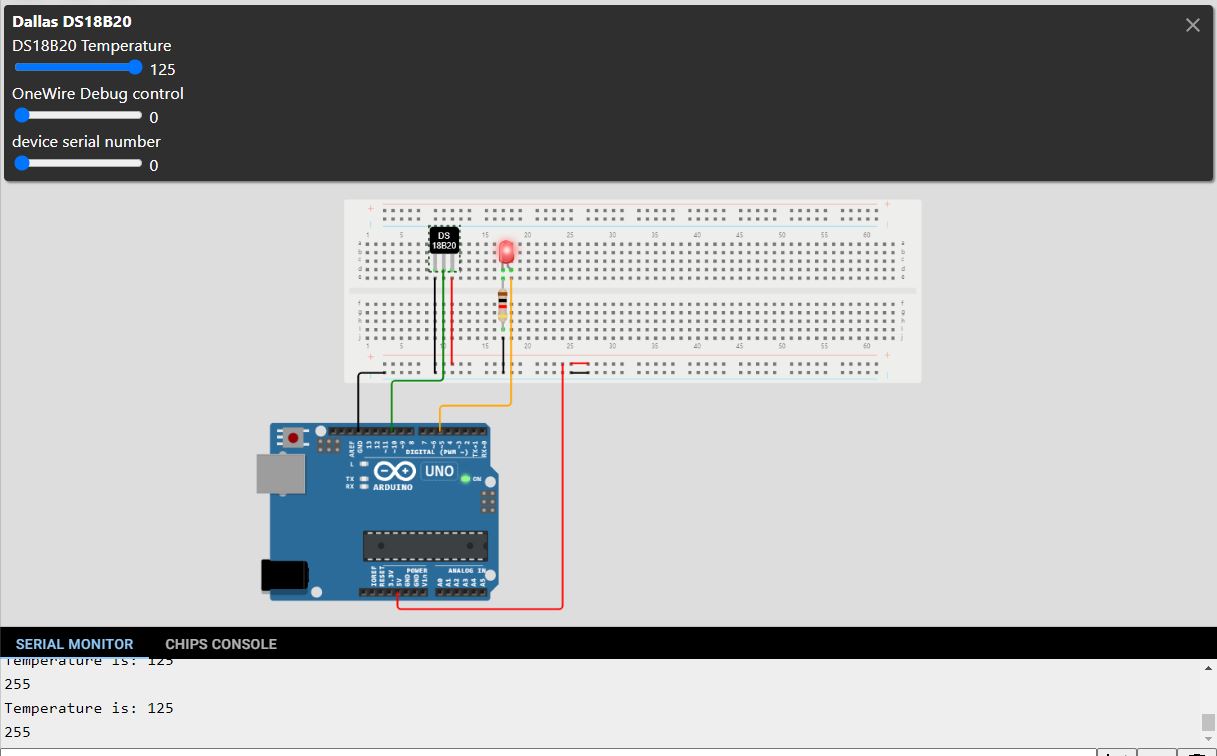
Here are the results for the water temperature sensor and Arduino Uno, interfaced with the LED.
The following pictures show temperature tests for the -54, 0, 50 and 125 degrees. Based on the temperature the brightness of the LED increases.
The serial monitor shows the temperature of each stage and its mapped value which is PWM value which is given to the LED.
What’s Next
Please find more tutorials on Arduino in peppe8o Arduino archives.
Enjoy!
Umar Jamil
For any queries and help with work, please contact me at:
Whatsapp: +92-346-661-7017/ Link Fiverr for order custom work
Email: umarjamil0007@gmail.com

I'm an Electronic Engineer, well-skilled to solve the issues of hardware and software. I do have laboratory which contains unlimited sensors and modules for testing the working. Also, I am experienced in Arduino programming, Android mobile application, microcontroller programming, IOTs and embedded projects. I provide services to control, realize the sensor data in the Mobile Application. For any queries and help for work Contact: Whatsapp:+92-346-661-7017 Email: umarjamil0007@gmail.com
![]()


