
Last Updated on 22nd May 2023 by peppe8o
In this tutorial, we will use Arduino with a flex sensor to get the degree of bending.
Flex sensors are commonly used in applications such as robotics, gaming controllers, medical devices, and musical instruments to get information about twisting.
Introduction
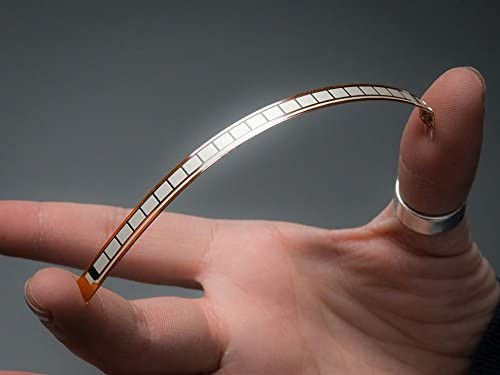
A flex sensor is a type of sensor that can detect the amount of bending or deformation that occurs in a particular object or surface.
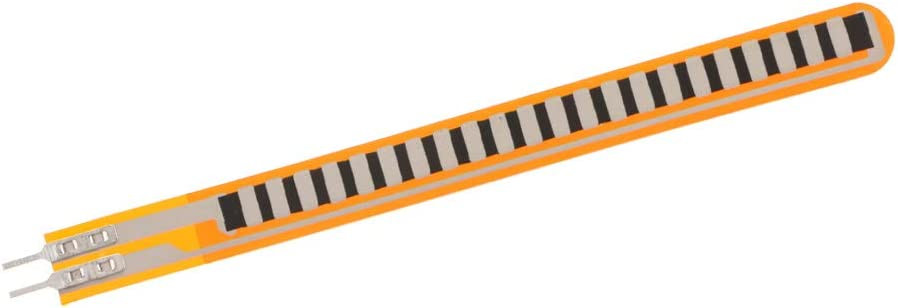
Usually made of a flexible material, such as plastic or rubber, it is typically thin and lightweight and changes its resistance when it bends.
Working principle of FLEX sensor
The flex sensor, also known as Flexible Potentiometer, is usually based on a phenolic resin substrate, a thin layer of conductive ink and a segmented conductor placed on top.
When the sensor is bent or flexed, the distance between the conductive strips changes and the conductive ink layer becomes thinner, causing the resistance of the sensor to increase. This change in resistance is proportional to the degree of bending or flexing of the sensor.
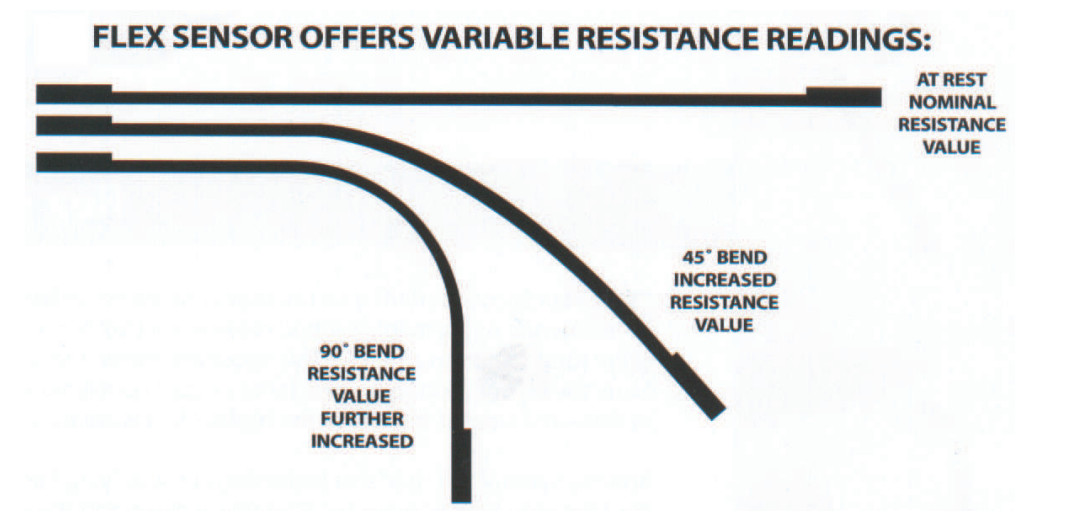
Usually, an electronic circuit connected to the flex sensor measures the resistance and converts it into a corresponding electrical signal, whose intensity changes proportionally to the blending degree.
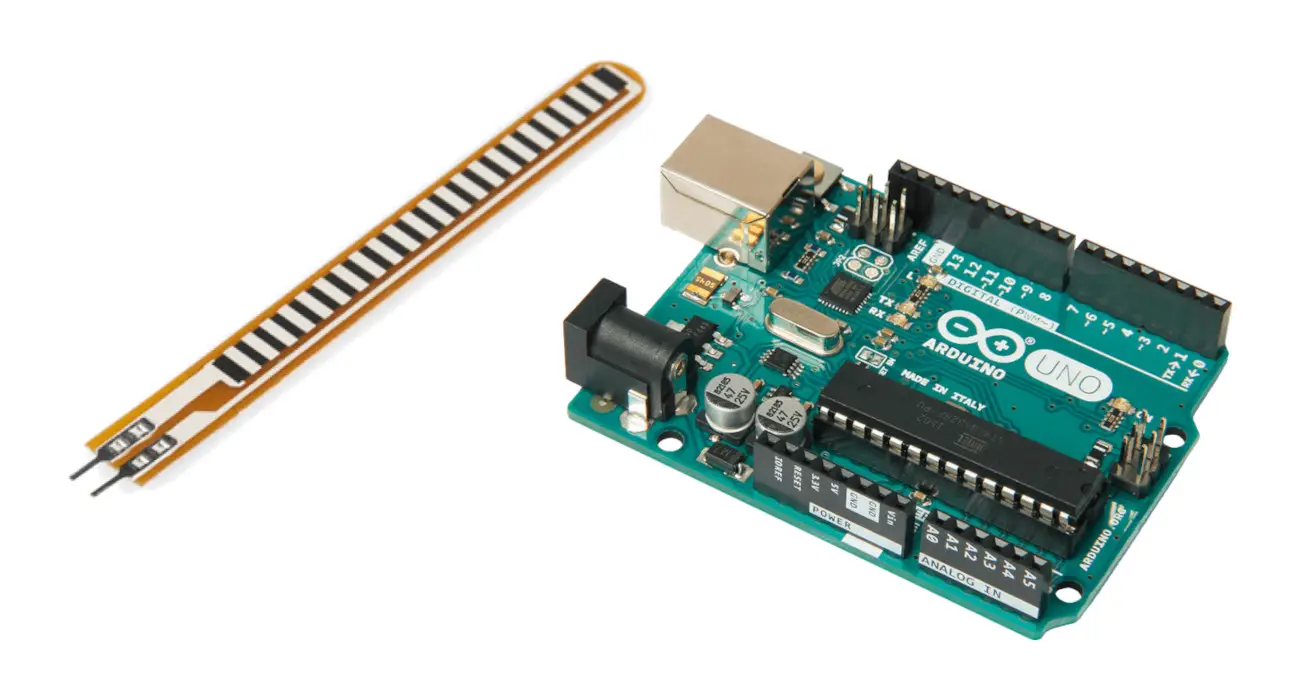
What We Need

As usual, I suggest adding from now to your favourite e-commerce shopping cart all the needed hardware, so that at the end you will be able to evaluate overall costs and decide if to continue with the project or remove them from the shopping cart. So, hardware will be only:
Step-by-Step Procedure
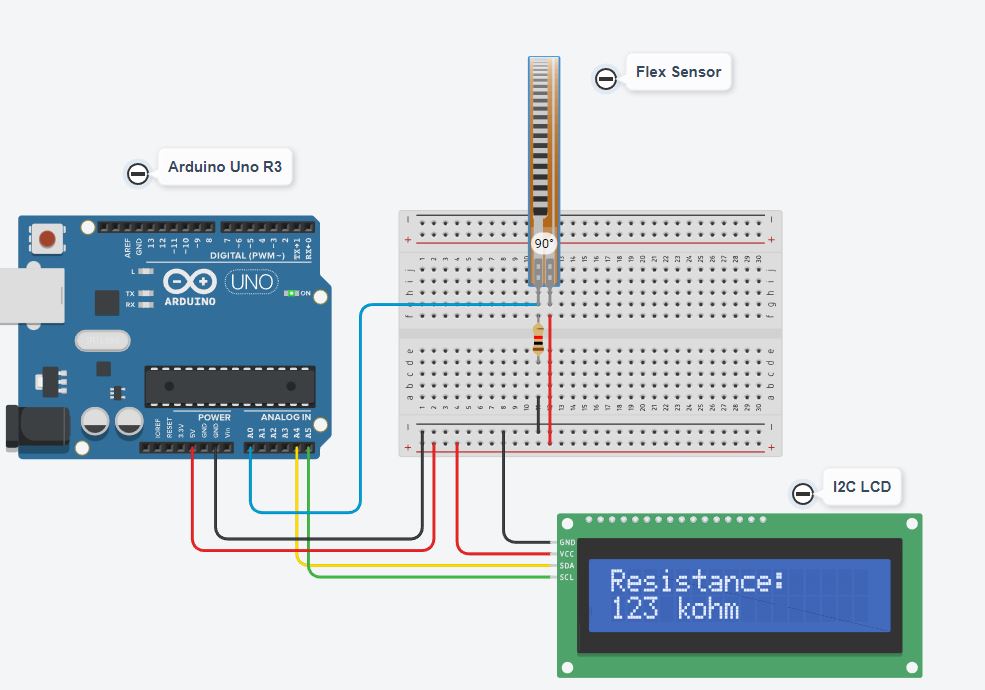
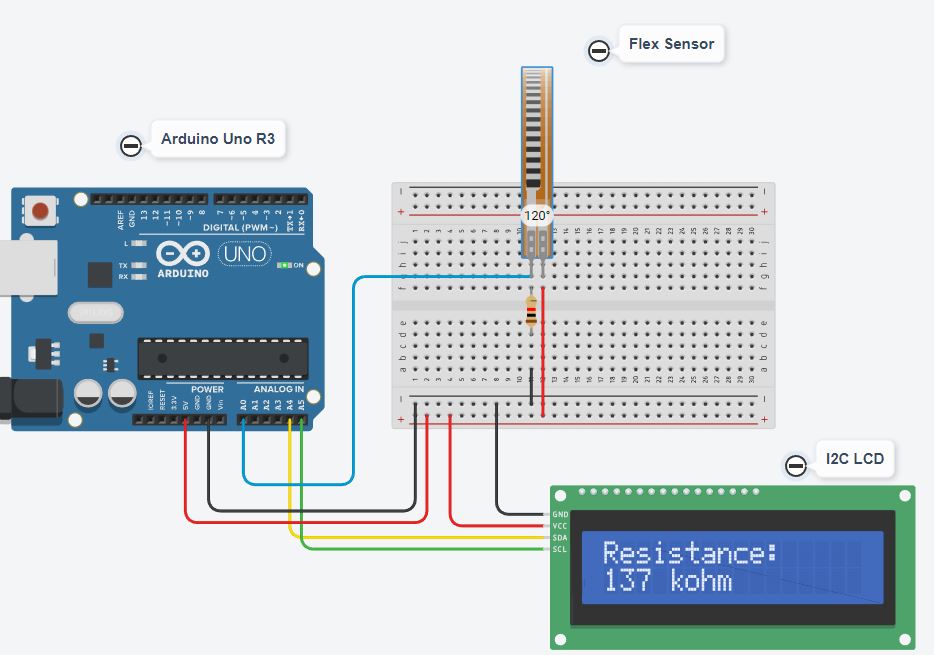
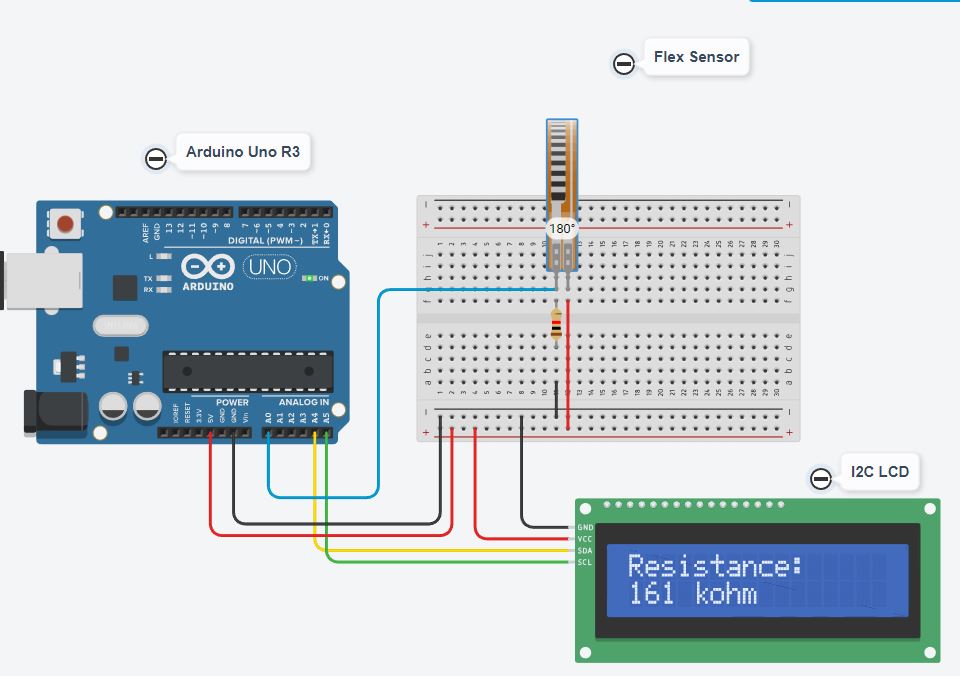
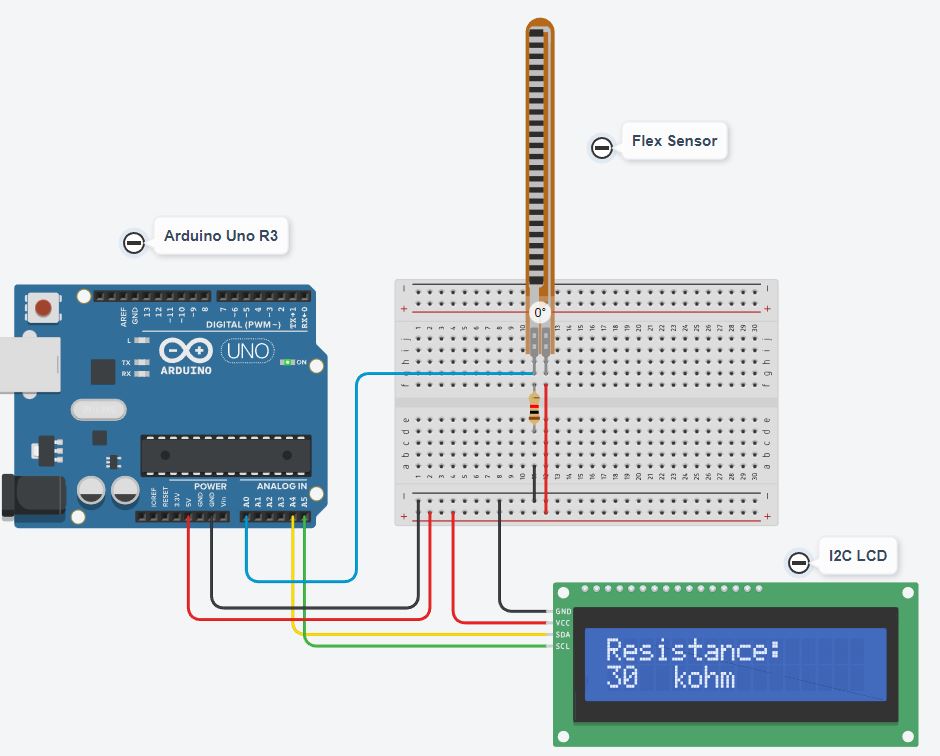
Wiring Diagram of Flex sensor with Arduino
The figure shows the wiring diagram between the flex sensor, Arduino Uno, and LCD according to Arduino pinout. The resistor has a value of 1K-ohms and works as a voltage divider with the flex sensor.
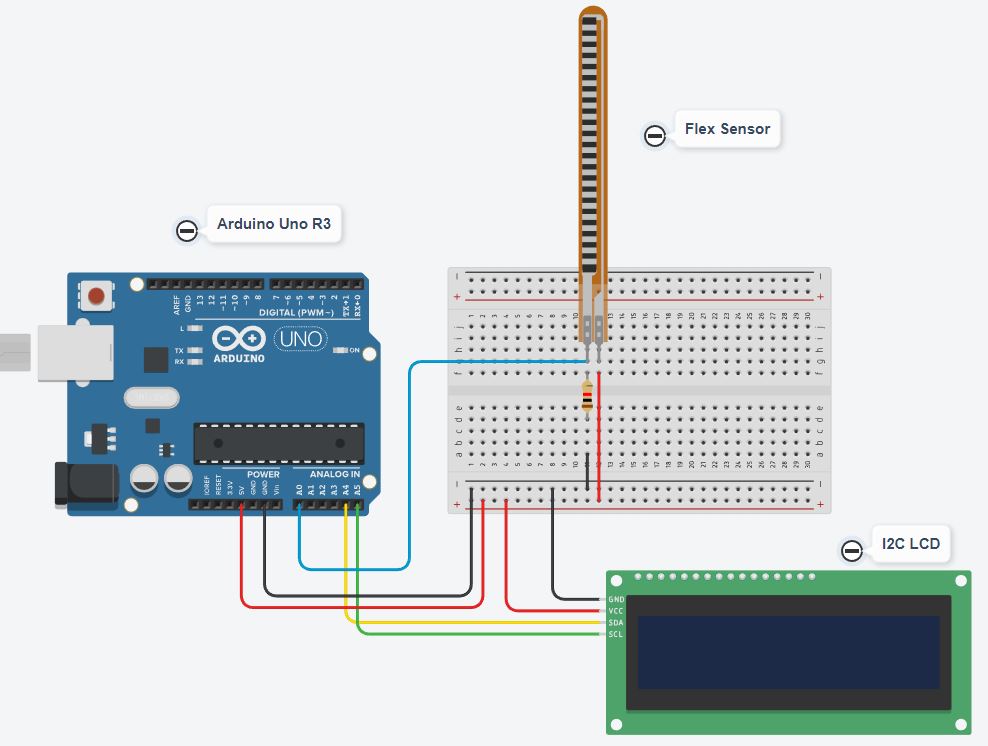
The following table shows the patterns between the components of this project:
| Flex Sensor | Arduino Uno | Resistor | I2C LCD |
|---|---|---|---|
| Pin 1 (right side) | 5V | VCC | |
| Pin 2 (left side) | A0 | side 1 | |
| GND | side 2 | GND | |
| A5 | SCL | ||
| A4 | SDA |
Get the code and OLED Libraries
Connect your PC to Arduino and open Arduino IDE. For the very first steps, you can refer to Connecting Windows PC with Arduino tutorial. You can get the .ino code and libraries from my download area with the following link:
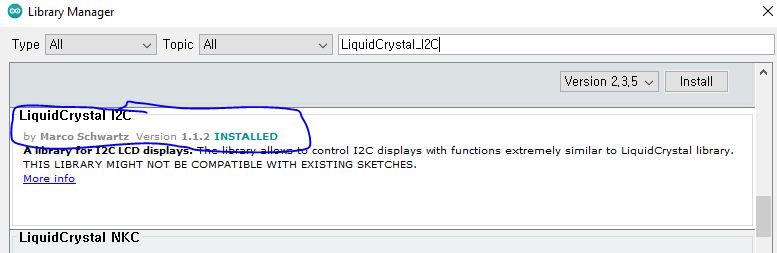
You also need to install the following libraries, according to my Install Arduino Libraries: methods to add libraries with Arduino IDE tutorial.
Code Explanation
Section 1: Before setup
This is the section before setup which we’ll use for global variables definition and libraries addition.
LiquidCrystal_I2C.h is the library for performing communication with LCD.
The I2C address, its rows count, and columns are defined.
We also define a variable to store the value of the A0 analogue input.
#include <LiquidCrystal_I2C.h>
LiquidCrystal_I2C lcd(0x26, 16, 2);
const int ADC_pin = A0;
int flex_ADC;
Section 2: Setup section
In the beginning, have defined the serial monitor with its baud rate.
void setup()
{
  Serial.begin(9600);
The LCD is initialized, and its backlight is turned on.
  lcd.init();
  lcd.backlight();
Cursors are set at (0, 0) pixels. The first print on the LCD will show the “peppe8o” label.
  lcd.setCursor(0,0);
  lcd.print("peppe8o");
}
Section 3: Loop section
In the loop section, we read the analogue value of the sensor and then map it, based on the resistance.
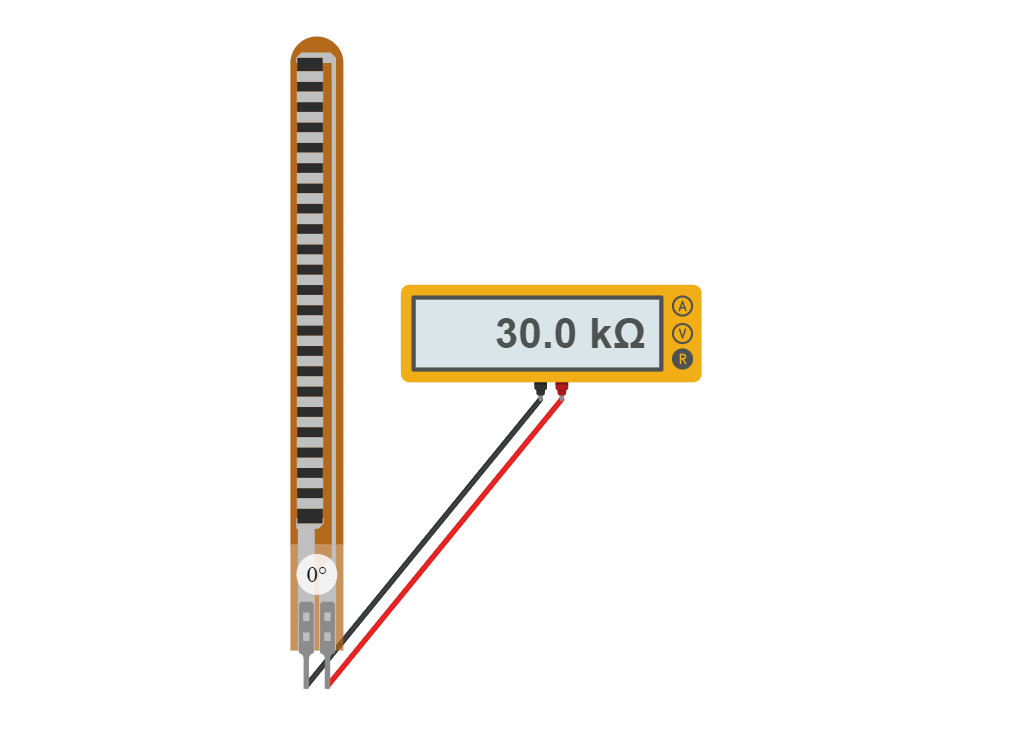
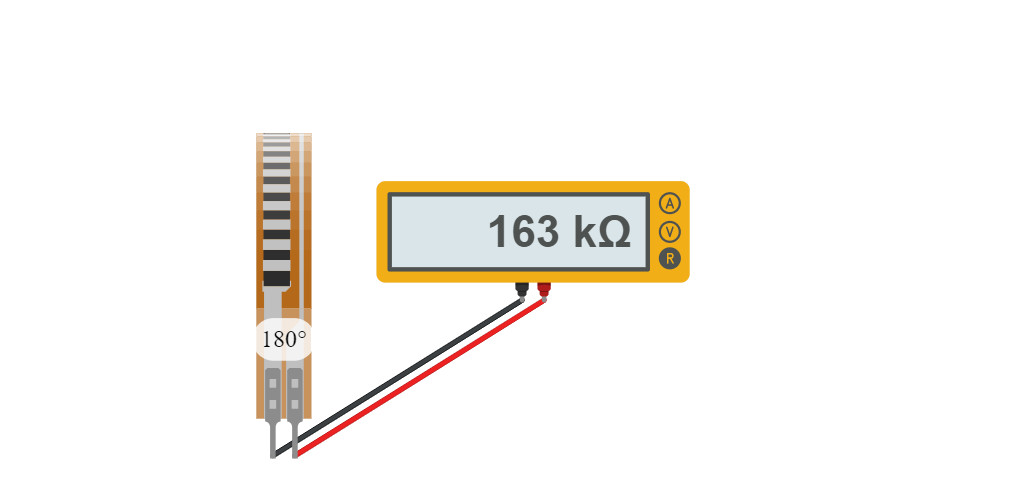
To know the mappings, you have to measure the flex resistance without connecting with the circuit. In this sensor case we have 30K-Ohm without bending, then (after fully bending) it’s 163 K-Ohms. After connecting the resistor with the sensor, the analogue value comes to be 6 to 33 mV.
void loop()
{
  flex_ADC = analogRead(ADC_pin);
  flex_ADC= map(flex_ADC, 6, 33, 163, 30);
Then after conversion, the sensor value will print on the LCD with its unit.
  Serial.println(flex_ADC);
  lcd.setCursor(0,0);
  lcd.print("Resistance: ");
  lcd.setCursor(0,1);
  lcd.print(flex_ADC);
  lcd.setCursor(4,1);
  lcd.print("kohm");
  delay(500);
  lcd.clear();
}
Results
Firstly, you have to measure the resistance of the sensor. You can perform this task using a Multimeter set to measure resistance (or checking the raw analogue reading of your Arduino when attaching the flex sensor).
Based on the sensor unbending, the resistance for this tutorial will be a minimum 30 K-Ohm (it may vary depending on the sensor type). Then, after bending, the resistance increases up to 163K-Ohm:
The results display the output of the Flex sensor on the LCD. The no bend, bend to 90 degrees, bend to 120 degrees, then resulted in the full bending. As the sensor bent the resistance increases, and the maximum resistance increase to 163K-Ohms, while the minimum is 30 K-Ohms
What’s Next
Please find more tutorials on Arduino in peppe8o Arduino archives.
Enjoy!
Umar Jamil
For any queries and help for work, please contact me at:
Whatsapp: +92-346-661-7017/ Link
Email: umarjamil0007@gmail.com

I'm an Electronic Engineer, well-skilled to solve the issues of hardware and software. I do have laboratory which contains unlimited sensors and modules for testing the working. Also, I am experienced in Arduino programming, Android mobile application, microcontroller programming, IOTs and embedded projects. I provide services to control, realize the sensor data in the Mobile Application. For any queries and help for work Contact: Whatsapp:+92-346-661-7017 Email: umarjamil0007@gmail.com
![]()


