
Last Updated on 2nd September 2023 by peppe8o
This tutorial will show you the features of this interesting Wukong2040 Raspberry PI Pico expansion board, also bringing code examples with MicroPython.
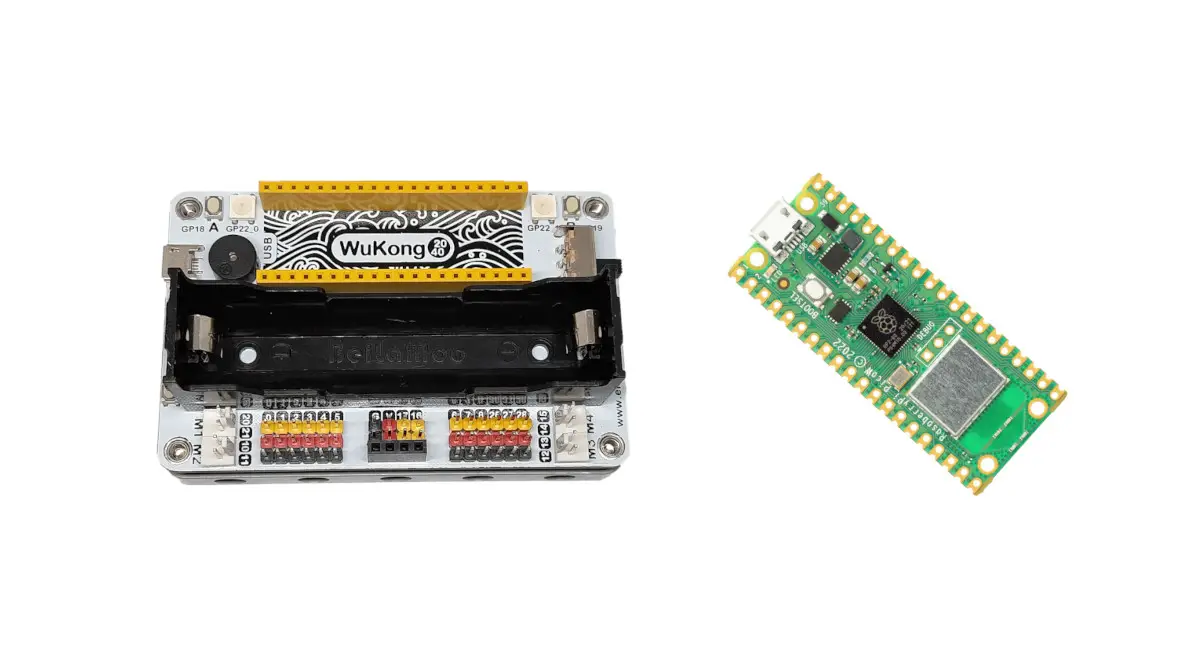
The ELECFREAKS Wukong2040 is a Raspberry PI Pico expansion board enabling beginners to get live with their simple to medium complexity projects, with a safe battery power source and a simplified PINs connection.
What is an Expansion Board
An Expansion Board is a PCB (Printed Circuit Board) that adds a guest board with new features. Usually, every expansion board is designed for specific hardware. In the microelectronics hobbyist world, it can provide protection for the guest board power and brings a number of sensors pre-connected to the guest board placement.
Expansion Boards make the wiring job easier for beginners and sometimes provide protection against power outages by adding a specific power supply line.
Wukong2040 Features
WuKong2040 is a multifunctional expansion board designed for Raspberry Pi Pico microcontrollers.
It supports one 18650 battery (that you have to provide separately) with an onboard power management chip and power indication. With this battery, the ELECFREAKS estimates a duration of at least 120 minutes of normal use, but this depends on the battery capacity and I think that such a battery can last far more by using power management tricks as referenced in my Raspberry PI Pico W Power Consumption (mA) and How to Reduce It tutorial (unless you need to move motors).
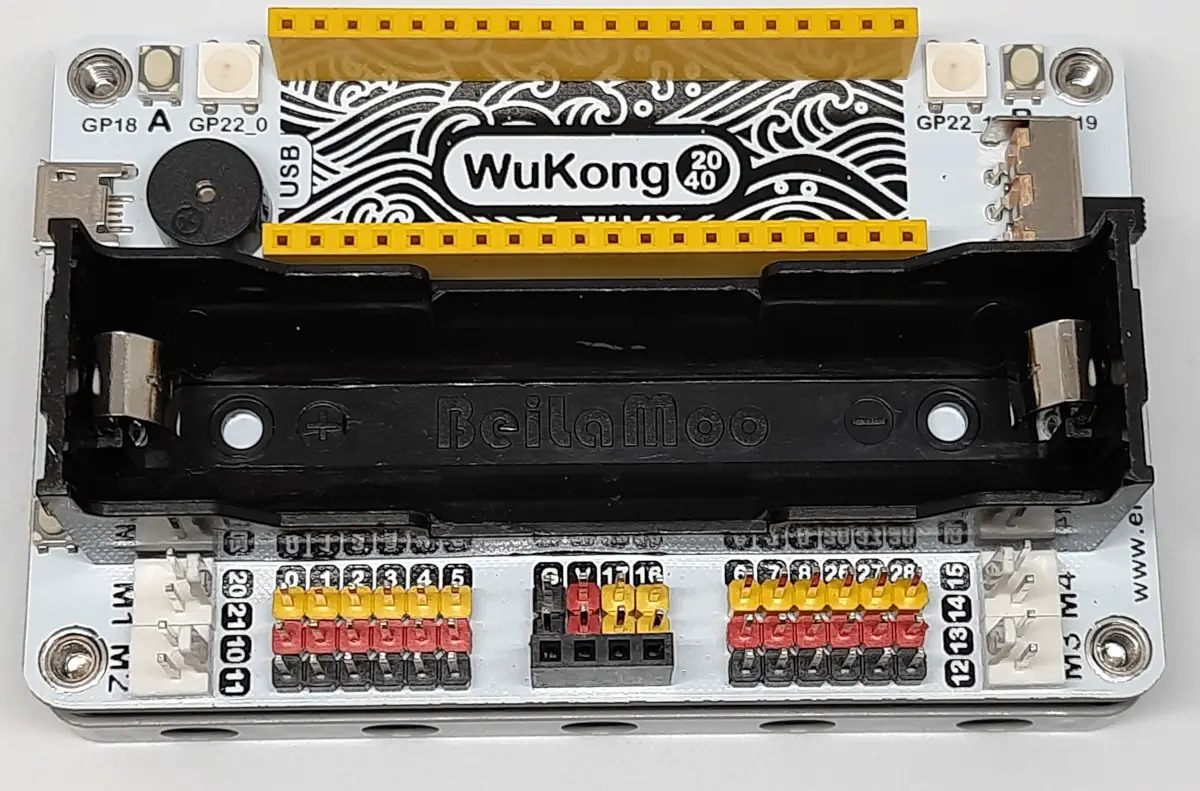
The expansion board brings into a single working block several additional pieces that make the board really interesting for anyone wishing to start with Raspberry PI Pico microelectronics projects:
- 2x Rainbow LEDs
- 2x Mini switch buttons
- 1x Passive Buzzer
- 4 ways DC Motor Drivers (M1, M2, M3, and M4)
- 14x Expansion GPIO Ports
- 1x Reset Button (useful for development)
- 1x power switch OFF (that cuts the power from the battery)
- 7×11 square block frame base, that can be expanded in order to create shapes at your fantasy
An important feature of the Wukong2040 is that it allows you to power motors from the battery.
Sometimes, people running the first projects connect motors directly to the Raspberry PI Pico GP ports. It is ok if you are performing tests for your code, but it isn’t good when your project goes live. The motors usually drain a lot of current and the Raspberry PI Pico ports can support only a few mA of power drain for a long time (usually 30 mA for the output ports, with a max 300 mA as total output of the microcontroller). So, having the battery to provide the current makes your projects far safer.
As the Wukong2040 requires a 2,8 – 4,2 V input to charge the battery, you can also add a solar source, as shown in my power Raspberry PI Pico with Solar Cells tutorial, to get a green project.
ELECFREAKS provides beginners with a number of examples that can help you quickly get started, based on CircuitPython and Raspberry PI Pico. In this review, I’ll provide you with several examples to use it with Raspberry PI Pico W, using MicroPython.
Wukong2040 Pinout
As the expansion board has a specific housing for the Raspberry PI Pico microcontroller, that takes all the Pico PINs (see the Raspberry PI Pico pinout for reference), their output will be “redirected” to specific Wukong PINs as shown in the following picture:

It is important to note that some Raspberry PI Pico PINs are allocated to control the onboard components, so they are not available as output connections.
What We Need
As usual, I suggest adding from now to your favourite e-commerce shopping cart all the needed hardware, so that at the end you will be able to evaluate overall costs and decide if to continue with the project or remove them from the shopping cart. So, hardware will be only:
- A common computer (maybe with Windows, Linux or Mac). It can also be a Raspberry PI Computer board
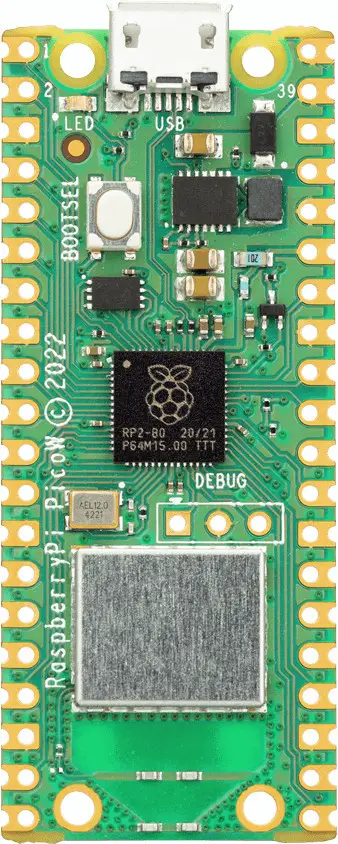
- Raspberry PI Pico W microcontroller (with a common micro USB cable), also available from the ELECFREAKS Shop
- ELECFREAKS Wukong2040, also available from the ELECFREAKS Shop
- a 18650 battery
Step-by-Step Procedure
In order to get started, we need to place at least the Raspberry PI Pico on the expansion board, by using the Wukong2040. For this, you must add the headings to your Raspberry PI Pico W by soldering them. A great guide to correctly perform this task is available from MagPI How to solder GPIO pin headers to Raspberry Pi Pico tutorial.
Once the headers are soldered, you can install MicroPython in your Raspberry PI Pico W. Also for this, you can refer to my tutorial: First steps with Raspberry PI Pico for Beginners.
You can now place the battery and the Raspberry PI Pico W in the ELECFREAKS Wukong2040 Raspberry PI Pico expansion board.
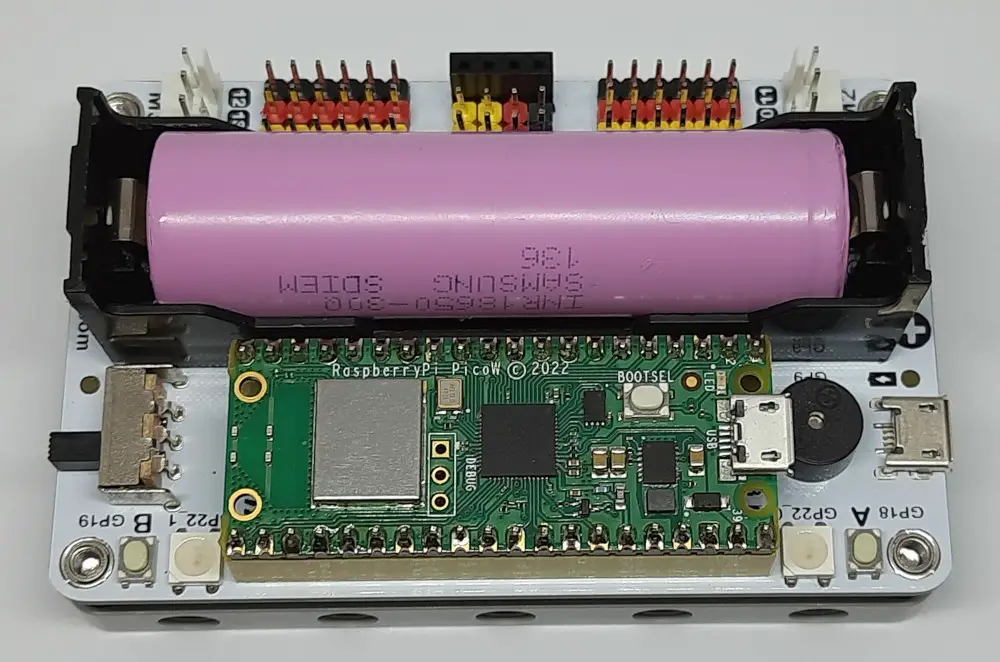
Please note that there are 2 different micro-USB ports. The one on the Wukong2040 expansion board will only charge your battery, while the micro-USB from the Raspberry PI Pico W remains the port to use to connect your PC with Thonny to Raspberry PI Pico W for programming.

We’ll use the last micro-USB port (from the Pico) in order to run the following examples.
Please note that executing the examples that interact with the Wukong2040 will require to use a charged battery and moving the power switch to ON.
Example 1: blinking the Raspberry PI Pico W onboard LED
This is the classic program to start and check if everything is ok. Please open a new Thonny file and add the following code:
from machine import Pin
import time
led = Pin("LED", Pin.OUT)

while True:
    led.toggle()
    time.sleep(0.5)
The file is also available from my download area with this link: wukong2040-onboard-blink.py
This will make your Raspberry PI Pico W onboard led blinking every half a second.
Please note that if you use a Raspberry PI Pico (not W), then the onboard led variable is stored at the GP25, with the LED variable declaration becoming:
led = Pin(25, Pin.OUT)Example 2: Using the Wukong2040 A/B mini Switch Buttons
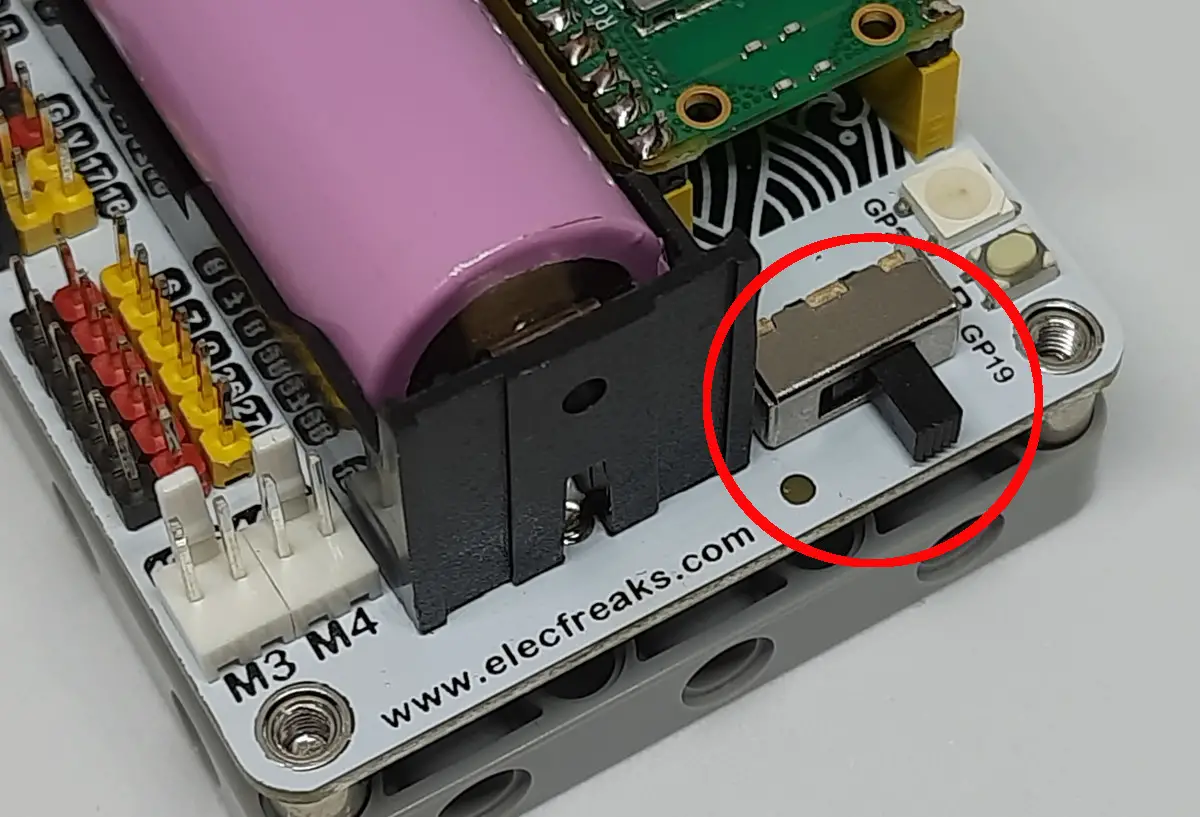
The two mini switch buttons are placed at the borders of the expansion board:
They (correctly) use a negative logic: when you press the button, the related GP output goes to 0 (zero). A comprehensive tutorial on these electronic components is available from my Switch Button and Raspberry PI Pico tutorial.
The A button is connected to GP18, while the output of the B button goes to GP19.
The following MicroPython example code will activate the Raspberry PI Pico W onboard LED when you press the A button, while the LED will be powered off when you press the B button:
from machine import Pin

led = Pin("LED", Pin.OUT)
button_a = 18
button_b = 19

on_button = Pin(button_a, Pin.IN, Pin.PULL_UP)
off_button = Pin(button_b, Pin.IN, Pin.PULL_UP)

def read_button(button_pin):
    return not button_pin.value()

while True:
    if read_button(on_button) == True:
        led.value(True)
    elif read_button(off_button) == True:
        led.value(False)
The same code is also available from my download area: wukong2040-buttons-test.py
Please remember to power on the Wukong2040 power switch and then you can run the code to activate/deactivate the Raspberry PI Pico W onboard LED with the two buttons.
Example 3: use the NeoPixel LEDs
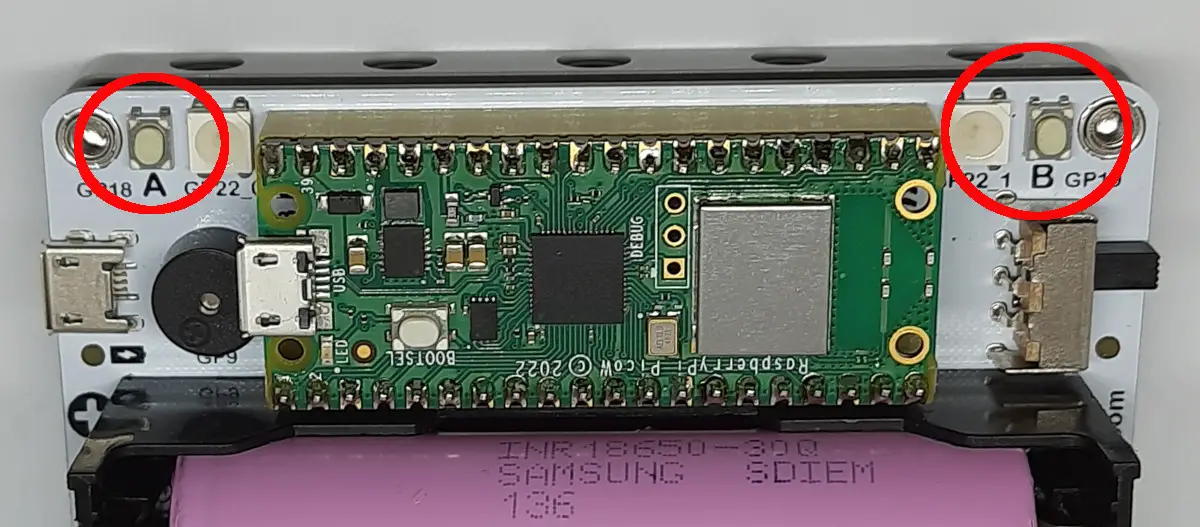
The two NeoPixel LEDs are placed near the buttons from the previous test:
You can reach both of them via the Raspberry PI Pico GP22 port.
In order to test them, I’ve arranged 2 MicroPython tests. As for the previous tests, please remember to power on the Wukong2040 power switch.
The first test helps you in understanding how the neopixel library:
import machine, neopixel, time

NPLED = 22 # NeoPixel GP port
n_NPLED = 2 # number of NeoPixel LEDs

np = neopixel.NeoPixel(machine.Pin(NPLED), n_NPLED)
np[0] = (255, 0, 0)
np[1] = (0, 255, 0)

np.write()
time.sleep(2)

np[0] = np[1] = (0, 0, 0) # turn OFF the NeoPixel LEDs
np.write()
It powers on both LEDs, at the np.write() command, with red (on one LED) and Green (on the other LED) colors. After 2 seconds, we power off both LEDs.
The code is available at wukong2040-neopixel-01.py
The second test, a bit more complex, follows below:
import machine, neopixel, time

NPLED = 22 # NeoPixel GP port
n_NPLED = 2 # number of NeoPixel LEDs

np = neopixel.NeoPixel(machine.Pin(NPLED), n_NPLED)

def demo(np):
    # RGB colors test
    print("RGB Colors test 01")
    red=(255,0,0)
    green=(0,255,0)
    blue=(0,0,255)
    for i in [red, green, blue]:
        for l in range(0, n_NPLED): np[l] = i
        np.write()
        time.sleep(0.5)

    # RGB colors test
    print("RGB Colors test 02")
    for r in range (0,255-1):
        for l in range(0, n_NPLED): np[l] = (r,0,0)
        np.write()
        time.sleep(0.01)
    for g in range (0,255-1):
        for l in range(0, n_NPLED): np[l] = (255-g,g,0)
        np.write()
        time.sleep(0.01)
    for b in range (0,255-1):
        for l in range(0, n_NPLED): np[l] = (0,255-b,b)
        np.write()
        time.sleep(0.01)

demo(np)

for l in range(0, n_NPLED): np[l] = (0,0,0) # turn OFF the NeoPixel LEDs
np.write()
The demo custom function will power both the LEDs with their main colors (red, green, and blue). After this, both LEDs will cycle showing the main spectrum from red to blue with a linear color change. Of course, you can get more complex effects.
The code is available with the following link: wukong2040-neopixel-02.py.
Example 4: use the Passive Buzzer
The passive buzzer is placed just below the Raspberry PI Pico micro USB port:
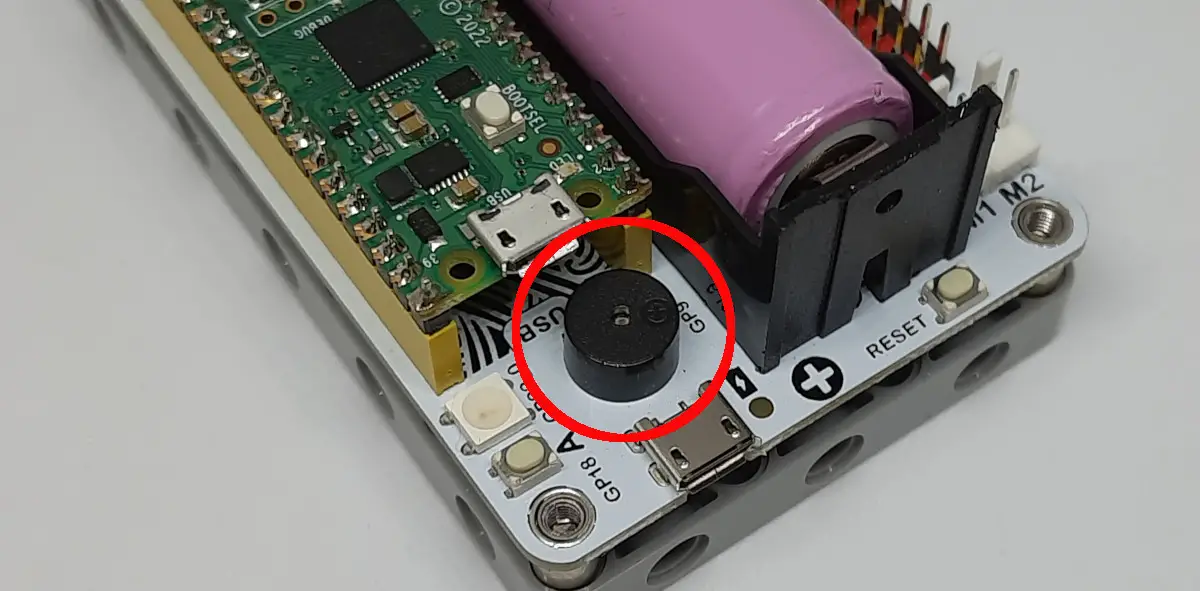
As marked, the buzzer can be reached with the Raspberry PI Pico GP9.
Differently from the active buzzer, the passive buzzer requires a PWM signal, as explained in my Passive Buzzer with Raspberry PI Pico tutorial, but it allows far more flexibility for your projects. You can give a look at the referred post to find out how to reproduce music like Beethoven’s or any note.
For this test, based on the code explanation from the previously shared post, the following code will execute the main music notes. Please note the buzzerPIN variable changed in order to use the GP number of the Wukong2040, differently from the tutorial above referred.
from machine import Pin, PWM
from time import sleep

buzzerPIN=9
BuzzerObj=PWM(Pin(buzzerPIN))

def buzzer(buzzerPinObject,frequency,sound_duration,silence_duration):

    buzzerPinObject.duty_u16(int(65536*0.2))
    buzzerPinObject.freq(frequency)
    sleep(sound_duration)
    buzzerPinObject.duty_u16(int(65536*0))
    sleep(silence_duration)


buzzer(BuzzerObj,523,0.5,0.1) #C (DO)
buzzer(BuzzerObj,587,0.5,0.1) #D (RE)
buzzer(BuzzerObj,659,0.5,0.1) #E (MI)
buzzer(BuzzerObj,698,0.5,0.1) #F (FA)
buzzer(BuzzerObj,784,0.5,0.1) #G (SOL)
buzzer(BuzzerObj,880,0.5,0.1) #A (LA)
buzzer(BuzzerObj,987,0.5,0.1) #B (SI)

BuzzerObj.deinit()
The code is available for download from this link: wukong2040-buzzer.py
Other Projects
You can use the Wukong2040 Expansion Board with many other Raspberry PI Pico projects. You will need to keep attention to adapting the code to the available ports, as some of the Wukong2040 PINs are already pre-connected with the sensors previously shown. Usually, the MicroPython code brings the ability to change the port number at the beginning of the code. You can match the port identified by your project with the Wukong2040 one by comparing the pinout previously shown and the Raspberry PI Pico Pinout.
You can try to look at my Raspberry PI Pico tutorials for useful and funny projects with your Wukong2040.
More info
You can find the complete ELECFREAKS Wiki at http://wiki.elecfreaks.com/en/pico/extension-module/wukong2040-pico/.
Final thoughts
The ELEFREAKS Wukong2040 is a great Raspberry PI Pico Expansion Board.
From the safety side, adding a battery means that your Raspberry PI Pico will get a more stable current input and your sensors will be powered from the battery (instead of draining current from the RPI Pico circuit.
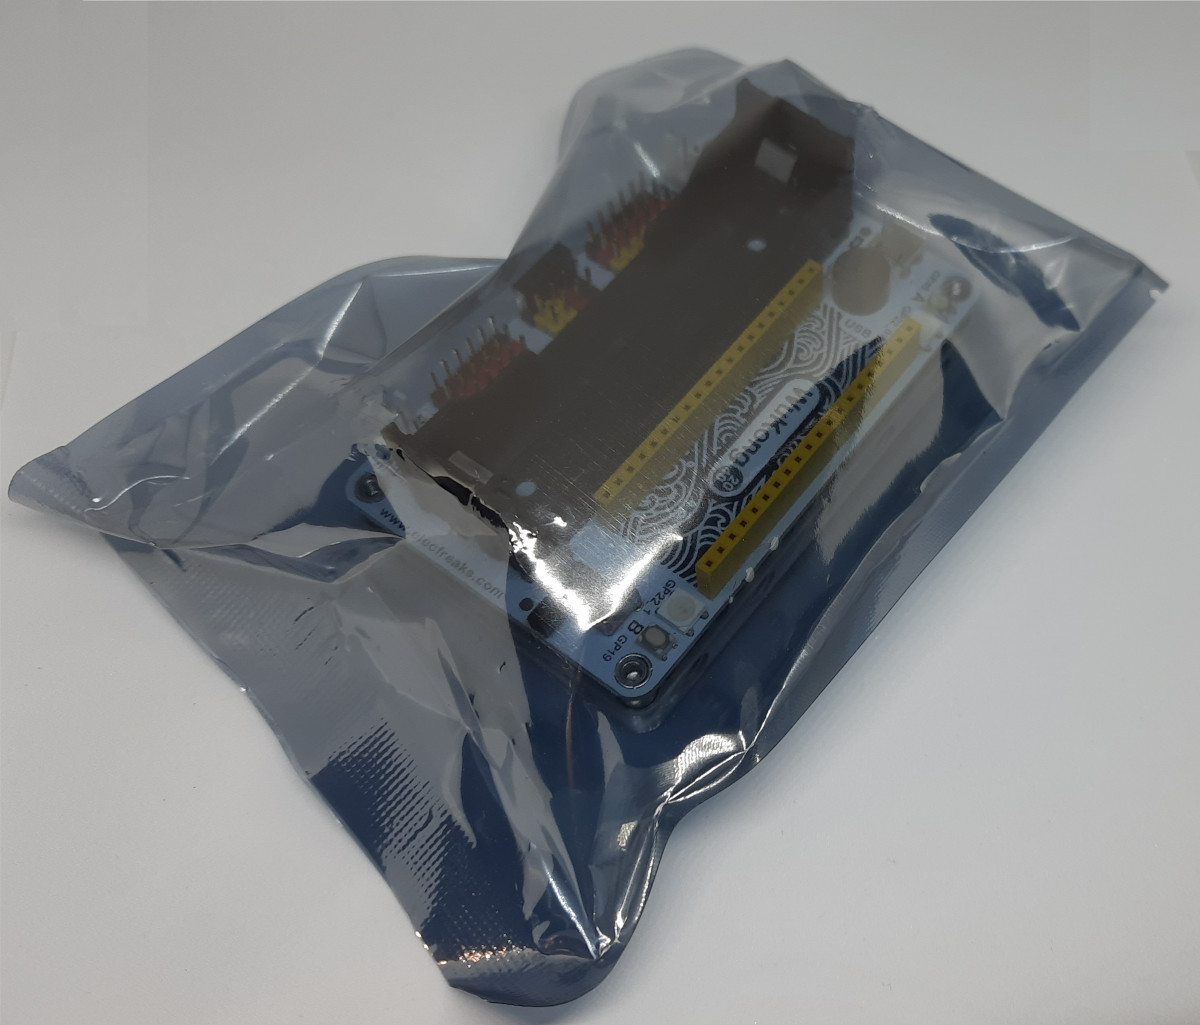
The board is solid and well-built, and comes with safe packaging:
I can’t find any specific improvement area from this board, as it offers a few basic things well organized and produced. Even the power switch, which usually is the most solicited part from the mechanical point of view, has worked showing solidity.
From the point of view of the price, it also brings a competitive alternative to buying single sensors: you can easily compare the sum of prices for the buzzer, battery stand, power switch, and NeoPixel LEDs with the Wukong2040 to find your cheaper solution.
Enjoy!

Open source and Raspberry PI lover, writes tutorials for beginners since 2019. He's an ICT expert, with a strong experience in supporting medium to big companies and public administrations to manage their ICT infrastructures. He's supporting the Italian public administration in digital transformation projects.
![]()
![]()
![]()
![]()
![]()
![]()
![]()


well,
the specs might be good and would be a reason to buy but 2 big downsides:
#1: 10$ shipping fee is ridicoulos overpriced for an even slow economy shipping aliexpress beats every time I order for 10$
#2: you will also have to deal with import customs and fees which are even worse cause dhl will take high fees on top cause usually dhl delivers here on the last mile from china. 5€ for dhl and on all of that the VAT would end in a 25$ + 19% VAT = 30$ mess no one would have expected.
The shop does not even have a faq nor explains anything about the duties.
At the end: yes, I would only purchase it via aliexpress for that 10$ price and that is it. Meanwhile I have now bought a cheaper solution for 5$ as expansion board (incl. shipping and VAT) with a few sensors and buttons only, now 18650 I do not really need.
They are killing their product with such a stupid fooling idea to make the money with shipping fees and let the customer deal with custom fees and VAT and all other mess. Not really convenient experience to buy from their store cause I had been tempted to buy that product and did a registration but at the final point I saw $$$ warning signs regarding customs and dhl fees.
Hi, here is a member of ELECFREAKS Official Brand Store, We support shipping without a fee if the order is higher than 10 USD. If you want to send it with DHL, you need to add a fee. It is very normal for the policy of the brand store. Besides, you don’t need to pay VAT normally if the package was sent not by DHL. Here is a wiki of Wukong 2040 breakout board. You can study it here http://wiki.elecfreaks.com/en/pico/extension-module/wukong2040-pico