Raspberry PI WiFi Hotspot with Android USB tethering
Last Updated on 2nd September 2023 by peppe8o
In this tutorial, I’m going to show you how to configure a Raspberry PI WiFi Hotspot to share smartphone USB connectivity creating a WiFi Network.
Connecting devices from Android WiFi Hotspots fastly drains your smartphone’s battery and can waste it in a few months. Raspberry PI, connected to smartphone USB tethering, works great as a WiFi hotspot and adds advanced features
A common Raspberry PI usage makes its ethernet port connected to old routers (without WiFi) to create a home Access Point. This works with boards including ethernet ports (RPI models B), but can’t be applied to all those boards (like RPI Zero W and PI 3 Model A+) which have an ideal form factor for portability.
Moreover, with increasing smart working needs, our smartphone usage as a WiFi hotspot can drain mobile batteries while having WiFi the hotspot function always on.
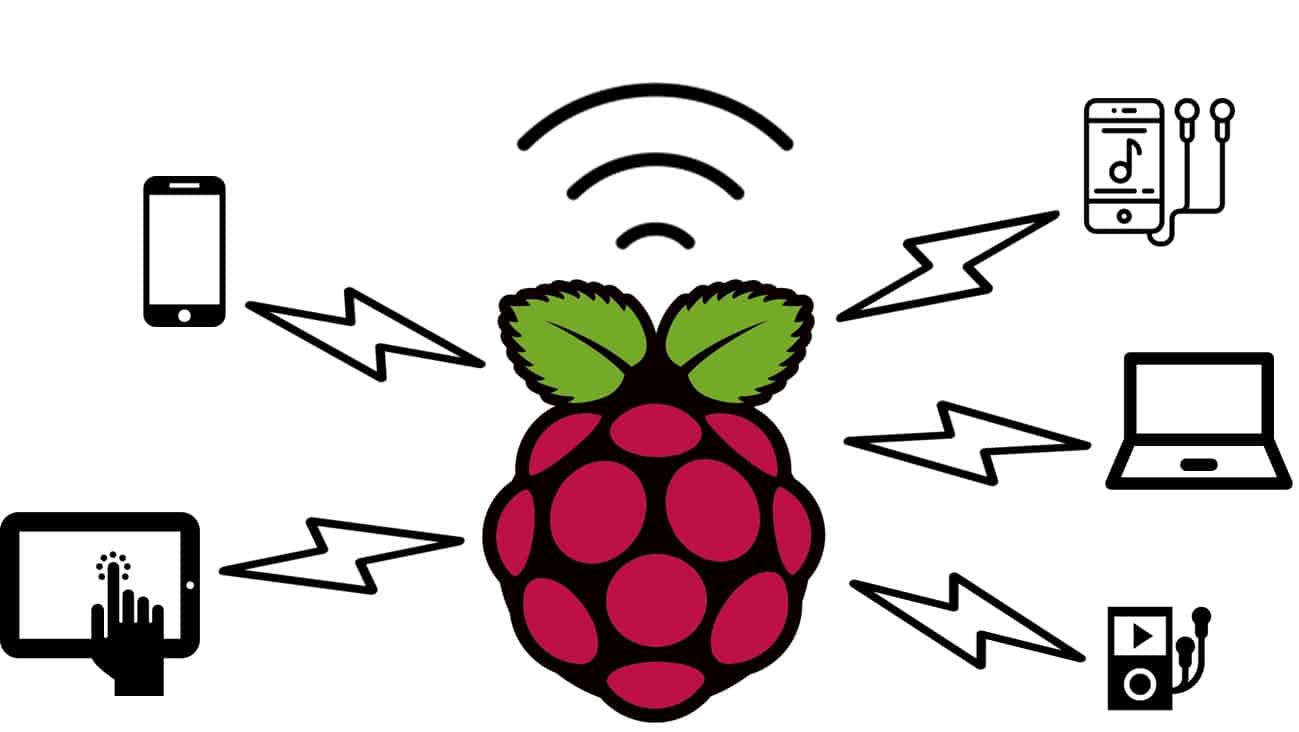
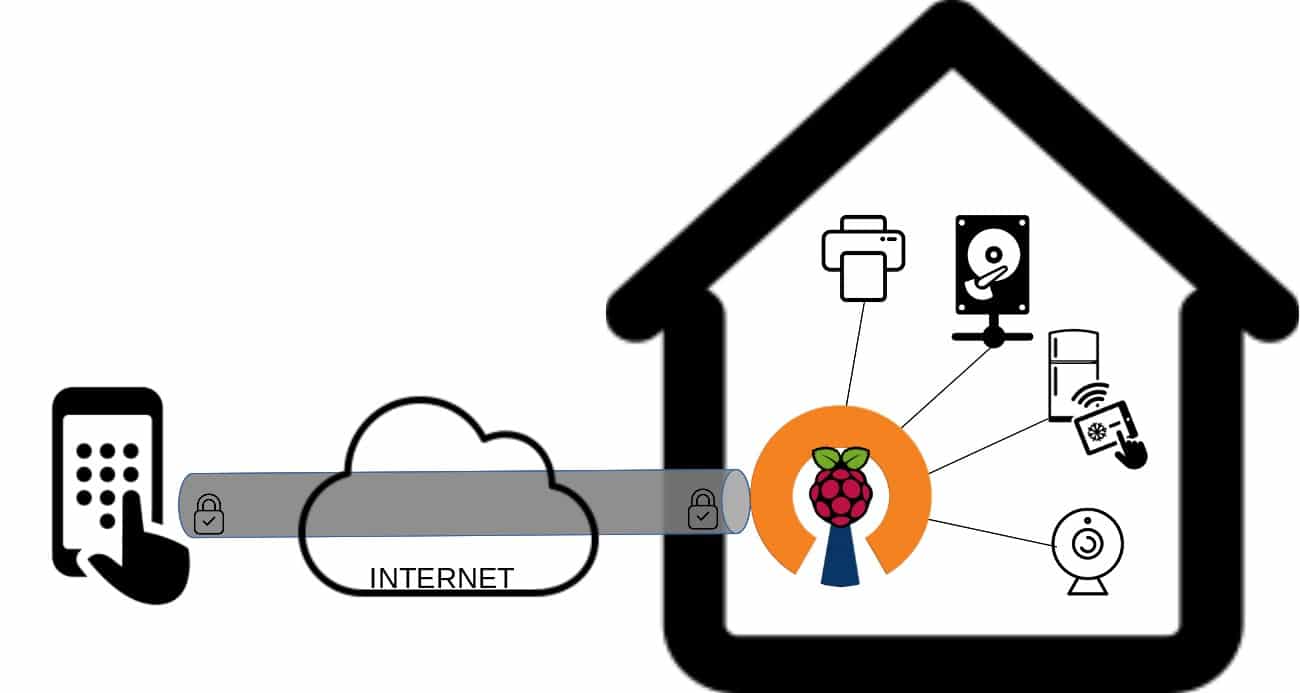
Using a small Raspberry PI (like the Raspberry PI Zero 2 W) to share smartphone connectivity across a WiFi network (created in RPI) also increases your WLAN capabilities, as you can run on the same single-board computer also a traffic-blocking system (like Pi-Hole), Proxy capabilities (like Squid, Privoxy or TOR) or creating local services (like a git web portal or WordPress host).
Of course, you can use this tutorial with all the Raspberry PI computer boards.
What We’ll Learn
We’ll configure a static IP for the wireless interface (wlan0, with the last character being a zero), which will be used from client devices as the default gateway.
All connections will be routed to the usb0 (with the last character being a zero) interface, which is the USB port connected to your smartphone in tethering mode (you can see it with the “ipconfig” terminal command when the smartphone is connected and the USB tethering is enabled).
Then, we’ll configure routing and DHCP server to correctly drive traffic and assign dynamic IPs to clients.
Finally, WiFI hotspot settings will complete our installation.
Please note that you can use this tutorial also as WiFi hotspot with Raspberry PI sharing your home internet connection, by connecting your home router via the Ethernet cable and changing the “usb0” in the following configurations with “eth0” (also here, the last character is a zero).
What We Need
As usual, I suggest adding from now to your favourite e-commerce shopping cart all the needed hardware, so that at the end you will be able to evaluate overall costs and decide if to continue with the project or remove them from the shopping cart. So, hardware will be only:
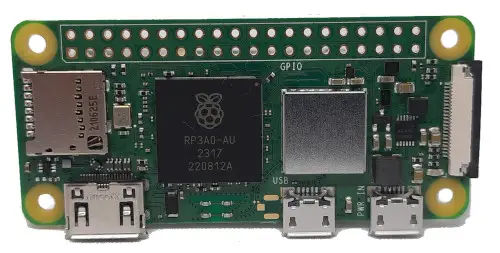
- Raspberry PI Zero 2 W (including proper power supply or using a smartphone micro USB charger with at least 3A) or newer Raspberry PI Board. If you use an RPI Zero W, you could also need a USB to micro USB adapter to connect your smartphone with RPI Zero out port.
- high speed micro SD card (at least 16 GB, at least class 10)
- a Smartphone with USB tethering function (available in quite all recent smartphones)
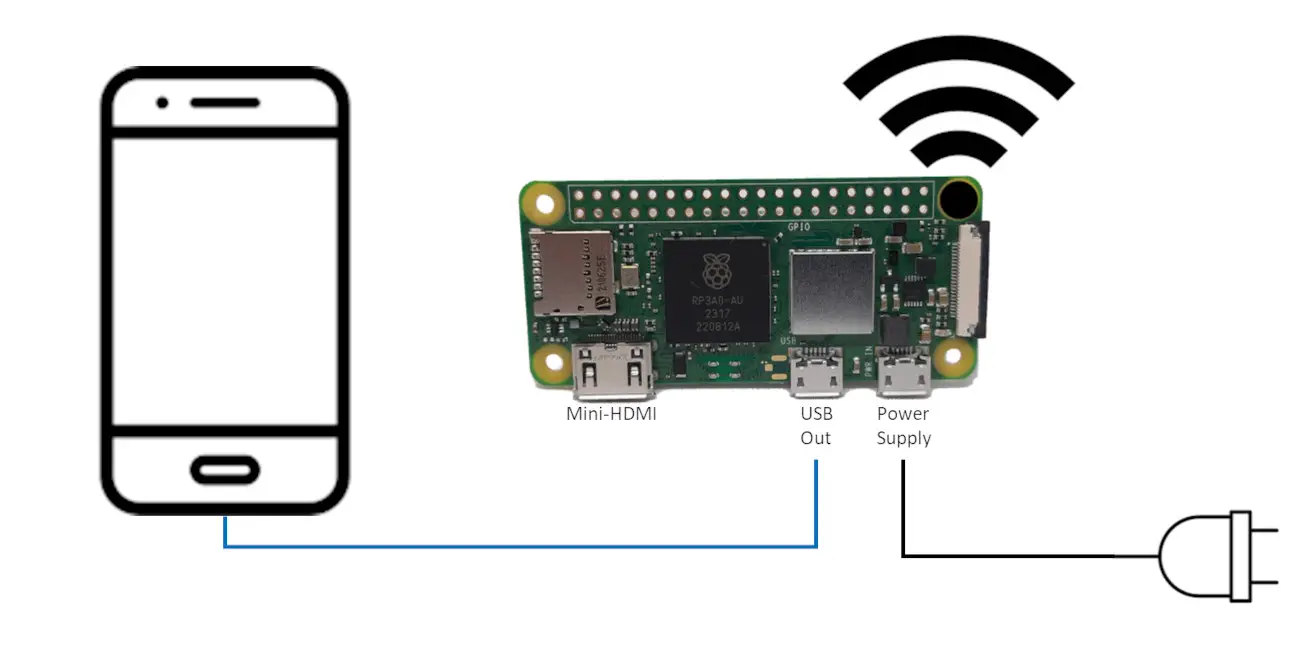
Wiring Diagram
Please refer to the following picture for the wiring diagram. The picture shows a Raspberry PI Zero 2 W, but you can use the same to create a WiFi hotspot with any Raspberry PI computer board.
Step-by-Step Procedure
Prepare the Operating System for Raspberry PI WiFi Hotspot
Start preparing the Raspberry PI operating system. I suggest you to install Raspberry PI OS Lite to have a headless, fast OS. After this step, please make your OS up-to-date. From terminal:
sudo apt update -y && sudo apt upgrade -yWe also need to install additional packages:
sudo apt install hostapd dnsmasq -yCheck The nfttables Service
In the previous article version, the routing was managed by the old “iptables” service (still available only in legacy OSes). The “iptables” service has been replaced in Raspberry PI OS Lite with the newer “nftables” service, already available by default.
In order to check that the nftables service is installed, you can run the following terminal command:
nft -vAnd nftables service should answer correctly the version query:
pi@raspberrypi:~ $ nft -v
nftables v0.9.8 (E.D.S.)
Disable WiFi Power Save
The Raspberry PI OS WiFi Power Save is a configuration that tries to reduce the WiFi chip power consumption. It is useful when the board works as a client of a network but, for hotspot usage, I suggest disabling it (in any case, this is optional). From the terminal, please open the rc.local file:
sudo nano /etc/rc.localAnd append the following before the final “exit 0” line:
iw dev wlan0 set power_save offClose and save.
Configure Static IP
In order to keep the Raspberry PI computer board always reachable from the WiFi network, we must give it a fixed IP address on that interface. Even if it can lead to misunderstandings, in Linux the dhcpcd configuration file manages the Raspberry PI’s IP configuration.
From the terminal, edit the dhcpcd.conf file:
sudo nano /etc/dhcpcd.confAnd append at the end the following:
interface wlan0
static ip_address=192.168.2.1/24
nohook wpa_supplicant
The “nohook wpa_supplicant” will disable the wpa_supplicat configuration file usage from the next reboot. “192.168.2.1” will become the IP address your Raspberry PI will use inside its WiFi LAN.
Save and close this file.
Connect Your Smartphone and enable USB Tethering
If still not done, you can connect now your smartphone to the Raspberry PI USB port. You have also to enable USB tethering from your smartphone, according to its OS user manual. Usually:
- Android Smartphones: this function is usually available in Settings -> Connections -> Mobile Hotspot and Tethering
- Apple Smartphones: this function is usually available in Settings -> Cellular (some iOS versions skip this step) -> Personal Hotspot
Enable the Routing
In this chapter, we’re going to set the Raspberry PI OS to redirect all the traffic entering from any port to the “usb0” port. The usb0 port is the interface automatically created by the Raspberry PI when it automatically detects a modem from one of its USB interfaces (you can check it by using the “ifconfig” terminal command on Raspberry PI once you have connected the smartphone and enabled here the USB Tethering).
Before setting traffic routing in RPI, we need to enable the IP forwarding process. From the Raspberry PI terminal:
sudo nano /etc/sysctl.confFind the following line and uncomment it (by removing the “#” char at the beginning of the line):
net.ipv4.ip_forward=1With the following commands, we’ll allow traffic coming from all Raspberry PI WiFi Hotspot external clients to consider the usb0 interface as the exit gateway. This configuration is similar to the one used for a ethernet-to-wifi RPI Access Point, just changing usb0 with eth0 (only for boards with cable connection and only if you want to share router ethernet internet connection instead of USB connection).
Let’s create a folder that will include the nft configuration files (even for your possible future needs):
sudo mkdir /etc/nftables.dNow, please create a new configuration file inside this folder:
sudo nano /etc/nftables.d/nat.confUse the following lines for the created file:
table ip nat {
        chain postrouting {
                type nat hook postrouting priority srcnat; policy accept;
                oif "usb0" masquerade
        }
}
Close and save.
In order to make this (and any “*.conf” file from this folder) loaded from the nft service, we have to include the folder files to the “/etc/nftables.conf” configuration file. The following command will do the job for you:
echo 'include "/etc/nftables.d/*.conf"' | sudo tee -a /etc/nftables.confPlease note that the routing is still not active and, even when activated, it will disappear after every reboot. Moreover, this command works correctly only when it can detect a “usb0” interface connected, so we can’t run it automatically at the boot time, because if the smartphone is still not connected it will result in an internal error not directly visible to you.
So, the trick is loading the “usb0” routing only when the Raspberry PI OS detects that the usb0 interface is plugged. For this reason we’ll use a “dhcpcd hook”. From the terminal, please create a new file:
sudo nano /lib/dhcpcd/dhcpcd-hooks/99-setntwAnd add the following lines
#!/bin/bash
if [ "$interface" = "usb0" ]
then
 nft -f /etc/nftables.conf
fi
the “nft -f /etc/nftables.conf” command is the one that loads the routing and it will be executed only when it will detect the interface.
Configure DHCP and DNS
Create a backup of your dnsmasq configuration file:
sudo mv /etc/dnsmasq.conf /etc/dnsmasq.conf.backupOpen /etc/dnsmasq.conf file with your terminal editor:
sudo nano /etc/dnsmasq.confand add the following lines:
interface=wlan0
dhcp-range=192.168.2.2,192.168.2.100,255.255.255.0,24h
domain=wlan
address=/gw.wlan/192.168.2.1
This configuration will configure IP assigned to WiFi clients in a range in a local “192.168.2.x” subnet, where devices will get an IP ending with a number between 2 and 100. All devices will be advised to use the 192.168.2.1 IP address (your Raspberry PI) as the gateway address.
Configure the Raspberry PI WiFi Hotspot
Configure the access point network. Please create a hostapd configuration file:
sudo nano /etc/hostapd/hostapd.confAdd the following lines (changing country_code with your one; SSID and password with your favourite one):
##### hostapd configuration file ##############################################
interface=wlan0

##### IEEE 802.11 related configuration #######################################
country_code=US
ssid=RpiWiFi
hw_mode=g
channel=7
macaddr_acl=0
auth_algs=1
ignore_broadcast_ssid=0

##### WPA/IEEE 802.11i configuration ##########################################
wpa=2
wpa_passphrase=wifipassword
wpa_key_mgmt=WPA-PSK
wpa_pairwise=TKIP
rsn_pairwise=CCMP
Configure Hosts
Before finishing the configuration and making the Raspberry PI WiFi hotspot running, I also suggest adding a few resolution names to your Raspberry PI (optional). It should improve the Hotspot performance and avoid Windows clients to release the WiFi network when your USB smartphone internet line is not really strong.
In the following lines, the “msftconnecttest.com” and “msftncsi.com” are the Microsoft service used by Microsoft Windows to detect if an internet network is connected to the web. When it can’t ping these services or the ping test is not performing really fine, your Windows PC will try to connect to a different network (from those already stored in your PC), in order to find a better internet connection.
So, open the hosts file from terminal:
sudo nano /etc/hosts
And append the following 3 lines, which include also the IP of our Raspberry PI from the Hotspot network:
127.0.0.1     www.msftconnecttest.com
127.0.0.1     www.msftncsi.com
192.168.2.1   localhost
Close and save.
Complete the Configuration and Reboot Raspberry PI
Last but not least, I experienced that sometimes the USB modem connection was fighting with the ModemManager service to use the same port. If you don’t really need this service in your Raspberry PI, you can stop and disable it:
sudo systemctl stop ModemManager.service
sudo systemctl disable ModemManager.service
Finally, enable the wireless access point and reboot Raspberry PI with the new configuration by using the following terminal command:
sudo systemctl unmask hostapd && sudo systemctl enable hostapd && sudo rebootAfter the reboot finishes, you can plug the smartphone and turn on USB Tethering.
The RpiWiFi will appear in your WiFi list in a few time (give it time to appear after every boot) and you should be able to use it for your internet connection.
Next Steps
You can take a look at my Raspberry PI projects to take inspiration for your first projects with Raspberry PI Zero 2 W (and other Raspberry PI computer boards).
Enjoy!




I have run all the codes, I did not get any errors. But at last I was unable to get wifi from raspberry.
What to do?
Hi. Before starting, what Raspberry PI model are you using?
If you aren’t getting WiFI SSID available, we need to inspect hostapd service. You should start checking its status with following command:
sudo systemctl status hostapd.serviceI am getting Failed to fetch… after sudo apt install hostapd dnsmasq
I am running a pi zero W with a OS lite. I am in the terminal on the pi connected to a monitor.
Any help?
Hi Dan. Failed to fetch errors usually depends on connection problems with repositories. This may be a both temporary problem from remote servers or user problems. Did your “sudo apt update” command worked?
After reading through many tutorials about this, and finally landing on this one. I now have my RPI3 (for some reason my Pi Zero W is not detected by cellphone but I digress), its outputting a wifi signal, and connecting via USB Tethering to a lte connection, and changing its TTL to 65. The last thing that I am having difficulty is adding a VPN connection to my home self hosted VPN.
I have the setup and connection to VPN working (on the RPI3 only) useing the PPTP-Linux setup and the “route add -net 0.0.0.0/0 dev ppp0” working from the RPI command line, but once I run this command, the RPI has full access to my home network, but none of the connected devices have any internet access anymore.
Im sure I am missing something in the IPTables area, but not sure what.
Thanks for all your help in advanced
Hi Aaron,
I can’t test this configuration right by now. Please, can you try to repeat this procedure by changing:
sudo iptables -t nat -A POSTROUTING -o usb0 -j MASQUERADE
with
sudo iptables -t nat -A POSTROUTING -o ppp0 -j MASQUERADE
Of course you can use this command after that ppp0 connection is setup.
Hope this can help you
Thanks for the attempt but this did not work.
I tried just adding this rule after everything in the above tutorial is up and running, and after the pon homevpn command, (no connection to the internet)
Then thinking the 2 rules were conflicting I restarted the pi, and after everything is up and running. and the pon homevpn command, I cleared all iptable rules with ”
sudo iptables -F
sudo iptables -t nat -F
sudo iptables -X
”
and then added the -o ppp0 rule. same result.
Again thanks for the help, and the tutorial.
Excellent post, got this up and running on Pi. Going to use it as a portable hotspot in the car.
Just a tip if this isn’t connecting to the Internet, switch off your phone’s wifi. This happened on my Samsung Note 8. Once switched off all connected devices could connect to the internet via mobile data
Thank you for your tip, Keith!
Hi, I got the same error as Prabhuram.S.S above, and ran your recomended command to get the following results:
pi@raspberrypi:~ $ sudo systemctl status hostapd.service
● hostapd.service – Advanced IEEE 802.11 AP and IEEE 802.1X/WPA/WPA2/EAP Authent
Loaded: loaded (/lib/systemd/system/hostapd.service; enabled; vendor preset:
Active: active (running) since Thu 2021-12-30 15:48:37 GMT; 10min ago
Main PID: 589 (hostapd)
Tasks: 1 (limit: 4915)
CGroup: /system.slice/hostapd.service
└─589 /usr/sbin/hostapd -B -P /run/hostapd.pid -B /etc/hostapd/hostap
Dec 30 15:48:37 raspberrypi systemd[1]: Starting Advanced IEEE 802.11 AP and IEE
Dec 30 15:48:37 raspberrypi hostapd[568]: Configuration file: /etc/hostapd/hosta
Dec 30 15:48:37 raspberrypi hostapd[568]: wlan0: interface state UNINITIALIZED->
Dec 30 15:48:37 raspberrypi systemd[1]: Started Advanced IEEE 802.11 AP and IEEE
lines 1-12/12 (END)
Many thanks for your article and help,
Ewan
Hi Ewan,
from your log I see the “wlan0: interface state UNINITIALIZED->”, which I suppose has been truncated. I’ve also checked in stackexchange posts that someone had a similar problem (it’s line is “wlan0: interface state UNINITIALIZED->ENABLED”) and he solved by setting static IP address for wlan0 also into /etc/networks/interfaces file, then rebooting.
Please can you try this too?
I’m sorry, but for the moment I can’t test this, but the wlan0 configuration there should be something like:
iface wlan0 inet static
address 192.168.2.1
netmask 255.255.255.0
gateway 192.168.1.1 #this should be your Android gateway IP address
Hi there, thanks for the writeup. I have followed the steps on my rpi4 and I have gotten this error.
Could you help me make sense of why this is occuring? Cheers.
hostapd.service – Access point and authentication server for Wi-Fi and Ethernet
Loaded: loaded (/lib/systemd/system/hostapd.service; enabled; vendor preset: enabled)
Active: activating (auto-restart) (Result: exit-code) since Tue 2022-01-04 06:30:15 GMT; 87ms ago
Docs: man:hostapd(8)
Process: 1478 ExecStart=/usr/sbin/hostapd -B -P /run/hostapd.pid -B $DAEMON_OPTS ${DAEMON_CONF} (code=exited, status=1/FAILURE)
CPU: 22ms
Jan 04 06:30:15 raspberrypi systemd[1]: hostapd.service: Control process exited, code=exited, status=1/FAILURE
Jan 04 06:30:15 raspberrypi systemd[1]: hostapd.service: Failed with result ‘exit-code’.
Jan 04 06:30:15 raspberrypi systemd[1]: Failed to start Access point and authentication server for Wi-Fi and Ethernet.
Hi Pooper,
in these days I’ll test everything again. Just to know, did you start from a fresh OS installation?
Thank you for this clear tutorial! I managed to get everything work, except that connected devices had the “No internet” problem. It turned out being an incomplete routing configuration, for which to solve I had to add the two following commands before the iptables-save step (as suggested in https://raspberrypi.stackexchange.com/questions/106871/share-usb-tethered-phone-to-raspberry-pi-4-lan-port ):
sudo iptables -A FORWARD -i usb0 -o wlan0 -m state –state RELATED,ESTABLISHED -j ACCEPT
sudo iptables -A FORWARD -i wlan0 -o usb0 -j ACCEPT
With this done everything works perfectly.
Thank you again for the tutorial!
Hi Axel,
testing the change for a few days. If no issues will occur, I’ll add these lines to my tutorial. Many thanks!
It works many thanks 🙂
How can i share usb-tethering not only to wlan but also to ethernet?
Hello Paul,
It should be quite simple, by adding the related iptable entry for every port routing you want to add and configuring the dnsmasq.conf for exposing dhcp service also the ethernet
“….also increases you WLAN capabilities, as you can run on same single board computer also traffic blocking systemas (like Pi-Hole), ….”
It is funny because this exact article detects I am using Pi-Hole in my network, says I need to turn off my ad blocker and is blocking me from reading it. Had to resort to disabling JS on the site to make it work.